
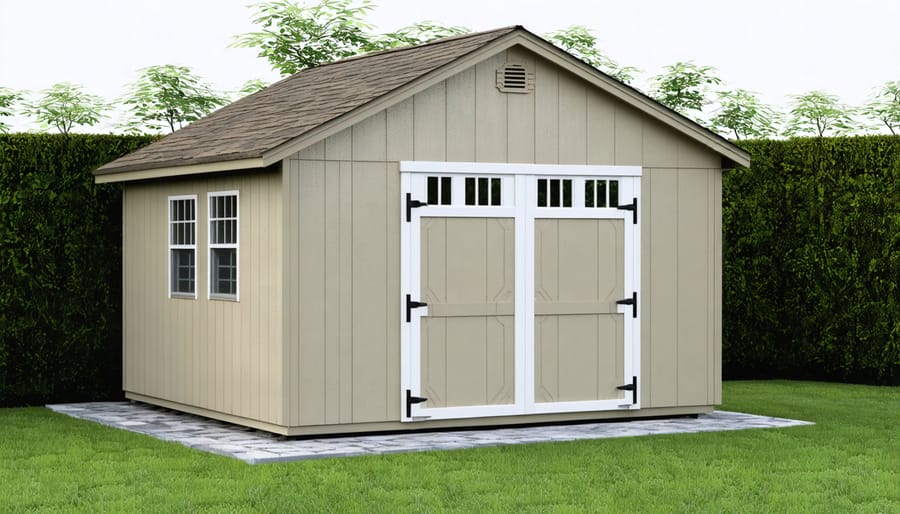
Build a Rock-Solid Shed Foundation with Pavers (That Actually Lasts)
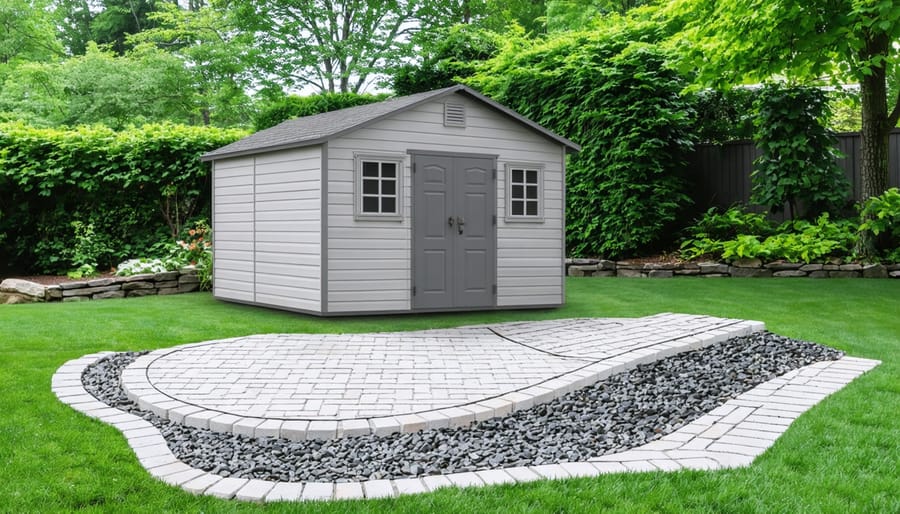
Transform your backyard storage solution with a durable, earth-friendly foundation method using interlocking pavers. This time-tested technique creates a stable, level base that distributes weight evenly, prevents moisture damage, and adapts to ground movement without cracking. Professional contractors and experienced DIYers favor paver foundations for their exceptional drainage capabilities, straightforward installation process, and minimal environmental impact compared to traditional concrete slabs.\n\nBuilding a shed foundation with pavers eliminates the need for heavy machinery, extensive excavation, or permanent alterations to your landscape. The modular nature of pavers allows for easy repairs and modifications, while their aesthetic appeal enhances your property’s value. Whether you’re planning a compact garden shed or a spacious workshop, this foundation system provides the perfect balance of strength, sustainability, and style.\n\nWith proper preparation and installation, a paver foundation can support your shed for decades while maintaining its structural integrity through seasonal changes. This guide will walk you through the essential steps to create a reliable base that protects your investment and preserves the natural drainage patterns of your property.\n\n\n
Why Choose Pavers for Your Shed Foundation?
\n\n
Environmental Benefits
\n\nUsing pavers for your shed foundation isn’t just about durability – it’s also an environmentally conscious choice. As part of modern eco-friendly building materials, pavers create a permeable surface that allows rainwater to naturally seep into the ground rather than contributing to runoff. This natural drainage system helps maintain the local water table and reduces the strain on municipal storm systems.\n\nThe gaps between pavers act as mini-filtration systems, naturally cleaning water as it passes through while preventing soil erosion around your shed. Unlike solid concrete foundations, paver installations don’t create a heat island effect, helping maintain cooler ground temperatures during hot summer months.\n\nAdditionally, many pavers are made from recycled materials, and if you ever need to modify or remove your shed foundation, the pavers can be reused for other projects around your property. This recyclability factor, combined with their minimal site disruption during installation, makes paver foundations an environmentally responsible choice for your storage solution.\n\n
Cost and Material Advantages
\n\nUsing pavers for your shed foundation offers significant cost advantages compared to traditional concrete foundations. On average, a paver foundation costs 30-40% less than a concrete slab, primarily due to reduced labor and equipment requirements. The materials themselves are also more affordable, with basic concrete pavers running about $2-4 per square foot.\n\nBeyond initial savings, paver foundations provide excellent long-term value. They’re easily repairable – if a paver becomes damaged, you can simply replace individual pieces rather than dealing with costly concrete repairs. The modular nature of pavers also allows for future modifications or expansions without breaking up an entire foundation.\n\nAnother cost benefit comes from the DIY-friendly nature of paver installations. While concrete slabs often require professional installation, many homeowners successfully install paver foundations themselves, saving hundreds in labor costs. The materials are also readily available at local home improvement stores, eliminating special order fees and long wait times.\n\nAdditionally, pavers offer better drainage capabilities than solid concrete, potentially saving money on future water damage repairs and foundation issues.\n\n\n
Planning Your Paver Foundation
\n\n
 \n
\n\n\n
Site Selection and Preparation
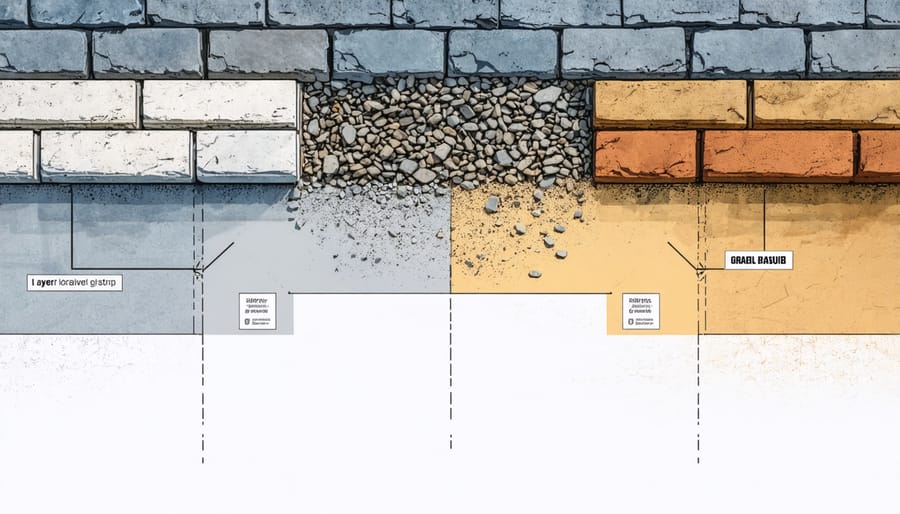
\n\nBefore laying your paver foundation, selecting and preparing the right site is crucial for your shed’s longevity. Start by choosing a level area that’s slightly elevated from the surrounding ground to prevent water pooling. The spot should be easily accessible and comply with local building codes regarding property lines and utilities.\n\nBegin site preparation by removing all vegetation, rocks, and debris from the area. Mark your shed’s footprint, adding an extra 12 inches on each side for proper drainage. Use a string line and stakes to ensure your outline is square, checking diagonal measurements for accuracy.\n\nNext, excavate the site to a depth of 4-6 inches, depending on your local frost line. The soil should be compacted using a plate compactor to create a stable base. If you encounter soft spots, remove the unsuitable soil and replace it with gravel.\n\nInstall landscape fabric across the excavated area to prevent weed growth and maintain soil separation. Edge restraints around the perimeter will keep your pavers from shifting over time. Add a 2-inch layer of gravel, leveling and compacting it thoroughly. Follow with a 1-inch layer of sand, screeded perfectly flat using level pipes and a straight board.\n\nRemember, proper site preparation might take time, but it’s essential for a stable foundation that will support your shed for years to come.\n\n
Materials and Tools Checklist
\n\nBefore starting your paver foundation project, gather these essential materials and tools. For best results, consider purchasing slightly more materials than calculated to account for cuts and waste.\n\nFoundation Materials:\n- Paver stones (concrete or natural stone)\n- Crushed gravel or stone (¾-inch)\n- Leveling sand\n- Landscape fabric (weed barrier)\n- Edge restraints or plastic paver edging\n- String line for layout\n- Wooden stakes\n- Level marker paint or spray chalk\n\nTools Required:\n- Shovel (both flat and pointed)\n- Wheelbarrow\n- Tape measure\n- Spirit level (4-foot recommended)\n- String line level\n- Hand tamper or plate compactor\n- Garden rake\n- Rubber mallet\n- Work gloves\n- Safety glasses\n- Marking pencil\n- Calculator\n\nOptional but Recommended:\n- Landscape rake\n- Mason’s line\n- Knee pads\n- Paver splitter or masonry saw\n- Square edge tool\n- Broom\n\nPro Tip: Consider renting larger equipment like the plate compactor from your local hardware store instead of purchasing. For sustainable options, look for recycled composite pavers or reclaimed stone materials, which offer both environmental benefits and unique aesthetic appeal.\n\nSafety Equipment:\n- Dust mask\n- Steel-toed boots\n- Back support belt\n- First aid kit\n\n\n
Step-by-Step Installation Process
\n\n
Base Layer Installation
\n\nA proper base layer is crucial for your paver shed foundation’s stability and longevity. Start by excavating the area to a depth of 6-8 inches, ensuring the soil is level and compacted. Line the perimeter with landscape edging to contain the base materials.\n\nBegin with a 4-inch layer of crushed gravel or stone (typically ¾-inch). Spread the gravel evenly across the excavated area, extending about 6 inches beyond your planned shed footprint. Use a plate compactor to compress the gravel, making several passes until it’s firmly packed.\n\nNext, add a 1-inch layer of coarse sand, often called mason sand. Level it carefully using a long straight board (screed) and a level. The sand layer provides a smooth, even surface for the pavers and helps with drainage. Don’t compact the sand layer – it needs to remain loose enough to allow for minor adjustments when setting the pavers.\n\nPro tip: Install a landscape fabric between the soil and gravel layer to prevent weed growth and soil mixing with your base materials. When leveling the sand, use PVC pipes as guides for consistent thickness – place them on the gravel, add sand between them, and use your screed board across the pipes to achieve an even surface.\n\nRemember to maintain a slight slope (about 1 inch per 8 feet) away from your future shed location for proper drainage.\n\n
 \n
\n\n\n
Paver Layout and Placement
\n\nStart by placing your first paver in a corner of your prepared base, using it as your reference point for the entire layout. Position subsequent pavers snugly against each other, maintaining consistent spacing of about 1/8 inch between them. Work in small sections, using a string line or straight edge as a guide to ensure your rows remain straight.\n\nAs you lay each paver, check its level with a bubble level in both directions. If a paver sits too high or low, adjust the sand beneath it by adding or removing material. Gently tap each paver with a rubber mallet to set it firmly in the sand bed. This helps create a stable, even surface for your shed.\n\nFor the best structural support, arrange your pavers in a running bond pattern (like bricks on a wall) rather than placing them in straight lines. This pattern distributes weight more effectively and creates a more stable foundation. Keep checking your progress with a long level across multiple pavers to maintain an even surface throughout the installation.\n\nOnce all pavers are in place, spread fine sand over the surface and sweep it into the joints between pavers. Use a plate compactor to vibrate the pavers, helping the sand settle fully into the gaps. This final step locks the pavers together, creating a solid, unified foundation for your shed.\n\n
Final Touches and Stabilization
\n\nAfter laying your pavers, it’s crucial to ensure they remain stable and secure for years to come. Start by spreading polymeric sand between all paver joints, making sure to fill them completely. This special sand hardens when wet, creating strong bonds between pavers while still allowing for effective drainage solutions.\n\nUse a push broom to sweep the sand across the surface, working it into every gap. Once you’re confident all joints are filled, remove excess sand with a leaf blower on low power. Next, lightly mist the entire surface with water, being careful not to oversaturate. This activates the polymeric sand’s binding properties.\n\nFor added stability, consider installing edge restraints around the perimeter of your foundation. These aluminum or plastic strips prevent pavers from shifting outward over time. Secure them with 10-inch landscape spikes every few feet.\n\nFinally, inspect your foundation’s levelness using a long level. Address any slight irregularities by gently tapping high spots down with a rubber mallet. Once everything is level and the polymeric sand has cured (typically 24 hours), your shed foundation is ready for the final structure. Remember to perform periodic checks throughout the year, especially after severe weather, to ensure your foundation maintains its integrity.\n\n
 \n
\n\n\n\n
Maintenance and Long-Term Care
\n\nRegular maintenance of your paver shed foundation is crucial for ensuring its longevity and stability. Start by conducting seasonal inspections, particularly after heavy rainfall or extreme weather conditions. Check for any signs of settling, which might appear as uneven spots or gaps between pavers. These issues should be addressed promptly to prevent further deterioration.\n\nKeep the foundation clean by removing debris, leaves, and organic matter that could promote weed growth or moisture retention. A stiff brush and environmentally friendly cleaning solution can help maintain the pavers’ appearance while adhering to sustainable shed practices. Pay special attention to the joints between pavers, ensuring they remain filled with the appropriate material to prevent shifting.\n\nMonitor drainage patterns around your foundation, especially during rainy seasons. If you notice water pooling, consider adjusting the grade or improving drainage systems. Apply a quality sealer every 2-3 years to protect the pavers from weathering and staining. This also helps maintain their color and structural integrity.\n\nFor long-term care, periodically check the edge restraints to ensure they’re secure and performing their job of keeping the pavers in place. If you notice any loose or damaged pavers, replace them immediately to maintain the foundation’s stability. Remember that preventive maintenance is always more cost-effective than major repairs down the line.\n\n\nBuilding a shed foundation with pavers offers a perfect blend of durability, sustainability, and aesthetic appeal. By choosing this eco-friendly option, you’re not only creating a stable base for your storage solution but also minimizing environmental impact through the use of permeable materials. Remember to carefully plan your layout, ensure proper leveling, and consider local climate conditions when selecting your paver type. Regular maintenance will keep your foundation strong for years to come, while the versatility of pavers allows for future modifications or expansions as needed. Whether you’re a DIY enthusiast or working with professionals, a paver foundation provides an excellent balance of functionality and environmental responsibility for your shed project.