Build Your Perfect Wood Garden Shed: A DIY Adventure for Homeowners

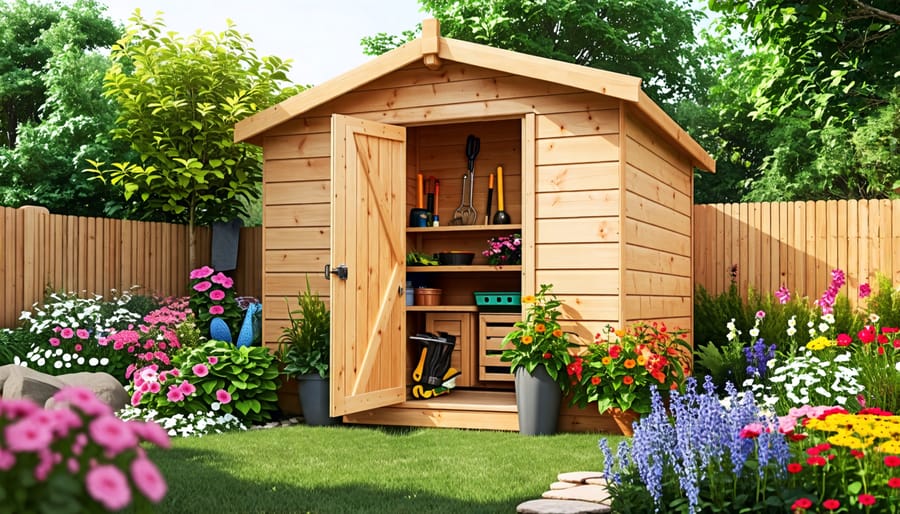
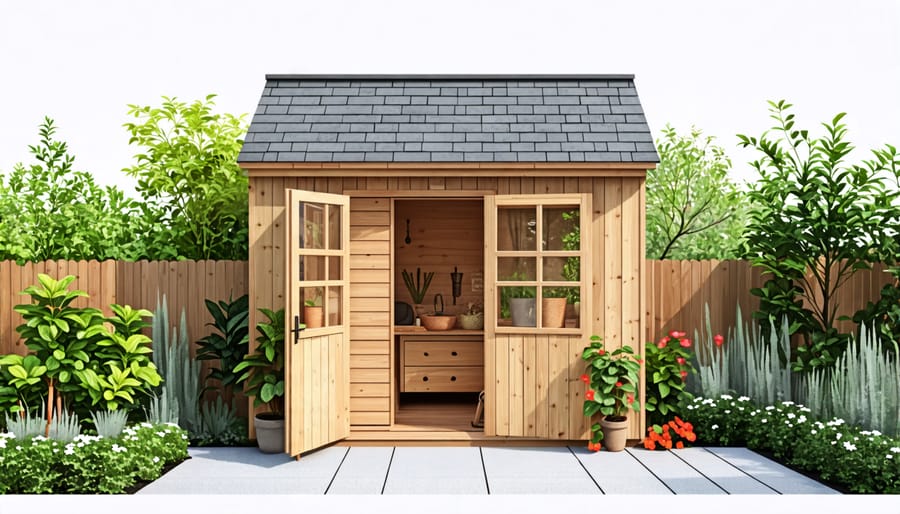
Identify your ideal shed location to maximize utility and aesthetic appeal; select a flat, accessible spot with ample sunlight. Gather materials like quality timber, weather-resistant screws, and corrugated roofing to ensure a durable structure. Focus on a detailed plan, incorporating measurements tailored to your needs for efficient space utilization. Construct the foundation and frame using pre-cut wood for precision and stability. Install siding and roofing respective to your design while ensuring it complements your garden’s style. By taking these steps, you’ll craft a personalized, functional shelter that enhances your garden’s beauty. Looking for extra storage space? Consider adding shelving or hooks to keep items organized and accessible.aptive text.
Why Build Your Own Wood Garden Shed?
Building your own wood garden shed offers a plethora of benefits that extend beyond merely creating a space for storing tools. One of the most gratifying aspects is the personal satisfaction that comes with completing a DIY project. Imagine the sense of accomplishment when you step back and admire the structure you built with your own hands. Not only does this boost your confidence, but it also provides a deeper connection to your outdoor space.
Customization is another significant advantage. Unlike pre-made sheds, which often come with limited design options, building your shed allows you to tailor every aspect to fit your specific needs and personal style. Want extra windows for more natural light? Prefer a particular type of wooden finish to complement your garden? These choices are entirely up to you, making your shed as functional and aesthetically pleasing as you desire.
Cost-effectiveness also plays a crucial role. By sourcing your own materials and doing the labor yourself, you can save a substantial amount compared to purchasing a ready-to-assemble kit or hiring professionals. This not only enables budget-friendly customization but also provides the opportunity to choose materials that best match your environmental and durability preferences.
Moreover, taking on a DIY garden shed project can be incredibly rewarding for those who enjoy problem-solving and creative challenges. You’ll gain new skills and insights into construction and design, which can be applied to future home improvement projects. And if you follow practical advice and guidelines, the process can be as enjoyable as it is educational. Whether you’re looking to improve your home’s functionality or add a personal touch to your garden, building your own wood garden shed is a fulfilling and sensible choice.

Planning Your DIY Shed Project

Choosing the Right Size and Location
When planning your DIY wood garden shed, determining the right size and location is crucial for functionality and aesthetics. Begin by assessing your available garden space. Consider the current layout, including any existing plants or structures that might influence the shed’s position. Remember, the shed should enhance, not overwhelm, your garden. Think about how you’ll use the shed—perhaps you need extra space for gardening tools, or it will house a hobby workstation. List what you’ll store to gauge the correct dimensions.
In choosing a location, look for flat, level ground with good drainage to avoid moisture damage. Ensure the area is accessible yet not disruptive to the garden’s natural flow. Reflect on sunlight exposure as well; too much sun can heat the interior, affecting stored items. Lastly, check local regulations or homeowners’ association guidelines to ensure compliance. With these considerations, you’ll create a shed that perfectly suits your needs and seamlessly integrates into your garden.
Design and Materials
When designing your DIY wood garden shed, consider both functionality and aesthetics to ensure it complements your home’s exterior while serving your storage needs. Start by choosing a design style that resonates with you—whether it’s rustic, modern, or traditional—each offers a unique charm. Consider a gable roof for a classic look or a lean-to style for a budget-friendly option. The beauty of building your shed is the flexibility to customize it; add windows for natural light or a loft for extra storage.
Durability hinges on the type of wood you select. Cedar is an excellent choice due to its natural resistance to weather and insects, keeping your shed in great shape for years. Pine, while more affordable, may require treatment for enhanced longevity. Pressure-treated wood is another solid option, offering robust durability against decay. Always consider your climate and maintenance willingness when selecting materials.
Real-life use cases show that a well-designed wood garden shed not only maximizes storage but also adds value to your property. Friends have shared how investing in quality materials has reduced long-term maintenance and afforded them peace of mind, knowing their tools and garden equipment are secure and sheltered.
Permits and Regulations
Before you start building your DIY wood garden shed, it’s crucial to check your local building codes and determine if a permit is needed. Many areas have specific regulations concerning shed size, placement, and overall design to ensure safety and compliance. Contact your local municipality or visit their website for detailed information on the requisite paperwork and guidelines. Not only will this keep you on the right side of the law, but it also helps prevent potential issues down the line. Understanding regulations upfront is like having a trusted roadmap, helping you avoid unnecessary headaches and paving the way for a smoother building experience.
Step-by-Step Construction Guide
Preparing the Foundation
A strong foundation is key to ensuring your diy wood garden shed stands the test of time, providing stability and protection from moisture. There are several best foundation options to consider. Concrete slabs offer durability and a flat surface but can be labor-intensive. Conversely, gravel bases are budget-friendly and handle drainage well, making them an excellent choice for DIY enthusiasts. Pressure-treated wood foundations are convenient and adaptable for uneven ground. Consider climatic conditions and soil types to decide what suits your needs. By laying a solid foundation, you’ll establish lasting reliability for your garden shed, ensuring functionality and charm for years to come.
Building the Frame
Start by gathering your materials: 2×4 lumber for the wall framing and 2×6 lumber for roof rafters. Begin with the walls; lay out the bottom and top plates on a flat surface, and attach them using a nail gun or hammer and nails. Ensure everything is square by measuring diagonally from corner to corner. Once all walls are framed, carefully lift and secure them in place, checking for level and using temporary bracing if necessary.
Next, focus on the roof framing. Cut your 2×6 rafters according to the desired pitch of your shed roof. Connecting these at the ridge board forms the sturdy backbone of your shed’s roof. Once assembled, lift them onto the wall plates and secure with joist hangers. For added stability, install collar ties midway up the rafters.
Remember to regularly check measurements and levels, ensuring each connection is secure. With patience and precision, the frame of your garden shed will be both strong and ready for the next stages of your DIY adventure.
Adding Walls and Roof
To begin adding the walls of your DIY wood garden shed, start by using treated lumber that can withstand the elements, ensuring longevity. As you build each wall, make sure to check for plumb and square regularly to keep everything nice and aligned. Consider using waterproof plywood for sheathing to prevent unnecessary weather damage. This step is crucial, especially in areas with heavy rainfall. Once the walls are up, it’s time for the roof. Opt for durable roofing materials like asphalt shingles or corrugated metal panels, which are both practical and resilient. Remember to add a slight overhang to direct rain away from the shed. A valuable tip is to install a vapor barrier under the roofing to protect against moisture buildup inside. One DIY enthusiast found that a properly installed roof not only protected their stored tools but also reduced the need for future repairs. These thoughtful choices and careful installation will give your garden shed a strong, weather-resistant structure.
Finishing Touches
Adding the finishing touches to your DIY wood garden shed can transform it from a mere storage space into a charming and functional part of your yard. Start by considering a fresh coat of paint that complements your garden’s palette, creating a cohesive look. Opt for weather-resistant paint to ensure durability. Trim details can add a sophisticated touch; think about installing decorative brackets or window boxes for a homely feel. Inside, maximize usability with customized shelving—perfect for organizing tools or pots. By integrating personal touches and practical storage solutions, your shed becomes a stylish extension of your home.

Tips for Maintenance and Longevity
To ensure your shed remains a trusty and attractive storage space for years to come, a little attention to maintenance goes a long way. First and foremost, keep an eye on the roof. Regularly check for leaks or damages, especially after storms, to prevent water from seeping in, which could lead to mold or structural damage. Replacing damaged shingles or panels promptly can save you from more extensive repairs down the line.
Ventilation is another key factor; proper airflow keeps moisture levels down, helping to prevent rot and rust. If you haven’t already, consider installing vents or a small fan to maintain air circulation. In climates with high humidity, a dehumidifier might be a wise investment.
The ground around your shed should slope away to ensure water doesn’t pool around the base. Additionally, inspecting the foundation periodically for cracks or shifts can help you catch and fix problems early.
For the exterior, a fresh coat of paint or wood sealant every few years can protect against the elements and keep your shed looking its best. If you notice any peeling or chipping, sand it down and reapply the finish promptly.
Finally, involve your shed in your seasonal routines by clearing out fallen leaves and debris from gutters and around the perimeter. With these proactive steps, your shed will serve you faithfully for a long time.
Real-Life Testimonials
When embarking on the journey to build their own wood garden sheds, many homeowners have found both inspiration and practical advice within our community of DIY enthusiasts. Jane, a busy mom from Denver, shared her excitement about transforming her backyard storage project into a creative family endeavor. “We spent weekends together as a family building the shed,” she recalls, “and now it’s not just storage; it’s organized space we truly cherish.” Similarly, Mark, an avid gardener from Portland, turned his shed into the perfect garden tool haven. With a bit of planning and the right materials, he says, “It’s easy to organize a shed that fits your lifestyle.” These stories highlight the rewarding process of creating a functional yet beautiful space that every homeowner can be proud of.
Conclusion
Embarking on the journey of building your own DIY wood garden shed is not only rewarding but also practical. By following detailed instructions and embracing problem-solving techniques, you can create a functional and aesthetically pleasing storage solution that perfectly suits your needs. With a touch of creativity and patience, your shed can become a cherished part of your backyard. Remember, every shed tells a story of personal achievement and resourcefulness. Embrace the process with confidence and enjoy the satisfaction of a job well done. Happy building!

