
Design Your Perfect Multi-Purpose Shed With These Smart Software Tools
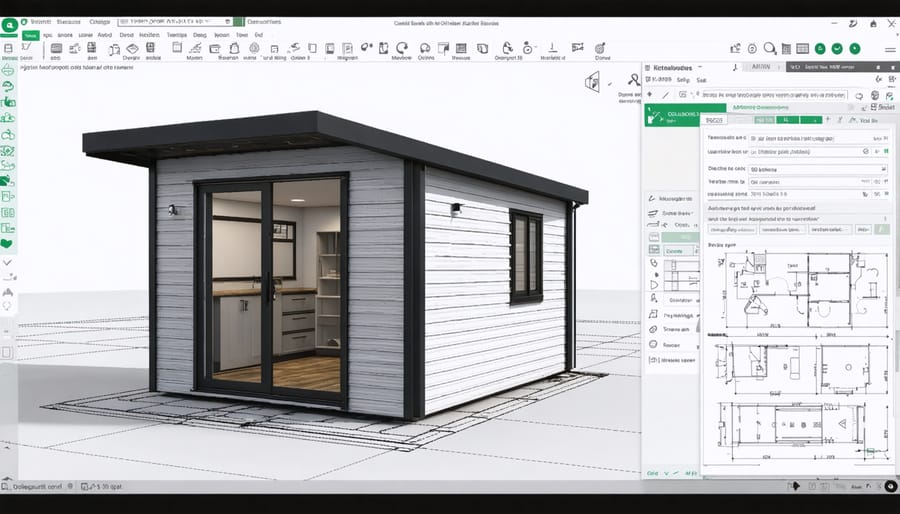
Transform your shed-building project from overwhelming to achievable with modern shed design software that generates precise materials lists and construction plans. Leading programs like SketchUp, Chief Architect, and SmartDraw now offer specialized tools for creating custom storage solutions while automatically calculating exact material requirements and costs. Whether you’re planning a simple garden shed or a multi-functional workspace, these digital tools eliminate guesswork by providing detailed 3D visualizations, accurate measurements, and comprehensive shopping lists for every board, nail, and bracket needed.\n\nThe right design software streamlines your entire building process – from initial concept to final construction. Advanced features like drag-and-drop components, pre-built templates, and real-time cost estimation help you explore different layouts and materials while staying within budget. Plus, many programs integrate with local suppliers’ inventories, allowing you to check material availability and current prices instantly.\n\nBy starting with professional design software, you’ll avoid costly mistakes, reduce material waste, and ensure your shed perfectly fits your needs and space requirements. The detailed materials list becomes your roadmap for efficient purchasing and organized construction, turning your shed vision into reality with confidence and precision.\n\n\n
Top Shed Design Software Options for Homeowners
\n\n
Free vs. Paid Design Tools
\n\nWhen it comes to shed design software, you’ll find both free and paid options that can help bring your vision to life. Free tools like SketchUp Free and Sweet Home 3D offer basic design capabilities, allowing you to create simple shed layouts and basic 3D visualizations. These options are perfect for homeowners working with straightforward designs and modest budgets.\n\nHowever, paid solutions like Chief Architect Home Designer and SmartDraw provide more comprehensive features that can make your shed planning process smoother. These premium tools typically include automated materials lists, detailed cost estimations, and extensive libraries of pre-made components. They also offer professional-grade construction documents and the ability to create precise building plans.\n\nThe choice between free and paid tools often comes down to your project’s complexity. Free tools work well for basic 8×10 or 10×12 sheds with standard features. But if you’re planning a custom workshop shed with electrical planning, multiple windows, or complex roof designs, paid software might be worth the investment.\n\nKey features to compare:\n- Materials list generation\n- Cost calculation tools\n- Design templates and components\n- Export options for plans\n- Technical support availability\n- Mobile device compatibility\n- Cloud storage for projects\n\nRemember that many paid tools offer free trials, letting you test their advanced features before committing to a purchase. This can help you make an informed decision based on your specific needs and comfort level with the software.\n\n
 \n
\n\n\n
Mobile Apps vs. Desktop Programs
\n\nWhen choosing shed design software, you’ll find options for both mobile devices and desktop computers, each offering unique advantages for your project. Mobile apps shine in their convenience and portability, allowing you to capture measurements, take photos, and make quick adjustments while walking around your yard or visiting hardware stores. Many shed design apps also offer augmented reality features, helping you visualize how your shed will look in your actual space.\n\nDesktop programs, however, typically provide more robust features and greater precision in your design work. With a larger screen and more processing power, these programs excel at detailed planning, offering comprehensive materials lists and the ability to create precise construction drawings. They’re particularly valuable when working with complex designs or when you need to generate detailed documentation for permits.\n\nFor best results, consider using both platforms complementarily. You might start with a mobile app for initial planning and visualization, then move to a desktop program for detailed design work and materials calculations. Many modern software solutions offer cloud synchronization, allowing you to seamlessly switch between your phone and computer while keeping your project data consistent.\n\nRemember that your choice should align with your working style and project needs. If you’re often on the go or prefer working from your tablet, a mobile app might be your primary tool. For more complex projects requiring detailed planning, a desktop program could be more suitable.\n\n\n
Creating Your Multi-Function Shed Design
\n\n
Planning Your Space Requirements
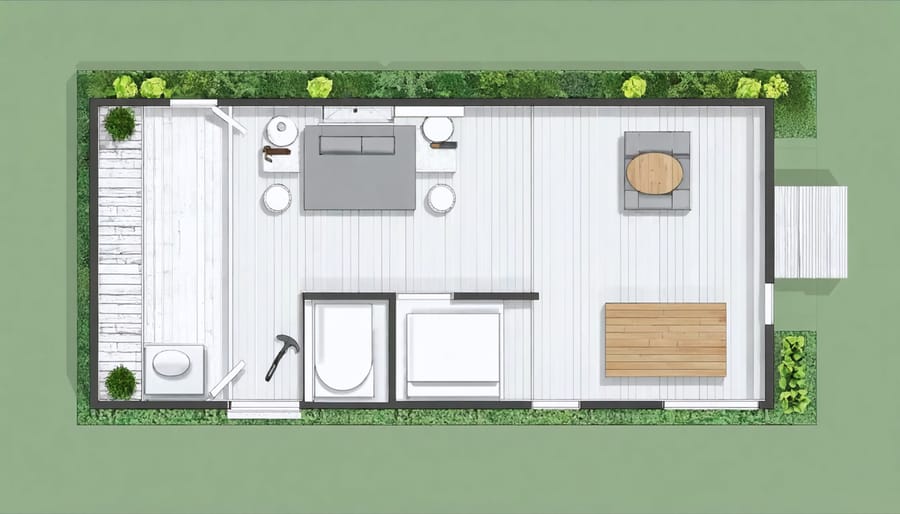
\n\nBefore diving into shed design software, it’s crucial to clearly define your space requirements. Start by listing all the items you plan to store and activities you’ll conduct in your shed. Whether it’s gardening equipment, workshop tools, or seasonal decorations, understanding your storage needs helps determine the optimal layout and size.\n\nTo maximize storage space efficiency, measure your largest items first and add buffer space for movement and accessibility. Don’t forget to consider future needs – many homeowners find themselves wishing they’d built bigger after a year or two.\n\nConsider creating zones within your shed for different purposes. For example, dedicate one area for tools, another for garden supplies, and perhaps a workspace if you’re planning a DIY station. These smart space planning strategies will help you make the most of every square foot.\n\nRemember to account for:\n- Door clearance and positioning\n- Window placement for natural light\n- Minimum working space requirements\n- Storage system dimensions\n- Ceiling height for tall items\n- Access paths between storage areas\n\nMost shed design software allows you to experiment with different layouts, helping you visualize how your space will function before finalizing your plans. Take time to try various configurations to find the most practical arrangement for your needs.\n\n
Incorporating Multiple Functions
\n\nModern shed design software allows you to create dedicated zones for different activities, making your shed more versatile and functional. Start by mapping out distinct areas based on your needs, such as storage, workspace, and hobby areas. The key is to implement effective storage layout designs that maximize every square foot while maintaining easy access to all zones.\n\nConsider incorporating adjustable features like movable workbenches or folding tables that can adapt to different uses. When designing your workspace zone, factor in adequate lighting, electrical outlets, and ventilation requirements. For storage areas, include customizable shelving systems and wall-mounted organizers that can be modified as your needs change.\n\nMany shed design programs offer drag-and-drop functionality for common elements like pegboards, cabinets, and storage bins. Take advantage of these features to visualize how different zones will interact. Remember to leave sufficient clearance for movement between areas and account for door swing spaces.\n\nThe software’s materials list will automatically update as you add different zones, helping you track additional items needed for each functional area. This ensures you don’t overlook essential components like extra electrical wiring for workshop areas or specialized storage solutions for garden tools and equipment.\n\n
 \n
\n\n\n
Generating Accurate Materials Lists
\n\nModern shed design software takes the guesswork out of creating accurate materials lists, saving you both time and money. Most programs automatically generate detailed lists as you design, accounting for everything from lumber and hardware to roofing materials and trim.\n\nTo ensure your materials list is comprehensive, start by double-checking your shed’s dimensions and features in the software. Pay special attention to structural elements like wall studs, rafters, and floor joists, as these form the foundation of your materials calculations. Many programs will automatically space these elements according to building codes, but you can adjust them based on your specific needs.\n\nDon’t forget to include often-overlooked items in your materials list. Good software will remind you about necessities like flashing, vapor barriers, and fasteners. You can usually customize the list to add specific brands or materials you prefer, making it easier to get accurate pricing from your local suppliers.\n\nMost programs also include a waste factor calculation, typically adding 10-15% to account for cut-offs and damaged materials. This feature helps prevent costly mid-project supply runs. Before finalizing your list, use the software’s review tools to verify all components, including doors, windows, and any special features you’ve added to your design.\n\nExport your materials list in a format that’s easy to share with suppliers – many programs offer spreadsheet formats that you can easily modify or print. Some even integrate directly with home improvement stores for immediate pricing and availability information.\n\n\n
Making the Most of Your Materials List
\n\n
Understanding Cost Estimates
\n\nMost shed design software provides detailed cost estimates that can be invaluable for project planning. Understanding these estimates starts with reviewing the default material prices, which are typically based on national averages. However, prices can vary significantly by region and supplier, so it’s important to adjust these figures to match your local market rates.\n\nLook for the cost adjustment features within your software, usually found in the materials or settings menu. Here, you can input current prices from your local suppliers, ensuring your estimate reflects real-world costs. Many programs allow you to save multiple price lists, which is helpful when comparing different material grades or suppliers.\n\nDon’t forget to factor in additional costs that might not be immediately visible in the base estimate. These can include delivery fees, special order charges, or bulk discounts. Some software packages include these options, while others might require manual adjustments to your total.\n\nKeep your estimates current by regularly updating material prices, especially for lumber and metals, which can fluctuate significantly. Many advanced software options include automatic price updates through supplier integrations, though you’ll want to verify these against local quotes.\n\nRemember that the final cost might differ from your estimate due to market changes or unexpected requirements. It’s wise to add a 10-15% buffer to your budget to account for these variables and ensure your project stays on track financially.\n\n
 \n
\n\n\n
Optimizing Material Usage
\n\nSmart material planning can significantly reduce waste and save money when building your shed. Modern shed design software excels at helping you make cost-effective material choices through precise calculations and efficient layout planning.\n\nStart by using your software’s cut optimization features to minimize waste from standard lumber lengths. Most programs can automatically arrange cutting patterns to get the most from each board, potentially saving 15-20% on material costs. Look for software that includes a board optimization viewer, which shows you exactly how to cut your materials for maximum efficiency.\n\nConsider adjusting your shed dimensions slightly to align with standard material sizes. For example, designing an 8×12 shed instead of 8×11 might help you use full sheets of plywood without wasteful cuts. Many software packages will alert you when your design could be modified to better utilize standard material dimensions.\n\nTake advantage of the software’s material list feature to plan purchases in bulk, which often leads to better pricing. Some programs even integrate with local suppliers’ inventories, helping you identify the most cost-effective suppliers in your area.\n\nRemember to account for a reasonable waste factor in your calculations – typically 10% for lumber and 15% for siding materials. This helps ensure you won’t run short while still maintaining efficient material usage.\n\n
Modifying Plans for Available Materials
\n\nOne of the most practical features of modern shed design software is the ability to modify your plans based on locally available materials. When your preferred lumber dimensions or specific materials aren’t available at your local suppliers, you can easily adjust your design without starting from scratch.\n\nStart by creating a list of alternative materials available in your area. Many design programs allow you to input custom material sizes and specifications, helping you adapt your plans while maintaining structural integrity. For example, if your design calls for 2×6 lumber but only 2×4 is readily available, the software can help recalculate spacing and support requirements accordingly.\n\nConsider using the software’s cost comparison tools to explore different material options. Sometimes, switching to alternative materials not only solves availability issues but can also lead to cost savings. The materials list feature will automatically update quantities and dimensions as you make these adjustments.\n\nRemember to check your local building codes when making material substitutions. Most shed design software includes regional code compliance checks, but it’s worth double-checking, especially when deviating from standard materials. Some programs even suggest common alternative materials that meet local building requirements.\n\nFor specialty items like windows or doors, look for the “custom component” feature in your software. This allows you to input exact dimensions of available products, ensuring your final design works with what you can actually purchase locally.\n\n\nEmbarking on your shed design journey with specialized software can transform what might seem like an overwhelming project into an organized and achievable goal. By utilizing shed design software with integrated materials lists, you’ll save countless hours of planning while minimizing costly mistakes and material waste. These digital tools empower you to visualize your dream shed, make real-time adjustments, and ensure every component is accounted for before you begin construction.\n\nThe ability to generate accurate materials lists automatically not only streamlines your shopping process but also helps you maintain better control over your budget. You can easily compare different design options and their associated costs, making informed decisions that align with both your vision and financial constraints.\n\nWhether you’re planning a simple storage solution or a multi-functional workspace, the right software will guide you through every step of the design process. The confidence you’ll gain from having a detailed plan and precise materials list makes the actual construction phase much more manageable and enjoyable.\n\nReady to start your shed project? Choose a design software that matches your skill level and project needs, and begin bringing your vision to life. With the right tools at your disposal, you’re well-equipped to create a sturdy, functional, and visually appealing shed that will serve your needs for years to come.