
Make Your Shed’s Electrical System Truly Weather-Proof (Expert Solutions)
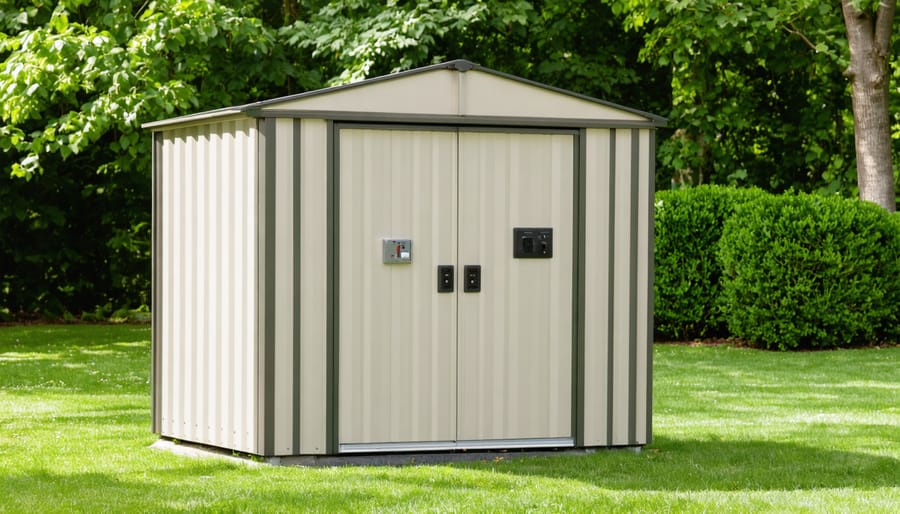
Protect your valuable outdoor belongings with a weather-resistant storage shed that stands up to nature’s toughest challenges. From scorching sun to heavy snow, these robust structures offer year-round protection while maintaining their structural integrity and appearance. Modern weather-resistant sheds combine innovative materials like high-grade vinyl, powder-coated steel, and treated wood with smart design features such as reinforced roofing, elevated foundations, and proper ventilation systems.
Whether you’re storing garden equipment, seasonal decorations, or workshop tools, a weather-resistant shed provides peace of mind through every season. Advanced features like UV-resistant panels, water-tight seals, and impact-resistant materials ensure your investment remains protected while requiring minimal maintenance. These durable structures not only safeguard your belongings but also enhance your property’s value and aesthetic appeal.
Strategic design elements like sloped roofs, weather stripping, and proper drainage systems work together to combat moisture, prevent rust, and maintain a dry interior environment. By choosing a weather-resistant storage shed, you’re investing in a long-term storage solution that combines functionality with durability, ensuring your stored items remain safe and accessible regardless of external conditions.
Essential Components of a Weather-Resistant Electrical System
Weather-Resistant Outlets and Switches
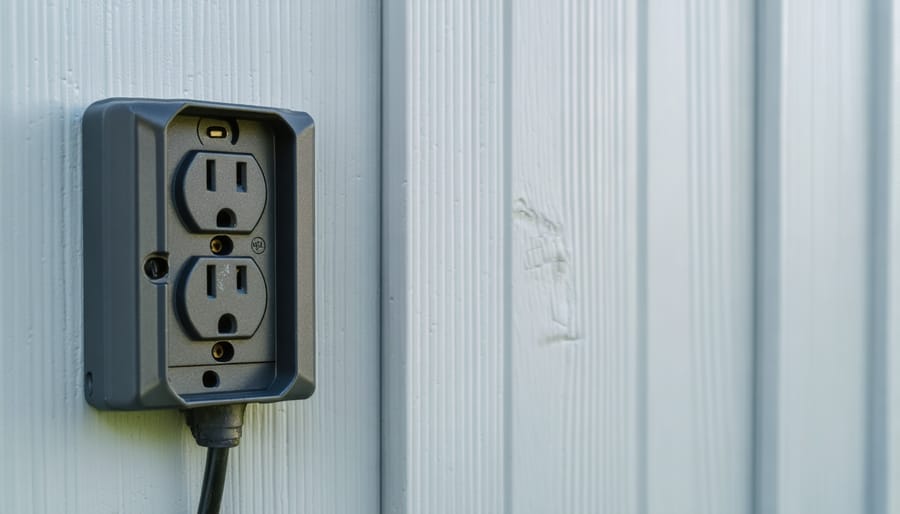
When it comes to powering tools and equipment in your storage shed, proper electrical installations are crucial for safety and functionality. Weather-resistant GFCI outlets are essential components that protect against electrical hazards in damp conditions. These specialized outlets automatically cut power when they detect ground faults, preventing potential shock hazards.
To ensure maximum protection, install weatherproof covers over all outdoor outlets. These covers, often called “while-in-use” covers, provide a waterproof seal even when cords are plugged in. Look for covers rated for wet locations and made from UV-resistant materials to prevent degradation from sun exposure.
When installing outlets and switches, position them at least 12 inches above the ground to minimize exposure to rain splash and snow accumulation. Use weather-resistant boxes and proper weatherproof gaskets to create a reliable seal. All connections should be made with waterproof wire nuts and electrical tape for added protection against moisture.
Remember to follow local building codes and consider having a licensed electrician handle the installation if you’re not confident in your electrical skills. Regular maintenance checks are important too – inspect your outlets and covers seasonally for signs of wear or damage, and replace any components that show deterioration. This proactive approach helps ensure your shed’s electrical system remains safe and reliable throughout the years.
Protected Wiring Solutions
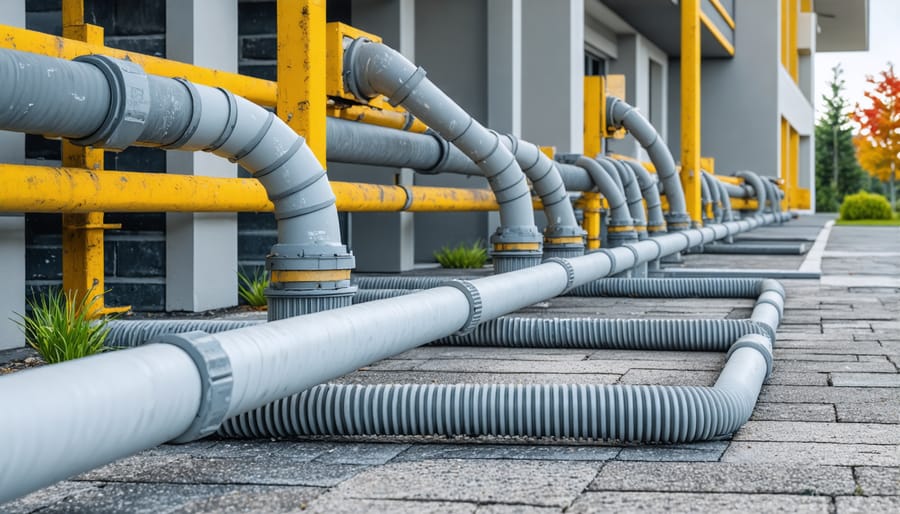
Protecting your shed’s electrical system from weather damage starts with selecting the right weatherproof electrical materials and implementing proper installation techniques. Begin by using UF (Underground Feeder) cables, which feature a solid waterproof coating that prevents moisture penetration. These cables should be run through PVC conduits rated for outdoor use, providing an additional layer of protection against rain, snow, and UV rays.
When installing conduits, ensure all connections are properly sealed with weatherproof fittings and waterproof sealant. Position junction boxes at least 12 inches above ground level to prevent water accumulation, and always use boxes specifically rated for outdoor applications. Install rubber gaskets around all box covers and entry points to create watertight seals.
Consider using flexible conduit sections near entry points to accommodate any building movement or settling without compromising the system’s integrity. All outdoor outlets should be protected with GFCI (Ground Fault Circuit Interrupter) receptacles and weather-resistant covers that automatically snap shut when not in use.
For added protection, create drip loops where wires enter the shed, ensuring water flows away from entry points rather than following cables inside. Use UV-resistant cable ties and mounting hardware to secure conduits and cables, preventing sagging or displacement over time. Remember to check local building codes, as they may require specific types of protection or installation methods for outdoor electrical systems.
Weatherproofing Your Shed’s Entry Points
Cable Entry Protection
Properly securing cable entry points is crucial for maintaining your shed’s weather resistance and protecting your electrical components. Start by installing cable glands or weatherproof cable entry boxes at each point where wires enter your shed. These specially designed fittings create a watertight seal around the cables while allowing necessary flexibility.
For maximum protection, position cable entry points at least 12 inches above ground level to prevent water from following the cable’s path into the shed. When installing cables, create a drip loop – a downward curve in the cable before it enters the shed – which allows water to drip off rather than travel along the cable into the structure.
Consider using conduit systems for added protection. PVC or metal conduits shield cables from weather exposure and physical damage while maintaining a professional appearance. Seal all conduit connections with weatherproof sealant or electrical tape designed for outdoor use.
Remember to use silicone caulk or waterproof sealant around each entry point, applying it generously to create a complete seal. For multiple cables entering through a single point, use a cable entry plate with rubber grommets sized specifically for your cables. These plates provide organized, neat entry points while maintaining weather resistance.
Regular inspection of cable entry points is essential. Check seals and protective measures at least twice yearly, particularly before severe weather seasons. Look for signs of deterioration, cracks in sealants, or loose fittings, and address any issues promptly to maintain your shed’s weather resistance.
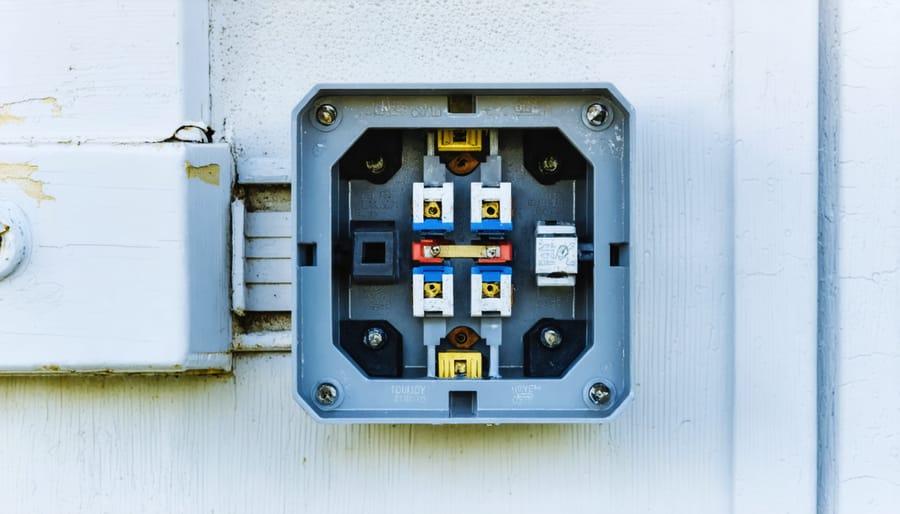
Junction Box Installation
Proper electrical installation is crucial for your storage shed’s safety and functionality, especially when dealing with varying weather conditions. Weather-resistant junction boxes are essential components that protect electrical connections from moisture, dust, and other environmental factors.
Start by selecting a junction box location at least 12 inches above ground level to prevent water accumulation. Mount the box on a sturdy surface, preferably on a wall stud or beam, using corrosion-resistant screws. Ensure the box is perfectly level before securing it in place.
When running cables into the junction box, use appropriate weatherproof cable connectors or conduit fittings. These create a watertight seal where wires enter the box. Make all connections inside the box using wire nuts rated for the wire gauge you’re using, and wrap them with electrical tape for added protection.
The junction box cover should have a rubber gasket to create a proper seal. When installing the cover, tighten all screws evenly to maintain consistent pressure around the gasket. Don’t overtighten, as this can damage the gasket or crack the cover.
Consider installing a drip loop in the cables entering the box from above. This simple bend in the wire prevents water from running down the cable and into the box. For added protection, apply a small bead of silicone caulk around the box where it meets the wall.
Remember to check local building codes and consider hiring a licensed electrician if you’re not comfortable working with electrical systems. Regular inspection of your junction boxes will help ensure they continue to protect your shed’s electrical components effectively.
Maintenance and Safety Measures
Seasonal Inspection Checklist
To keep your weather-resistant storage shed in top condition, perform these essential checks each season:
Spring Inspection (March-May):
• Check roof shingles or panels for winter damage
• Clean gutters and drainage systems
• Inspect door hinges and lubricate if needed
• Look for signs of pest intrusion around the foundation
• Test ventilation systems and clear any blocked vents
Summer Maintenance (June-August):
• Examine seals around windows and doors
• Check for UV damage to exterior surfaces
• Clean and test weather stripping
• Inspect interior for signs of moisture
• Ensure proper airflow through vents
Fall Preparation (September-November):
• Clear debris from roof and gutters
• Check weatherproofing around utility entry points
• Inspect door sweeps and replace if worn
• Test locks and handles for smooth operation
• Seal any gaps or cracks before winter
Winter Monitoring (December-February):
• Remove snow accumulation from roof
• Check for ice dam formation
• Monitor interior temperature and humidity
• Inspect foundation for frost heave
• Test door operation for winter weather impacts
Create a maintenance log to track these inspections and any repairs needed. Address minor issues promptly to prevent them from becoming major problems. Consider taking photos during each inspection to document changes over time and identify developing issues early.
Remember to adjust this schedule based on your local climate and specific weather patterns. More frequent checks may be necessary in areas with extreme weather conditions.
Emergency Protection Systems
Protecting your storage shed’s electrical system from unexpected power surges and weather-related issues is crucial for maintaining both safety and functionality. A comprehensive emergency protection system starts with installing a high-quality surge protector at the main power entry point. This device acts as your first line of defense against lightning strikes and power fluctuations that could damage your shed’s electrical components.
Consider installing a whole-shed surge protector rated for outdoor use, with at least 1,000 joules of protection. For added safety, include individual surge protectors for any valuable power tools or equipment stored inside. Many homeowners find that layered protection offers the best security for their investment.
An emergency shutoff system is equally important. Install a clearly marked master switch near the shed’s entrance that can quickly cut power during storms or emergencies. Modern shutoff systems can include smart features that automatically disconnect power when detecting severe weather conditions or unusual power fluctuations.
Regular maintenance of these protection systems is essential. Test your surge protectors monthly using their built-in indicator lights, and replace them every 3-5 years or after a major surge event. Keep the area around your emergency shutoff clean and easily accessible, and consider posting simple instructions nearby for family members who might need to use it in your absence.
Professional Installation vs. DIY Considerations
While many aspects of storage shed installation can be handled by experienced DIY enthusiasts, it’s crucial to understand when professional help is necessary. The decision between professional installation and DIY often depends on factors like project scope, personal expertise, and local building codes.
DIY installation is suitable for smaller pre-fabricated sheds and basic assembly tasks. If you’re comfortable with tools, can read detailed instructions, and have experience with similar projects, you might successfully tackle:
– Site preparation and leveling
– Basic foundation work for smaller sheds
– Assembly of pre-cut components
– Basic weatherproofing
– Simple anchoring systems
However, professional installation is strongly recommended for:
– Large or custom-built sheds
– Complex foundation work
– Electrical installations (to avoid common electrical safety mistakes)
– Structural modifications
– Permits and code compliance
– Sites with challenging terrain
Consider the time investment as well. What might take professionals a day or two could stretch into weeks for DIY enthusiasts. Professional installers also typically offer warranties and guarantee their work, providing peace of mind.
Cost considerations vary significantly. While DIY installation saves on labor costs, professionals bring expertise, proper tools, and efficiency to the project. They can also identify potential issues before they become problems, potentially saving money in the long run.
For the best results, many homeowners opt for a hybrid approach: hiring professionals for complex aspects like electrical work and foundation laying while handling simpler tasks themselves. This balanced approach often provides the best value while ensuring safety and proper installation.
Remember to check local regulations before starting your project, as some areas require professional installation for structures above certain dimensions or those requiring electrical work.
A well-planned weather-resistant storage shed with proper electrical systems not only protects your belongings but also ensures safe and reliable power access throughout the year. By incorporating waterproof outlets, weather-sealed connections, and appropriate grounding systems, you’ve taken essential steps toward creating a truly all-weather storage solution.
Remember that the key to long-lasting protection lies in the details – from selecting the right weatherproof components to ensuring proper installation and regular maintenance. Taking time to properly seal entry points, install GFCI outlets, and use appropriate outdoor-rated materials will pay dividends in the long run, protecting both your stored items and electrical equipment from moisture damage.
Safety should always remain your top priority when working with electrical systems in outdoor structures. If you’re unsure about any aspect of the installation, don’t hesitate to consult a licensed electrician. They can ensure your system meets local codes and provides the protection you need.
Regular inspections of your weather-resistant electrical components, along with prompt attention to any signs of wear or damage, will help maintain the integrity of your system. By following these guidelines and maintaining vigilance over your shed’s electrical infrastructure, you’ll create a safe, functional, and weather-resistant storage space that serves you well for years to come.
Don’t forget that a properly equipped weather-resistant shed is an investment in protecting your valuable belongings while adding functionality to your outdoor space.