
OSHA-Approved Electrical Safety for Your Shed (Simple DIY Checklist)
Protect your family and property by mastering essential electrical safety protocols for your shed installation. OSHA’s comprehensive safety guidelines serve as the gold standard for preventing electrical hazards, even in residential projects. While designed for professional environments, these safety principles are equally crucial for DIY shed builders who want to ensure their electrical installations meet the highest safety standards.
Following OSHA-aligned safety practices isn’t just about compliance – it’s about creating a secure environment where your shed’s electrical system operates reliably for years to come. This practical checklist adapts professional-grade safety requirements for homeowner use, helping you navigate everything from proper wire selection to grounding procedures with confidence.
Whether you’re planning a new shed electrical installation or upgrading an existing system, understanding and implementing these safety protocols will help prevent common hazards like shock, fire, and electrical malfunctions. Let’s explore the essential safety measures that will keep your shed’s electrical system up to code and your family protected.
Essential Pre-Installation Safety Checks
Required Tools and Safety Equipment
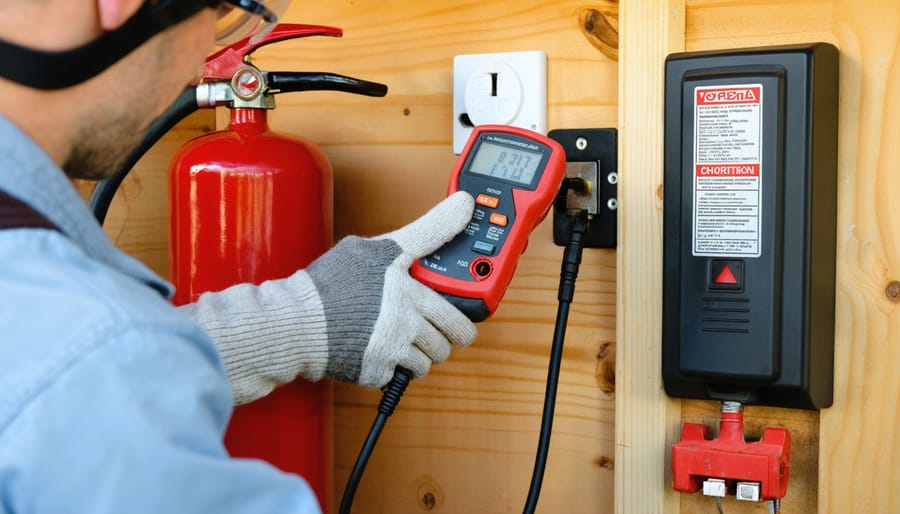
Before starting any electrical work, ensure you have these OSHA-recommended safety tools and equipment readily available. Essential personal protective equipment includes insulated gloves rated for electrical work, safety glasses with side shields, and non-conductive safety boots. You’ll also need a properly rated voltage tester, insulated hand tools (screwdrivers, wire strippers, and pliers), and lockout/tagout devices for power isolation.
Keep a Class C fire extinguisher nearby for electrical fires, and always have a first aid kit within reach. For proper visibility, maintain adequate portable lighting or a headlamp. When working in damp conditions, use a rubber insulating mat to prevent ground contact. Don’t forget warning signs and barrier tape to mark off work areas.
Remember to inspect all safety equipment before each use, checking for wear, damage, or expired ratings. Replace any compromised items immediately to maintain optimal protection.

Environmental Safety Assessment
Environmental conditions play a crucial role in electrical safety within your storage shed. Start by checking for any signs of moisture or water intrusion, as these can create dangerous electrical hazards. Ensure your shed has proper ventilation to prevent the buildup of condensation, which can damage electrical components and create safety risks.
Pay special attention to areas around electrical outlets and junction boxes, keeping them dry and protected from the elements. Install weather-resistant covers on outdoor outlets and ensure all electrical connections are properly sealed. Good airflow is essential, so consider adding vents or a small fan if your shed tends to get humid.
Check the surrounding area for potential environmental hazards like overhanging branches or flooding risks that could compromise electrical safety. During seasonal changes, inspect your shed’s interior for any new moisture patterns or ventilation issues. Regular environmental assessments help maintain a safe electrical system and protect your stored items from damage.
Remember to document any environmental concerns you find and address them promptly to maintain a safe storage space year-round.
Wiring and Circuit Protection Requirements
Proper Wire Sizing and Selection
Selecting the right wire size is crucial for both safety and efficiency in your shed’s electrical system. Before starting your electrical wiring installation guide, determine the total amperage requirements for all your planned devices and fixtures. For most standard shed installations, 12-gauge wire is suitable for 20-amp circuits, while 14-gauge wire works for 15-amp circuits.
Remember to account for voltage drop, especially if your shed is located far from the main power source. As a rule of thumb, increase wire size by one gauge for every 100 feet of wire run to maintain proper voltage. Always choose wire with appropriate insulation ratings for your environment – UF (underground feeder) cable for buried runs and THHN/THWN for interior wiring.
Color coding is essential: black for hot wires, white for neutral, and green or bare copper for ground. When in doubt about wire sizing, it’s better to go slightly larger than necessary rather than risk undersizing, which could lead to overheating and potential fire hazards.
Circuit Breaker and GFCI Protection
Proper electrical protection is essential for your shed’s safety and compliance with OSHA standards. Every electrical circuit in your shed must be equipped with appropriate circuit breakers to prevent overload and short circuits. These breakers should be clearly labeled and easily accessible in your main electrical panel.
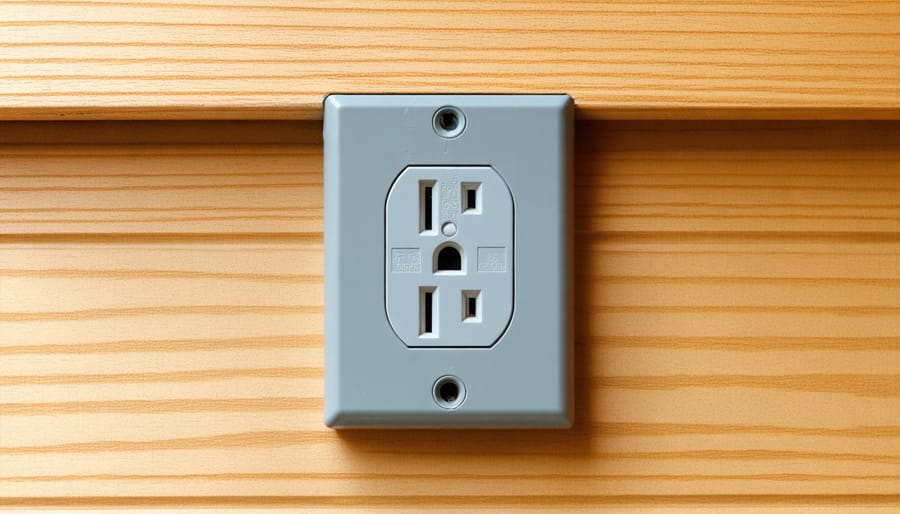
For areas where water exposure is possible, such as near doors or windows, GFCI outlet installation is mandatory. GFCIs (Ground Fault Circuit Interrupters) protect against electric shock by quickly shutting off power when they detect current leakage.
Test your circuit breakers every three months by manually tripping and resetting them. For GFCIs, use the built-in test button monthly to ensure they’re working correctly. If any protection device fails to operate properly, have it replaced immediately by a qualified electrician.
Remember to document all testing dates and results in your maintenance log. This not only helps you stay on top of safety checks but also demonstrates your commitment to maintaining a safe electrical system in your shed.
Installation Safety Checklist
Outlet and Switch Installation
When installing outlets and switches, always start by ensuring the power is completely off at the circuit breaker. Use a voltage tester to double-check there’s no live current before beginning work. Mount electrical boxes securely at the correct height and depth according to OSHA standards, typically 12-16 inches from the floor for outlets and 48 inches for switches.
Strip wires carefully, leaving appropriate length for connections, and never remove more insulation than necessary. Make sure to maintain proper wire polarity by connecting black (hot) wires to brass screws, white (neutral) wires to silver screws, and green or bare copper (ground) wires to green ground screws. Secure all connections tightly, but avoid over-tightening which can damage the terminals.
When working with multiple outlets or switches in the same box, use approved wire connectors and ensure there’s adequate space without overcrowding. All outlet and switch covers should fit snugly without gaps, protecting against accidental contact with live parts. After installation, label all new outlets and switches on your electrical panel for future reference.
Before restoring power, perform a final visual inspection to verify all connections are secure and no bare wires are exposed. Test each newly installed device with a circuit tester to confirm proper wiring and grounding.
Lighting Installation Safety
When installing lighting fixtures in your shed, always start by turning off power at the main electrical panel and verifying the absence of voltage using a reliable testing device. Ensure you have proper mounting hardware and use an appropriate ladder or platform that provides stable footing. Never work on metal ladders when dealing with electrical installations.
For overhead lighting, secure fixtures firmly to ceiling joists or use proper mounting brackets rated for the fixture’s weight. Always connect ground wires first, followed by neutral (white) and hot (black) wires, using appropriate wire nuts and electrical tape for insulation. Double-check all connections before securing the fixture’s housing.
Keep all wiring connections inside approved junction boxes and ensure proper strain relief where cables enter the box. When installing outdoor lighting, use weather-resistant fixtures and GFCI protection. All exposed wiring should be properly enclosed in conduit to prevent damage.
Remember to maintain proper clearance around fixtures, especially for heat-producing ones, and avoid placing flammable materials nearby. Once installation is complete, verify all mounting hardware is secure and test the fixture operation after restoring power. Document any modifications to your electrical system for future reference.
Regular Maintenance and Inspection
Monthly Safety Checks
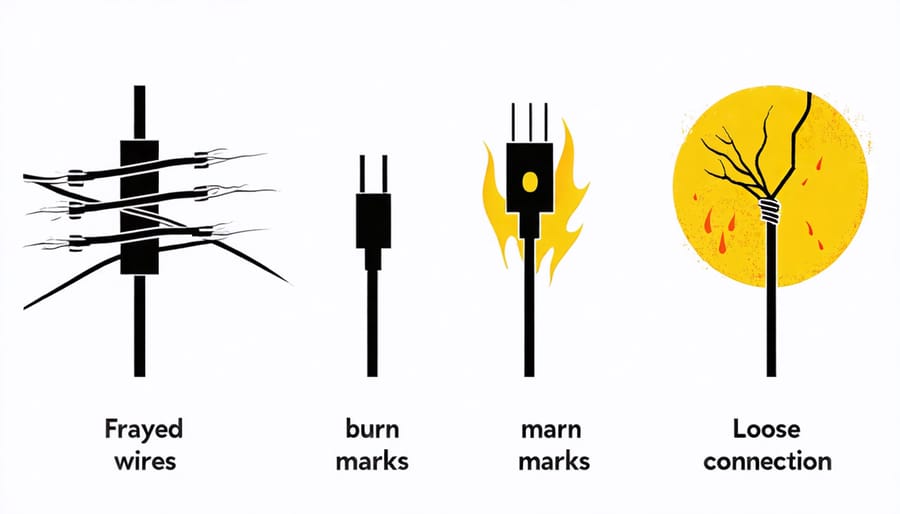
Monthly safety inspections are crucial for maintaining a safe electrical system in your shed. Start by checking all outlets for signs of wear, loose connections, or discoloration. Test ground fault circuit interrupters (GFCIs) by pressing the “test” and “reset” buttons – they should click firmly and function properly. Examine extension cords and power strips for fraying, exposed wires, or damage to the insulation.
Look for any water damage or moisture around electrical components, especially after heavy rain. Inspect your circuit breaker panel for rust, unusual sounds, or warm spots. Make sure all junction boxes are properly covered and sealed. Check that all light fixtures are securely mounted and bulbs are the correct wattage for their fixtures.
Don’t forget to test your emergency lighting if installed, and ensure all electrical warning signs remain visible and legible. Document your findings in a safety log to track issues over time and maintain OSHA compliance.
Warning Signs of Electrical Problems
Being vigilant about electrical issues in your storage shed can prevent serious accidents and costly repairs. Watch for these common electrical hazards that signal it’s time to take action: flickering or dimming lights, which often indicate loose connections or overloaded circuits; warm or discolored outlet covers that suggest potential overheating; buzzing sounds from switches or outlets that might mean loose wiring; and frequent circuit breaker trips pointing to possible system overload.
Pay attention to burning smells, which require immediate investigation, and any tingling sensation when touching metal components. Check for frayed or damaged wires, especially in areas exposed to weather or where rodents might access. Watch out for excessive extension cord use, as this can create fire risks. If you notice multiple devices losing power simultaneously or experience mild shocks from appliances, these are serious red flags requiring professional attention.
Maintaining electrical safety in your shed is not just about following a checklist – it’s about creating a secure environment for you and your family. By following OSHA-inspired safety guidelines, you’ve taken important steps toward preventing electrical hazards and ensuring your storage space remains safe and functional.
Remember to regularly inspect your electrical installations, keeping an eye out for warning signs like frayed wires, loose connections, or unusual sounds. Maintain clear documentation of all electrical work and inspections, which will prove invaluable for future reference and maintenance planning.
While many electrical tasks can be handled by DIY enthusiasts, it’s crucial to recognize when professional help is needed. Complex electrical work, major upgrades, or any tasks you’re unsure about should always be handled by licensed electricians. This investment in professional expertise can prevent costly mistakes and, more importantly, ensure your safety.
Make electrical safety checks a regular part of your shed maintenance routine. Schedule quarterly inspections, keep your electrical safety equipment updated, and ensure all users of the space are familiar with basic safety protocols and emergency procedures.
By maintaining these safety standards, you’re not just complying with regulations – you’re protecting your investment and, most importantly, ensuring a safe environment for everyone who uses your shed. Remember, when it comes to electrical safety, it’s always better to be overly cautious than to risk potential hazards.