
Perfect Metal Shed Insulation That Stops Condensation Cold
Properly insulating your metal shed transforms it from a basic storage space into a temperature-controlled, moisture-resistant workshop or storage solution. The right insulation not only prevents condensation and rust but can slash your energy costs by up to 50% if you’re heating or cooling the space. From flexible fiberglass batts to rigid foam boards, modern insulation options offer exceptional performance while being surprisingly DIY-friendly. Whether you’re building a new shed or upgrading an existing structure, choosing the right insulation material and installing it correctly makes all the difference in creating a comfortable, protected space that lasts for years.
Today’s guide walks you through the most effective insulation materials for metal sheds, complete with installation tips and cost comparisons, helping you make an informed decision that balances performance, budget, and ease of installation. We’ll focus specifically on wall insulation solutions that prevent thermal bridging – a common issue with metal structures – while maintaining proper ventilation to prevent moisture buildup.
Why Metal Sheds Need Special Insulation Consideration
The Condensation Problem
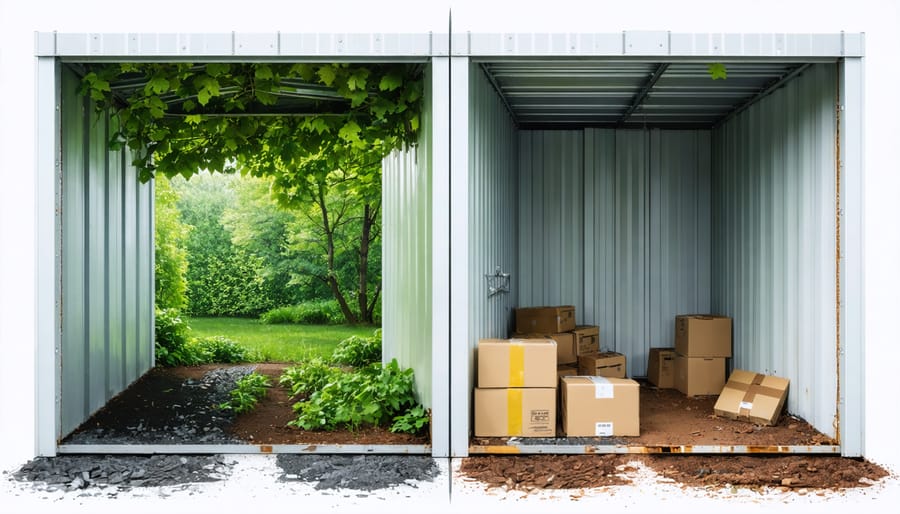
Metal sheds are particularly prone to condensation due to their high thermal conductivity. When warm, moist air inside the shed meets the cold metal surfaces, especially during temperature changes, water droplets form. This process is similar to what happens when you take a cold drink outside on a hot day.
The resulting condensation can wreak havoc on your stored items. Tools may develop rust, cardboard boxes can become soggy, and fabrics might grow mold. Over time, this moisture can even compromise the structural integrity of your shed, leading to corrosion of the metal panels and damage to the foundation.
This moisture problem becomes especially noticeable during seasonal transitions and in areas with high humidity. Without proper insulation, you might find water dripping from the ceiling or running down the walls, creating a damp environment that’s unsuitable for storage. Understanding this condensation issue is crucial for choosing the right insulation solution that will effectively manage moisture while maintaining a dry, protected storage space.
Temperature Control Challenges
Metal sheds present unique challenges when it comes to temperature control in sheds. Unlike wooden structures, metal conducts heat rapidly, making these buildings particularly susceptible to temperature extremes. During summer months, the metal walls can turn your shed into a virtual oven, with interior temperatures soaring well above the outside air. Conversely, winter brings its own set of problems, as metal quickly transfers cold temperatures inside, potentially leading to condensation issues and making the space uncomfortably chilly.
The rapid heat transfer through metal walls can also affect your stored items. Tools may become too hot to handle, sensitive electronics could be damaged, and any temperature-sensitive materials might deteriorate faster. Additionally, the dramatic temperature swings can create condensation, which may lead to rust formation on both the structure itself and its contents. Understanding these challenges is crucial for selecting the right insulation solution that will effectively maintain a more stable internal environment year-round.
Top-Performing Insulation Materials for Metal Sheds
Foam Board Insulation
Foam board insulation stands out as an excellent choice for metal shed walls, offering a robust combination of thermal efficiency and ease of installation. These rigid panels, typically made from polystyrene, polyisocyanurate, or extruded polystyrene (XPS), provide impressive R-values ranging from R-3.6 to R-6.5 per inch of thickness.
What makes foam boards particularly suitable for metal sheds is their moisture resistance and ability to create a continuous insulation barrier. When properly installed alongside protecting metal shed surfaces, these panels help prevent condensation – a common issue in metal structures.
Installation is relatively straightforward, though you’ll need to consider a few key points. First, measure your wall cavities carefully to ensure proper fitting. Most foam boards come in 4×8 foot sheets that can be easily cut to size with a utility knife. Use foam-compatible adhesive and mechanical fasteners to secure the panels, and don’t forget to seal the joints with foil tape for optimal performance.
For best results, choose a thickness that matches your climate needs – 1-inch panels work well in mild climates, while colder regions might benefit from 2-inch or thicker boards. Remember to leave no gaps between panels and consider adding a vapor barrier if your local climate demands it.
Reflective Foil Insulation
Reflective foil insulation, also known as radiant barrier insulation, is a highly effective solution for metal shed walls that works by reflecting radiant heat rather than absorbing it. This type of insulation typically consists of aluminum foil layered with bubble wrap or foam material, creating a durable and lightweight barrier against both heat and cold.
What makes reflective foil particularly suitable for metal sheds is its ability to combat the greenhouse effect that often occurs in metal structures. During summer months, the foil reflects up to 97% of radiant heat away from your shed’s interior, helping maintain a comfortable temperature without excessive energy use. In winter, it works in reverse by reflecting heat back into the space, reducing heat loss through the metal walls.
Installation is relatively straightforward, making it a popular choice among DIY enthusiasts. The foil can be attached directly to the shed’s frame using staples or adhesive tape, creating a clean, professional look. Many homeowners appreciate that it’s lightweight and doesn’t take up much space, preserving valuable storage area within the shed.
One practical tip from experienced users: ensure you leave an air gap between the foil and the metal wall for optimal performance. This air space enhances the insulation’s effectiveness by creating an additional thermal barrier. While not the cheapest option upfront, its durability and performance make it a cost-effective long-term investment for your metal shed.
Spray Foam Solutions
Spray foam insulation offers one of the most effective solutions for insulating metal shed walls, available in both DIY and professional applications. For the DIY enthusiast, closed-cell spray foam kits provide a manageable way to tackle the project yourself. These kits typically come with everything needed, including protective gear and spray nozzles, making them an attractive option for smaller sheds.
The process involves spraying the foam directly onto the interior walls, where it expands and hardens to create an airtight seal. DIY kits usually cover 200-600 square feet, depending on the size purchased, and can be applied in stages if needed. While the initial cost might seem higher than other options, the superior insulation properties often justify the investment.
For larger sheds or those seeking professional-grade results, hiring a spray foam contractor is worth considering. Professional installers use high-grade equipment and materials, ensuring even coverage and optimal thickness. They can typically complete the job in a single day, and their work usually comes with warranties for added peace of mind.
One homeowner, Mike from Ohio, reported a 15-degree difference in his metal shed’s interior temperature after professional spray foam installation. While professional installation costs more upfront, the superior air-sealing properties and long-term durability make it a worthwhile consideration for those seeking the best possible insulation solution.
Remember to maintain proper ventilation during and after installation, regardless of whether you choose the DIY or professional route.
Installation Best Practices
Preparation Steps
Before starting your insulation project, gather essential tools including a measuring tape, utility knife, safety glasses, dust mask, work gloves, and a staple gun with plenty of staples. You’ll also need a straight edge for cutting insulation and a caulking gun for sealing gaps.
Begin by thoroughly cleaning the interior walls of your metal shed. Remove any dust, cobwebs, or debris that could interfere with insulation adhesion. Check for and repair any rust spots, holes, or damage that might compromise your proper shed ventilation or insulation effectiveness.
Next, measure the wall cavity spaces between support beams carefully, noting any areas where you’ll need to work around electrical outlets or windows. Add an extra inch to your measurements to ensure proper fit. Consider installing a vapor barrier if your region experiences high humidity levels.
Finally, ensure your work area is well-ventilated and that you have adequate lighting. If working on higher areas, have a sturdy stepladder ready. It’s also helpful to organize your materials in advance and clear the shed of stored items to give yourself plenty of working space.
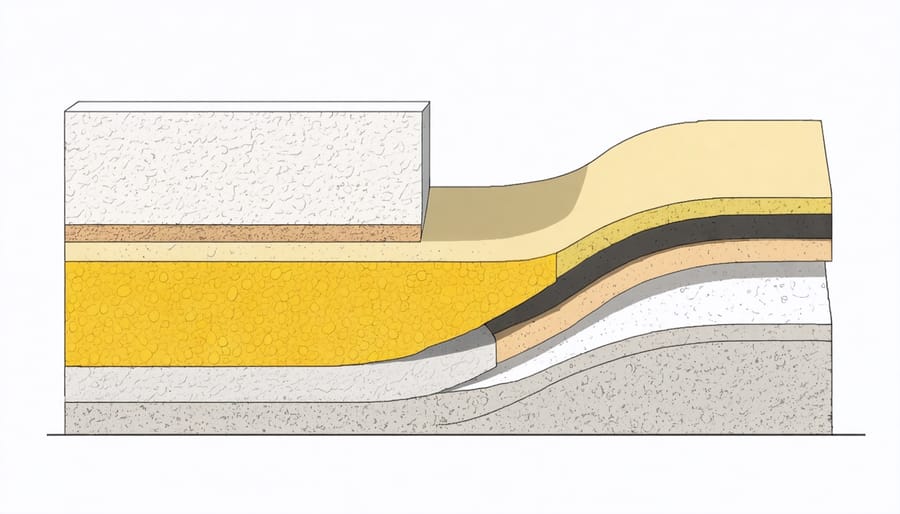
Moisture Barrier Requirements
A proper moisture barrier is crucial when weatherproofing your shed, as it prevents condensation from forming between your insulation and metal walls. The most effective approach is to install a vapor barrier on the warm side of your insulation – typically the interior facing side. This creates a protective envelope that keeps moisture from penetrating your insulation material.
For metal sheds, 6-mil polyethylene sheeting is the go-to choice for vapor barriers. When installing, overlap seams by at least 6 inches and seal them with vapor barrier tape. Pay special attention to corners and joints, where moisture is most likely to accumulate. Don’t forget to extend the barrier slightly up walls and across the ceiling to create a continuous moisture-blocking surface.
Common mistakes to avoid include creating holes in the barrier during installation and leaving gaps around electrical outlets or fixtures. Use special vapor barrier gaskets around outlets and carefully seal any necessary penetrations. Remember that even small holes can compromise the effectiveness of your moisture barrier, potentially leading to insulation damage and reduced performance over time.
Securing Insulation Properly
Proper installation is crucial for ensuring your insulation performs effectively and stays in place. For rigid foam boards, use construction adhesive specifically designed for foam materials, applying it in a zigzag pattern across the metal surface. Secure the boards further with washered screws every 12-16 inches along the edges and in the center.
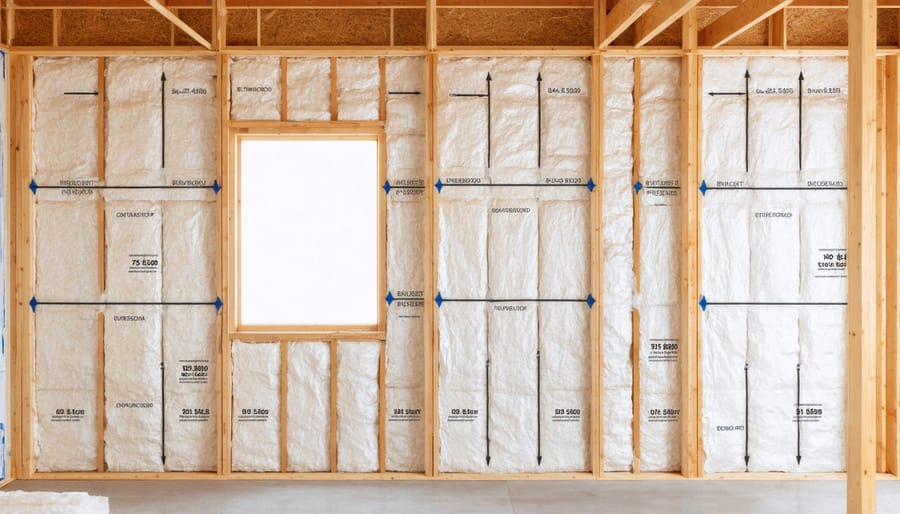
When installing fiberglass batts, start by creating a framework using furring strips or studs attached to the metal walls. This provides a cavity for the insulation and prevents direct contact with the metal surface. Space the strips 16-24 inches apart and secure the batts using insulation supports or staples if you’ve added a vapor barrier.
For reflective foil insulation, use foil tape to seal the seams between panels and construction adhesive to attach it to the walls. Some varieties come with a self-adhesive backing, making installation straightforward. Always ensure there’s an air gap between the foil and the wall surface for optimal performance.
Remember to wear appropriate safety gear, including gloves, eye protection, and a dust mask, regardless of the insulation type you’re installing. Work methodically from top to bottom, ensuring each section is properly secured before moving on to the next.
Cost Comparison and ROI
Material Costs
When budgeting for your metal shed insulation project, material costs can vary significantly depending on your chosen solution. Fiberglass batts are typically the most budget-friendly option, ranging from $0.50 to $1.50 per square foot. Reflective foil insulation offers mid-range pricing at $0.75 to $2.00 per square foot, making it an attractive option for those seeking a balance between cost and effectiveness.
For superior performance, rigid foam boards like polyisocyanurate (polyiso) or extruded polystyrene (XPS) cost between $1.00 and $3.00 per square foot. While spray foam insulation provides excellent coverage and air-sealing properties, it comes at a premium of $2.00 to $5.00 per square foot when professionally installed.
Remember to factor in additional materials like vapor barriers, fasteners, and tape, which typically add $0.30 to $0.50 per square foot to your total cost. For a standard 10×12 metal shed, expect to spend anywhere from $150 to $900 on insulation materials, depending on your chosen solution and local pricing. Buying in bulk or during seasonal sales can help reduce these costs considerably.
Energy Savings Benefits
Properly insulating your metal shed walls can lead to significant energy savings, particularly if you use the space as a workshop or hobby area. Most homeowners report a 20-30% reduction in heating and cooling costs after installing quality insulation in their metal sheds. This improvement in energy efficiency typically means your investment pays for itself within 2-3 years through reduced utility bills.
Beyond the immediate cost savings, insulated walls help maintain more consistent temperatures year-round, reducing the strain on any heating or cooling equipment you might use in the shed. This extended equipment lifespan provides additional long-term savings. In summer months, proper insulation can keep your shed up to 15-20 degrees cooler than outdoor temperatures, while in winter, it helps retain valuable heat, reducing the energy needed to maintain comfortable working conditions.
For workshops that require climate control, the energy savings become even more substantial. Users often report cutting their monthly energy costs by $30-50 during peak seasons, making insulation a smart investment for any metal shed that sees regular use.
Choosing the right insulation for your metal shed walls is a crucial decision that impacts both comfort and functionality. After exploring various options, fiberglass batts and rigid foam boards emerge as top choices for most homeowners, offering excellent value and performance. Fiberglass provides superior cost-effectiveness and ease of installation, while rigid foam delivers outstanding thermal resistance and moisture protection.
Remember to always consider your local climate, budget, and specific needs when making your final decision. For areas with extreme temperatures or high humidity, investing in premium options like spray foam or polyisocyanurate boards may be worth the extra cost. Don’t forget to properly prepare your shed walls and ensure adequate ventilation before starting the installation process.
The most successful insulation projects combine quality materials with proper installation techniques. Whether you choose to tackle this as a DIY project or hire a professional, focusing on proper sealing and moisture barriers will maximize your insulation’s effectiveness. By following the guidelines and recommendations discussed, you’ll create a comfortable, energy-efficient space that protects your belongings year-round.