
R-8 Insulation in Your Shed: When It Works (and When You Need More)

R-8 insulation strikes a middle ground that works beautifully for three-season sheds, garden workshops, and storage spaces in moderate climates, but understanding whether it’s right for your situation can save you hundreds of dollars and countless headaches. This insulation level provides roughly twice the thermal resistance of basic R-4 options, making it a popular choice for homeowners who need more than basic protection without the expense of premium insulation systems.
The real question isn’t whether R-8 is “good enough” in absolute terms—it’s whether this specific rating matches your shed’s purpose, your local weather patterns, and how you’ll actually use the space. A woodworker in Georgia running power tools year-round has completely different needs than someone in Minnesota storing lawn equipment seasonally. Getting this decision right means considering your climate zone, whether you’ll heat or cool the space, and what you’re protecting inside.
This guide breaks down exactly when R-8 delivers excellent value, when you should consider upgrading to R-13 or higher, and how to install it properly for maximum performance. You’ll find straightforward answers backed by real homeowner experiences, helping you make a confident choice without overthinking the technical details.
What R-8 Actually Means for Your Shed
Think of R-value as a winter coat for your shed. The higher the number, the better it keeps the warmth in and the cold out. R-8 insulation means there are 8 units of thermal resistance between the inside and outside of your shed walls.
To put this in everyday terms, R-8 is like wearing a light jacket on a cool spring evening. It provides noticeable protection, but it’s not the heavy-duty winter parka you’d need for harsh conditions. This level of insulation will definitely make a difference compared to no insulation at all, typically maintaining temperatures about 10-15 degrees warmer inside during winter months.
Here’s what R-8 actually feels like in your shed: On a 40-degree day outside, your shed interior might hold around 50-55 degrees without any heating. That’s enough to keep your tools from freezing and protect paint cans from damage, but you probably won’t want to spend hours working in there without a space heater.
The amount of how much insulation you need depends entirely on your situation. R-8 works beautifully for three-season storage, hobby spaces in moderate climates, and sheds that get occasional use. It’s the sweet spot between doing nothing and going overboard with insulation costs.
One homeowner from Tennessee shared that R-8 transformed her garden shed into a comfortable potting station from March through November. However, another from Minnesota found R-8 insufficient for his year-round workshop and wished he’d started with R-13 instead.
The key takeaway? R-8 provides meaningful protection without breaking the bank, but it’s not a one-size-fits-all solution for every climate or purpose.
Where R-8 Insulation Makes Perfect Sense
Climate Zones That Work Well with R-8
R-8 insulation works best in mild to moderate climates where temperature extremes aren’t the norm. If you live in USDA Hardiness Zones 7-10, which include much of the southern United States, coastal California, and parts of the Pacific Northwest, R-8 can provide adequate protection for your shed.
In practical terms, think about your typical winter temperatures. If you rarely see sustained freezing weather or your winters stay mostly above 20°F, R-8 should keep your stored items safe from temperature-related damage. For gardeners storing pots and tools, or hobbyists keeping craft supplies, this level of insulation prevents the harsh freeze-thaw cycles that can crack containers and warp materials.
Coastal areas benefit particularly well from R-8 since ocean breezes moderate temperature swings throughout the year. One homeowner in coastal North Carolina shared that her R-8 insulated shed keeps paint from freezing and lawn equipment running smoothly through their mild winters.
However, if you’re in the northern states or high-altitude areas where winters bring sustained sub-zero temperatures, you’ll likely need to upgrade beyond R-8. The investment in higher R-values pays off when protecting temperature-sensitive items or creating a comfortable workspace year-round.
Shed Uses Perfect for R-8
R-8 insulation works beautifully for sheds with straightforward storage needs. If you’re storing garden tools, lawn equipment, or seasonal decorations that aren’t sensitive to temperature swings, R-8 provides just enough protection without breaking the bank.
Think of storage-only sheds where you keep rakes, shovels, and pots during winter months. R-8 keeps the worst temperature extremes at bay, preventing frost damage to basic tools while maintaining reasonable humidity levels. Your gardening supplies stay organized and accessible without the expense of higher insulation values.
For seasonal equipment storage, R-8 handles the job nicely. Patio furniture, grills, and outdoor toys benefit from that modest thermal barrier. You’ll notice less condensation buildup compared to uninsulated sheds, which means fewer rust issues and longer-lasting equipment.
Garden tool organization is another perfect application. Weekend gardeners appreciate how R-8 keeps their workspace comfortable enough for quick trips in and out during spring and fall. You won’t feel like you’re stepping into an oven or freezer, making those Saturday morning planting sessions more enjoyable.
The bottom line? If you’re not spending extended time in your shed or storing temperature-sensitive items, R-8 delivers practical protection at a reasonable cost.
When R-8 Won’t Cut It
Let’s be honest—R-8 insulation isn’t always the hero of the story. While it’s a solid choice for many shed applications, there are situations where it simply won’t deliver the performance you need.
If you’re planning to use your shed as a heated workshop during frigid winters, R-8 probably won’t keep you comfortable. Sarah from Minnesota learned this the hard way when she installed R-8 in her craft studio, only to find herself bundled in layers during January sessions. “My space heater worked overtime, and my energy bills showed it,” she shared. “I ended up adding more insulation the following spring.”
Extreme climates pose real challenges for R-8. If you regularly experience temperatures below 10°F or scorching summers above 95°F, you’ll want to consider R-13 or higher. The temperature difference your insulation needs to manage is just too significant for R-8 to handle efficiently.
Air-conditioned or heated spaces demand better thermal barriers too. Planning to run HVAC systems in your shed? R-8 won’t provide adequate resistance to keep conditioned air where you want it. You’ll essentially be wasting energy and money fighting against inadequate insulation.
Another overlooked factor is building codes. Some municipalities require minimum R-values for any conditioned space, and R-8 might fall short of requirements. Always check local regulations before purchasing materials.
The good news? Understanding these reasons to insulate properly helps you make smarter choices upfront. If your shed is simply protecting tools and equipment in moderate climates without climate control, R-8 remains perfectly adequate. But for anything more demanding, investing in higher R-values from the start saves frustration and expense down the road.
Common R-8 Insulation Materials for Sheds
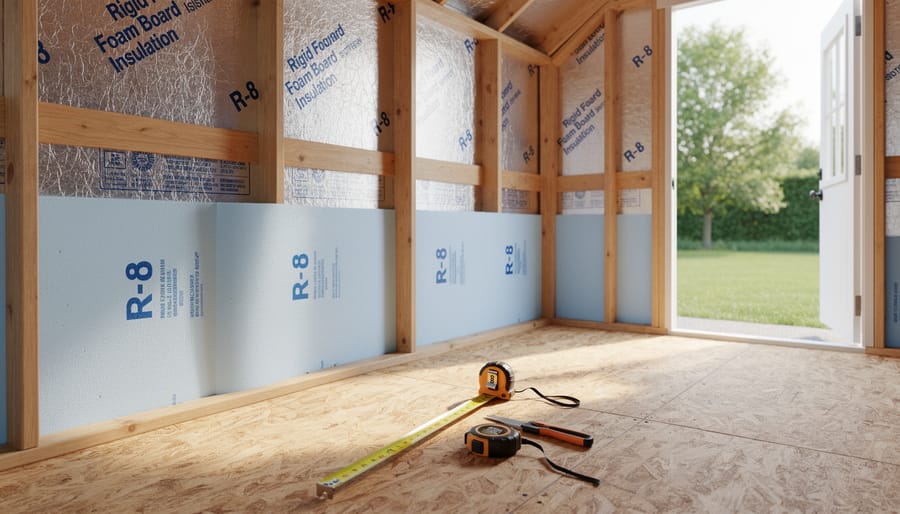
Foam Board Options
Rigid foam boards offer one of the simplest paths to R-8 insulation in your shed. These lightweight panels come in various thicknesses, with 2-inch polyisocyanurate boards typically delivering R-13, while 1.5-inch versions get you close to R-8. For budget-conscious projects, extruded polystyrene (XPS) boards at 2 inches provide approximately R-10, and you can adjust thickness to hit your R-8 target.
What makes foam boards particularly appealing for DIY shed projects is their straightforward installation. You can cut them with a utility knife, fit them snugly between wall studs, and secure them with construction adhesive or long screws with washers. Many homeowners appreciate that foam boards won’t sag over time like some fiberglass batts can.
One shed owner in Minnesota shared that installing 1.5-inch foam boards transformed his workshop space: “I can actually use my tools in winter now without my hands going numb.” The key is sealing all seams with foil tape to prevent air leaks, which can dramatically reduce your insulation’s effectiveness. This extra step takes minimal time but maximizes your R-8 investment.
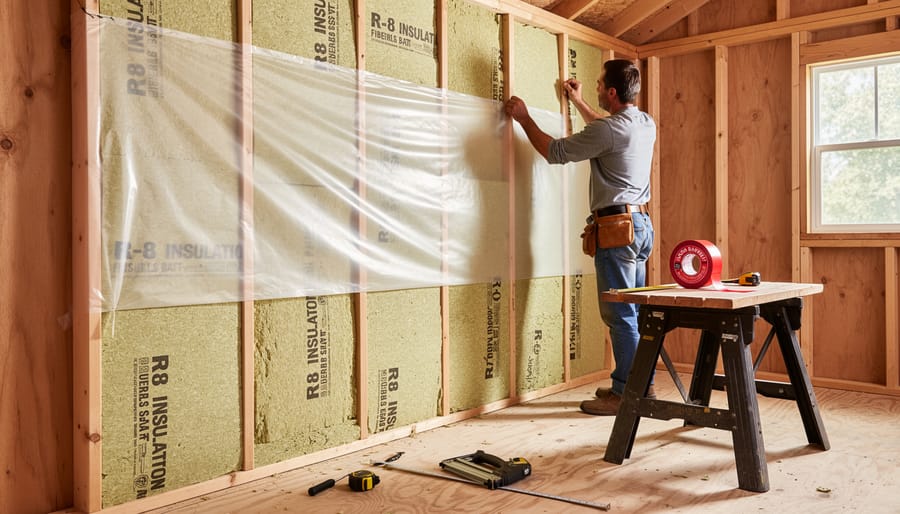
Fiberglass Batts at R-8
Traditional fiberglass batts remain one of the most popular insulation choices for shed owners, and reaching R-8 typically requires about 2.5 inches of material. You’ll find these pink or yellow rolls at nearly any home improvement store, making them incredibly accessible for weekend DIY projects.
The biggest advantage? Cost-effectiveness. Fiberglass batts are budget-friendly and straightforward to install between standard wall studs. Many homeowners appreciate that they can handle installation themselves without special equipment beyond gloves, a dust mask, and a utility knife for trimming.
However, there are some considerations. Fiberglass loses effectiveness when compressed or exposed to moisture, which can be problematic in shed environments without proper vapor barriers. Sarah from Minnesota learned this firsthand: “I installed fiberglass batts in my garden shed but noticed they sagged after the first humid summer. Adding a vapor barrier made all the difference.”
For best results with fiberglass at R-8, ensure your shed has adequate ventilation and moisture protection. The batts work well in climate-controlled sheds used for hobbies or storage, but may underperform in damp conditions without proper preparation. They’re an excellent starting point for moderate climates where extreme temperature protection isn’t critical.
Spray Foam Solutions
Spray foam insulation can reach R-8 with just one to two inches of application, making it a space-efficient option for sheds with limited wall depth. Closed-cell spray foam delivers approximately R-6 to R-7 per inch, while open-cell provides around R-3.5 per inch. However, the higher cost per square foot means spray foam typically makes financial sense when you need maximum insulation in minimal space, such as converting a shed into a year-round workshop or office. For basic seasonal storage, more budget-friendly options often provide better value.
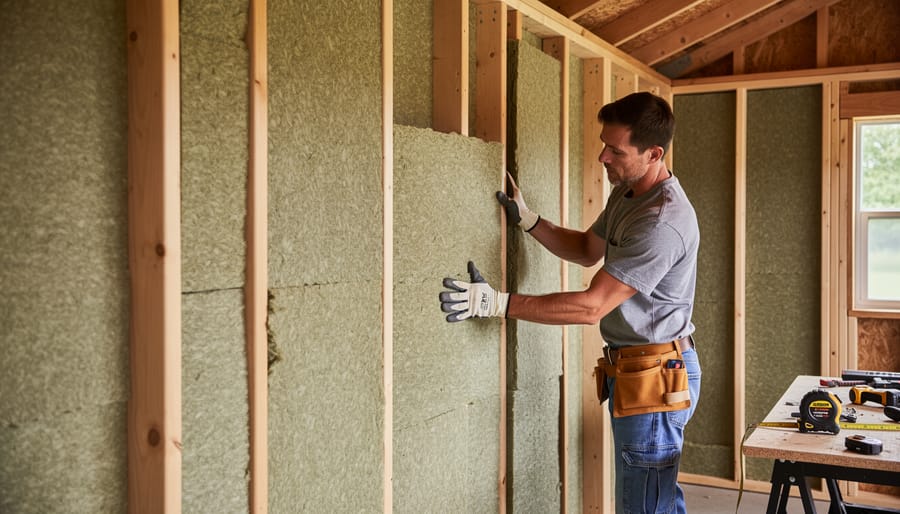
Installing R-8 Insulation: What Homeowners Need to Know
Installing R-8 insulation in your shed is a manageable DIY project that can make a real difference in temperature control, but getting it right matters. Let’s walk through the essentials to help you avoid the most common pitfalls.
Start by measuring your shed’s walls and ceiling to calculate how much insulation you’ll need. R-8 typically comes in batts or rolls, and you’ll want to purchase about 10% extra to account for cutting and fitting around obstacles. Before installation, make sure your shed’s framing is clean and dry.
One of the biggest mistakes beginners make is compressing the insulation to make it fit. When you squeeze R-8 insulation into tight spaces, you’re crushing the air pockets that provide insulating power, effectively reducing its R-value. Cut pieces to fit snugly but without forcing them. If you’re working with 2×4 framing, R-8 batts should fit perfectly without compression.
Vapor barriers deserve special attention. In most climates, you’ll want a vapor barrier on the warm side of the insulation, which is typically the interior wall in cold climates and the exterior in hot, humid areas. Using proper moisture barrier solutions prevents condensation from building up inside your walls, which can lead to mold and reduced insulation effectiveness.
When installing in walls, work from top to bottom, securing the insulation with staples or friction fit between studs. For ceilings, you may need a helper to hold batts in place while you secure them. Wear protective gear including gloves, long sleeves, and a dust mask, as fiberglass insulation can irritate skin and lungs.
Pay special attention to gaps around windows, doors, and electrical outlets. These are prime spots for air leaks that undermine your insulation efforts. Use expanding foam or additional insulation scraps to seal these areas thoroughly. Remember, even the best insulation won’t perform well if air can freely flow around it.
Real Shed Owners Share Their R-8 Experiences
Maria from Portland had a simple goal: turn her 10×12 shed into a year-round workspace without breaking the bank. “I went with R-8 foam board because I’m in Zone 4 and honestly, I didn’t need a sauna out there,” she laughs. “It keeps the temperature comfortable from about March through November, which is exactly what I needed. The installation took me a weekend, and I haven’t looked back.”
Down in Georgia, James chose R-8 for his garden shed where he stores tools and equipment. “My biggest win was moisture control,” he shares. “The insulation keeps things dry, and I haven’t had any rust issues since installing it two years ago. If I could do it differently, I’d have paid more attention to sealing the gaps around the door. That’s where I lose most of my temperature control.”
Rebecca in Michigan offers a different perspective. “I used R-8 in my craft shed, and while it works fine in spring and fall, winters are tough. I added a small space heater, which helps, but I wish someone had told me upfront that R-8 really shines in milder climates. For serious cold-weather use, I’d probably bump up to R-13 next time.”
These real experiences highlight an important takeaway: R-8 delivers solid results when matched correctly to your climate zone and intended use.
So, is R-8 insulation the right choice for your shed? The answer truly depends on your unique situation. If you live in a mild climate and use your shed for basic storage or occasional weekend projects, R-8 offers solid protection without breaking the bank. It’s a smart, practical solution that gets the job done.
However, if you’re in a region with harsh winters, plan to use your shed as a workshop year-round, or need to protect temperature-sensitive items, you’ll want to consider upgrading to R-13 or higher. Think about your climate, how you’ll use the space, and what you’re storing before making your decision.
The good news? You have options. Whether you choose R-8 or decide to beef things up with budget-friendly insulation options, the right insulation makes all the difference in creating a functional, comfortable space.
Ready to find the perfect shed for your needs? Browse our collection of quality storage sheds designed with your projects in mind. We’re here to help you create a space that works as hard as you do.