
Transform Your Shed into a Warm Haven: Solar Heating Made Simple

Transform your home into an energy-efficient sanctuary with a solar heating system that harnesses the sun’s free, renewable power. As energy costs continue to rise and environmental consciousness grows, homeowners are discovering that solar heating systems offer a compelling solution for both comfort and cost savings. These innovative systems can reduce heating bills by 50-80% while significantly decreasing your carbon footprint.
Modern solar heating technology has evolved dramatically, making it more accessible and efficient than ever before. Whether you’re considering a passive solar design that uses strategic window placement and thermal mass materials, or an active system with solar collectors and heat distribution networks, today’s options can be tailored to virtually any home’s architecture and heating needs.
Our comprehensive guide explores both active and passive solar heating solutions, helping you understand which system best suits your climate, budget, and energy goals. From initial planning and installation considerations to long-term maintenance requirements, we’ll walk you through everything you need to know about bringing sustainable, cost-effective solar heating to your home. Discover how this smart investment can deliver year-round comfort while protecting both your wallet and the planet.
Why Your Shed Needs Solar Heating
Protecting Your Stored Items
A well-heated storage space does more than just keep you comfortable while working – it plays a crucial role in protecting your valuable items. Consistent heating helps maintain optimal humidity levels, preventing the formation of damaging moisture that can lead to rust, mold, and mildew. This is especially important for storing power tools, machinery, and seasonal equipment.
Solar heating systems are particularly effective at maintaining steady temperatures and reducing humidity fluctuations. The gentle, consistent warmth they provide helps create a protective environment for wood furniture, preventing warping and splitting. Electronic equipment, musical instruments, and important documents also benefit from this controlled environment.
For workshop areas, proper heating ensures that paints, adhesives, and other temperature-sensitive materials remain in good condition and ready to use. It also helps protect metal tools from corrosion by keeping the air dry and stable. During winter months, solar heating prevents freeze damage to stored liquids and ensures that battery-operated tools maintain their charge longer.
Consider adding a small dehumidifier to work alongside your solar heating system for maximum protection in particularly damp climates or seasons.
Creating a Year-Round Workspace
A temperature-controlled workspace allows you to pursue your hobbies and projects throughout the year, regardless of weather conditions. By implementing solar-powered workspace solutions, you can maintain a comfortable environment that’s perfect for woodworking, crafting, or any other hands-on activities. During winter months, a well-heated workspace prevents wood materials from warping and keeps paints and adhesives at optimal working temperatures. In summer, proper ventilation and temperature control protect your tools from humidity damage and create a pleasant environment for extended work sessions.
The consistent temperature also helps preserve your equipment and supplies, extending their lifespan and maintaining their quality. Whether you’re working on detailed model buildings or restoring furniture, a climate-controlled space allows you to focus on your projects without weather-related interruptions. Many DIY enthusiasts report increased productivity and more enjoyable working conditions after installing solar heating systems in their workspaces, making it a worthwhile investment for year-round creativity and productivity.
Solar Heating Options for Your Shed
Passive Solar Design
Passive solar design harnesses the sun’s natural energy through strategic window placement and building materials, offering a cost-effective way to heat your home. South-facing windows are your best friends in this approach, capturing maximum sunlight during winter months while specialized overhangs prevent overheating in summer.
The key to successful passive solar heating lies in thermal mass – materials like concrete floors, brick walls, or stone features that absorb heat during the day and release it slowly at night. These elements act like natural batteries, maintaining comfortable temperatures throughout your living space.
To maximize efficiency, consider installing double-pane or triple-pane windows with high solar heat gain coefficients (SHGC) on the south side of your home. Dark-colored flooring or walls in direct sunlight can also enhance heat absorption. Adding thermal curtains or blinds helps retain warmth after sunset.
Many homeowners complement their passive solar design with strategic landscaping. Deciduous trees planted on the south side provide natural shade in summer while allowing sunlight through in winter when leaves fall. Remember that proper insulation is crucial – even the best passive solar design won’t be effective if heat escapes through poorly insulated walls or windows.
The beauty of passive solar design lies in its simplicity – once implemented, it requires minimal maintenance while providing consistent, natural warmth throughout the colder months.

Active Solar Systems
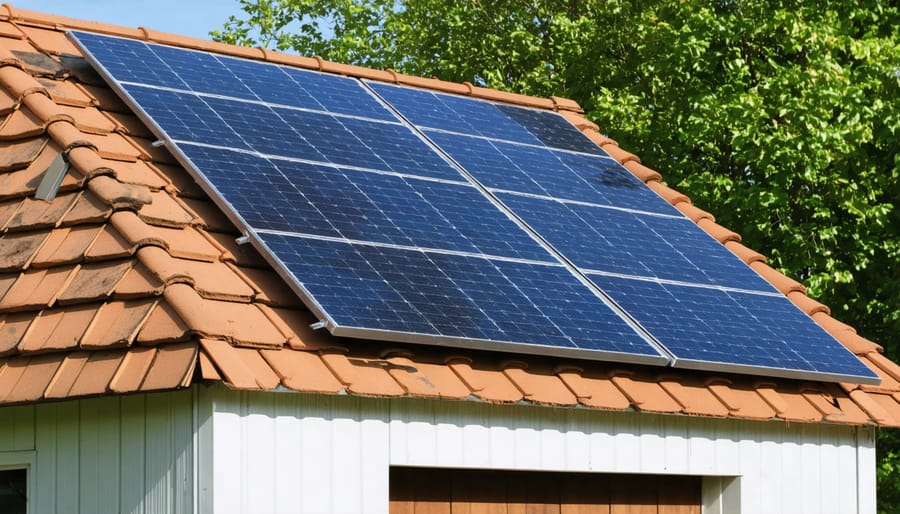
Active solar heating systems take a more direct approach to harnessing the sun’s energy for your home. Unlike passive systems, these setups use solar collectors, pumps, and controls to gather and distribute heat throughout your living space. The heart of an active system is the solar collector, typically mounted on your roof or a south-facing wall, which absorbs sunlight and converts it into heat.
These systems come in two main varieties: liquid-based and air-based. Liquid systems circulate water or antifreeze through pipes in the collector, ideal for homes with existing radiators or radiant floor heating. Air-based systems, on the other hand, heat air directly and work well with forced-air heating systems.
A typical setup includes solar collectors, a heat transfer fluid (either liquid or air), pumps or fans to move the heated fluid, and a thermal storage system – usually a well-insulated tank or rock bed. The storage component ensures you have heat available even after sunset or on cloudy days.
While active systems require more upfront investment than passive solutions, they often provide more consistent heating and can integrate with your existing HVAC system. Many homeowners find that active solar heating significantly reduces their energy bills, with some systems covering 40-80% of their heating needs depending on local climate conditions.
Hybrid Solutions
For the ultimate in solar heating efficiency, combining both passive and active systems creates a comprehensive solution that maximizes your energy savings. This hybrid approach takes advantage of the best features from both worlds, ensuring your space stays comfortable year-round while minimizing energy costs.
Start with passive elements like strategically placed windows and thermal mass materials, then complement these with active components such as solar collectors and smart climate control systems. For example, you might use south-facing windows with heat-absorbing flooring while also installing solar panels that power a backup heating system.
The beauty of hybrid solutions lies in their flexibility. During sunny winter days, your passive elements do most of the work, while active systems kick in during cloudy periods or extremely cold weather. This redundancy ensures consistent heating performance regardless of weather conditions.
Many homeowners find that combining a passive solar design with a small active system offers the perfect balance of cost-effectiveness and reliability. The initial investment might be higher than choosing just one approach, but the long-term benefits often justify the expense through increased efficiency and reduced operating costs.
To get started with a hybrid system, consider working with a solar heating specialist who can assess your specific needs and design a custom solution that perfectly matches your space and climate requirements.
Installation and Setup Tips
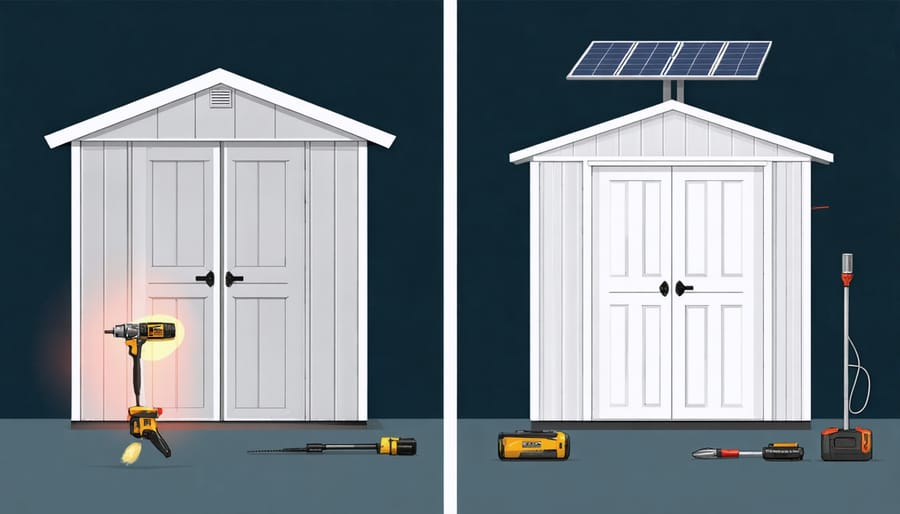
DIY Installation Steps
Ready to build a simple solar heater? Follow these straightforward steps to create your DIY solar heating system:
1. Choose your location carefully. Select a south-facing wall or roof area that receives maximum sunlight during winter months. Ensure the spot is free from shadows cast by trees or buildings.
2. Gather your materials: You’ll need clear polycarbonate sheets, black paint, wooden boards for framing, insulation material, aluminum ducting, and basic tools like a saw, drill, and screwdriver.
3. Create the collector box by building a wooden frame that’s roughly 4×8 feet. Install insulation at the back of the frame to minimize heat loss.
4. Paint the interior surface black to maximize heat absorption. This creates the heat collection surface that will warm the air.
5. Mount the polycarbonate sheet on top of the frame, ensuring an airtight seal. This creates a greenhouse effect, trapping solar heat inside.
6. Install intake and output vents. The lower vent draws in cool air, while the upper vent releases heated air into your space. For better circulation, consider adding a small fan.
7. Secure the entire unit to your chosen location, ensuring it’s properly weatherproofed and angled for optimal sun exposure.
8. Test the system on a sunny day and adjust vent positions if needed for better airflow.
Remember to check local building codes before installation and consider adding a thermostat for temperature control. Regular cleaning of the polycarbonate surface will maintain optimal performance.
Professional Installation Considerations
While many aspects of solar heating can be DIY-friendly, certain installations require professional expertise to ensure safety, efficiency, and compliance with local building codes. A certified solar installer should handle complex active systems, particularly those involving electrical work or roof modifications. These professionals can properly size your system, ensure optimal placement for maximum sun exposure, and integrate it with existing heating systems.
When hiring a professional, expect them to conduct a thorough site assessment, including a roof inspection and solar analysis of your property. They should provide detailed documentation of the proposed system, including equipment specifications, estimated energy production, and projected cost savings. A good installer will also handle necessary permits and paperwork for local authorities and utility companies.
The installation process typically takes 2-3 days for a standard residential system. Professionals will ensure proper weatherproofing around roof penetrations, correct mounting of solar collectors, and appropriate integration with your home’s electrical and plumbing systems. They should also provide comprehensive system testing and user training upon completion.
Cost-wise, professional installation typically adds 30-50% to your total project budget, but this investment often pays off through proper system performance, warranty protection, and peace of mind. Look for certified installers with positive reviews and ask for references from previous solar heating installations. Many reputable companies offer free consultations and detailed quotes, allowing you to make an informed decision about your installation needs.
Maintenance and Optimization
Regular maintenance is key to keeping your home solar heating system performing at its best. Start with a monthly visual inspection of your solar panels and collectors, checking for any dust, debris, or leaves that might block sunlight. A simple cleaning with water and a soft brush can significantly improve efficiency. During winter months, ensure snow isn’t accumulating on your panels, as this can reduce their effectiveness.
Check all system connections quarterly, including pipes, valves, and electrical components. Listen for any unusual sounds from pumps or fans, and monitor your system’s performance through its control panel. If you notice any significant drops in efficiency, it might be time for a professional inspection.
Your heat storage components, whether water tanks or thermal mass materials, should be inspected annually for leaks or damage. Consider integrating solar ventilation solutions to maximize your system’s effectiveness and prevent overheating during summer months.
To optimize performance, consider these practical tips:
– Adjust collector angles seasonally if your system allows
– Keep trees trimmed to prevent shading
– Monitor system pressure readings monthly
– Clean glass surfaces every 3-6 months
– Check antifreeze levels before winter
– Test backup heating systems regularly
Create a maintenance calendar to track these tasks, and keep detailed records of any repairs or adjustments. This documentation helps identify patterns and potential issues before they become serious problems. Many homeowners find that setting reminders on their phones helps them stay on top of routine maintenance.
Remember, a well-maintained solar heating system can last 20-30 years or more, making your initial investment even more worthwhile. If you’re unsure about any maintenance tasks, don’t hesitate to consult with a professional solar installer for guidance or service.
Embracing solar heating for your home is a smart investment that pays dividends in both environmental impact and long-term cost savings. We’ve explored how these systems can significantly reduce your energy bills while providing reliable, sustainable warmth throughout your living spaces. Whether you choose a passive solar design or an active system with collectors and thermal storage, the technology is proven and increasingly accessible. By taking action now, you’ll join thousands of homeowners already enjoying the benefits of solar heating, from increased property value to reduced carbon footprint. Don’t let another heating season pass with conventional energy costs – consider implementing these solar solutions to transform your home into an energy-efficient haven. Start small if needed, but start today to harness the sun’s free, abundant energy for your home heating needs.