
Transform Your Shed Storage: Smart Shelving That Actually Works
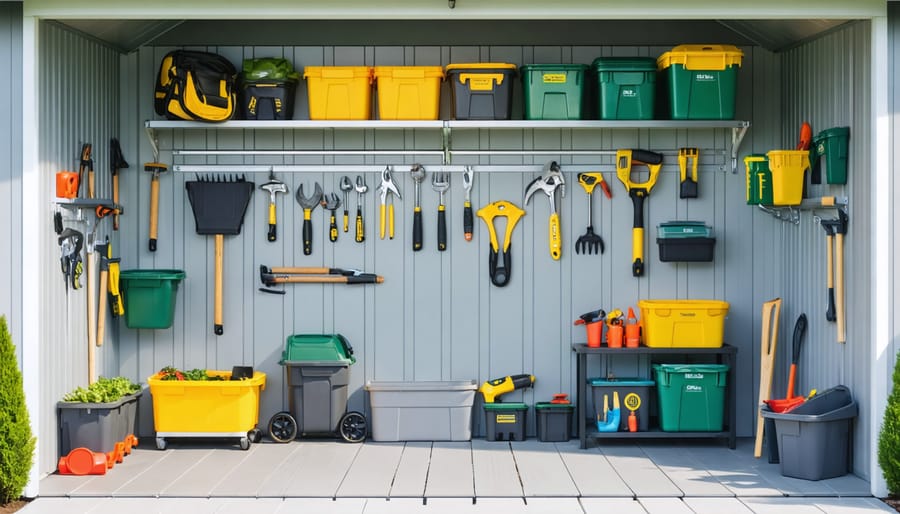
Transform your cluttered shed into an organized storage haven with strategically placed interior shelving. Wall-mounted adjustable brackets paired with heavy-duty wooden planks create flexible storage zones that adapt to changing needs. Install corner-to-corner utility shelves at varying heights to maximize your shed storage capacity while maintaining easy access to frequently used items.\n\nCustom-built shelving units dramatically increase usable space by utilizing vertical wall area from floor to ceiling. Mount pegboard panels between shelves for hanging tools, creating a dual-purpose storage solution that keeps essential items visible and accessible. Position deeper shelves (16-24 inches) at waist height for power tools and frequently accessed items, while using narrower shelves (8-12 inches) above head height for seasonal storage.\n\nWeather-resistant metal shelving systems offer maintenance-free durability and quick installation, perfect for storing garden chemicals, paint cans, and heavy equipment. Incorporate sliding storage bins beneath the lowest shelves to utilize floor space efficiently while keeping items protected from dust and moisture.\n\n\n
Planning Your Shed Shelving System
\n\n
 \n
\n\n\n
Assessing Your Storage Needs
\n\nBefore diving into shelf installation, it’s crucial to thoroughly evaluate your storage needs and available space. Start by taking detailed measurements of your shed’s interior, including height, width, and depth. Don’t forget to account for doors, windows, and any existing fixtures that might impact shelf placement.\n\nMake a comprehensive inventory of items you plan to store, grouping them by size, weight, and frequency of use. This helps determine the type and strength of shelving required. Consider implementing compact storage strategies to maximize vertical space while maintaining easy access to your belongings.\n\nThink about seasonal storage patterns too. Will you need flexible space for rotating items like holiday decorations or gardening equipment? Map out zones within your shed for different categories: frequently used tools, seasonal items, and long-term storage. This zoning approach helps determine optimal shelf heights and depths for each area.\n\nRemember to leave adequate floor space for larger equipment and comfortable movement within the shed. A well-planned layout ensures both efficient storage and practical functionality for years to come.\n\n
Choosing the Right Materials
\n\nWhen it comes to shed shelving, your choice of materials can make a big difference in durability and functionality. Wood remains a popular option, with pine offering affordability and easy customization, while cedar naturally resists moisture and insects. Plywood is another cost-effective choice that works well for basic storage needs.\n\nFor heavier items, metal shelving provides superior strength and stability. Steel units are particularly durable and can handle significant weight, though they may be prone to rust in humid environments. Aluminum shelving offers a lightweight alternative that naturally resists corrosion but typically costs more.\n\nPlastic or resin shelving units are excellent for areas prone to moisture, as they won’t rot or rust. They’re easy to clean and maintain but may not support as much weight as metal options. Wire shelving combines the benefits of metal durability with excellent airflow, making it ideal for storing garden supplies and tools.\n\nConsider your specific needs when selecting materials. Factor in your local climate, the weight of items you’ll store, and your budget. Remember that mixing materials can often provide the best solution, such as using metal frames with wooden shelves for a blend of strength and aesthetics.\n\n\n
Popular Shed Shelving Options
\n\n
Wall-Mounted Shelving Solutions
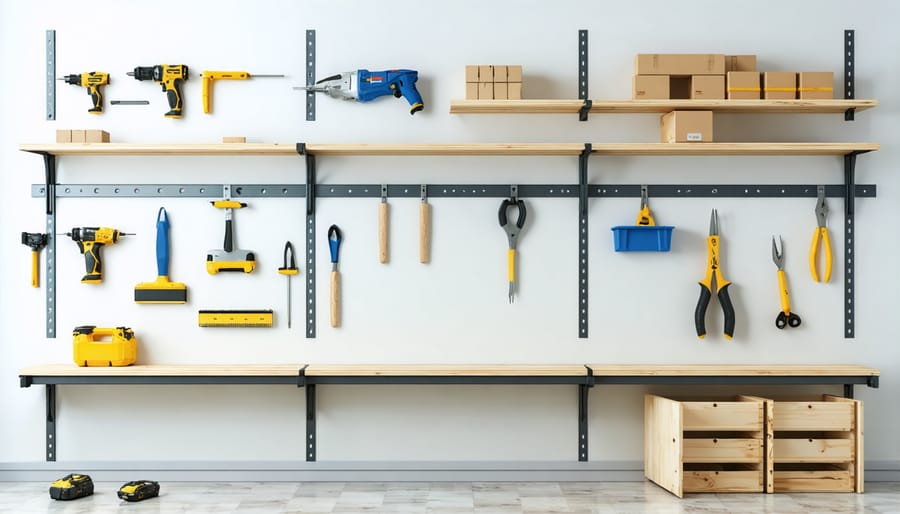
\n\nWall-mounted shelving offers an excellent solution for maximizing vertical space in your shed while keeping tools and supplies easily accessible. These shelves attach directly to your shed’s wall studs, providing sturdy support without taking up valuable floor space. You can install them at any height, making them perfect for storing items of various sizes and weights.\n\nOne of the biggest advantages of wall-mounted shelves is their flexibility. You can mix and match different lengths and depths to create a customized storage system that fits your specific needs. Heavy-duty brackets can support substantial weight, making them ideal for power tools, paint cans, and gardening supplies.\n\nInstallation is relatively straightforward, but proper mounting is crucial for safety. Always locate wall studs before mounting, and use appropriate anchors and screws rated for your shelf’s intended weight capacity. For metal sheds, you may need special fasteners or mounting plates to ensure secure attachment.\n\nConsider installing adjustable track systems that allow you to modify shelf positions as your storage needs change. This versatility makes wall-mounted shelves particularly valuable for seasonal storage rotation. For enhanced organization, combine different shelf depths – deeper shelves for bulky items at the bottom and narrower ones for smaller items at eye level.\n\nTo prevent items from falling, add a small lip or guard rail to your shelves, especially if you’re storing round objects or items that might roll. This simple addition can prevent accidents and keep your storage secure.\n\n
Free-Standing Storage Units
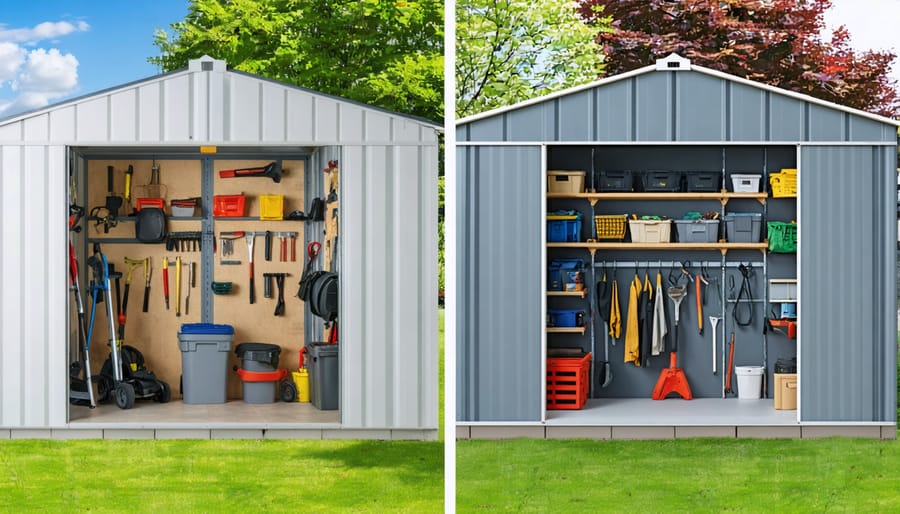
\n\nFree-standing storage units offer remarkable flexibility for shed organization, allowing you to adapt your storage layout as your needs change. These versatile units come in various materials, with metal, plastic, and wood being the most popular options. Each type has its advantages – metal units provide durability, plastic resists moisture, and wood offers a classic, warm appearance.\n\nOne of the biggest advantages of free-standing units is their mobility. Unlike fixed shelving, you can easily relocate these units within your shed or even move them to a different location entirely. This flexibility proves invaluable when reorganizing your space or accommodating new equipment.\n\nMany free-standing units feature adjustable shelves, letting you customize the spacing between levels to accommodate items of different heights. Look for units with weight ratings that match your storage needs – lighter-duty units work well for garden supplies and small tools, while heavy-duty options can handle power equipment and large containers.\n\nPopular options include utility shelves with wire or solid shelving, rolling cart systems with built-in drawers, and modular cube storage that can be configured in multiple ways. For maximum versatility, consider units with wheels or casters, which make reorganizing your space effortless. Just ensure the wheels have locks to keep the unit stable when stationed.\n\nRemember to measure your available floor space and doorways before purchasing to ensure your chosen units will fit comfortably while leaving adequate walkway space.\n\n
Corner and Overhead Storage
\n\nDon’t overlook the untapped potential of corner and overhead spaces in your shed! These often-neglected areas can become valuable storage zones with the right shelving solutions. Corner shelves, designed to fit snugly in 90-degree angles, transform dead space into functional storage for smaller items like paint cans, garden supplies, or tool collections.\n\nInstalling corner shelving units requires careful planning, but the payoff in additional storage space is worth the effort. Consider using adjustable corner shelf systems that allow you to modify shelf heights as your storage needs change. For maximum stability, ensure these units are properly anchored to both walls.\n\nOverhead storage represents another golden opportunity for implementing smart space optimization techniques. Installing suspended shelving systems or overhead racks near the ceiling creates valuable storage space for seasonal items, rarely-used equipment, or bulky storage containers. Just remember to keep frequently accessed items at lower levels for convenience and safety.\n\nFor overhead installations, use sturdy mounting brackets and ensure they’re secured to roof joists or wall studs. Consider installing pull-down systems for easier access to elevated storage areas. Clear plastic bins work well for overhead storage, allowing you to see contents from below while protecting items from dust and moisture.\n\nWhen combining corner and overhead storage solutions, maintain a balanced approach to prevent the space from feeling cramped while maximizing every available inch of your shed’s interior.\n\n\n
DIY Installation Tips
\n\n
Tools and Hardware Needed
\n\nBefore starting your shed shelving project, gather these essential tools and materials for a smooth installation process:\n\nBasic Tools:\n- Power drill with drill bits\n- Level (2-foot and 4-foot recommended)\n- Tape measure\n- Pencil\n- Stud finder\n- Screwdriver set (both Phillips and flathead)\n- Safety glasses and work gloves\n- Dust mask\n\nCutting and Mounting Tools:\n- Circular saw or hand saw\n- Speed square\n- Wood clamps\n- Socket wrench set\n- Hammer\n- Work table or sawhorses\n\nHardware and Fasteners:\n- Wood screws (various sizes)\n- Wall anchors\n- Shelf brackets\n- L-brackets\n- Heavy-duty construction screws\n- Washers\n- Wall cleats (if using adjustable systems)\n\nOptional but Helpful:\n- Impact driver\n- Electric sander\n- Shop vacuum\n- Carpenter’s square\n- Utility knife\n\nPro tip: Always have extra hardware on hand – it’s better to have more than you need than to pause your project for a hardware store run. Keep your tools organized in a dedicated toolbox for easy access throughout the installation process.\n\n
Installation Best Practices
\n\nA successful shelf installation starts with proper planning and the right tools. Before mounting any shelves, use a level to mark straight lines on your shed walls, ensuring your shelves will sit perfectly horizontal. For maximum stability, always locate and mark your wall studs – these will be your primary mounting points.\n\nWhen installing brackets, pre-drill your holes to prevent wood splitting and use appropriately sized lag bolts or heavy-duty screws. Space your brackets no more than 32 inches apart for optimal weight distribution. For shelves longer than 4 feet, consider adding a middle support bracket to prevent sagging over time.\n\nKeep safety in mind by using a sturdy stepladder and having a helper spot you during installation. If you’re installing multiple shelf levels, start from the bottom and work your way up. This approach helps maintain proper spacing and allows you to check the weight capacity of lower shelves before adding more above.\n\nFor wooden shelves, sand any rough edges before installation to prevent splinters. Apply a wood sealer to protect against moisture, particularly important in non-climate-controlled sheds. When securing shelf boards to brackets, use screws rather than nails for better long-term stability.\n\nRemember to leave enough clearance between shelves for your tallest items, and consider future storage needs when planning shelf heights. Double-check all connections once installation is complete, and test each shelf with a moderate weight load before storing your items. This initial testing helps identify any potential issues before fully loading your shelving system.\n\nFinally, label your maximum weight capacity on each shelf to prevent overloading and ensure long-lasting performance.\n\n
 \n
\n\n\n\n
Organization and Maintenance
\n\n
 \n
\n\n\n
Smart Storage Strategies
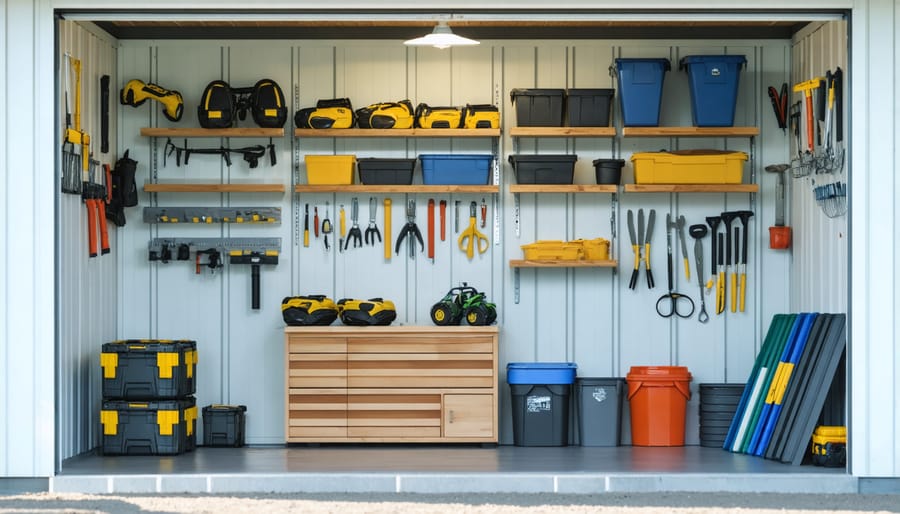
\n\nMaximizing your shed’s storage potential starts with smart organization strategies that transform cluttered spaces into professional storage solutions. Begin by implementing the zone system, grouping similar items together – gardening tools in one area, seasonal decorations in another, and frequently used items at eye level for easy access.\n\nUse clear storage bins on upper shelves to easily identify contents from below, and label everything meticulously. Consider installing shelf dividers to keep items upright and prevent toppling, particularly useful for storing lumber, pipes, or long-handled tools. For smaller items, incorporate drawer organizers or small bins to prevent items from getting lost or scattered.\n\nUtilize vertical space by adding pegboards between shelving units for hanging lightweight tools and creating additional storage opportunities. Install hooks on shelf edges to hang items like extension cords or garden hoses, keeping them tangle-free and easily accessible.\n\nImplement the “one in, one out” rule to maintain organization – when adding new items, remove outdated or unused ones. Position heavier items on lower shelves to maintain stability and prevent accidents. Remember to leave adequate walking space between shelving units for comfortable access to all stored items.\n\nKeep a basic inventory list updated, especially for seasonal items, to avoid buying duplicates and maintain an organized system year-round. This approach ensures your shed remains a functional and efficient storage space.\n\n
Maintenance Tips
\n\nRegular maintenance of your shed shelves will extend their lifespan and keep your storage space organized and safe. Start by dusting your shelves monthly with a microfiber cloth or soft brush to prevent dirt buildup. For wooden shelves, apply a wood preservative annually to protect against moisture and prevent warping.\n\nCheck all mounting brackets, screws, and supports every six months to ensure they remain tight and secure. If you notice any loose hardware, tighten it immediately to prevent shelf collapse. For metal shelves, inspect regularly for signs of rust, especially in humid climates. Address any rust spots promptly with appropriate treatment to prevent spreading.\n\nKeep your shelves dry by addressing any leaks in your shed roof or walls quickly. Consider using silica gel packets in areas prone to dampness. Avoid overloading shelves beyond their weight capacity, as this can cause bending and structural damage over time. When cleaning, use appropriate products for your shelf material – mild soap and water work well for most surfaces, while avoiding harsh chemicals that could cause damage.\n\nPeriodically reorganize items to distribute weight evenly and ensure proper air circulation between stored items and shelving surfaces.\n\n\nTransforming your shed into an organized, efficient space starts with the right shelving solution. We’ve explored various options, from basic floating shelves to comprehensive wall-mounted systems, each offering unique benefits for different storage needs. Remember that successful shed organization begins with careful planning, considering factors like available space, weight requirements, and the items you’ll be storing.\n\nWhether you choose to build custom wooden shelves or opt for ready-to-install metal units, proper installation is crucial for safety and longevity. Take time to measure accurately, use appropriate mounting hardware, and consider moisture protection for your shelving materials.\n\nBy implementing the organization tips we’ve discussed, you can maximize your shed’s storage potential while keeping items easily accessible. Don’t hesitate to start your shed transformation today – even small improvements in shelving can make a significant difference in your storage efficiency.\n\nTake the first step toward a better-organized shed by selecting and installing the shelving system that best suits your needs. With proper planning and execution, you’ll create a functional storage space that serves you well for years to come.