
Turn Your Shed Into a Solar-Powered Energy Hub (Even on a Budget)
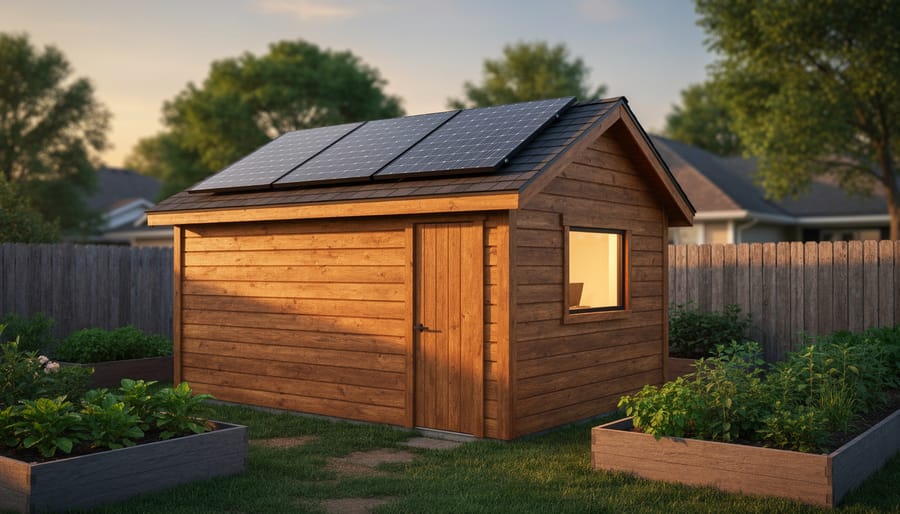
Transform your backyard shed into a self-powered workspace by installing a basic 400-watt solar panel system on its roof—enough to run LED lights, charge tools, and power a laptop without touching your home’s electrical grid. Position panels facing south at a 30-degree angle to maximize energy collection year-round, and you’ll generate approximately 1,600 watt-hours daily in most climates.\n\nStart with an off-grid setup using two 200-watt panels, a charge controller, and a single deep-cycle battery to avoid the complexity and cost of grid-tied systems. This approach typically costs between $800-1,200 and requires no professional electrician, making it perfect for DIYers who want immediate energy independence for their outdoor structures.\n\nYour shed’s compact footprint actually works in your favor here. Unlike whole-home installations that demand significant investment and permitting headaches, shed-based renewable energy lets you experiment affordably and learn through hands-on experience. Sarah, a homeowner in Colorado, converted her 10×12 garden shed into a pottery studio using this exact setup, cutting her monthly electricity costs by $45 while gaining a functional creative space that operates entirely on sunshine.\n\nThe beauty of green energy sheds lies in their scalability—begin with enough solar capacity to power essential lighting and small tools, then expand as you discover new uses for your space. Whether you’re creating a home office, workshop, or hobby retreat, renewable energy transforms an ordinary storage structure into a practical, cost-effective extension of your living space that pays environmental and financial dividends for years.\n\n\n
Why Your Shed Is the Perfect Candidate for Green Energy
\n\n
 \n
\n\n\n
Starting Small: What Most Shed Owners Actually Need
\n\nBefore you start shopping for solar panels and batteries, let’s get real about what your shed actually needs. Most shed owners are surprised to learn they can power their space effectively with a modest setup that won’t break the bank.\n\nIf you’re using your shed as a weekend workshop, you’re probably running a few basic tools, some LED lighting, and maybe a radio. A typical circular saw draws about 1,200 watts, but only when you’re actively cutting. LED work lights use just 10-15 watts each, and modern battery chargers for your cordless tools are incredibly efficient. When you add it all up, a small 400-600 watt solar system with a modest battery bank handles most hobby woodworking needs beautifully.\n\nSarah from Portland learned this firsthand. She initially planned a 2,000-watt system for her craft shed but realized she only needed lights, a small space heater for chilly mornings, and outlets for charging her devices. She scaled back to a 300-watt setup and has been running her creative space for three years without issues.\n\nSecurity and monitoring setups are even simpler. Modern security cameras draw just 2-5 watts continuously, meaning a single 100-watt panel with a small battery can keep your shed monitored year-round. Add motion-sensor LED lights at 12 watts each, and you’re still well under 50 watts of total demand.\n\nThe key is tracking your actual usage before buying equipment. Grab a notepad and list everything you’ll plug in, how many watts each item uses, and how many hours daily you’ll run them. This simple exercise prevents the common mistake of over-investing in capacity you’ll never use, keeping your green energy project both affordable and practical.\n\n\n
Solar Power for Sheds: Your Most Practical Green Energy Option
\n\n
Choosing the Right Solar Setup: Grid-Tied vs. Off-Grid
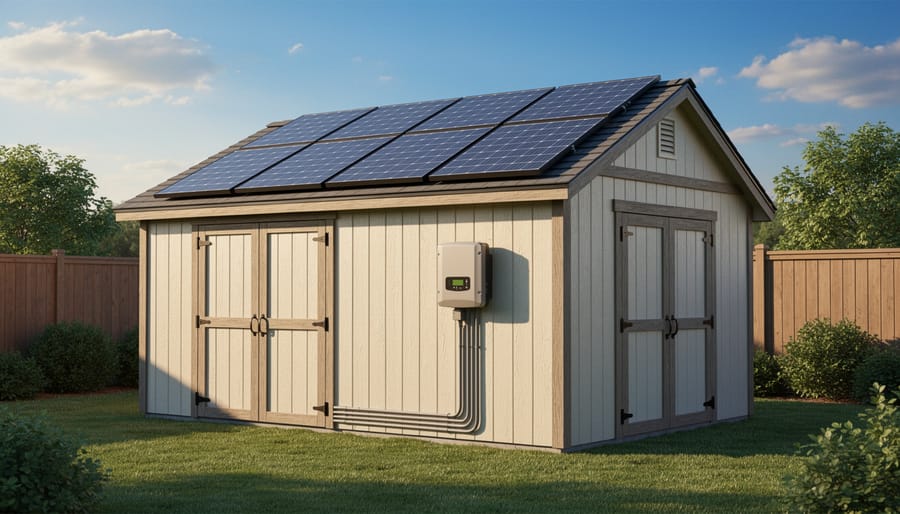
\n\nWhen planning your shed’s solar power system, one of the biggest decisions you’ll face is choosing between grid-tied and off-grid setups. Each has distinct advantages, and the right choice depends on your specific situation.\n\nGrid-tied systems connect your solar panels to your home’s existing electrical system, allowing excess power to flow back into your household. This option works beautifully if your shed is within 100-150 feet of your house. You’ll enjoy the flexibility of drawing power from your home when solar production is low, and any surplus energy your panels generate can offset your home’s electricity bills. Installation costs tend to be lower since you’re essentially extending your existing electrical infrastructure. However, you’ll need to hire a licensed electrician for proper integration, and you’ll still have electric bills, albeit reduced ones.\n\nOff-grid systems operate independently, storing power in batteries for use when the sun isn’t shining. This setup makes perfect sense for sheds located far from your home, where trenching and running electrical lines would be expensive or impractical. Many homeowners love the complete energy independence these systems provide. One DIY enthusiast shared that her off-grid workshop shed, located 300 feet from her house, would have cost over $3,000 just to run electrical lines, making solar batteries the clear winner financially.\n\nConsider your intended use carefully. Running basic LED lighting and charging tools? An off-grid system with a modest battery bank handles this easily. Planning to power air conditioning or heavy machinery regularly? Grid-tied might serve you better with its unlimited power access.\n\nDistance from your home is the practical tipping point. Within 150 feet, grid-tied systems usually cost less overall. Beyond that distance, off-grid setups become increasingly attractive both financially and functionally. Think about your shed’s purpose, its location, and your energy needs to make the choice that truly fits your lifestyle.\n\n
Solar Panel Placement: Making the Most of Your Shed’s Roof
\n\nGetting the most from your shed’s solar panels starts with understanding what you’re working with. While a south-facing roof with a 30-40 degree tilt is ideal, don’t worry if your shed doesn’t check all these boxes. Many homeowners successfully generate power with less-than-perfect setups.\n\nFirst, assess your roof orientation. South-facing roofs capture maximum sunlight throughout the day, but east and west-facing sheds still produce 75-85% of optimal output. Even north-facing installations can work if you adjust your expectations and panel positioning. If your shed faces the wrong direction, consider ground-mounted panels nearby instead of giving up entirely.\n\nTilt angle matters, but it’s flexible. Match your latitude for year-round efficiency, or adjust seasonally if you’re comfortable making changes. Many shed roofs have moderate pitches of 15-25 degrees, which work reasonably well across most climates.\n\nShading is your biggest enemy. Survey your shed’s surroundings throughout the day, watching for tree shadows, nearby buildings, or even roof vents that cast shade. Even partial shading on one panel can reduce your entire system’s output by 25% or more. Trimming branches or relocating panels often solves this problem.\n\nYour shed material influences installation complexity more than performance. Metal roofs offer the easiest installation with specialized clamps that don’t penetrate the surface, preventing leaks. Wood sheds require careful waterproofing around mounting bolts but provide solid anchoring. Vinyl sheds present challenges since they may need reinforcement before supporting panel weight.\n\nOne homeowner shared that their west-facing metal shed produces enough power for their workshop tools despite not having ideal orientation. The key was eliminating shade from a nearby maple tree and using micro-inverters to maximize each panel’s performance independently.\n\n
Budget-Friendly Solar Kits vs. Custom Systems
\n\nWhen considering solar solutions for sheds, you’ll face a key decision: should you purchase a budget-friendly kit and install it yourself, or invest in a professionally designed custom system?\n\nBudget solar kits typically range from $150 to $800 and include basic components like solar panels, a charge controller, battery, and inverter. These pre-packaged options are perfect for simple shed applications requiring lights, phone charging, or powering small tools. Popular brands like Renogy and WindyNation offer starter kits around $200 that can generate 100-200 watts. The main advantage? Installation is straightforward enough for weekend DIY enthusiasts, and you’ll know your total cost upfront. However, these kits come with limitations. They’re designed for average needs, so if your shed has unique requirements or you want room for expansion, you might outgrow the system quickly.\n\nCustom solar installations, professionally designed and installed, start around $1,500 and can exceed $5,000 depending on your needs. This route provides a system tailored specifically to your shed’s power requirements, optimal panel placement for your property’s sun exposure, and proper electrical integration. One homeowner in Oregon shared that her $2,800 custom setup powers her pottery studio year-round, something her previous $400 kit struggled with during winter months.\n\nThe honest assessment? Budget kits work beautifully for occasional shed use, hobby spaces, or testing solar before committing fully. They’re also expandable over time as you learn your actual power needs. Custom systems make sense when your shed functions as a workshop, home office, or requires consistent power throughout the year. Consider starting small with a quality kit. Many homeowners find this approach lets them understand solar basics firsthand while keeping initial investment manageable, then upgrade strategically based on real-world experience.\n\n\n
Wind Power and Other Renewable Options Worth Considering
\n\n
When Wind Power Actually Makes Sense for Your Property
\n\nBefore installing a wind turbine on your property, you need to honestly assess whether it makes practical sense for your situation. Many homeowners get excited about wind power only to discover their location simply isn’t suitable, leading to disappointing results and wasted investment.\n\nStart with a proper wind assessment. Your property needs consistent wind speeds of at least 10-12 mph to make small wind turbines worthwhile. Trees, buildings, and hills can significantly reduce wind speed and create turbulence. You can purchase an inexpensive anemometer to measure wind speeds over several months, giving you real data rather than hopeful guesses.\n\nLocal regulations often present the biggest hurdle. Many residential areas have strict height restrictions that prevent turbines from reaching effective wind levels. Check your zoning laws, homeowner association rules, and setback requirements before purchasing equipment. Some neighborhoods prohibit wind turbines entirely.\n\nNoise is another consideration that catches people off-guard. Even small turbines create a whooshing sound that can annoy neighbors or disturb your own peace. If your shed sits close to property lines or bedroom windows, this matters more than you might think.\n\nSarah from Oregon learned this the hard way: “I bought a turbine without checking our HOA rules. It sat in my garage for two years before I finally sold it at a loss. I wish I’d done my homework first.”\n\nFor most suburban and urban properties, solar panels remain the more practical choice. Wind power works best for rural locations with open spaces, consistent winds, and fewer regulatory restrictions.\n\n\n
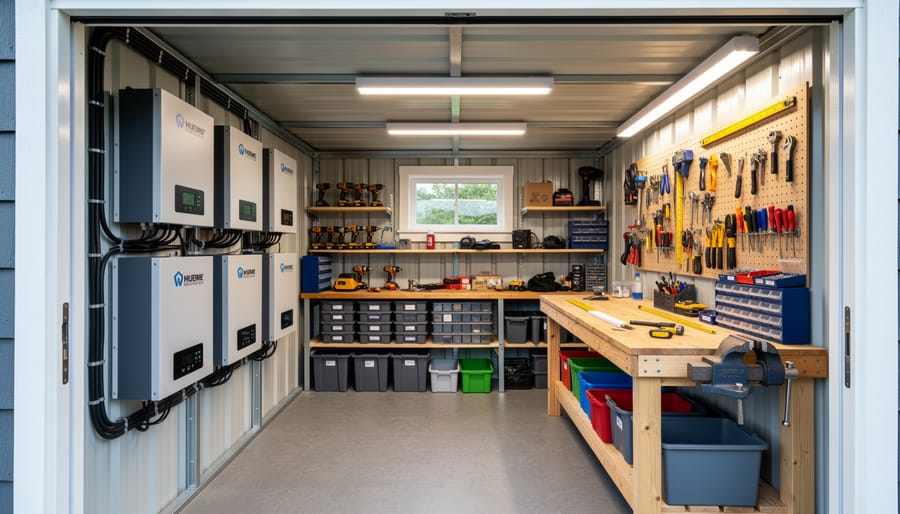
Energy Storage: Battery Solutions That Won’t Break the Bank
\n\nStoring the energy your shed generates doesn’t require an engineering degree or a second mortgage. Let’s break down your battery options in plain English so you can make a smart choice.\n\nLead-acid batteries are the budget-friendly workhorses of energy storage. They’ve been around forever, cost significantly less than newer technologies, and get the job done reliably. You’ll find two types: flooded (which need occasional water top-ups) and sealed (maintenance-free). For a typical shed running lights, a small fridge, and power tools, a 200-400 amp-hour battery bank should cover your needs. Expect these to last 3-5 years with proper care. The trade-off? They’re heavy, bulkier, and don’t like being fully drained.\n\nLithium batteries are the newer kids on the block, and while pricier upfront, they’re worth considering. They last 10-15 years, weigh about half as much, and handle deeper discharges without damage. One homeowner I spoke with initially balked at the cost but calculated that over their lifespan, lithium batteries actually saved money compared to replacing lead-acid units multiple times.\n\nHere’s something crucial many people overlook: temperature fluctuations in uninsulated sheds can seriously shorten battery life. Extreme cold slows charging, while heat accelerates degradation. Simple solutions make a big difference. Install batteries in an insulated box or cupboard within your shed. Even basic foam board insulation helps stabilize temperatures. Keep batteries off cold concrete floors using wooden pallets or stands.\n\nEmerging options like saltwater batteries offer safer, eco-friendlier alternatives, though they’re still catching up in availability and cost-effectiveness.\n\nCalculate your capacity needs by listing what you’ll power and for how long. Most shed setups work perfectly fine with modest battery banks paired with solar panels. Start small and expand as needed rather than over-investing upfront.\n\n
 \n
\n\n\n\n
Essential Upgrades to Make Your Shed Energy-Efficient First
\n\nBefore you rush to install solar panels or wind turbines on your shed, here’s some wisdom from seasoned green energy enthusiasts: start by plugging the leaks. Think of it this way—pouring renewable energy into an inefficient shed is like filling a bucket with holes. You’ll get better results and faster payback by making smart upgrades first.\n\nStart with lighting, the easiest win. Replace any old incandescent bulbs with LED alternatives. Sarah from Oregon made this simple switch in her workshop shed and cut her lighting energy use by 75%. LEDs last longer too, meaning fewer replacement trips and less waste heading to landfills.\n\nNext, tackle insulation and weather sealing. Gaps around doors, windows, and wall joints let your conditioned air escape and outside temperatures creep in. A weekend spent adding weather stripping and caulking these openings can dramatically reduce heating and cooling needs. For year-round comfort, proper climate control solutions start with keeping the elements outside where they belong. Adding insulation to walls and ceilings creates a thermal barrier that maintains stable temperatures naturally.\n\nDon’t overlook your tools and equipment. If you’re outfitting a workshop, choose ENERGY STAR rated or battery-powered options when possible. Modern cordless tools often match corded performance while drawing power more efficiently during charging cycles.\n\nThese foundational upgrades typically cost less than renewable energy installations but deliver immediate savings. Once you’ve minimized waste, any solar panels or wind generators you add will work smarter, not harder, powering an efficient space that respects both your budget and the environment.\n\n\n
 \n
\n\n\n
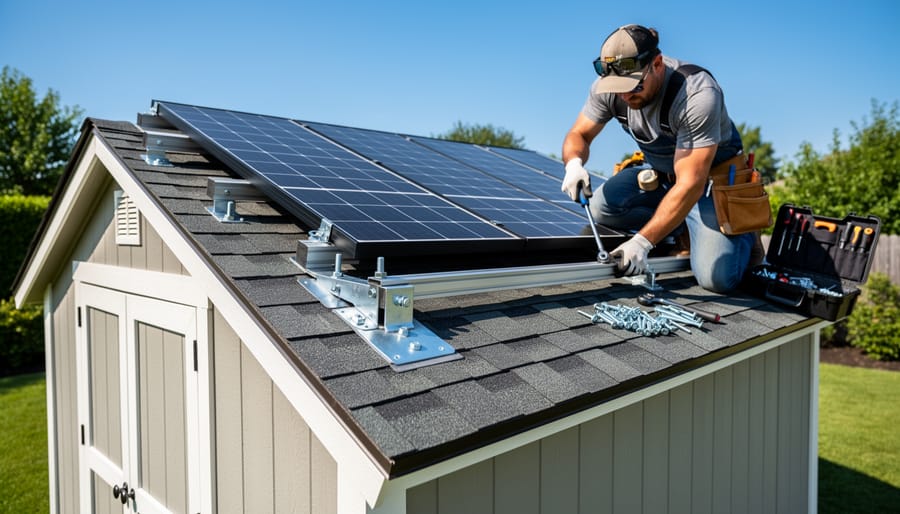
Step-by-Step: Installing a Basic Solar System on Your Shed
\n\nReady to harness the sun’s power for your shed? Installing a basic solar setup is more achievable than you might think, though it does require careful planning and respect for safety. Let’s walk through what you need to know before you begin.\n\nFirst, let’s talk safety. Working with electricity demands caution. If you’re not comfortable working with electrical systems, there’s no shame in calling a licensed electrician for the final connections. You can still handle much of the physical installation yourself and save money while ensuring safety.\n\nBefore purchasing anything, assess your power needs. Start by listing what you’ll run in your shed: LED lights, a phone charger, maybe some power tools? Calculate total wattage requirements. Most basic shed setups work well with a 100-400 watt solar panel system paired with a deep-cycle battery for storage.\n\nHere’s what you’ll need: solar panels (100-400 watts total), a charge controller to prevent battery overcharging, a deep-cycle battery rated for solar use, an inverter if you need standard AC outlets, appropriate gauge wiring, mounting brackets, and basic tools like a drill, wrench set, and wire strippers.\n\nThe installation process breaks down into manageable steps. Mount your panels on the shed roof at the optimal angle for your latitude, typically facing south. Secure them firmly to withstand wind and weather. Run weatherproof wiring from panels to your charge controller, which should be mounted inside the shed near your battery. Connect the battery to the charge controller, then attach your inverter if needed.\n\nOne homeowner from Oregon shared that combining solar with shed insulation and other energy-saving upgrades reduced her overall power needs, allowing a smaller, more affordable solar system to meet her requirements perfectly.\n\nWhen should you call a professional? If you’re connecting to your home’s electrical system, permits and professional installation are typically required. For standalone systems, professional help ensures proper grounding and prevents costly mistakes.\n\nStart small, learn as you go, and expand your system as confidence grows. Your shed’s green energy journey begins with that first panel.\n\n\n
Real Homeowners, Real Results: What to Actually Expect
\n\nWhen Sarah from Portland decided to add solar panels to her garden shed, she expected instant savings. Reality proved more nuanced. “I spent about $1,200 on a 400-watt system with battery storage,” she shares. “It powers my tools and LED lighting perfectly, but winter production was maybe 40% of summer output. I didn’t account for Oregon’s cloudy months.” Her advice? Calculate based on worst-case weather scenarios, not ideal conditions. Despite the learning curve, Sarah now saves roughly $180 annually on electricity and loves the independence during power outages.\n\nMike in Texas took a different approach, installing a modest 200-watt panel setup for just $450. His shed houses a workshop where he runs power tools on weekends. “I’m not off-grid, but I’ve cut my workshop electricity costs by about 60%,” he explains. The surprise challenge? Heat management. “My battery controller overheated twice the first summer before I added ventilation. Nobody mentions that in the YouTube videos.” Mike recommends budgeting an extra $100-150 for unexpected modifications and being patient with the optimization process.\n\nMeanwhile, Linda in Vermont combined solar with insulation upgrades for her converted she-office. Her $2,000 total investment included 300 watts of panels and proper weatherproofing. “Honestly, the insulation made the bigger immediate difference,” she admits. “The solar handles my laptop, space heater on low, and lighting, but I’m still grid-connected for backup.” Her biggest lesson? Start with energy efficiency before adding production. “I wish I’d measured my actual power needs for a month first. I probably could’ve gone with a smaller, cheaper system.”\n\nThe common thread? None achieved perfection, but all found practical value once expectations aligned with reality. Plan for challenges, start smaller than you think, and remember that green energy is a journey, not an instant transformation.\n\n\nYou’ve explored the possibilities, learned about the options, and now comes the most important part: taking that first step. The beauty of adding green energy to your shed is that you don’t need to do everything at once. Start with something simple and achievable, like a basic solar panel kit for lighting. Many homeowners have transformed their sheds simply by installing a 50-watt panel, a charge controller, and a couple of LED lights. Suddenly, that dark storage space becomes a functional workshop or hobby room, all without touching your home’s electrical bill.\n\nSarah from Vermont started with just one panel three years ago. “I wasn’t sure if I was handy enough,” she told us. “But within a weekend, I had light in my pottery studio. Last year, I added another panel and now run my kiln during sunny days. My electricity costs dropped noticeably.” Her story isn’t unique. Countless DIYers discover that green energy projects are more forgiving and rewarding than they initially expected.\n\nThink about the long game too. That initial investment typically pays for itself within five to eight years through energy savings, and panels can last 25 years or more. You’re not just cutting costs; you’re reducing your carbon footprint and creating energy independence, one small improvement at a time.\n\nDon’t let perfection be the enemy of progress. Browse a few starter kits this weekend, watch an installation video, or simply measure your shed’s roof. Every journey toward sustainability begins with a single, achievable action. Your greener, more efficient shed is waiting.