
Yes, You Can Paint Your Vinyl Shed (And Make It Last for Years)
Yes, you can successfully paint a vinyl shed – but it requires specific preparation and materials to ensure lasting results. Modern vinyl-specific paints and proper surface treatment have made it possible to transform these traditionally low-maintenance structures into customized storage solutions that complement your home’s exterior. While vinyl sheds come pre-colored from manufacturers, painting offers an affordable way to refresh faded surfaces or match your property’s color scheme without replacing the entire structure.
The key lies in using the right combination of cleaning methods, bonding primers, and urethane-modified acrylic paints designed specifically for vinyl surfaces. With proper preparation and application techniques, a painted vinyl shed can maintain its new appearance for 5-7 years while preserving the material’s durability. This guide will walk you through the essential steps to achieve professional-quality results, whether you’re updating an aging shed or customizing a new installation to match your outdoor aesthetic.
Why Paint Your Vinyl Shed?
Aesthetic Benefits
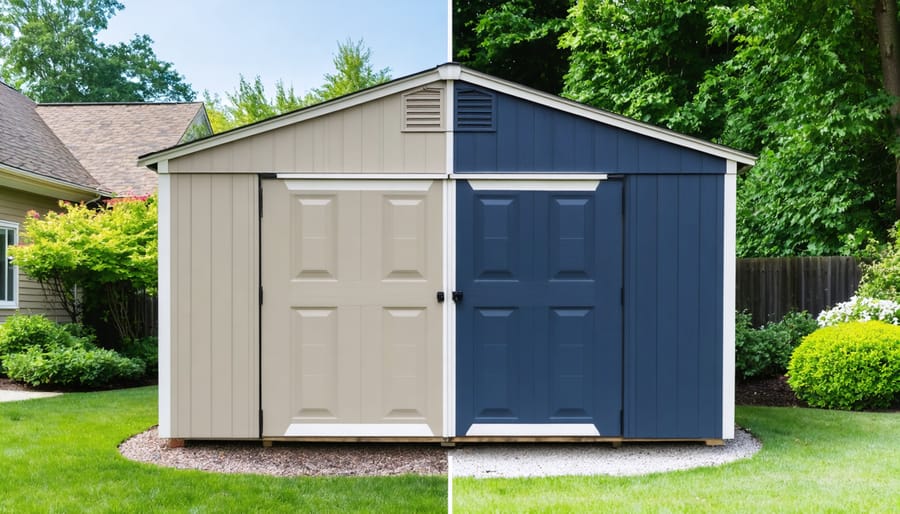
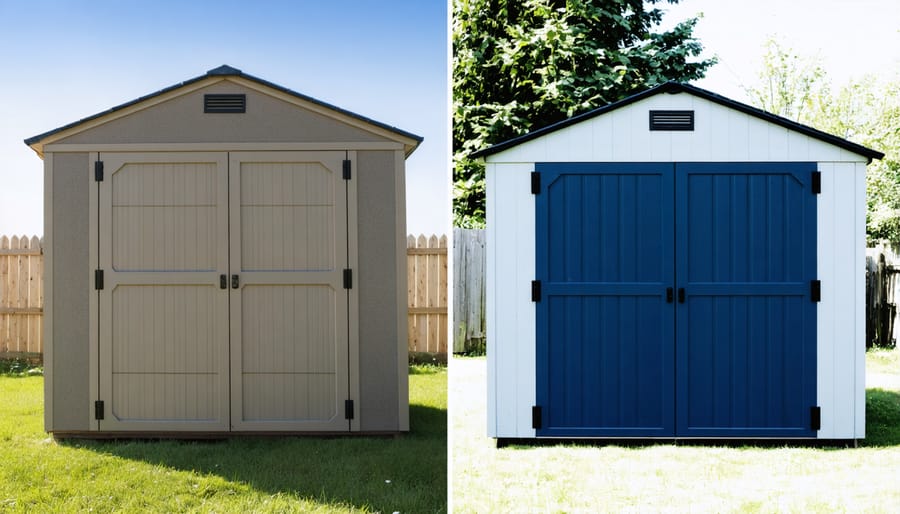
Painting your vinyl shed opens up a world of design possibilities, transforming a basic storage structure into an eye-catching outdoor feature. Whether you want your shed to complement your home’s exterior or make a bold statement, modern vinyl-compatible paints come in virtually unlimited color options. A freshly painted shed can enhance your property’s curb appeal, making it blend seamlessly with your landscaping or serve as an attractive focal point in your backyard.
Beyond basic colors, you can explore two-tone designs, adding accent colors to doors and trim for a more sophisticated look. Many homeowners choose to match their shed to their home’s color scheme, creating a cohesive outdoor aesthetic. The right paint job can also help disguise an aging shed, making it look new again while protecting the vinyl surface underneath. Plus, updating your shed’s appearance can potentially increase your property’s overall value by improving its outdoor aesthetics.
Protective Advantages
Applying paint to your vinyl shed offers more than just aesthetic appeal – it provides a vital layer of protection against environmental challenges. Quality exterior paint creates a protective barrier that shields your shed from harmful UV rays, which can cause fading and material degradation over time. By implementing proper paint protection techniques, you can significantly extend your shed’s lifespan and maintain its structural integrity. The paint coating helps prevent moisture penetration, reducing the risk of mold and mildew growth. It also provides additional resistance against rain, snow, and temperature fluctuations that could otherwise compromise your shed’s durability. This protective layer can help prevent warping and cracking, ensuring your storage solution remains weather-tight and functional for years to come.
Essential Preparation Steps
Cleaning and Surface Preparation
Before painting your vinyl shed, thorough cleaning and preparation are essential for achieving a professional, long-lasting finish. Start by washing the entire surface with a mixture of warm water and mild dish soap, using a soft-bristled brush to remove dirt, debris, and mildew. Pay special attention to corners and crevices where grime tends to accumulate.
Once the initial cleaning is complete, rinse the shed thoroughly with a garden hose to remove all soap residue. For stubborn stains or mildew, create a solution of one part white vinegar to three parts water and scrub the affected areas gently.
After cleaning, let the shed dry completely for at least 24 hours. Use this time to inspect the surface for any damage, loose panels, or areas that need repair. Sand any rough spots or peeling areas with fine-grit sandpaper to create a smooth surface. Finally, wipe down the entire shed with a clean, lint-free cloth dampened with mineral spirits to remove any remaining residue and ensure proper paint adhesion.
Remember to cover the ground around your shed with drop cloths and mask off any areas you don’t want to paint, such as windows or hardware, using painter’s tape.
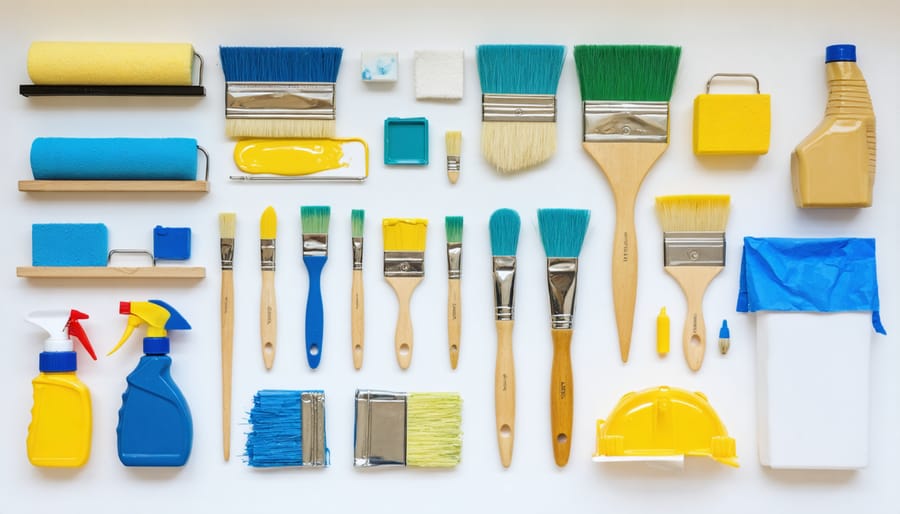
Required Materials and Tools
To successfully paint your vinyl shed, you’ll need to gather the following materials and tools before starting:
Essential Materials:
– Bonding primer specifically designed for vinyl surfaces
– Exterior acrylic paint suitable for plastic/vinyl (2-3 gallons depending on shed size)
– TSP (trisodium phosphate) cleaner or vinyl-specific cleaner
– Soft-bristled brush or non-abrasive sponge for cleaning
– Paint rollers with 3/8-inch nap
– Paint brushes for detail work and corners
– Drop cloths or plastic sheeting
– Painter’s tape
– Clean rags or microfiber cloths
– Bucket for cleaning solution
– Garden hose with spray nozzle
Safety Equipment:
– Safety goggles
– Face mask or respirator
– Work gloves
– Non-slip shoes
Optional but Recommended:
– Paint sprayer for larger sheds
– Step ladder or extension ladder
– Fine-grit sandpaper (220-grit)
– Small foam brushes for tight spaces
– Paint tray and liners
Remember to choose high-quality materials, especially when selecting your primer and paint, as these will directly impact the longevity and appearance of your finished project. Store all materials in a cool, dry place until you’re ready to begin.
Choosing the Right Paint
Best Paint Types for Vinyl
When it comes to painting your vinyl shed, choosing the right paint type is crucial for long-lasting results. Acrylic latex paints specifically formulated for exterior use and vinyl surfaces are your best bet. These paints are designed to expand and contract with the vinyl material, preventing cracking and peeling over time.
Look for paints labeled as “vinyl-safe” or “vinyl-compatible” from trusted brands. These typically contain urethane additives that enhance adhesion and durability. Many homeowners have found success with Sherwin-Williams VinylSafe or Benjamin Moore Regal Select Exterior paints, which come in a wide range of colors suitable for vinyl surfaces.
Avoid oil-based paints or standard latex paints, as these can damage the vinyl or fail to adhere properly. Additionally, steer clear of dark colors unless specifically formulated for vinyl, as these can cause warping due to excessive heat absorption.
For best results, choose a paint color that’s similar to or lighter than your shed’s original color. This approach ensures better coverage and helps prevent potential heat-related issues down the line.
Color Selection Tips
When selecting paint colors for your vinyl shed, opt for light to medium shades that reflect rather than absorb heat. Dark colors like deep blues, blacks, or browns can cause the vinyl to warp or buckle as they attract more sunlight. Light grays, beiges, and soft whites are excellent choices that maintain the shed’s structural integrity while providing an attractive finish.
Consider your home’s exterior color scheme to create a cohesive look. Choose colors that complement, rather than match exactly, your house color. This creates visual interest while maintaining harmony in your outdoor space. Remember that vinyl-safe paints come in a limited but practical range of colors, so it’s best to browse these specific options before setting your heart on a particular shade.
For the best results, select a paint color specifically formulated for vinyl surfaces, as these contain special bonding agents and heat-resistant properties that protect your shed.
Painting Process and Techniques
Application Methods
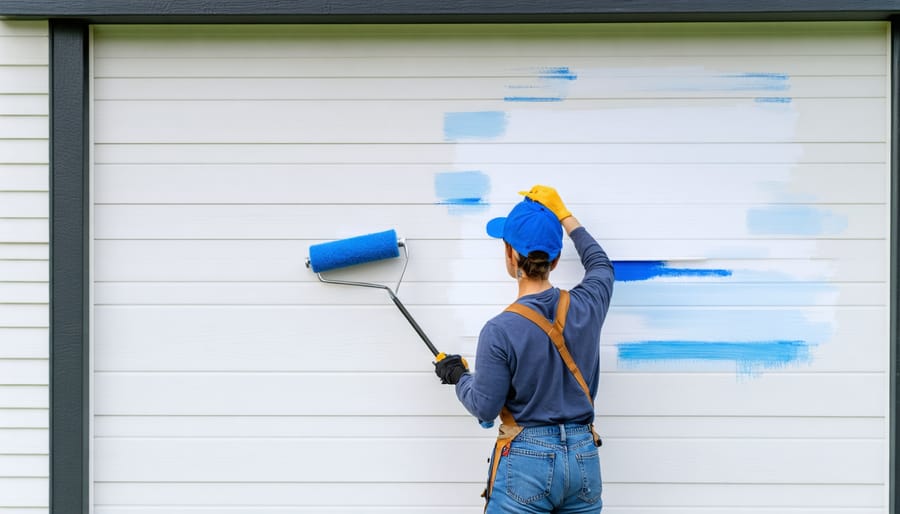
For the best results, apply paint to your vinyl shed using a high-quality synthetic brush or roller designed for exterior surfaces. Begin at the top of each wall and work your way down in smooth, even strokes to prevent drips and runs. When using a roller, maintain a consistent pressure and overlap each stroke by about 2 inches to ensure complete coverage.
Spray painting is another effective method, especially for larger sheds or textured surfaces. Hold the spray gun approximately 12 inches from the surface and apply in steady, horizontal sweeps. Keep your arm moving continuously to avoid paint buildup in any one area.
For detailed areas around windows, doors, or corners, use a smaller brush to ensure precise application. Apply thin, even coats rather than one thick layer – this prevents dripping and promotes better adhesion. Wait for each coat to dry completely before applying the next one, typically 2-4 hours depending on weather conditions.
On warmer days, work in sections that aren’t in direct sunlight to prevent the paint from drying too quickly. If you notice any spots you’ve missed, wait until the first coat is completely dry before touching them up. For optimal coverage and durability, plan to apply at least two coats of paint, allowing proper drying time between applications.
Remember to maintain consistent technique throughout the project for a professional-looking finish. Clean your brushes or roller immediately after use to keep them in good condition for future touch-ups.
Common Mistakes to Avoid
When painting your vinyl shed, avoiding common mistakes can save you time, money, and frustration. One of the biggest errors is skipping proper surface preparation. Never paint over dirt, mold, or loose material, as this will lead to poor adhesion and peeling.
Another frequent mistake is choosing the wrong type of paint. Using interior paint or products not specifically designed for vinyl can result in cracking, bubbling, or rapid deterioration. Always select paints that explicitly state they’re suitable for vinyl surfaces.
Painting in unsuitable weather conditions can seriously impact your results. Avoid painting on extremely hot days, in direct sunlight, or when rain is forecasted within 24 hours. The ideal temperature range is between 50-85°F with moderate humidity.
Many DIYers make the mistake of applying paint too thickly or not allowing sufficient drying time between coats. This can cause drips, uneven coverage, and extended curing times. Always apply thin, even coats and follow the manufacturer’s recommended drying times.
Neglecting to protect surrounding areas is another common oversight. Paint overspray can damage nearby plants, concrete, or other structures. Use drop cloths and painter’s tape to protect these areas before starting.
Finally, don’t forget to maintain proper ventilation during the project. Working in an enclosed space with paint fumes can be dangerous. Keep doors open and use fans to ensure adequate air circulation throughout the painting process.
Maintenance and Care
To maintain your shed and protect your fresh paint job, regular inspection and cleaning are essential. Every few months, gently wash the painted surfaces with mild soap and water using a soft brush or cloth. Avoid using harsh chemicals or pressure washers, as these can damage the paint and underlying vinyl.
Keep an eye out for any signs of paint peeling or bubbling, especially around joints and seams. Address these issues promptly by lightly sanding the affected area, cleaning it thoroughly, and applying touch-up paint. This prevents further deterioration and maintains the shed’s appearance.
Trim back any nearby vegetation to prevent branches and leaves from scratching the painted surface. During winter months, clear snow away from the shed’s walls to prevent moisture damage. Consider applying a clear UV-protective coating every few years to prevent fading and extend the life of your paint job.
If you notice any damage to the vinyl itself, repair it before it affects the paint. Small holes or cracks can be fixed with vinyl repair kits available at most hardware stores. Remember, proper maintenance not only preserves the paint but also protects your investment in the shed itself.
Painting your vinyl shed is not only possible but can be a rewarding DIY project that transforms your outdoor space. With the right preparation, materials, and technique, you can achieve a beautiful, lasting finish that protects your investment. Remember to clean thoroughly, use appropriate primers and paints, and follow proper seasonal maintenance tips to keep your newly painted shed looking fresh for years to come. Don’t be afraid to take on this project – with patience and attention to detail, you’ll have a custom-colored shed that enhances your property’s appeal.