
Why Your Snowblower Shelter Could Collapse This Winter (And How to Prevent It)
Position your snowblower shelter on a reinforced foundation, not directly on grass or gravel, to prevent sinking and structural stress when heavy snow accumulates on the roof. Choose a shelter rated for at least 35 pounds per square foot snow load—the minimum standard for most northern climates—and verify this specification before purchasing, as many budget models lack adequate engineering to survive a single harsh winter.
Your snowblower represents a significant investment, often costing $800 to $3,000, yet the shelter protecting it can fail catastrophically under conditions it was designed to withstand. Last winter, thousands of homeowners discovered their storage solutions collapsed under snow weight, leaving expensive equipment exposed to the elements and, in some cases, damaged beyond repair. The culprit wasn’t just heavy snowfall—it was shelters built without proper snow load calculations, inadequate frame materials, or poor assembly that compromised structural integrity.
Understanding snow load engineering doesn’t require a degree in structural mechanics. It means recognizing that a cubic foot of wet snow weighs approximately 20 pounds, and a modest 10×10 shelter roof can support over 3,000 pounds during significant snowfall. The difference between a shelter that stands strong and one that buckles comes down to frame gauge, roof pitch, anchoring method, and material quality—all decisions you’ll make before the first snowflake falls. This guide will walk you through selecting, installing, and maintaining a snowblower shelter that actually protects your investment when winter conditions turn severe.
What Makes Snowblower Shelters Different From Regular Storage
Snowblower shelters face unique challenges that set them apart from your typical garden shed or storage unit. Understanding these differences can help you avoid the frustrating scenario where you need your snowblower most, only to find it buried under a collapsed shelter.
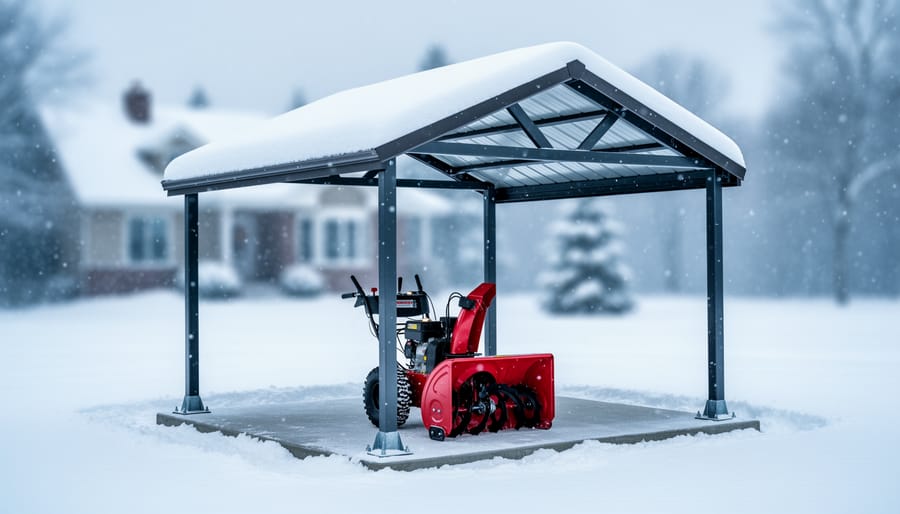
First, let’s talk about size. Snowblowers, especially two-stage models, are bulky machines with wide augers and handles that don’t fold neatly away. Most snowblower shelters measure at least 3 feet wide by 4 feet deep, with some reaching 5 feet in height. This oversized footprint means more surface area for snow to accumulate on top, creating greater structural stress than compact storage boxes experience.
The accessibility factor also makes these shelters unique. Unlike lawn mower storage that you might access once weekly in summer, your snowblower shelter needs to remain functional during the worst weather conditions. You’ll be opening it in blizzards, after heavy snowfall, and in freezing temperatures. This constant winter use means the shelter faces repeated exposure to moisture, ice buildup around zippers or doors, and the challenging task of keeping snow from blocking the entrance.
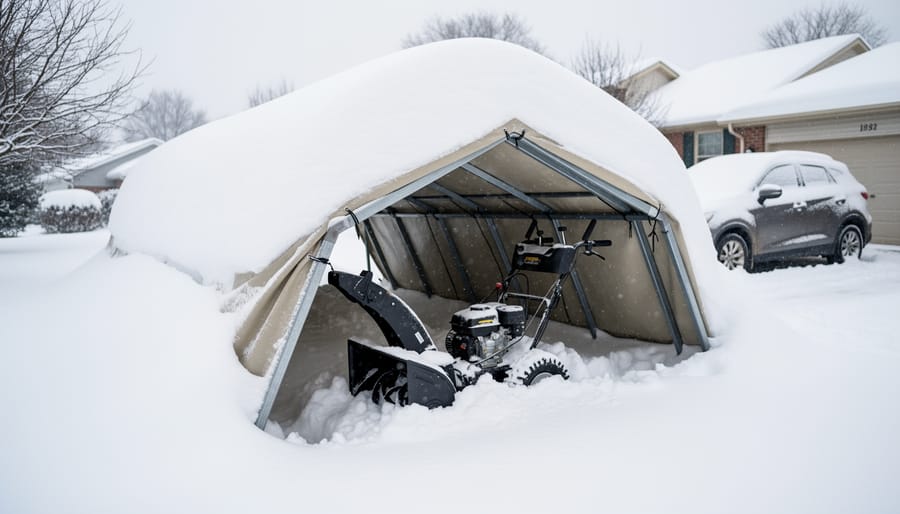
Here’s where things get critical: snowblower shelters typically use lightweight fabric or thin metal construction to keep costs reasonable and portability high. While this makes them easy to assemble and move, it also makes them vulnerable to snow load pressure. A homeowner in Minnesota learned this the hard way when 18 inches of wet snow collapsed his shelter, bending his snowblower’s handlebars and cracking the housing.
The combination of large roof area, lightweight materials, and exposure to peak snow conditions creates a perfect storm of vulnerability that regular storage solutions simply don’t encounter.
Understanding Snow Load (Without the Engineering Degree)
How Much Does Snow Actually Weigh?
Understanding snow weight is crucial when selecting a shelter that’ll actually protect your snowblower investment. The difference between snow types is dramatic and often surprising to homeowners.
Fresh, fluffy powder snow weighs approximately 3-5 pounds per cubic foot. Picture a laundry basket filled with powder snow—that’s roughly the weight of a gallon of milk. Seems manageable, right?
Here’s where it gets serious. Wet, heavy snow that falls during warmer storms weighs 12-20 pounds per cubic foot—nearly four times heavier than powder. That same laundry basket now weighs as much as a car tire. And compacted snow or ice? You’re looking at 30-60 pounds per cubic foot.
Let’s put this in perspective: A modest 8×10 shelter roof with just 12 inches of wet snow is supporting roughly 800-1,300 pounds. That’s like parking a grand piano on top of your shelter. Add another foot during a multi-day storm, and you’ve doubled that weight. Many homeowners discover this reality too late, finding their collapsed shelter buried alongside their snowblower. Choosing a shelter rated for your region’s actual snow loads—not just the lightest powder days—ensures your equipment stays protected when winter hits hardest.
Your Local Snow Load Requirements
Understanding your local snow load requirements is simpler than you might think, and it’s absolutely essential for choosing a snowblower shelter that won’t buckle under winter’s weight.
Snow load ratings measure how much snow weight a structure can safely handle, expressed in pounds per square foot (PSF). A shelter rated for 20 PSF can support approximately 20 pounds of snow on every square foot of roof. To put this in perspective, fresh powder weighs about 3-7 pounds per cubic foot, while wet, heavy snow can weigh 15-20 pounds per cubic foot or more.
Your first stop should be your local building department’s website or office. Most municipalities provide snow load maps showing required ratings for your specific area. These requirements aren’t arbitrary—they’re based on decades of weather data and designed to keep structures standing during typical winter conditions. In regions with heavy snowfall like Michigan’s Upper Peninsula or Vermont, you might need shelters rated for 35-50 PSF, while milder areas may only require 15-20 PSF.
One homeowner we spoke with, Sarah from Minnesota, learned this lesson the hard way. She purchased a bargain shelter rated for 15 PSF in an area requiring 30 PSF. After just one heavy snowfall, the roof collapsed onto her $1,200 snowblower. By contrast, matching your shelter’s specifications to local requirements ensures peace of mind throughout winter.
When comparing products, look for manufacturer specifications that clearly state the PSF rating. If this information isn’t readily available, that’s a red flag worth investigating before making your purchase.
Critical Features That Prevent Snowblower Shelter Collapse
Roof Design and Pitch
Your shelter’s roof design is your first line of defense against snow accumulation and potential collapse. Think of it this way: the steeper the pitch, the less snow stays put. A peaked roof with a pitch of at least 30 to 45 degrees allows snow to naturally slide off before dangerous loads can build up, which is exactly what you want during heavy snowfalls.
Peaked roofs consistently outperform rounded or flat designs in areas with significant snowfall. While rounded roofs do shed snow reasonably well, peaked roofs create clearer pathways for snow to exit, reducing the chance of ice dams forming along the edges. Flat roofs? They’re asking for trouble in snow country, as they require constant manual clearing and risk sagging under heavy loads.
For homeowners in heavy snow regions, a steeper pitch isn’t just recommended—it’s essential. Consider a 45-degree angle or greater if your area regularly sees wet, heavy snow. This design choice means less worry during winter storms and fewer midnight scrambles to shovel off your shelter roof. One Massachusetts homeowner shared how upgrading from a 20-degree to a 40-degree pitch saved her shelter after a particularly brutal nor’easter dumped two feet overnight.
Frame Materials and Construction
When selecting a snowblower shelter, the frame material directly impacts how well it handles heavy snow accumulation. Let’s break down your options so you can make an informed choice.
Steel frames offer exceptional snow-load capacity, typically supporting 25 to 35 pounds per square foot or more. This makes them ideal for regions with heavy snowfall. The trade-off? Steel is heavier and requires a powder-coated or galvanized finish to prevent rust. Look for frames with cross-bracing and reinforcement bars at stress points, as these additions significantly boost structural integrity during winter storms.
Aluminum frames provide a lighter alternative while still delivering solid performance. They naturally resist corrosion and can handle moderate snow loads of 15 to 25 pounds per square foot. Many homeowners appreciate aluminum’s ease of assembly and relocation capabilities. However, if you live in an area that regularly sees significant snowfall, verify the frame gauge thickness before purchasing.
Hybrid construction combining steel corner posts with aluminum roof supports offers a practical middle ground. This design places strength where you need it most while keeping overall weight manageable.
When shopping, always check the manufacturer’s certified snow-load rating rather than relying on general descriptions. A shelter rated for your region’s typical snowfall prevents the heartbreak of finding your equipment buried under a collapsed structure come spring. Consider local building codes too, as some municipalities require minimum snow-load ratings for outdoor structures.
Anchoring and Foundation Systems
Even the sturdiest snowblower shelter is only as reliable as what holds it to the ground. Without proper anchoring, winter winds and heavy snow loads can turn your investment into a crumpled mess—exactly when you need it most.
The foundation you choose depends largely on your ground conditions. For permanent installations on soil, concrete footings or frost-protected shallow foundations provide rock-solid stability. These work beautifully in areas with deep frost lines, preventing heaving and shifting through freeze-thaw cycles. One homeowner in Minnesota shared how her concrete pier foundation kept her shelter perfectly level through five winters of brutal weather, while her neighbor’s un-anchored shelter shifted noticeably each spring.
For softer ground or temporary setups, ground anchors or auger-style stakes offer excellent holding power. Drive them at angles for maximum resistance against uplift forces—snow loads push down, but wind can create surprising suction that tries to lift your shelter right off the ground.
If you’re working with gravel, asphalt, or concrete surfaces, specialized anchor bolts or weighted systems become your best friends. Many modern shelters include anchor kits designed specifically for hard surfaces, making installation straightforward even for DIY enthusiasts.
Remember, investing an extra hour in proper anchoring now prevents the heartbreak of finding your shelter collapsed under two feet of heavy, wet snow come February.
Choosing the Right Snowblower Shelter for Your Climate
Metal vs. Fabric Covers: The Snow Load Showdown
When it comes to handling heavy snow loads, the material of your snowblower shelter makes all the difference between a standing structure and a costly pile of bent metal come spring.
Metal shelters, particularly those with a peaked or rounded roof design, excel at shedding snow naturally. The slick surface doesn’t give snow much to grip onto, and quality metal frames can handle impressive weight when properly anchored. Steel-framed options typically support 20-35 pounds per square foot, which covers most residential snow scenarios. The downside? Cheaper metal shelters with flat or low-slope roofs are snow-load disasters waiting to happen. I’ve seen neighbors learn this lesson the hard way when their bargain shelter pancaked after a heavy February storm.
Fabric covers over metal frames offer a middle ground that surprises many homeowners. Heavy-duty polyethylene fabric actually performs remarkably well because it flexes slightly under load rather than fighting it. This give-and-take means the frame experiences less stress. However, fabric requires more maintenance, as you’ll need to brush off accumulated snow more frequently to prevent sagging pockets that can tear the material or stress the frame.
The honest truth? For pure snow-load strength without hands-on maintenance, a well-designed metal shelter with a steep roof pitch wins every time. But if you’re willing to stay proactive during storms, a quality fabric shelter costs less upfront while still providing solid protection.
Sizing Up: Why Bigger Isn’t Always Better
When shopping for a snowblower shelter, it’s tempting to think bigger is better. After all, extra space never hurts, right? Not so fast. Here’s a reality check that might surprise you: larger shelters actually face greater snow-load challenges than their more modest counterparts.
Think of it this way. A 10×10 shelter needs to support the snow weight across 100 square feet of roof. Scale up to 12×12, and you’re suddenly dealing with 144 square feet. That’s nearly 50% more surface area collecting snow, which translates directly to increased stress on the frame and roof structure. During a heavy snowstorm dropping 12 inches of wet snow, that extra square footage could mean supporting several hundred additional pounds.
One homeowner from Minnesota learned this lesson the hard way. “I bought the biggest shelter I could find, thinking I’d have room for my snowblower plus lawn equipment,” he shared. “After our first major snowfall, the roof started sagging badly. I had to shovel it off every few hours during the storm.”
The sweet spot? Choose a shelter that comfortably fits your snowblower with just enough clearance to maneuver easily. You’ll want about 18-24 inches on each side for walkway space. This approach gives you adequate protection without unnecessarily multiplying your snow-load concerns. Remember, a properly sized, well-built shelter will outlast an oversized one struggling under winter’s weight every single season.
Winter Maintenance That Saves Your Shelter
When and How to Clear Snow From Your Shelter
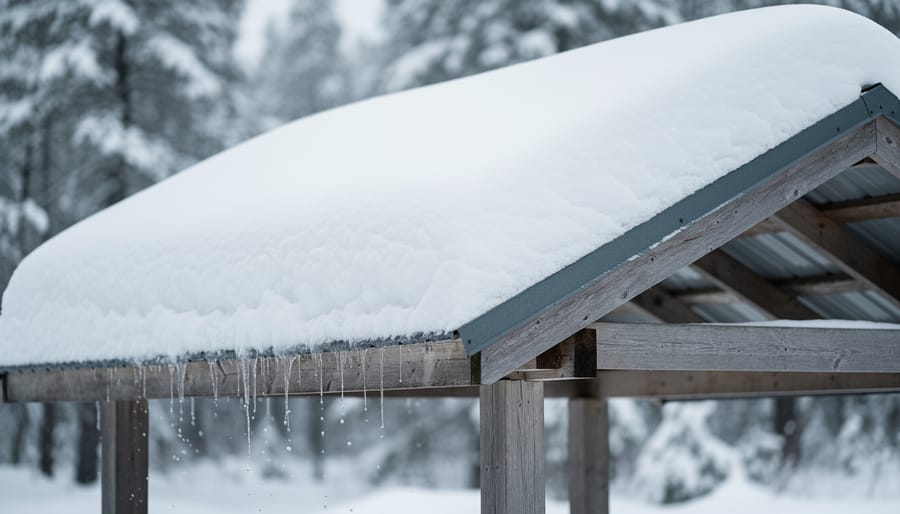
Don’t wait until your shelter is buried under a mountain of snow! As a general rule, you should clear snow from your snowblower shelter’s roof when accumulation reaches 6 to 8 inches, especially if it’s heavy, wet snow. Remember, this isn’t just about keeping your shelter looking tidy—it’s about preventing structural damage or collapse that could destroy both your shelter and the valuable equipment inside.
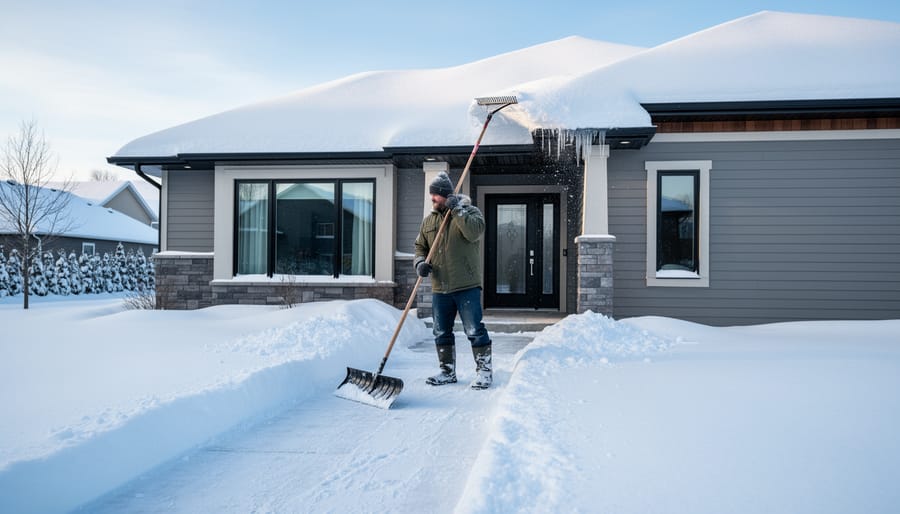
When removing snow, always use a soft-bristled roof rake or plastic snow shovel rather than metal tools that can tear or puncture your shelter’s fabric or panels. Work gently from the ground level whenever possible, pulling snow down in layers rather than scraping aggressively. Never climb onto the shelter itself, as this adds extra weight and risks damaging the structure.
For powder snow, a simple push broom works beautifully and won’t cause any scratches. If ice forms, resist the urge to chip away at it with sharp implements. Instead, let natural melting do most of the work, or use a calcium chloride ice melt product sparingly along edges. Many homeowners find that establishing a quick routine after each snowfall—just five minutes with a roof rake—prevents major accumulation problems entirely. One satisfied shelter owner told us, “I clear mine after every storm, takes less time than making coffee, and I’ve never worried about collapse.”
Pre-Winter Checkup Checklist
Before the first snowflake falls, spend 15 minutes giving your snowblower shelter a thorough once-over. Start by checking all anchor points and stakes—winter winds can be surprisingly forceful, so make sure everything is firmly secured to the ground. If you’re using a fabric shelter, inspect the cover for any tears, worn spots, or UV damage from summer sun. Small rips now will become big problems under heavy snow loads.
Next, examine the frame carefully. Tighten any loose bolts or connections, and look for bent poles or weakened joints that might buckle under pressure. If your shelter has a door or zipper entry, test it several times and apply lubricant if needed—you don’t want it freezing shut mid-winter when you need quick access.
For shelters in snowy regions, consider adding extra support poles or bracing before the season starts. Many homeowners have learned this lesson the hard way after finding collapsed shelters in spring. Check that your shelter’s placement hasn’t created ice dam potential against your house or garage. Finally, clear the surrounding area of debris and ensure proper drainage to prevent water pooling and ice formation at the base.
Real Stories: Shelter Failures and Successes
Learning from others’ experiences can save you both money and heartache when it comes to protecting your snowblower investment.
Take Mike from Vermont, who purchased a lightweight fabric shelter from a big-box store. “It looked perfect in August,” he recalls. “But after our first heavy snowfall in December, I came outside to find the whole thing collapsed on top of my snowblower. The frame just couldn’t handle the weight.” Mike learned the hard way that his region’s snow load requirements called for something far sturdier than what he’d chosen.
On the flip side, Jennifer from Michigan did her homework before buying. “I checked with my local building department and found out we need structures rated for at least 40 pounds per square foot,” she explains. She invested in a properly engineered metal shelter with reinforced trusses. “We’ve had three winters of heavy lake-effect snow, and it’s still standing strong. My neighbor’s cheap shelter didn’t make it through year one.”
Then there’s the Davis family from Minnesota, who initially tried to save money with a basic carport-style cover. After it buckled under ice buildup, they upgraded to a shelter specifically designed for snow country. “The difference is night and day,” they shared. “The peaked roof sheds snow naturally, and the heavy-duty frame gives us complete peace of mind.”
These real-world experiences highlight a crucial lesson: cutting corners on snow-load capacity almost always costs more in the long run. Whether it’s repair bills, equipment damage, or having to buy a replacement shelter entirely, inadequate structures simply don’t survive winter in snow-prone areas. Investing in proper engineering from the start protects both your snowblower and your wallet.
Protecting your snowblower is a serious investment, and understanding snow-load engineering basics empowers you to make that investment wisely. You now know that not all shelters are created equal when it comes to withstanding heavy snow, and those seemingly small differences in design, materials, and construction can mean the difference between a shelter that lasts for years and one that collapses during the first big storm.
The good news? Armed with knowledge about snow load ratings, roof pitch, framing quality, and proper site preparation, you’re ready to choose a snowblower shelter that truly protects your equipment. Remember to check your local snow load requirements, select appropriate materials for your climate, and don’t skip those crucial maintenance tasks like clearing snow buildup and inspecting structural integrity each season.
Taking the time to select the right shelter now saves you from the headache and expense of replacing collapsed structures or damaged equipment later. Your snowblower deserves a home that works as hard as it does, keeping it ready to tackle whatever winter throws your way. Make the smart choice today, and you’ll enjoy peace of mind for many winters to come.
Looking for a portable garages?
Browse our full range of portable garages from authorized dealer brands. Free shipping to the continental US.