
7 Surprising Reasons to Insulate Your Shed (And How to Do It Right)
Why Insulate Your Shed?
Energy Efficiency & Climate Control
Insulating your shed can significantly improve its energy efficiency and comfort level throughout the year. In the summer, insulation helps keep the interior cool by preventing heat from seeping in through the walls and roof. This makes your shed a more pleasant space to work or relax in during hot weather. When winter rolls around, insulation acts as a barrier against cold air, helping to maintain a warmer temperature inside. By regulating the temperature in your shed, insulation not only enhances comfort but also protects stored items from damage caused by extreme heat or cold. Consider implementing additional climate control strategies to further enhance your shed’s usability throughout the year.
Protecting Your Belongings
Insulating your shed not only keeps the interior temperature stable but also safeguards your belongings from damage caused by moisture, mold, and rust. By preventing condensation buildup, insulation reduces the risk of mold growth on your stored items. Additionally, it helps maintain a dry environment that protects against rust on metal tools and equipment. With proper insulation, you can confidently store your possessions knowing they are shielded from the detrimental effects of moisture and temperature fluctuations, ensuring their longevity and preserving their value for years to come.
Noise Reduction
Insulating your shed not only helps regulate temperature but also reduces noise levels. The insulation materials absorb sound waves, minimizing echoes and reverberations within the space. This creates a quieter, more peaceful environment, perfect for hobbies, work, or simply enjoying some solitude. Whether you’re using power tools, listening to music, or just want to reduce external noise, insulating your shed can significantly improve its acoustic properties, making it a more comfortable and functional space.
Pest and Rodent Deterrent
Insulating your shed can also help deter pests and rodents from making it their home. Properly installed insulation minimizes gaps and cracks that these critters often use as entry points. By sealing off potential access routes, you create a barrier that makes it harder for them to invade your shed. This not only protects your stored items but also helps maintain a cleaner, healthier environment free from droppings and damage caused by unwanted guests.
Improved Durability
Insulating your shed not only improves energy efficiency but also enhances its durability. By regulating temperature and moisture levels, insulation helps protect the shed’s structure from damage caused by extreme weather conditions, humidity, and condensation. This added layer of protection can prevent warping, rotting, and mold growth, extending the life of your shed. With proper insulation, you can enjoy a more resilient and long-lasting storage solution that withstands the test of time.
Expand Shed’s Potential Uses
Insulating your shed opens up a world of possibilities beyond basic storage. With proper insulation, your shed can be transformed into a functional workshop for hobbies and projects, a peaceful studio for artistic pursuits, or even a productive home office space. Insulation helps regulate temperature and humidity, creating a comfortable environment suitable for year-round use. Imagine having a dedicated space to pursue your passions or work from home, all within the convenience of your own backyard.
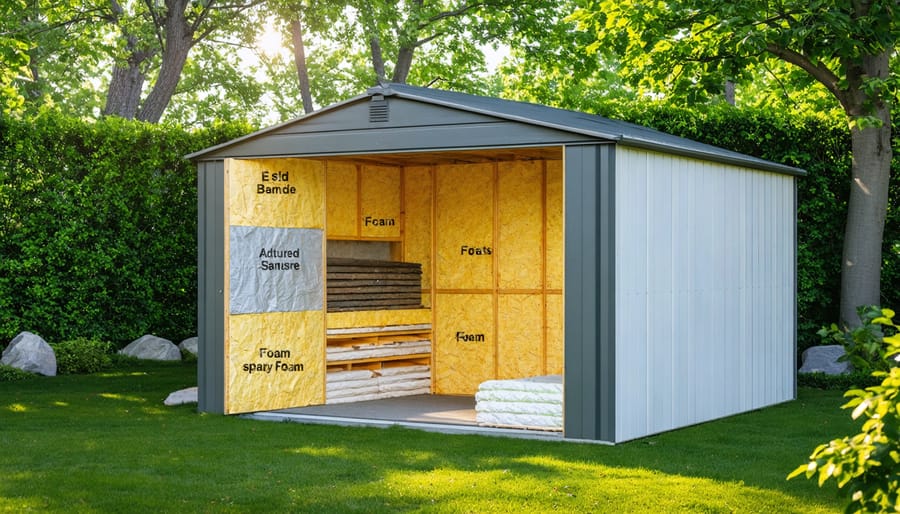
Types of Shed Insulation
Blanket Batts
Blanket batts, made from fiberglass or mineral wool, are a budget-friendly and DIY-friendly insulation option for your shed. These pre-cut sections of insulation are designed to fit snugly between wall studs and ceiling joists, making installation a breeze. With a little measuring and cutting, you can easily insulate your shed’s walls and roof using blanket batts. This type of insulation is not only affordable but also provides good thermal resistance, helping to keep your shed comfortable year-round. Plus, the materials are readily available at most home improvement stores, making it a convenient choice for many homeowners.
Rigid Foam Boards
Rigid foam boards offer a moisture-resistant insulation solution that’s easy to cut and install in your shed. These lightweight panels, typically made from polystyrene or polyisocyanurate, provide excellent thermal resistance and help prevent moisture buildup. With their tongue-and-groove edges, rigid foam boards fit snugly together, creating a seamless insulation layer. Simply measure, cut, and press the boards against the shed walls for a hassle-free installation. Rigid foam boards not only keep your shed comfortable year-round but also help protect your stored items from humidity-related damage, ensuring your belongings stay in top condition.
Loose Fill
Loose fill insulation, also known as blown-in cellulose, is a popular choice for insulating sheds. This type of insulation consists of small, loose particles that are blown into the walls and ceilings using special equipment. One of the main advantages of loose fill insulation is its ability to conform to irregular spaces and fill in crevices, providing a seamless and effective barrier against heat transfer. It’s also an eco-friendly option, as cellulose is often made from recycled materials like newspaper. When installing loose fill insulation, it’s important to ensure proper density and coverage to achieve optimal thermal performance in your shed.
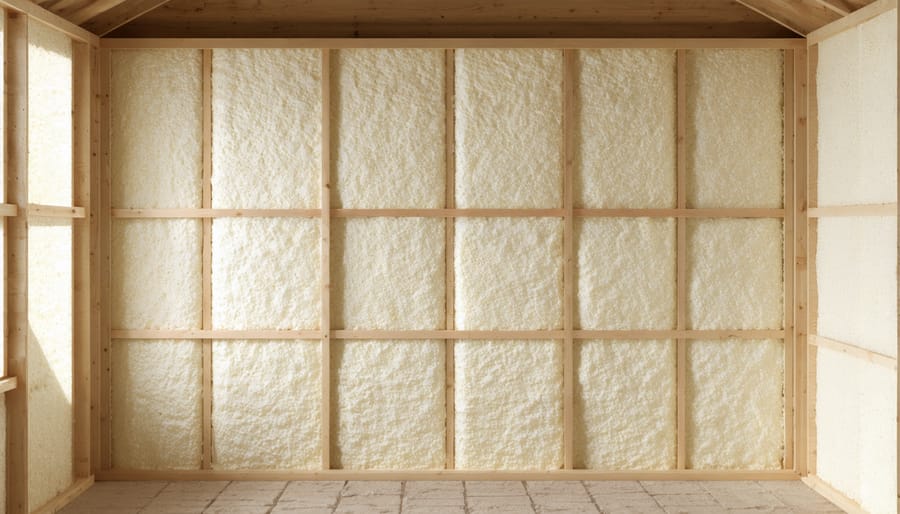
Spray Foam
Spray foam insulation is a highly effective option for insulating your shed, offering superior thermal performance and air sealing properties. While it may be more expensive than other methods, spray foam provides excellent coverage and can help eliminate drafts and moisture issues. For optimal results, it’s recommended to hire a professional contractor experienced in spray foam application. They can ensure proper installation and thickness, maximizing the insulation’s efficiency. Although the upfront cost may be higher, spray foam’s long-term energy savings and durability make it a worthwhile investment for homeowners seeking the best insulation solution for their shed.

Steps to Insulate Your Shed
Preparation
Before installing insulation, prepare your shed by thoroughly cleaning the interior, removing any debris or stored items. Inspect the walls, floor, and ceiling for gaps or cracks, and seal them with caulk or weatherstripping to prevent air leaks and moisture intrusion. Pay close attention to the areas around windows, doors, and the shed’s base. Consider adding a vapor barrier to the floor and walls to further protect against moisture damage. A vapor barrier, such as plastic sheeting, helps to prevent condensation from forming on the inside of the shed, which can lead to mold and mildew growth. By taking these preparatory steps, you’ll create a clean, dry, and sealed environment that’s ready for insulation, ensuring optimal performance and longevity for your shed.
Installation
Once you’ve chosen the best insulation type for your shed, proper installation is key to maximizing its effectiveness. For fiberglass batts, carefully measure and cut pieces to fit snugly between wall studs and ceiling joists, ensuring there are no gaps or compression. When using rigid foam boards, apply a compatible adhesive to the shed’s interior walls and press the boards firmly in place, sealing the edges with tape. If opting for spray foam, follow the manufacturer’s instructions for safe application, covering all surfaces evenly. Regardless of the insulation type, it’s crucial to maintain adequate ventilation to prevent moisture buildup. Consider installing a vapor barrier on the warm side of the insulation to further control moisture. Take your time during installation and pay attention to details for the best results in transforming your shed into a comfortable, year-round space.
Finishing Touches
Once your shed is properly insulated, you can add the finishing touches to create a polished look. Consider installing drywall or paneling over the insulation for a clean, finished appearance. This not only enhances the aesthetics of your shed but also provides an extra layer of protection for the insulation. When selecting drywall or paneling, opt for moisture-resistant materials to prevent damage from humidity or potential leaks. With these final steps, your insulated shed will be both functional and visually appealing, offering a comfortable space for storage, hobbies, or even a small workshop.
Conclusion
Insulating your shed is a wise investment that offers numerous benefits, from improving temperature control and energy efficiency to creating a more comfortable and functional space. Whether you use your shed for storage, as a workshop, or a home office, insulation can make a significant difference in its usability and durability. By choosing the right insulation materials and following proper installation techniques, you can transform your shed into a well-protected, year-round haven. Don’t let extreme temperatures or moisture damage limit the potential of your shed—take action today and enjoy the lasting advantages of a properly insulated space.