
Build a Money-Saving Rainwater System for Your Shed (Simple Steps)
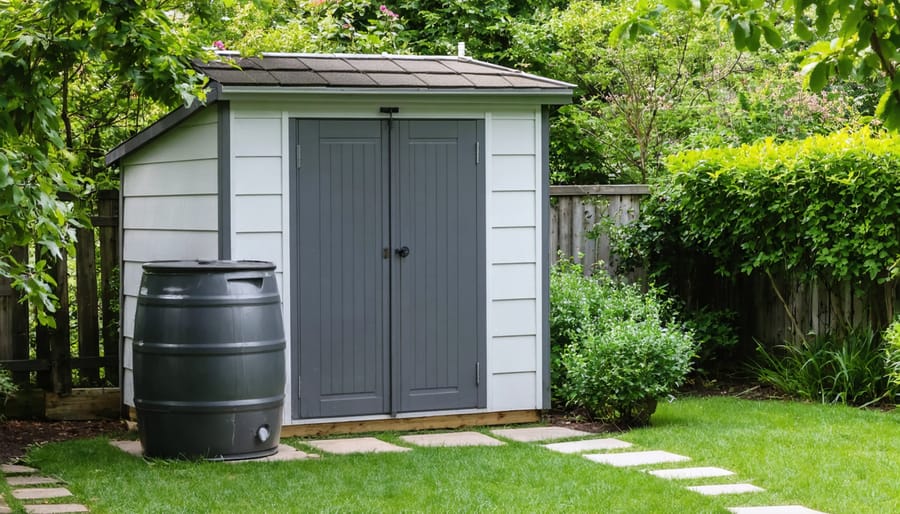
Transform your backyard shed into a sustainable water collection powerhouse with a DIY rainwater harvesting system – one of today’s most practical eco-friendly shed solutions. By capturing rainfall from your shed’s roof, you can collect up to 600 gallons of free water annually from just a 100-square-foot surface, significantly reducing your water bills and environmental impact.\n\nInstalling a basic rainwater collection system requires only four core components: gutters, downspouts, a first-flush diverter, and a storage tank. This weekend project can be completed for under $500, using readily available materials from your local hardware store. The collected water proves invaluable for garden irrigation, lawn maintenance, and emergency backup supplies.\n\nBeyond the immediate cost savings, a properly designed rainwater harvesting system helps prevent soil erosion around your shed’s foundation, reduces stormwater runoff, and provides chemical-free water for sensitive plants. With minimal maintenance – just quarterly gutter cleaning and annual system inspection – your DIY setup can reliably serve your household for decades while contributing to a more sustainable future.\n\n\n
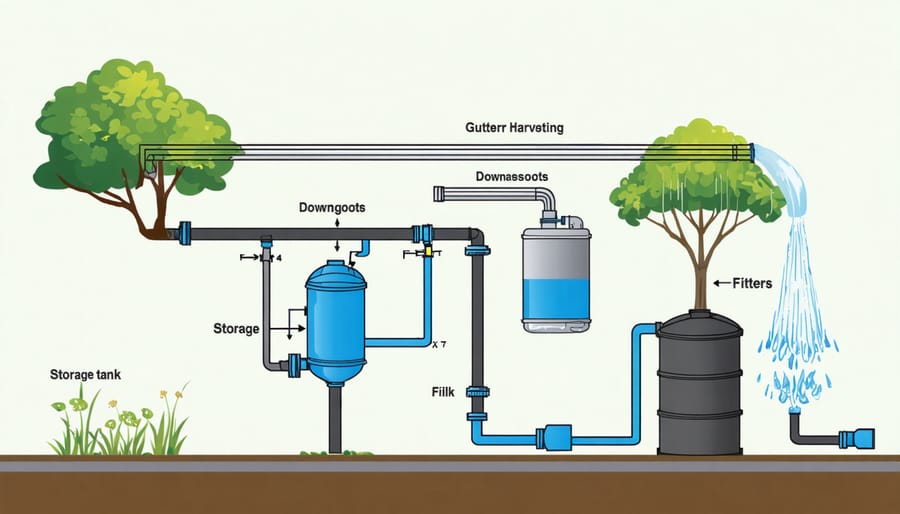
Essential Components for Your Rainwater System
\n\n
 \n
\n\n\n
Collection Materials
\n\nTo effectively collect rainwater from your shed’s roof, you’ll need a well-planned system of gutters and downspouts, similar to those used with other sustainable building materials. Start with durable vinyl or aluminum gutters, which are both cost-effective and easy to install. You’ll typically need enough gutter length to cover the entire lower edge of your shed’s roof, plus corner pieces and end caps.\n\nFor downspouts, choose materials that match your gutters and calculate the number needed based on your shed’s size – generally, one downspout per 20 feet of gutter is recommended. Don’t forget to include essential connectors, elbows, and mounting brackets.\n\nA reliable filtration system is crucial for clean water collection. Install leaf guards or gutter screens to prevent large debris from entering the system. Add a first-flush diverter to remove initial roof runoff containing dust and small particles. For additional filtration, include a mesh filter at the tank inlet to catch any remaining debris. Remember to pick rust-resistant screws and brackets for mounting all components.\n\n
Storage Solutions
\n\nWhen it comes to storing your harvested rainwater, you have several practical options that can match both your capacity needs and budget. Food-grade plastic barrels, ranging from 55 to 100 gallons, offer an affordable starting point for most homeowners. These lightweight containers are easy to position and maintain, making them perfect for DIY installations.\n\nFor larger storage needs, consider IBC totes (Intermediate Bulk Containers), which typically hold 275 to 330 gallons. These industrial-grade containers are incredibly durable and often available second-hand at reasonable prices. Just ensure they previously held food-grade materials only.\n\nPolyethylene water tanks are another excellent choice, available in sizes from 300 to 5000 gallons. These purpose-built containers are UV-resistant and designed specifically for water storage. While they’re more expensive initially, their longevity makes them a worthwhile investment.\n\nFor a more aesthetic approach, decorative rain barrels designed to complement your home’s exterior are available in various styles and materials, including terra cotta and wood-like finishes. Remember to choose containers with proper screening to prevent debris and mosquitoes, and always opt for opaque materials to prevent algae growth.\n\n\n
Setting Up Your Collection System
\n\n
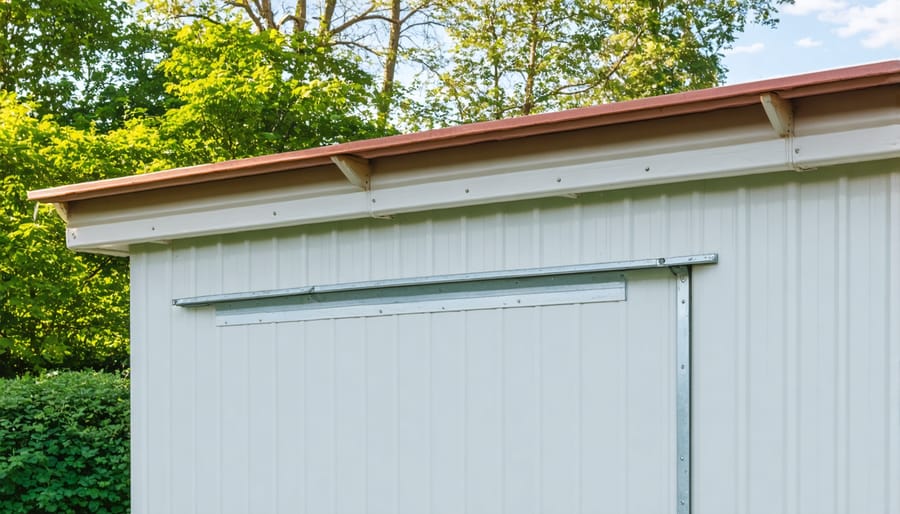
Gutter Installation
\n\nProper gutter installation is crucial for efficient rainwater collection from your shed’s roof. Start by measuring the length of your shed’s roofline and purchase gutters that extend slightly beyond each end. You’ll want to install mounting brackets every 24 inches along the fascia board, ensuring they’re securely fastened with rust-resistant screws.\n\nThe key to effective water collection is maintaining the correct slope. Aim for a drop of about 1/4 inch for every 10 feet of gutter length. Use a level and string line to mark your slope before installing the brackets. This gentle decline will ensure water flows smoothly toward your downspout without pooling or overflowing.\n\nWhen connecting gutter sections, apply a thin bead of gutter sealant to prevent leaks, and secure the joints with rivets or screws. Install end caps at the termination points and place your downspout outlet at the lowest point of the slope. Make sure to position the downspout where it naturally directs water toward your collection barrel or tank.\n\nFor added efficiency, consider installing gutter guards to prevent leaves and debris from clogging your system. While optional, these guards can significantly reduce maintenance needs and ensure consistent water flow. Remember to test your gutter system with a garden hose before connecting it to your storage container to verify proper water flow and identify any potential leaks.\n\n
 \n
\n\n\n
Downspout Setup
\n\nSetting up your downspouts correctly is crucial for efficient rainwater collection. Start by measuring the distance from your shed’s gutters to your storage tank location. You’ll want to create a gentle slope of about 1/4 inch per foot to ensure proper water flow.\n\nChoose downspouts that match your gutter size, typically 2×3 or 3×4 inches. Installing a leaf screen or gutter guard at the top of each downspout prevents debris from clogging the system. Secure the downspouts to your shed’s wall using mounting brackets every 4-6 feet for stability.\n\nFor optimal collection, direct the downspout into a first-flush diverter – this nifty device redirects the initial rainfall that often contains dust and debris away from your storage tank. Connect the diverter to your tank using food-grade PVC piping, ensuring all joints are properly sealed with waterproof silicone.\n\nPro tip: Install a flexible coupling near the bottom of your downspout to absorb any movement and prevent stress on the connections. Consider adding a removable section in your downspout setup for easy maintenance and cleaning.\n\nRemember to position the final outflow point slightly above your tank’s inlet to prevent backflow. If you live in a cold climate, plan for a winter bypass system to redirect water away from your tank during freezing temperatures.\n\n\n
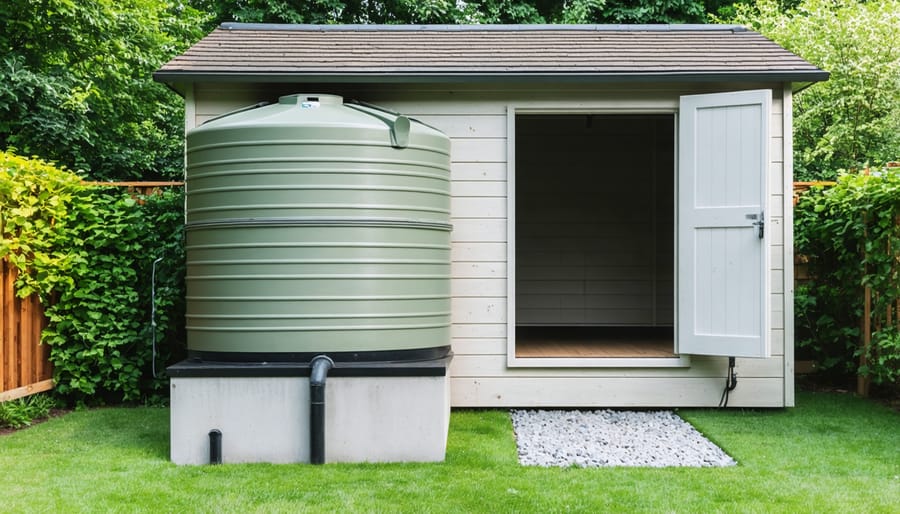
Storage Tank Installation
\n\n
 \n
\n\n\n
Creating a Stable Foundation
\n\nCreating a stable foundation for your rainwater tank is crucial for long-term success and safety. Start by choosing a level area near your downspout that can support the weight of a full tank. Remember, water weighs about 8.3 pounds per gallon, so your foundation needs to be robust.\n\nClear the chosen area of vegetation, rocks, and debris. Using a shovel, dig down about 4-6 inches, making sure the area extends at least 6 inches beyond your tank’s footprint on all sides. Use a level to check that the ground is perfectly flat, adjusting as needed.\n\nFill the excavated area with a 2-inch layer of crushed gravel or stone, tamping it down firmly with a plate compactor or hand tamper. Add a 2-inch layer of sand on top, leveling it carefully. For extra stability, consider placing a concrete pad or solid paver stones on top of the sand layer.\n\nTest the foundation’s levelness by placing a long level across different sections. Any slight tilt could cause your tank to become unstable when full. Take time to make adjustments now – it’s much harder to fix foundation issues once your system is installed.\n\n
Tank Connection Tips
\n\nConnecting your tank properly is crucial for an efficient rainwater harvesting system. Start by installing a first-flush diverter at the tank inlet to prevent debris and contaminants from entering your storage. Position the inlet screen filter above the tank’s maximum water level to ensure proper overflow protection.\n\nWhen connecting multiple tanks, use linking pipes at the same height to maintain equal water distribution. Install flexible coupling joints between the tank and connecting pipes to accommodate any minor ground movement or settling. This prevents stress on the connections and potential leaks.\n\nFor the outlet, place the tap or connection point at least 4 inches above the tank’s base to allow space for sediment collection. Install a floating outlet to draw water from just below the surface, where it’s cleanest. Don’t forget to include an overflow pipe sized larger than your inlet pipe to handle excess water during heavy rainfall.\n\nConsider adding a sight gauge to monitor water levels easily, and ensure all connections are properly sealed with appropriate plumbing tape or sealant to prevent leaks.\n\n\n
Maintenance and Usage Tips
\n\n
Seasonal Care
\n\nYour rainwater harvesting system needs different care throughout the year to maintain its efficiency and longevity. During spring, clean your gutters and downspouts of accumulated leaves and debris from winter. Check all connections and seals, and give your storage tanks a thorough inspection for any damage that might have occurred during freezing temperatures.\n\nSummer maintenance focuses on managing algae growth, which thrives in warm conditions. Keep your tanks shaded where possible and consider adding non-toxic algae inhibitors if needed. Monitor water levels and usage patterns to optimize your collection system during these peak months.\n\nAs autumn approaches, install gutter guards to prevent falling leaves from clogging your system. Regular cleaning becomes especially important during this season. Check your first-flush diverter and ensure it’s working correctly to prevent the initial, dirty runoff from entering your storage tanks.\n\nWinter requires special attention to prevent freeze damage. Drain exposed pipes and add insulation where necessary. If you live in an area with severe winters, consider partially draining storage tanks to allow for ice expansion. Keep snow cleared from your gutters to prevent ice dams from forming.\n\nThroughout all seasons, regularly inspect filters, clean screens, and check for any leaks or damage. A well-maintained system will provide reliable water supply year-round while extending the life of your investment.\n\n
Smart Usage Guidelines
\n\nMake the most of your harvested rainwater by implementing smart usage strategies that help you save money with sustainable practices. Start by prioritizing your water usage based on need – garden irrigation should take precedence during dry spells, while tasks like tool cleaning can use stored water during wetter periods.\n\nInstall a first-flush diverter to ensure only the cleanest rainwater enters your storage system. The initial rainfall typically contains more debris and contaminants, so diverting it helps maintain better water quality. Use filtered water for sensitive plants and unfiltered water for hardier vegetation.\n\nConsider installing a simple drip irrigation system connected to your storage tank. This ensures efficient water distribution and prevents wastage through evaporation. During winter, keep your system running to prevent stagnation – use the water for indoor plants or cold-weather vegetables in your greenhouse.\n\nMonitor your water levels regularly and adjust usage based on weather forecasts. During extended dry periods, implement conservation measures like mulching garden beds to reduce evaporation and watering during early morning or evening hours. Keep track of your water consumption to better understand your needs and optimize your storage capacity for future seasons.\n\nRemember to regularly clean your collection surfaces and gutters to maximize the quality and quantity of harvested water. This simple maintenance routine will ensure your system remains efficient and sustainable throughout the year.\n\n\nCreating your own rainwater harvesting system is more than just a weekend DIY project – it’s a smart investment in sustainability and self-sufficiency. By implementing this system alongside other energy-efficient shed upgrades, you’re taking a significant step toward reducing your environmental impact while saving money on your water bills.\n\nThe benefits are clear: you’ll have a reliable source of free water for your garden, reduce stormwater runoff, and contribute to water conservation efforts in your community. Plus, the satisfaction of building and maintaining your own system is truly rewarding.\n\nRemember, starting small is perfectly fine. You can always expand your system as you become more comfortable with its operation and maintenance. The initial investment in materials will pay for itself through reduced water bills and the peace of mind that comes with having your own water supply during dry spells.\n\nDon’t let the scope of the project intimidate you. With the right planning, materials, and attention to detail, you can create a safe and efficient rainwater harvesting system that will serve your needs for years to come. So why wait? Gather your materials, follow the installation steps we’ve outlined, and join the growing community of homeowners who are taking control of their water resources through sustainable harvesting methods.