
Build a Tool Shed That Keeps Your Equipment Like New
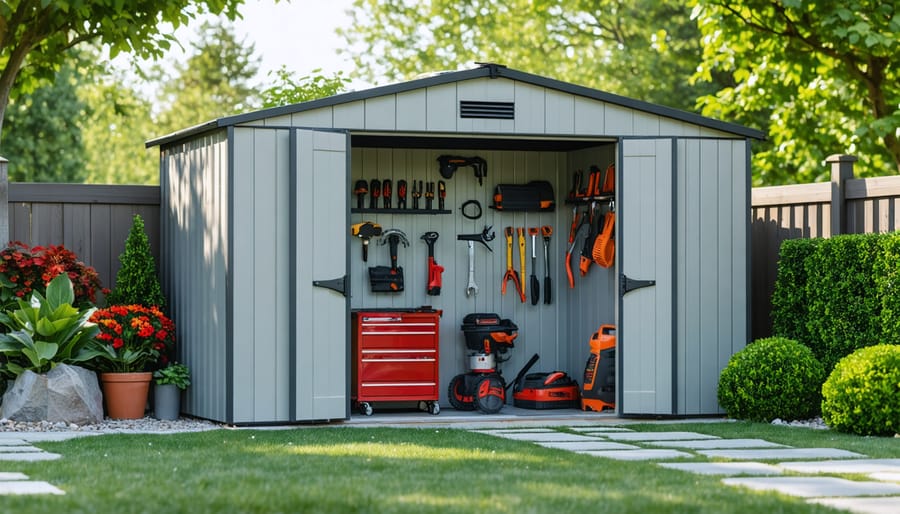
Building a tool shed transforms your backyard workspace while helping protect tools from rusting and weather damage. Start by selecting a level location with good drainage, at least 2 feet away from property lines and existing structures. Plan your shed’s dimensions based on your largest tools plus 30% extra space for future storage needs. Choose pressure-treated lumber for the base frame and weather-resistant materials like cedar or metal siding to ensure decades of protection against moisture and pests. A properly built tool shed isn’t just about storage – it’s an investment in extending the life of your valuable tools while creating an organized, accessible workspace that makes every DIY project more efficient. With basic carpentry skills and a weekend’s worth of work, you can construct a durable shed that keeps your tools organized, protected, and ready for action.\n\n\n
Planning Your Tool-Preserving Shed
\n\n
Location and Orientation
\n\nChoosing the right location for your tool shed is crucial for both protection and convenience. Start by selecting a spot that’s easily accessible from your house and workspace, ideally within clear view but not dominating your yard’s appearance. The shed should be positioned on level ground, slightly elevated if possible, to prevent water from pooling around the foundation.\n\nConsider the path of the sun throughout the day when orienting your shed. Position the door to face east or south to maximize natural light during peak working hours. This orientation also helps prevent excessive heat buildup during summer afternoons. Avoid placing the shed under large trees where falling branches could cause damage and decomposing leaves might promote moisture problems.\n\nFor optimal protection from the elements, position your shed so that the shorter side faces the direction of prevailing winds. This reduces wind resistance and helps prevent weather-related wear and tear. Leave at least three feet of clearance around all sides for maintenance access and proper airflow, which helps prevent moisture buildup and extends the life of both your shed and tools.\n\nFinally, check local building codes and HOA regulations before finalizing your shed’s location, as there may be specific setback requirements from property lines and other structures.\n\n
Size and Layout Planning
\n\nBefore grabbing your hammer and nails, careful planning of your tool shed’s size and layout is essential for creating an organized, accessible space. Start by taking inventory of your current tools and equipment, then add about 30% extra space for future additions. A standard 8×10 feet shed works well for most homeowners, providing enough room for basic yard tools and equipment while remaining a manageable size for most properties.\n\nWhen planning the interior layout, consider creating distinct zones: frequently used tools near the entrance, power tools along one wall with proper electrical access, and seasonal items toward the back. Include wall space for pegboards and shelving units, leaving adequate floor space for larger equipment like lawn mowers or wheelbarrows.\n\nHeight is equally important – aim for walls at least 7 feet tall to accommodate long-handled tools and install overhead storage for rarely-used items. Remember to factor in workspace; a 2×4 feet workbench can be invaluable for maintenance tasks and projects. Plan your door width carefully too – a minimum of 4 feet ensures easy movement of bulky equipment and reduces the risk of damaging tools during transport.\n\n\n
Foundation and Moisture Control
\n\n
Proper Foundation Types
\n\nA solid foundation is crucial for protecting your tools and ensuring your shed’s longevity. The three most reliable options are concrete slab, gravel pad, and concrete pier foundations. A concrete slab provides the most robust protection against moisture and pests, creating an impenetrable barrier between your tools and the ground. While it’s the most expensive option, it offers unmatched durability and requires minimal maintenance.\n\nFor budget-conscious DIYers, a gravel pad foundation offers excellent drainage and prevents tools from exposure to ground moisture. Layer 4-6 inches of crushed stone over landscape fabric, and you’ll have a sturdy base that keeps your tools dry. This option is particularly suitable for smaller sheds and allows for easy leveling adjustments.\n\nConcrete pier foundations elevate your shed off the ground, providing excellent airflow underneath while protecting tools from ground moisture. This system uses concrete footings placed at strategic points, supporting your shed’s frame. It’s an excellent middle-ground option, combining the durability of concrete with better ventilation than a slab.\n\nWhichever foundation you choose, ensure it’s level and extends slightly beyond your shed’s footprint. This overhang helps direct water away from your tools and maintains a dry interior.\n\n
 \n
\n\n\n
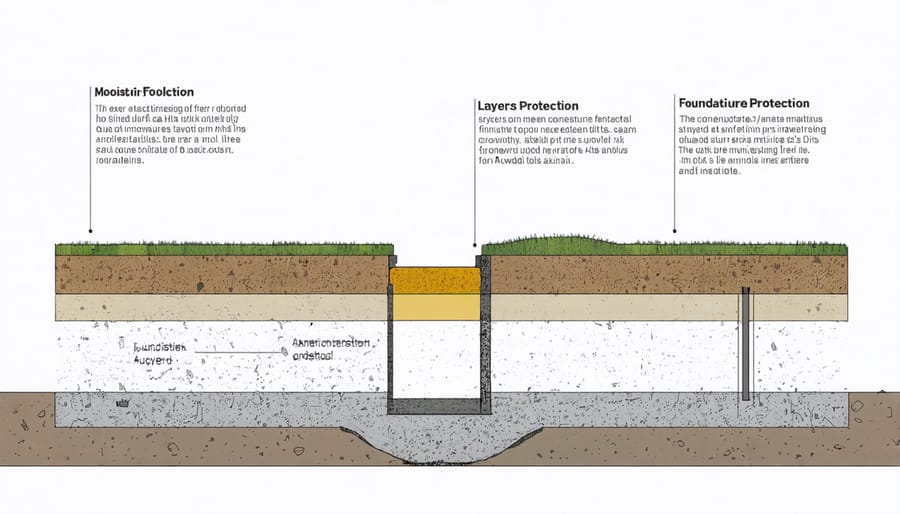
Moisture Barrier Installation
\n\nA proper moisture barrier is crucial for protecting your valuable tools from dampness and rust. Start by clearing the ground and removing any vegetation or debris from your shed’s footprint. Layer 4-6 inches of gravel across the entire area, tamping it down to create a stable base. This helps with drainage and prevents water from pooling underneath your shed.\n\nNext, lay down a heavy-duty 6-mil polyethylene sheet, extending it about 12 inches beyond your shed’s perimeter. Overlap any seams by at least 6 inches and secure the edges with landscape staples. For extra protection, consider adding a second layer of moisture barrier, running it perpendicular to the first.\n\nInstall pressure-treated wooden sleepers or skids on top of the barrier, spacing them 16 inches apart. These create an air gap between your shed floor and the ground, promoting ventilation and further reducing moisture buildup. Make sure the sleepers are level before proceeding with floor construction.\n\nPro tip: In areas with severe moisture issues, consider adding a perimeter drain around your shed. This simple addition can significantly reduce ground moisture and extend the life of both your shed and tools.\n\n\n
 \n
\n\n\n
Ventilation and Climate Control
\n\n
Air Flow Solutions
\n\nProper airflow is crucial for maintaining optimal storage conditions and protecting your valuable tools from rust and mold. Install two types of vents in your tool shed: roof vents near the peak and wall vents at the base. This creates a natural chimney effect, allowing warm, moist air to escape through the top while drawing in fresh air from below.\n\nFor wall vents, place at least two 8×16-inch louvered vents on opposite walls near ground level. Add a pair of 12-inch turbine vents or ridge vents along the roof peak to maximize air circulation. If your area experiences high humidity, consider installing a solar-powered vent fan for additional airflow during still days.\n\nDon’t forget to include small mesh screens behind all vents to keep out insects and debris. Position your storage shelves and tool racks slightly away from the walls to promote air movement around your equipment. This simple step can significantly extend the life of your tools by preventing moisture buildup and reducing the risk of rust formation.\n\nFor best results, check your vents seasonally to ensure they’re clear of cobwebs and debris, allowing continuous airflow throughout the year.\n\n
Temperature Management
\n\nProper temperature management in your tool shed is crucial for protecting your valuable tools from rust and damage. Start by installing proper insulation in the walls and ceiling using rigid foam boards or fiberglass batting. This creates a barrier against extreme temperatures and helps prevent condensation, which can be particularly damaging to metal tools.\n\nConsider adding a small vent near the roof peak and lower wall vents to create natural airflow. This cross-ventilation system helps regulate humidity levels and prevents moisture buildup. For extra protection, install a solar-powered vent fan to boost air circulation on particularly humid days.\n\nTo maintain consistent temperatures, apply weather stripping around doors and windows, and seal any gaps with caulk. Adding a vapor barrier beneath the insulation provides an extra layer of moisture protection. During summer months, consider installing a small window unit or portable fan to keep air moving and prevent heat buildup.\n\nFor winter protection, a small electric heater with a thermostat can maintain temperatures above freezing, protecting your tools and any temperature-sensitive materials like adhesives or paint.\n\n\n
Wall and Roof Construction
\n\n
Weather-Resistant Materials
\n\nWhen building a tool shed that stands the test of time, choosing the right weather-resistant materials is crucial. Start with pressure-treated lumber for the foundation and floor joists, as it effectively resists moisture, rot, and insect damage. For the shed’s frame, opt for cedar or redwood if your budget allows – these naturally resistant woods offer excellent durability without requiring extensive treatment.\n\nFor exterior walls, consider fiber cement siding or vinyl – both provide outstanding protection against rain, snow, and UV rays while requiring minimal maintenance. Metal siding is another excellent choice, particularly corrugated aluminum or steel panels, which offer superior moisture resistance and longevity.\n\nThe roof deserves special attention since it’s your first line of defense against the elements. Architectural shingles offer enhanced durability compared to standard asphalt shingles, typically lasting 25-30 years. Metal roofing, though pricier initially, can last 50+ years and provides excellent protection against heavy rain and snow loads.\n\nDon’t forget about hardware and fasteners – choose stainless steel or hot-dipped galvanized options to prevent rust and corrosion. For added protection, install a moisture barrier beneath your siding and use quality caulk around all joints and seams. A proper vapor barrier under the flooring will prevent ground moisture from seeping upward, protecting both your shed’s structure and the tools stored inside.\n\nFor doors and windows, select weather-stripped, pre-hung units designed specifically for outdoor use. This extra attention to weatherproofing details will ensure your tool shed remains a dry, secure space for years to come.\n\n
Sealing and Waterproofing
\n\nProper sealing and waterproofing are crucial steps that protect your valuable tools from moisture damage and help prevent pest damage. Start by applying a high-quality exterior primer to all wooden surfaces, paying special attention to corners and joints where water tends to collect. Follow this with two coats of exterior paint, ensuring complete coverage of all exposed surfaces.\n\nFor the roof, install a layer of roofing felt beneath your shingles or metal roofing material. Make sure to overlap each piece by at least 2 inches and secure it properly with roofing nails. Don’t forget to add drip edges along the roof’s perimeter to direct water away from the walls.\n\nSeal all gaps and joints with weatherproof caulk, focusing on areas around windows, doors, and where different materials meet. Use silicone-based caulk for maximum durability and flexibility. Install weather stripping around doors and windows to create a tight seal when closed.\n\nFor floor protection, apply a waterproof sealant to concrete floors or treat wooden floors with a water-resistant wood sealer. Consider adding rubber gaskets under door thresholds to prevent water from seeping in during heavy rain.\n\nFinally, install gutters and downspouts to direct rainwater away from your shed’s foundation. Position downspouts so they empty at least 3 feet away from the structure, preventing water from pooling around the base.\n\n\n
Interior Organization Features
\n\n
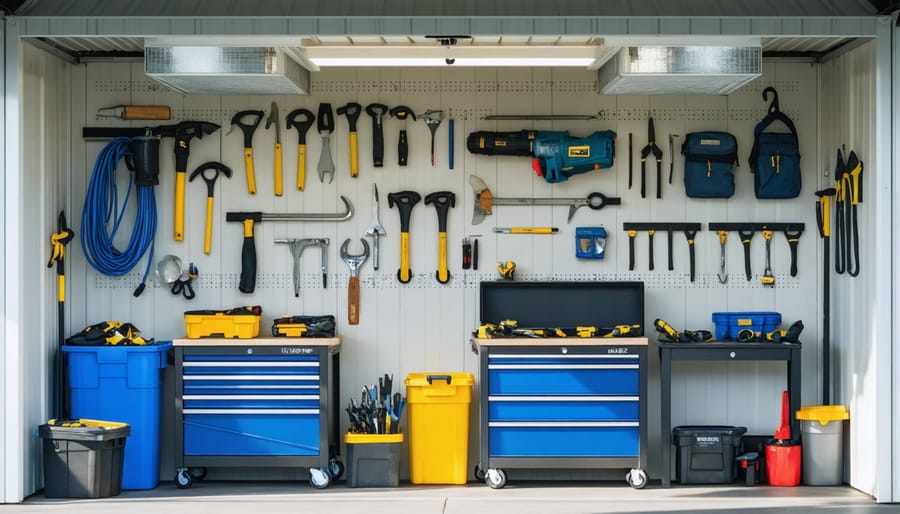
Tool Storage Systems
\n\nTo effectively organize your tool storage, start by installing adjustable wall-mounted systems that maximize vertical space. Position heavy-duty pegboards at eye level for frequently used hand tools, and install magnetic strips for metallic items like chisels and screwdrivers. Below these, mount sturdy shelving units designed to hold plastic bins and toolboxes.\n\nFor power tools, dedicate a corner with custom-built shelving that includes padded surfaces to prevent damage. Install lockable cabinets for expensive equipment and hazardous materials. Utilize the space under your workbench by adding pull-out drawers or rolling tool chests.\n\nDon’t forget overhead storage – install ceiling-mounted racks for long items like lumber and garden tools. Use heavy-duty hooks and brackets rated for the weight of your equipment. Consider adding a tool apron or rotating carousel near your workbench for immediate access to essential items.\n\nLabel everything clearly and group similar tools together. Leave adequate walking space and ensure all storage solutions are securely anchored to wall studs or support beams. This systematic approach not only protects your investments but also makes every project more efficient and enjoyable.\n\n
 \n
\n\n\n
Material Choices for Storage
\n\nWhen it comes to protecting your valuable tools, the right storage surface materials make all the difference. For shelving and workbenches, pressure-treated plywood offers excellent durability and moisture resistance. A 3/4-inch thickness provides the perfect balance between strength and cost-effectiveness, while its smooth surface prevents tools from getting scratched or damaged.\n\nFor wall-mounted storage, consider using pegboard made from hardboard or metal. Hardboard pegboard is budget-friendly and versatile, though metal options offer superior longevity and can handle heavier tools without warping. Line your drawers and cabinets with rubber matting or foam drawer liners to prevent tools from sliding around and getting damaged.\n\nFor frequently accessed tools, magnetic strips mounted on walls or the sides of cabinets work wonderfully. They keep metal tools easily accessible while preventing them from coming into contact with each other. If you’re storing power tools, install dedicated hooks or brackets with rubber coating to protect their housing from scratches.\n\nRemember to avoid untreated wood for any surface that will come in direct contact with tools, as it can absorb moisture and potentially lead to rust. Instead, opt for materials with moisture-resistant coatings or naturally water-resistant properties like cedar or composite materials.\n\n\nBuilding your own tool shed is more than just a weekend project – it’s an investment in the long-term protection and organization of your valuable tools and equipment. By following the steps outlined in this guide, you’ll create a sturdy, weather-resistant structure that serves as a dedicated space for your DIY pursuits. Remember that attention to detail during construction, particularly with foundation preparation and moisture control, will pay dividends in the years to come.\n\nA well-built tool shed not only extends the life of your tools by protecting them from rust and damage but also increases your property’s value and improves your outdoor space’s functionality. The organized storage solutions we’ve discussed will help you maintain an efficient workspace, saving you time and frustration when tackling future projects.\n\nAs your collection of tools grows, you’ll appreciate having a purpose-built structure that keeps everything accessible and protected. Take pride in creating a space that combines practical storage with thoughtful design – your tools (and your back) will thank you for not having to hunt through a cluttered garage or basement anymore. With proper maintenance, your tool shed will continue to serve as a reliable workshop and storage solution for many years to come.
Looking for a storage sheds?
Browse our full range of storage sheds from authorized dealer brands. Free shipping to the continental US.