
Build Rock-Solid Shed Walls That Last (Expert Framing Tips)

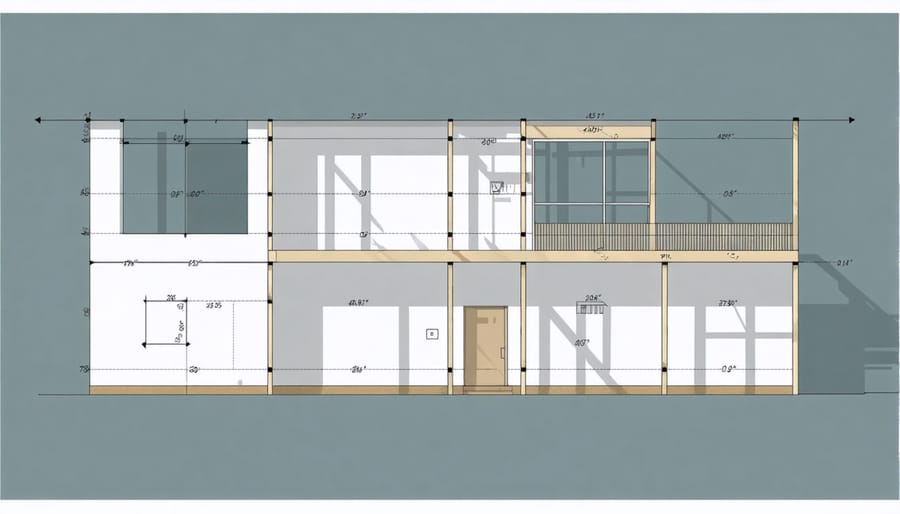
Frame your shed walls correctly the first time by starting with proper foundation preparation and precise measurements. Building sturdy shed walls requires attention to detail and the right techniques, but with proper planning and execution, it’s a manageable DIY project for most homeowners.
Start by calculating your lumber needs based on standard 16-inch stud spacing, accounting for double top plates and pressure-treated bottom plates. This systematic approach prevents material waste and ensures structural integrity. Consider factors like door and window placement early in the planning phase to avoid costly modifications later.
Professional builders know that successful wall framing hinges on three key elements: square corners, level plates, and plumb studs. By following industry-standard framing techniques and building codes, you’ll create a reliable structure that stands the test of time. Let’s break down the essential steps to frame your shed walls with confidence, using methods that guarantee both stability and durability.
Essential Tools and Materials for Shed Wall Framing
Choosing the Right Lumber
Selecting the right lumber for your shed walls is crucial for ensuring long-term durability and structural integrity. For wall framing, pressure-treated 2×4 lumber is typically your best choice, particularly for bottom plates that may come in contact with moisture. When making your weather-resistant lumber selection, look for straight pieces with minimal knots and warping.
Choose lumber stamped with “SPF” (Spruce-Pine-Fir) or “SYP” (Southern Yellow Pine), as these options offer excellent strength and value for framing. Aim for grade #2 or better lumber, which provides the right balance of quality and cost-effectiveness. Avoid boards with large cracks, excessive warping, or water damage.
Before purchasing, inspect each piece by looking down its length to check for twists or bows. A good tip is to purchase about 10% more lumber than your calculations suggest to account for any pieces you might need to discard due to imperfections or mistakes during construction. Store your lumber flat and off the ground until you’re ready to begin framing to prevent warping and moisture damage.
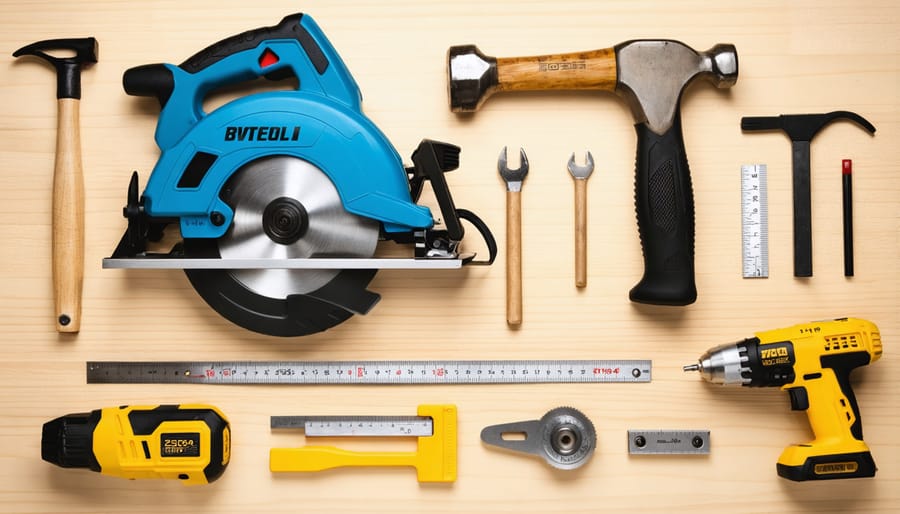
Tools Checklist
Before starting your wall framing project, gather these essential tools to ensure a smooth building process. For safety, you’ll need protective goggles, work gloves, a dust mask, and steel-toed boots. Keep a first aid kit nearby just in case.
For measuring and marking, collect a tape measure, carpenter’s pencil, speed square, and chalk line. These tools help ensure accurate cuts and proper alignment. You’ll also need a level (both 2-foot and 4-foot recommended) and a plumb bob for checking vertical alignment.
Power tools are crucial for efficiency: grab a circular saw for cutting lumber, a power drill with various bits, and an impact driver for faster screw installation. Hand tools should include a sturdy hammer, pry bar, utility knife, and a cat’s paw for removing misplaced nails.
For assembly, you’ll want a framing nailer (pneumatic preferred) with appropriate nails, wood screws in various sizes, and a reliable air compressor if using pneumatic tools. Don’t forget sawhorses for comfortable cutting height and a sturdy ladder for reaching higher spots.
Consider having a tool belt to keep frequently used items within easy reach while working. This organization will save time and reduce frustration during the building process.
Planning Your Shed Walls
Wall Layout Basics
Before you start placing studs, you’ll need to mark your top and bottom plates accurately. Start by laying your plates side by side and marking both simultaneously to ensure perfect alignment. Using a tape measure and pencil, mark the locations for your studs at 16-inch intervals – this is the standard spacing that provides optimal support for wall sheathing.
Make an “X” on the side of each mark where the stud will go, and label corners and any door or window openings. This simple system helps prevent confusion during assembly. Don’t forget to mark locations for doubles at corners and around openings – these provide essential structural support and give you something solid to nail into.
Pro tip: Use a different color marker or symbol for door and window openings to distinguish them from regular stud locations. When marking headers and trimmer studs for openings, add a few inches of clearance above doors and windows to allow for proper installation later.
Remember to account for any electrical boxes or other utilities that might need to be installed in your walls. It’s much easier to plan for these now than to modify the framing later. Once all your marks are complete, double-check your measurements before cutting any lumber – this small step can save you time and materials in the long run.
Door and Window Openings
Properly framing openings for doors and windows is crucial for your shed’s functionality and appearance. Begin by marking the rough opening dimensions on your wall frame, adding an extra 1/2 inch on each side for easier installation and shimming. For doors, measure 3 inches above the finished door height to accommodate the header and threshold.
When framing these openings, install a header beam across the top that’s sturdy enough to support the weight above. Double headers made from 2×6 or 2×8 lumber work well for most shed openings. Below the header, install trimmer studs (jack studs) on both sides that run from the bottom plate to the header, providing vertical support.
For window openings, add a window sill between the trimmer studs and install cripple studs below the sill to the bottom plate. If you’re planning on installing shed windows, ensure your rough opening allows for proper flashing installation later.
Pro tip: Always double-check your measurements before cutting, and remember that it’s better to have a slightly larger opening that you can shim than one that’s too small. Consider using pre-hung doors to simplify the installation process and ensure proper operation.
Step-by-Step Wall Assembly
Building the Bottom Plate
Start by laying out your treated lumber for the bottom plate on a flat surface. Since this component makes direct contact with your foundation, always use pressure-treated 2x4s to prevent moisture damage. Before installation, take time to inspect each piece for warping or defects, selecting the straightest boards for your project.
Measure and cut your treated lumber to match your shed’s floor dimensions, ensuring precise 90-degree angles at the corners. When protecting your bottom plate, apply a water-resistant barrier beneath it for extra moisture protection.
Secure the bottom plate to your foundation using appropriate fasteners – concrete anchors for slab foundations or lag screws for wood foundations. Space anchors every 4 feet and within 6 inches of each end. Remember to pre-drill holes to prevent splitting the wood and use washers with your fasteners for better load distribution.
Double-check that your bottom plate is level across all sides using a 4-foot level. Any discrepancy now will affect your entire wall structure, so take time to make necessary adjustments before moving forward.
Installing Wall Studs
With your wall plates in place, it’s time to install the wall studs. Start by marking stud locations on both the top and bottom plates at 16-inch intervals, using a measuring tape and pencil. Don’t forget to mark the centers to ensure accurate placement. For standard 8-foot walls, you’ll need 2×4 studs cut to 92-5/8 inches, allowing proper spacing for the top and bottom plates.
Begin installation at one corner, ensuring your first stud is perfectly plumb using a level. Secure each stud with two 16d nails through the top and bottom plates into the stud ends. For extra stability, toe-nail the studs by driving nails at an angle through the sides of the studs into the plates.
When installing multiple studs, use a framing square to check that each stud is square with the plates. A common mistake is rushing this process – take your time to ensure each stud is properly aligned. For doorways and windows, install additional studs (known as jack studs) to support headers.
Pro tip: Create a marking jig using a scrap piece of 2×4 with marks at 16 inches. This speeds up the marking process and ensures consistent spacing. Also, check each stud for crown (natural bow) and install them with the crown facing the same direction – typically upward.
Remember to double-check your work as you go. Proper stud installation is crucial for the overall structural integrity of your shed walls and will make later steps, like installing siding and shelving, much easier.
Top Plate Installation
Installing the top plate is a crucial step that ties your wall framing together. Start by laying a single 2×4 across the tops of all wall studs, ensuring it’s flush with the outer edges. Use your level to check that the plate is perfectly straight before securing it with two 16d nails driven through the top plate into each stud below.
For extra stability, add a second top plate (called a double top plate) that overlaps the first. This second plate should break joints with the first plate and overlap at corners and intersections by at least 4 feet. This creates a stronger bond and helps distribute the load more evenly. When installing the second plate, offset the joints from any breaks in the bottom plate by at least two stud spaces.
Remember to mark your stud locations on both top plates – this will make it easier when you’re ready to install your roof trusses or rafters later. For doorways and windows, your top plate should run continuous over the opening to provide additional structural support.
Pro tip: Pre-mark all your nailing points on the top plates before securing them. This ensures accurate placement and speeds up the installation process.
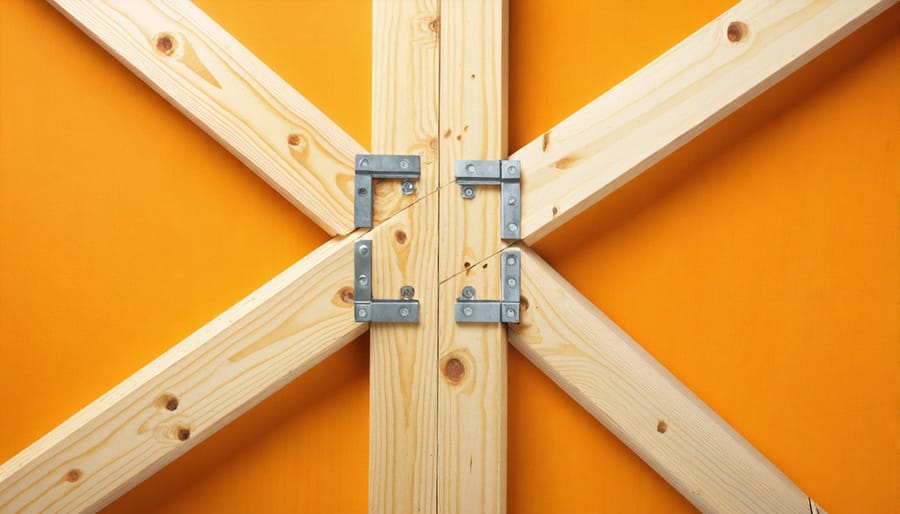
Corner and Intersection Framing
Strong corners and wall intersections are crucial for your shed’s structural integrity. For corners, use a three-stud assembly: two studs placed side by side with a third stud turned perpendicular. This creates a solid nailing surface for both interior and exterior wall materials while preventing cold spots in the corners.
When framing intersecting walls, use a similar approach with a three-stud configuration. Place two studs together at the intersection point, then add a third stud perpendicular to create a strong connection point. Remember to leave a small gap (about 1/16 inch) between the studs to account for natural wood movement and prevent warping.
Pro tip: Pre-assemble your corner and intersection frames on the ground before raising the walls. This makes the process easier and ensures everything fits correctly. Secure all connections with 16d nails, using at least two nails per joint. For extra stability, consider adding metal framing connectors at critical joints.
Always check your corners for plumb (vertical straightness) using a level, and make adjustments before securing everything permanently. This attention to detail will pay off when it’s time to install siding and interior wall materials.
Quality Checks and Common Mistakes
Ensuring your shed walls are properly framed is crucial for long-term stability and durability. Start by checking that all your wall plates are level using a four-foot level – even small discrepancies at this stage can lead to significant problems later. A common mistake is rushing through this initial check, so take your time to get it right.
Double-check that all your studs are exactly 16 inches on center by measuring from the same end each time. Many DIYers make the error of measuring from alternate ends, which can throw off the entire wall alignment. Remember to mark both the top and bottom plates to ensure your studs line up perfectly.
Pay special attention to your corners and door openings. These areas need proper support, and a frequent mistake is not installing enough studs around openings. Make sure your door header is adequately supported with jack studs, and verify that king studs run from floor to top plate without interruption.
When nailing, avoid splitting the wood by keeping nails at least 2 inches from the end of boards. A simple trick is to pre-drill if you’re working close to edges. Also, check that your walls are perfectly plumb (vertical) using a level before securing them permanently. Many beginners skip this crucial step, leading to doors that don’t close properly.
Watch out for these red flags during installation:
– Gaps between studs and plates
– Twisted or warped studs
– Inconsistent stud spacing
– Missing or improperly installed hurricane ties
– Inadequate nailing patterns
Before sheathing the walls, step back and look at your framing from different angles. Any bowing or misalignment will be much harder to fix once the sheathing is installed. Finally, ensure all your walls are properly squared – measure diagonally from corner to corner in both directions. These measurements should be equal within 1/8 inch for a perfectly square frame.
Congratulations on learning the essentials of framing walls for your shed project! By following these steps, you’ve laid the groundwork for a sturdy and reliable structure. Remember to double-check your measurements, ensure all walls are plumb and level, and maintain consistent spacing between studs. Once your walls are framed, you’re ready to move on to installing roof trusses, adding sheathing, and applying your chosen siding material.
Keep your construction area clean and organized throughout the process, and don’t hesitate to seek help when lifting and securing wall sections. It’s also worth taking photos of your framed walls before adding insulation or interior walls, as this documentation can be valuable for future maintenance or modifications.
For the best results, let your lumber acclimate to local conditions before building, use proper safety equipment, and work during favorable weather conditions. With your walls properly framed, you’re well on your way to completing a shed that will serve your storage needs for years to come. Take pride in your work, and remember that attention to detail during the framing stage will pay dividends in the final quality of your shed.