
Keep Your Shed Cool in Summer Without Running Up Energy Bills
**Stop letting scorching summer heat turn your shed into an oven that warps tools, melts plastics, and makes the space completely unusable.** Heat resistant material sheets offer a straightforward solution that can drop interior temperatures by 15-30 degrees, protecting your belongings and creating functional storage year-round.
These specialized insulation barriers work by reflecting radiant heat before it penetrates your shed’s walls and roof—think of them as a shield against the sun’s intensity. Whether you’re dealing with metal sheds that become unbearably hot or wooden structures baking in direct sunlight, the right heat resistant sheet creates a thermal barrier that keeps stored items safe from heat damage.
The market offers several effective options, from budget-friendly reflective foil sheets to premium multi-layer insulation boards, each suited to different shed types and climates. Most homeowners can install these materials in a single weekend using basic tools, making this one of the most cost-effective upgrades for any storage space.
Understanding which material matches your specific situation—considering factors like your shed’s construction, local climate, and what you’re storing—ensures you invest in protection that actually performs, not just promises results.
Why Your Shed Turns Into an Oven (And What That’s Costing You)
Ever wondered why your shed feels like a sauna by mid-morning? It’s all about heat transfer. Metal sheds act like giant heat magnets, absorbing the sun’s rays and radiating that warmth inward. Wood sheds fare slightly better but still trap heat inside, especially when poorly ventilated. Without protection, temperatures can soar 20-30 degrees higher than outside—turning your storage space into a literal oven.
The consequences go far beyond discomfort. Sarah from Portland learned this the hard way when she discovered her gardening supplies melted together one August afternoon. “My plastic seed trays fused into one lumpy mess, and the handles on my tools were too hot to touch,” she recalls. It’s a common story among shed owners who underestimate the power of trapped heat.
The damage adds up quickly. Power tools with plastic components can warp or crack, rendering them useless. Wooden furniture and equipment absorb moisture from temperature fluctuations, leading to swelling and splitting. Paint cans explode, adhesives separate, and anything rubber deteriorates faster. If you’ve stored sporting equipment, camping gear, or seasonal decorations, they’re all at risk.
Beyond damaged belongings, there’s the practical issue of usability. Need to grab something at 2 PM on a summer day? Good luck spending more than two minutes inside without breaking a sweat. Your shed becomes off-limits during the hours you’d actually use it most—afternoons and weekends when you’re tackling projects.
Understanding why insulation matters is the first step toward reclaiming your space and protecting your investment in tools and equipment.
What Makes a Material Sheet ‘Heat Resistant’
When you’re shopping for heat-resistant materials for your shed, you’ll want to understand a few key properties that actually make a difference in keeping the heat out.
**Reflectivity** is your first line of defense. Think of it like wearing a white shirt on a sunny day instead of a black one—materials with reflective surfaces bounce heat away before it can penetrate your shed. Look for sheets with shiny or metallic finishes that send radiant heat back where it came from.
**R-value** measures how well a material resists heat flow. The higher the R-value, the better the insulation. For shed applications, you’ll typically see R-values ranging from R-3 to R-13. A higher number means your stored items stay cooler, though you’ll want to balance performance with your budget and available wall space.
**Thermal barriers** work by trapping air or creating layers that slow heat transfer. Materials with bubbles, foam cores, or multiple layers excel at this. It’s similar to how a thermos keeps your coffee hot—the principle just works in reverse for your shed.
**Radiant heat blocking** specifically targets the sun’s infrared rays, which are responsible for that intense heat buildup on sunny afternoons. The best heat-resistant sheets combine reflective surfaces with insulating cores to tackle both radiant heat and conductive heat transfer.
When shopping, prioritize materials that address multiple heat transfer methods rather than just one—you’ll get better protection for your investment.
Smart Insulation Materials That Actually Work in Sheds
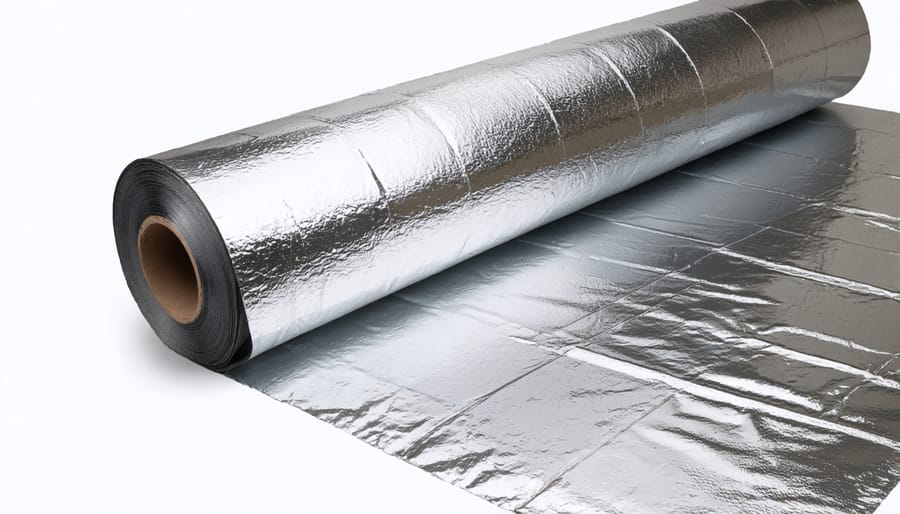
Reflective Foil Insulation Sheets
Reflective foil insulation sheets are popular for shed insulation because they’re incredibly user-friendly and budget-conscious. These aluminum-backed sheets work by reflecting radiant heat away from your shed rather than absorbing it—think of them as tiny mirrors bouncing the sun’s energy back outside. You’ll typically find them in rolls or pre-cut panels, making installation straightforward for weekend DIYers.
For best results, install these sheets with the shiny side facing the heat source. In most sheds, that means the reflective surface should face outward toward the roof or walls. Leave a small air gap between the foil and your shed’s exterior when possible—this creates a thermal break that boosts effectiveness significantly.
Cost-wise, you’re looking at roughly $0.40 to $1.50 per square foot, making them one of the most affordable options available.
Real-world feedback from homeowners shows mixed results. Sarah from Texas shared: “My garden shed stayed noticeably cooler after adding foil insulation to the roof, though I did need to combine it with better ventilation.” The key takeaway? Reflective insulation works well for blocking radiant heat but won’t solve all temperature issues alone—it’s most effective when paired with proper airflow.
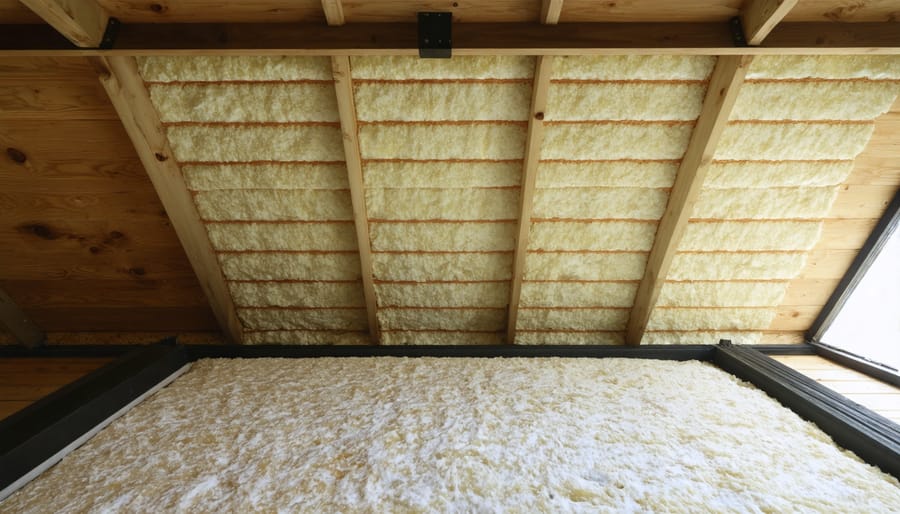
Rigid Foam Board Insulation
Rigid foam boards are popular among DIYers because they’re straightforward to cut and install—think of them as insulation panels you can handle yourself on a weekend project. You’ll encounter three main types, each with distinct advantages.
**Polyisocyanurate (polyiso)** offers the highest R-value per inch (around R-6 to R-6.5), making it ideal when you’re working with limited wall thickness. It’s your best bet for maximizing insulation in tight spaces, though it loses some effectiveness in freezing temperatures.
**Expanded polystyrene (EPS)** provides consistent performance across temperature ranges with an R-value of about R-3.6 to R-4.2 per inch. It’s budget-friendly and breathable, making it forgiving if moisture becomes an issue. Many homeowners choose EPS for shed projects because it balances cost and reliability.
**Extruded polystyrene (XPS)** sits in the middle at R-5 per inch and boasts excellent moisture resistance—perfect if your shed faces damp conditions or you’re insulating near ground level. The distinctive blue or pink boards are easy to recognize at your local hardware store.
Choose polyiso for maximum insulation efficiency, EPS for budget-conscious projects with good ventilation, and XPS when moisture protection is your primary concern.
Ceramic-Coated Insulation Panels
Ceramic-coated insulation panels represent cutting-edge technology in temperature control, using microscopic ceramic particles to reflect heat away from your shed’s interior. These lightweight sheets can handle temperatures exceeding 500°F, making them particularly effective for metal shed insulation where scorching surfaces are a common headache.
What makes ceramic panels stand out? They’re incredibly thin—often just a few millimeters—yet deliver impressive thermal resistance without eating up precious storage space. Installation is straightforward too, with many panels featuring adhesive backing for simple application.
The trade-off? These high-tech sheets typically cost more upfront than traditional options, running between $2-4 per square foot. However, homeowners report noticeable temperature drops of 15-20 degrees, which means better protection for paint, tools, and seasonal items. If your shed bakes in direct sunlight all day, the investment often pays off through extended equipment life and a genuinely usable workspace year-round.
Multi-Layer Bubble Insulation
If you’re looking for a budget-friendly option that won’t require heavy lifting or special tools, multi-layer bubble insulation might be your perfect match. This lightweight material features reflective aluminum layers sandwiched around bubble wrap-style air pockets, creating an effective barrier against radiant heat.
DIY enthusiasts love this material because you can install it with just scissors and a stapler – no protective gear needed! It’s particularly effective in sheds where you’re battling intense sun exposure, as those reflective surfaces bounce heat away before it penetrates your space. Many homeowners report noticeable temperature drops of 10-15 degrees after installation.
The trade-off? It works best against radiant heat rather than conducted heat, so it won’t solve every heat problem. At around $0.40-$0.80 per square foot, it’s one of the most economical solutions available. One satisfied DIYer shared: “I installed it in my garden shed on a Saturday morning, and by afternoon, I could actually work in there without feeling like I was in an oven!”
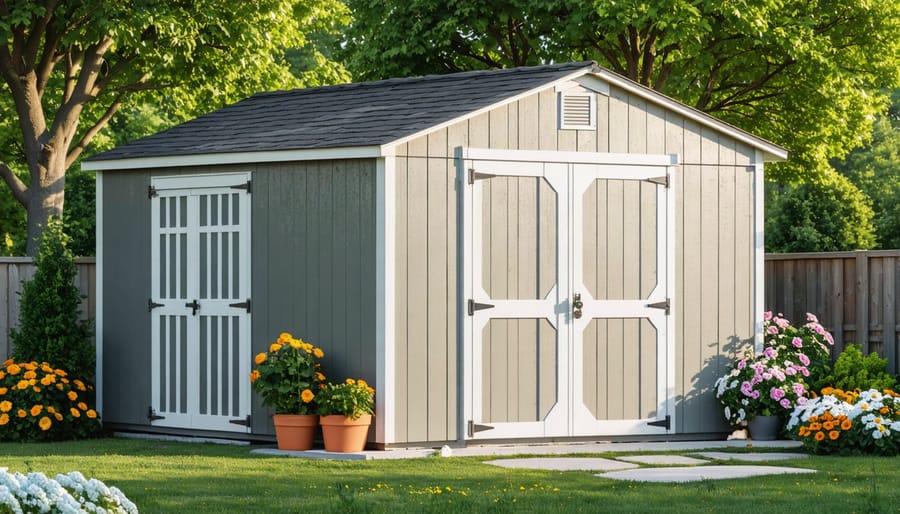
Which Material Works Best for Your Shed Type
For **metal sheds** in hot climates, reflective foil barriers work wonderfully and install quickly with adhesive backing. **Wood sheds** benefit from rigid foam boards that fit snugly between framing—perfect for year-round temperature control and reasonable cost of insulating. **Plastic or resin sheds** present unique challenges; lightweight reflective bubble wrap insulation attaches easily without adding structural stress. Budget-conscious? Fiberglass batts offer solid protection for wood-framed sheds. Storing temperature-sensitive items like paint or electronics? Invest in higher R-value rigid foam regardless of shed type—your belongings will thank you!
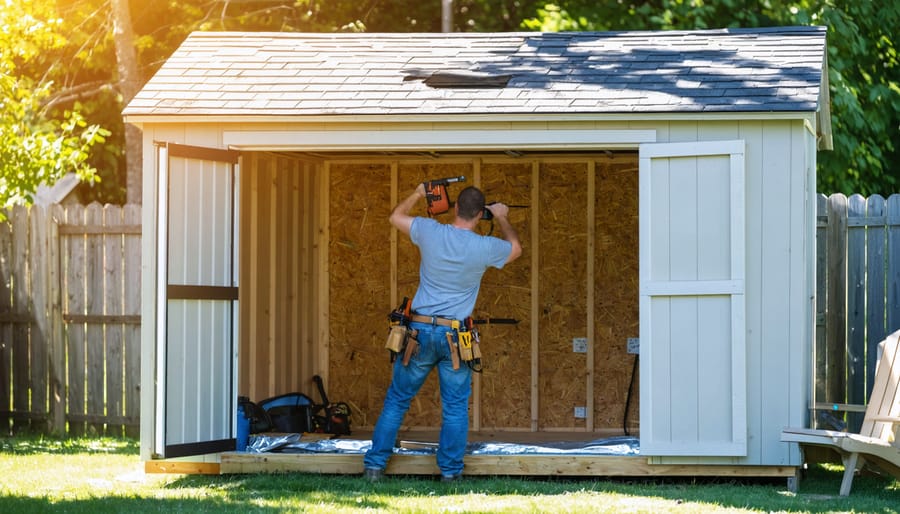
Installing Heat-Resistant Sheets: A Weekend DIY Project
Installing heat-resistant sheets in your shed is surprisingly straightforward and makes for a satisfying weekend project. With the right approach, you’ll have your space protected and more comfortable in no time.
**Gathering Your Tools**
Before you begin, round up these essentials: a sharp utility knife or tin snips (depending on your material), measuring tape, straight edge or T-square, safety gloves and goggles, fasteners appropriate for your material (screws with washers for metal sheets, staples or adhesive for flexible sheets), and foil tape for sealing seams. Having everything on hand saves frustrating mid-project trips to the hardware store.
**Preparation Makes Perfect**
Start by cleaning your installation surface thoroughly. Dust and debris prevent proper adhesion and create air pockets that reduce effectiveness. Measure your walls or ceiling carefully, accounting for corners and obstacles like windows or vents. Remember the old carpenter’s adage: measure twice, cut once!
**Cutting and Fitting**
When cutting heat-resistant sheets, always cut slightly larger than needed—you can trim excess, but you can’t add material back. For rigid sheets, score the surface multiple times with your utility knife rather than trying to cut through in one pass. This prevents cracking and gives cleaner edges. Work on a stable, flat surface to ensure straight cuts.
**Fastening Securely**
Space your fasteners every 12-18 inches for optimal hold. When working with reflective materials, avoid over-tightening screws, which can create punctures that compromise the reflective barrier. For adhesive-backed sheets, start from one corner and work gradually across, smoothing as you go to eliminate air bubbles.
**Sealing the Deal**
The most common mistake? Ignoring gaps and seams. Even small openings let heat transfer through. Use aluminum foil tape specifically designed for this purpose—regular duct tape degrades under heat. Pay special attention to corners and edges where sheets meet.
One homeowner, Marcus from Texas, shared: “I thought I could skip taping the seams to save time. Big mistake! Once I went back and sealed everything properly, the temperature difference was remarkable.”
Beyond the Sheets: Maximizing Your Shed’s Temperature Control
Heat resistant sheets work even better when paired with other temperature-control strategies. Think of it like dressing for winter—layering makes all the difference!
Start with proper ventilation solutions. Ridge vents, gable vents, or even strategically placed louvers allow hot air to escape naturally. Without airflow, even the best heat resistant materials can’t work their magic—the hot air has nowhere to go.
Your roof deserves special attention since it takes the brunt of sun exposure. Consider light-colored or reflective roof coatings that bounce heat away before it penetrates inside. Combine this with your interior heat resistant sheets for double protection.
Don’t overlook the little details! Seal gaps around doors with weatherstripping to prevent hot air infiltration. Add shade cloth or awnings over windows to block direct sunlight. Sarah from Texas shared, “I installed solar screens on my shed windows and added ventilation—combined with radiant barrier sheeting, my shed stays 20 degrees cooler now.”
Strategic insulation placement matters too. Focus on areas with maximum sun exposure first, typically the roof and west-facing walls. For best results, create an air gap between your heat resistant sheet and the shed wall—this dead air space provides additional insulation.
The bottom line? Combining multiple approaches delivers the most dramatic temperature reduction, making your shed truly functional year-round.
Real Results: What Homeowners Are Experiencing
Real homeowners are seeing impressive results after installing heat resistant sheets in their sheds. Take Sarah from Arizona, who was frustrated watching her garden supplies warp in the scorching heat. After adding reflective insulation sheets to her metal shed, she measured a 28-degree temperature drop inside. “I can actually step in during the afternoon without feeling like I’m in an oven,” she reports.
In Florida’s humid climate, Mike protected his workshop tools by lining his wooden shed with radiant barrier material. The temperature difference was noticeable within days—his shed now stays 20 degrees cooler, and he’s no longer finding rust on his equipment.
Even in moderate climates, the benefits shine through. Jennifer in North Carolina installed foam-backed reflective sheets in her vinyl shed last spring. “My stored paint cans used to separate and become unusable by summer’s end,” she explains. “This year, everything stayed perfectly preserved.”
These aren’t isolated cases. Homeowners consistently report that their sheds transform from unusable hotboxes into functional spaces where temperature-sensitive items—from holiday decorations to sporting gear—remain in excellent condition throughout the year.
Investing in heat-resistant material sheets for your shed is more than just an upgrade—it’s a smart solution that transforms how you use your space. By installing proper insulation, you’re protecting valuable tools, equipment, and seasonal items from heat damage while creating a comfortable environment you’ll actually want to work in. No more avoiding your shed during summer months or worrying about warped wood, cracked plastics, or ruined paint cans.
The beauty of this project is that it pays dividends year after year. Your shed becomes usable during more months of the year, your stored belongings stay in better condition, and you’ve added functional value to your property. Whether you tackle the installation yourself over a weekend or hire a professional, the investment is worthwhile.
Ready to reclaim your shed space? Start by measuring your shed’s dimensions and identifying your biggest heat challenges. Choose a material that fits your budget and skill level, then take that first step toward a cooler, more protected storage space. Your future self—and your belongings—will thank you for making the change today.