
Keep Your Shed Tools Rust-Free (Simple Methods That Actually Work)
Protect your valuable tools from rust with a three-pronged defense strategy that starts in your storage space. Control humidity levels in your shed or garage by installing a dehumidifier and maintaining proper ventilation – even a basic fan can significantly reduce moisture buildup. Store tools in protective cases or wrap them in oil-treated cloth, creating a barrier against ambient moisture and preventing metal-to-metal contact that accelerates corrosion. Apply a protective coating of machine oil or specialized rust inhibitor to metal surfaces after each use, paying special attention to joints, edges, and areas prone to wear. This simple maintenance routine takes just minutes but can extend your tools’ lifespan by years, preserving both their function and value. Remember: rust prevention costs far less in time and money than replacing damaged tools, making it a smart investment for any DIY enthusiast or homeowner.
Why Tools Rust in Your Shed (And What to Do About It)
The Hidden Moisture Problem
Even in seemingly dry conditions, moisture poses a silent threat to your valuable tools. Humidity and temperature fluctuations throughout the seasons create perfect conditions for rust formation through condensation. When warm air meets cold tool surfaces, tiny water droplets form, initiating the corrosion process. This is particularly problematic during spring and fall when temperature swings are most dramatic.
Regular monitoring your shed environment is crucial, as relative humidity above 60% significantly increases rust risk. Coastal areas face additional challenges due to salt-laden air, while basement storage often struggles with poor ventilation and ground moisture. Understanding these hidden moisture sources is your first step toward effective tool protection.
Common Rust Trigger Points
Tools are particularly vulnerable to rust when exposed to high humidity levels in your shed, especially during seasonal changes. Leaving wet tools after garden work or pressure washing is a common oversight that leads to rust formation. Metal-to-metal contact on crowded shelves can scratch protective coatings, creating entry points for moisture. Areas near windows or doors where rain can splash in pose higher risks, as do uninsulated walls where condensation forms. Tools stored directly on concrete floors are also susceptible, as concrete naturally draws moisture from the ground. Even fingerprints left on metal surfaces can trigger rust spots, as they contain oils and salts that attract moisture. Being aware of these trigger points helps you take targeted preventive measures to protect your valuable tools.
Immediate Steps to Protect Your Tools
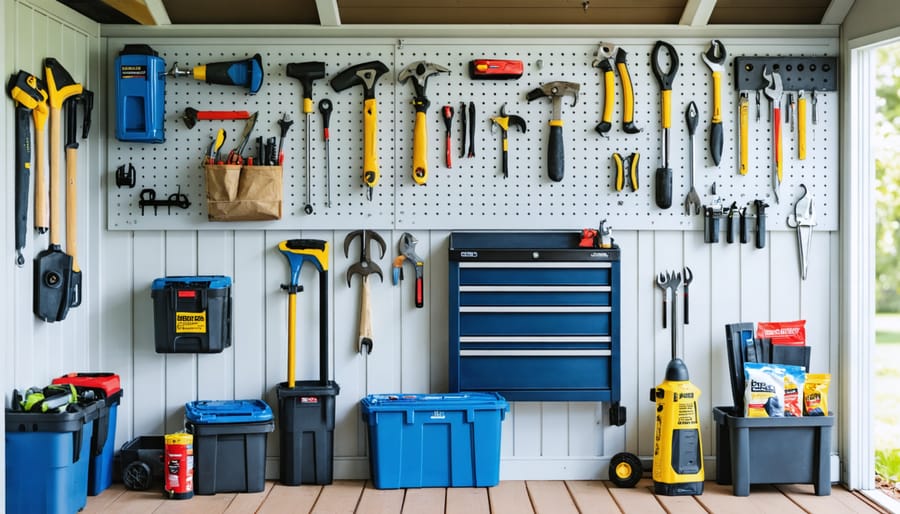
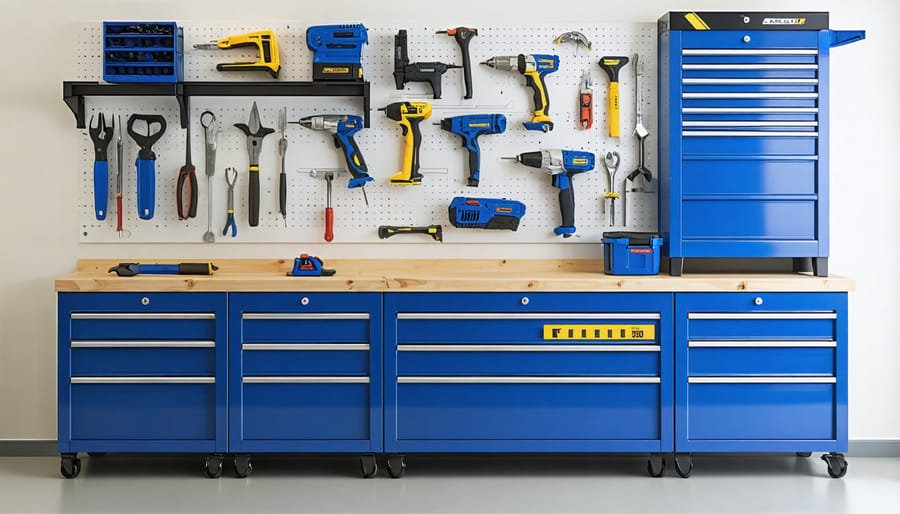
Smart Storage Solutions
Implementing smart tool organization strategies is your first line of defense against rust. Start by investing in wall-mounted pegboards or magnetic strips to keep tools off the ground and away from moisture-prone areas. Consider using silica gel packets in your toolboxes and drawers to absorb excess humidity, and replace them every few months for optimal effectiveness.
Create dedicated zones for frequently used tools versus occasional-use items, ensuring proper airflow between tools. Metal tool cabinets with rubber seals work wonders for protecting valuable items, while plastic bins with tight-fitting lids offer affordable protection for smaller tools. Always store tools in a climate-controlled environment when possible, or use a dehumidifier in your storage area during humid seasons.
Remember to wipe tools clean and dry before storage, and consider applying a light coat of protective oil on metal surfaces. Keep leather tool bags and pouches elevated on shelves rather than directly on concrete floors, as concrete can transfer moisture to your tools.
Moisture Control Methods
Controlling moisture in your shed is crucial for keeping your tools rust-free. Start by installing a quality dehumidifier to maintain optimal humidity levels between 40-50%. Place moisture-absorbing products like silica gel packets or desiccant containers near your tool storage areas for an extra layer of protection.
Proper ventilation plays a vital role in moisture control. Install vents near the roof and base of your shed to create natural airflow. On dry, sunny days, open your shed doors for an hour to allow fresh air circulation. Consider adding a small fan to improve air movement, especially in corners where moisture tends to accumulate.
For additional protection, line your tool storage areas with moisture-barrier mats or install a vapor barrier on your shed walls. Keep tools elevated off the floor using shelves or pegboards, as ground moisture can seep up through concrete floors. During particularly humid seasons, running a small space heater occasionally can help reduce condensation.
Remember to check your shed’s roof and walls regularly for leaks, as even small water intrusions can create persistent moisture problems.
Protective Coatings and Treatments
Several effective protective coatings can shield your tools from rust and corrosion. A coat of paste wax provides excellent protection and leaves a smooth, professional finish. For power tools and metal surfaces, consider applying a rust inhibitor spray, which creates an invisible barrier against moisture. Machine oil and WD-40 are reliable standbys that both protect and rejuvenate tools.
For long-term protection, specially formulated tool oils and sprays containing zinc compounds offer industrial-grade defense. Some DIY enthusiasts swear by boiled linseed oil for wooden handles and metal surfaces alike. Paint or clear lacquer can also serve as effective barriers, particularly on rarely-used tools. Remember to reapply your chosen protective coating regularly, especially after heavy use or exposure to moisture.
Maintenance Routine That Works
Weekly Check-up Steps
Set aside a few minutes each week to perform these simple maintenance tasks – they’ll save you hours of rust removal work later! Start by wiping down your tools with a clean, dry cloth to remove any moisture or debris that may have accumulated. Pay special attention to areas where metal parts meet handles or other components, as these spots tend to trap moisture.
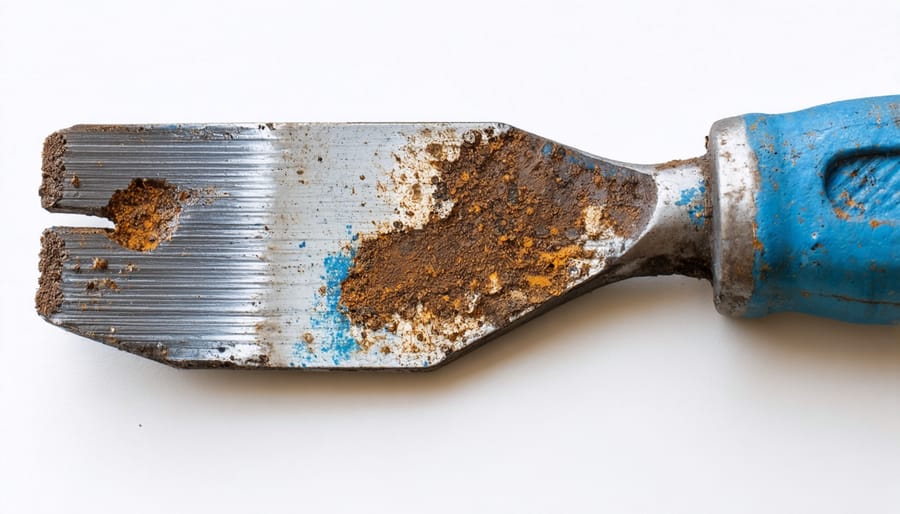
Check for any early signs of rust formation, like reddish-brown spots or slight discoloration. If you spot any, address them immediately with light steel wool or sandpaper before they spread. Apply a thin layer of protective oil to metal surfaces using a cloth or brush – mineral oil, WD-40, or specialized tool oil all work well.
Inspect your storage area for any leaks or dampness that could affect your tools. Consider using silica gel packets or a dehumidifier in your storage space if you notice consistent moisture issues. Finally, ensure all tools are properly arranged and not touching each other, as metal-on-metal contact can encourage rust formation, especially in humid conditions.
Remember to keep your most frequently used tools easily accessible – this encourages regular checking and immediate cleaning after use.
Seasonal Protection Plan
Each season brings unique challenges for tool protection, requiring specific preventive measures. In spring and summer, high humidity levels can accelerate rust formation, so using dehumidifiers and maintaining proper ventilation is crucial. Following shed maintenance best practices during these months helps control moisture levels effectively.
For fall preparation, apply a protective coating or light oil to your tools before the wet season begins. This extra layer of protection helps combat the increased moisture from autumn rains and morning dew. Consider using silica gel packets in your toolbox to absorb excess moisture.
Winter demands the most rigorous protection strategy. Store tools in a climate-controlled environment when possible, and ensure they’re completely dry before storage. Apply a rust inhibitor to metal surfaces and wrap particularly valuable tools in oil-treated cloth or vapor corrosion inhibitor (VCI) paper.
Keep a maintenance calendar to track seasonal tool care routines. Regular inspection and cleaning throughout the year, combined with season-specific protection measures, will significantly extend the life of your tools and maintain their functionality.
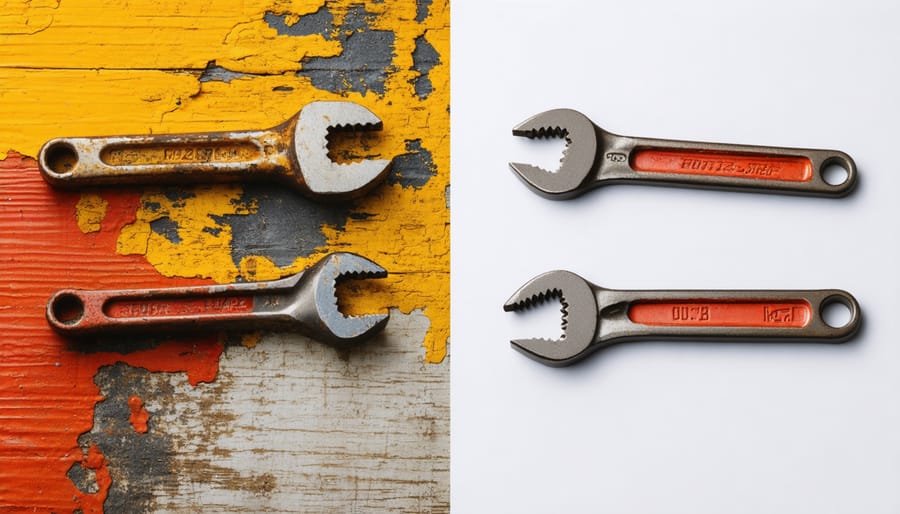
Rescuing Already Rusted Tools
Don’t let rusted tools discourage you – with the right approach, most can be restored to working condition. Start by assessing the level of rust damage. For light surface rust, begin with a thorough cleaning using warm, soapy water to remove dirt and loose debris. Once dry, use steel wool or a wire brush to gently scrub away the rust, working in the direction of the metal’s grain.
For more stubborn rust, consider using a rust converter product, which chemically changes rust into a stable compound that prevents further corrosion. Apply the converter following the manufacturer’s instructions, typically letting it sit for 24 hours before proceeding with restoration.
White vinegar can be an effective natural rust remover – simply soak smaller tools overnight in undiluted vinegar, then scrub away the loosened rust. For larger tools, wrap them in vinegar-soaked rags and cover with plastic wrap to keep the moisture in contact with the rusty areas.
After removing the rust, it’s crucial to protect the restored metal. Thoroughly dry the tools and apply a light coat of mineral oil or paste wax to create a protective barrier. For power tools, consider using a rust inhibitor spray specifically designed for mechanical parts.
Remember to wear protective gloves and work in a well-ventilated area when using chemical rust removers. Once restored, implement proper storage practices to prevent future rust formation, such as keeping tools in a dry environment and using silica gel packets in your toolbox.
Protecting your tools from rust doesn’t have to be complicated or time-consuming. By implementing the prevention methods we’ve discussed, you can significantly extend the life of your valuable tools and maintain their performance. Remember to keep your storage area dry, use silica gel packets or dehumidifiers when needed, and apply protective coatings regularly. Make tool maintenance a part of your routine by wiping down tools after each use and storing them properly. Even small steps, like hanging tools instead of letting them rest on concrete floors, can make a big difference. Your tools are an investment worth protecting, and with these simple preventive measures, you’ll ensure they remain rust-free and ready for your next project. Start implementing these strategies today, and you’ll enjoy reliable, well-maintained tools for years to come.