
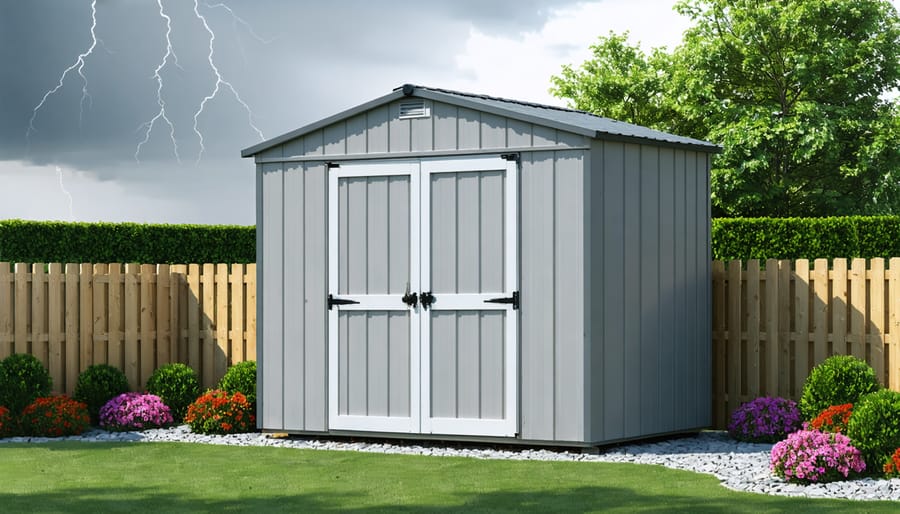
Make Your Shed Truly Windproof (Even in Storm Season)
Transform your vulnerable storage shed into a fortress against fierce winds by implementing proven hurricane-resistant design features. Anchor your structure with concrete footings extending below the frost line, reinforced with galvanized steel brackets that create an unbreakable bond between foundation and frame. Install diagonal bracing across wall sections and roof trusses, distributing wind forces evenly throughout the entire structure. Select impact-resistant materials like fiber cement siding and specialized roofing systems rated for 130+ mph winds.
Professional builders understand that a windproof shelter requires more than just sturdy construction – it demands strategic positioning and smart landscaping choices. Position your shed with its shortest wall facing prevailing winds, reducing the surface area exposed to gusts. Create natural windbreaks using dense evergreen hedges or solid fencing positioned 15-20 feet from the structure. These protective barriers redirect airflow over and around your shed, significantly reducing wind pressure on walls and roof.
Regular maintenance ensures your windproof features remain effective: inspect anchor points quarterly, tighten loose fasteners immediately, and replace damaged siding or roofing before small issues become structural vulnerabilities. This proactive approach transforms an ordinary shed into a lasting investment that stands strong against nature’s fury.
Foundation and Anchoring: Your First Line of Defense
Selecting the Right Foundation Type
A solid foundation is crucial for ensuring your shed stays anchored during high winds. Proper ground preparation sets the stage for a wind-resistant structure that will stand the test of time.
Concrete slab foundations offer superior wind resistance and stability. They provide a solid, level base that helps distribute weight evenly and prevents shifting during strong gusts. While more expensive initially, concrete slabs are particularly suitable for larger sheds in wind-prone areas.
Gravel pad foundations present a cost-effective alternative that still offers good wind resistance. When properly installed with adequate depth and compaction, a gravel foundation allows for drainage while maintaining stability. This option works well for medium-sized sheds in moderately windy conditions.
Block foundations elevate your shed off the ground, which can be beneficial in areas with poor drainage. When properly anchored, concrete blocks provide excellent wind resistance. However, it’s essential to ensure each block is level and securely placed to prevent any wobbling or shifting.
For smaller sheds, post foundations can work effectively when installed correctly. These should be set deep enough (typically 2-3 feet) and secured with concrete to withstand strong winds. Remember to use pressure-treated lumber for any wood components that contact the ground.
Whatever foundation type you choose, always consider your local climate, soil conditions, and building codes before making a final decision.

Professional-Grade Anchoring Systems
A robust anchoring system is the backbone of any windproof shelter, and choosing the right method can make all the difference in keeping your structure secure. Ground anchors, which extend deep into the soil, provide exceptional stability for most installations. The most effective setup typically includes four-point anchoring at minimum, with additional points recommended for larger structures.
Auger-style anchors, which look like giant screws, offer superior hold in most soil types. These anchors work by creating a strong mechanical bond with the surrounding earth, making them particularly effective against uplift forces. For concrete foundations, expanding wedge anchors or epoxy anchors provide industrial-strength security when properly installed.
Mobile home-style anchors with straps offer excellent versatility and can be adjusted as needed. These systems work well with both permanent and temporary structures, allowing for some natural movement while maintaining overall stability. For areas with sandy or loose soil, cross-bracing between anchor points adds an extra layer of security.
Remember to check your local building codes, as some areas require specific anchoring methods based on wind zones. It’s also worth considering installing anchor points slightly beyond your structure’s footprint – this wider base creates a more stable foundation. Regular inspection of your anchoring system, especially after severe weather events, helps ensure continued protection against strong winds.
Structural Reinforcement Techniques
Frame Bracing Strategies
Proper frame bracing is essential for creating a wind-resistant shelter that stands strong against harsh weather. Start with diagonal braces at each corner, running from the top plate to the bottom plate at a 45-degree angle. These corner braces distribute wind forces evenly throughout the structure and prevent racking.
Metal strapping offers excellent reinforcement for wooden frames. Install hurricane ties or galvanized steel straps at all major joints, particularly where rafters meet wall plates. For added stability, use metal T-braces at wall intersections and cross braces between roof trusses.
When working with wooden braces, opt for pressure-treated lumber that resists moisture and decay. Cut braces to fit snugly, and secure them with appropriate fasteners like galvanized nails or structural screws. For larger shelters, consider installing horizontal blocking between wall studs at mid-height to prevent warping and twisting.
Cable bracing systems provide a modern alternative to traditional wooden braces. These high-tension cables can be adjusted over time to maintain optimal tension and support. They’re particularly effective in areas with frequent strong winds, as they allow slight flexibility while maintaining structural integrity.
Remember to double-check all connections and ensure braces are properly anchored to both top and bottom plates. In high-wind areas, consider adding extra diagonal braces in the middle of longer walls. For metal-framed shelters, use appropriate cross-bracing specific to the frame material and follow manufacturer guidelines for optimal placement and installation.
By implementing these bracing strategies, you’ll create a robust structure capable of withstanding significant wind loads while maintaining its shape and stability over time.

Wall and Roof Support Systems
Strong walls and a well-supported roof are essential for creating a windproof shelter that stands the test of time. Start by installing sturdy wall studs at 16-inch intervals, using pressure-treated lumber for enhanced durability. Double up on corner studs to create solid angles that resist twisting forces during high winds.
For maximum stability, integrate diagonal bracing between wall studs. These braces, typically installed at 45-degree angles, prevent your shelter from racking under wind pressure. Metal hurricane ties are invaluable for securing wall frames to both the foundation and roof structure, creating a continuous load path that distributes wind forces evenly throughout the building.
When it comes to roof support, trusses are your best friend. Space them 24 inches apart and secure each one with hurricane clips on both ends. Consider installing a horizontal collar tie between opposite rafters to prevent the roof from spreading under wind pressure. For added strength, use plywood or oriented strand board (OSB) sheathing on both walls and roof, ensuring each panel is properly nailed at 6-inch intervals along the edges and 12-inch intervals in the field.
Don’t forget about proper ventilation – install soffit vents and ridge vents to regulate air pressure differences during high winds. This helps prevent roof lift and reduces strain on your support system. For areas prone to extreme weather, consider adding extra roof straps or cables that anchor the roof structure directly to the foundation, providing additional protection against uplift forces.
Remember, the key to effective wind resistance lies in creating a unified structure where each component works together to distribute and resist wind loads.
Weather Sealing and Protection

Gap and Crack Prevention
A well-sealed shelter is your best defense against persistent winds. Start by performing a thorough inspection of your structure during daylight hours. Look for visible gaps around windows, doors, and where walls meet the roof. These are common areas where wind can find its way in and potentially compromise your shelter’s integrity.
For a professional assessment, try the flashlight test: have someone shine a light around potential problem areas from the inside while you observe from outside in darkness. Any visible light indicates a gap that needs attention. Another effective weatherproofing techniques is to use an incense stick on a windy day – the smoke will clearly show air movement and identify drafty spots.
Once you’ve identified gaps, address them with appropriate materials. Use weather stripping around doors and windows, paying special attention to the bottom of doors where gaps are common. High-quality silicone caulk works well for smaller cracks, while expanding foam is perfect for larger openings. Don’t forget to check and seal any utility entry points, such as where electrical cables or pipes enter the structure.
For optimal protection, install draft excluders at the bottom of doors and use rubber gaskets around windows. Remember to recheck these seals seasonally, as weather conditions can cause materials to contract or expand, potentially creating new entry points for wind.
Door and Window Security
Securing doors and windows is crucial for maintaining a windproof shelter. Start by installing heavy-duty hinges and latches on all doors, ensuring they’re rated for high-wind conditions. A robust door closer can prevent sudden gusts from yanking the door open, while weatherstripping around the frame creates an effective seal against wind infiltration.
For windows, consider installing storm shutters or impact-resistant panels that can be quickly deployed when severe weather approaches. Window locks should be installed on all sides, not just the bottom, to prevent rattling and potential breakage during high winds. Clear polycarbonate panels offer excellent protection while maintaining natural light when permanent solutions are preferred.
Don’t overlook the importance of proper maintenance. Regularly inspect door hinges, latches, and window seals for signs of wear or damage. Tighten any loose screws and replace weatherstripping that’s become brittle or compressed. Keep door tracks clean and lubricated to ensure smooth operation during emergencies.
A smart addition to any door system is a wind chain or door restraint, which prevents the door from swinging too wide in strong gusts. For sliding doors, install wind bars or security poles in the tracks when severe weather is expected. Remember to check that all fasteners are rust-resistant and appropriate for your climate conditions.
Maintenance Tips for Long-Term Wind Protection
Regular maintenance is key to ensuring your windproof shelter remains effective throughout the seasons. Start by conducting monthly visual inspections of your shelter’s exterior, paying close attention to any loose fasteners, worn weatherstripping, or signs of structural wear. These quick checks can prevent minor issues from becoming major problems during severe weather events.
Consider installing weather monitoring systems to track local conditions and receive alerts when maintenance might be needed. This proactive approach helps you stay ahead of potential issues before storms arrive.
Maintain a seasonal maintenance schedule that includes:
Spring: Clean gutters and drainage systems, check for winter damage, and ensure ventilation systems are working properly.
Summer: Inspect and repair any damaged sealants around windows and doors, tighten any loose hardware, and check anchor points.
Fall: Clear debris from the shelter’s surroundings, reinforce weatherstripping, and ensure roof materials are secure.
Winter: Remove snow accumulation from the roof, check for ice dam formation, and monitor for signs of stress on support structures.
Keep trees and branches trimmed away from your shelter, maintaining at least a 10-foot clearance. This reduces the risk of impact damage during high winds and prevents debris from compromising your shelter’s integrity.
Remember to regularly lubricate door hinges and tracks to prevent binding, which can compromise the shelter’s seal during windy conditions. Replace any worn weatherstripping immediately to maintain the structure’s wind resistance.
Document all maintenance activities and keep receipts for replacement parts. This record-keeping helps track the shelter’s maintenance history and identifies recurring issues that might need professional attention.
By following these maintenance practices consistently, you’ll extend the life of your windproof shelter and ensure it continues to provide reliable protection when you need it most.
Creating a windproof shelter is an investment in safety and peace of mind that pays dividends throughout the years. By implementing the strategies we’ve discussed, you can significantly enhance your shed’s resistance to even the strongest winds while maintaining its aesthetic appeal and functionality.
Remember that proper foundation preparation serves as the cornerstone of a wind-resistant structure. Combining this with strategic anchor points, reinforced walls, and a properly secured roof creates a comprehensive defense system against wind damage. The additional features like wind braces and proper ventilation not only protect your shelter but also extend its lifespan.
Regular maintenance remains crucial in ensuring your windproofing measures continue to perform effectively. By conducting seasonal inspections and addressing minor issues promptly, you can prevent more serious problems from developing. Don’t forget that the surrounding landscape plays a vital role in wind protection – strategic placement of barriers and proper drainage can significantly enhance your shelter’s wind resistance.
For those living in particularly wind-prone areas, investing in professional installation and high-quality materials may seem costly initially, but it’s far more economical than dealing with repairs or replacement after wind damage. By following these guidelines and maintaining vigilance in upkeep, you can enjoy a secure, durable shelter that stands strong against the elements while protecting your valuable belongings for years to come.