
Smart DIY Storage Solutions That Keep Your Shed Tools Rust-Free
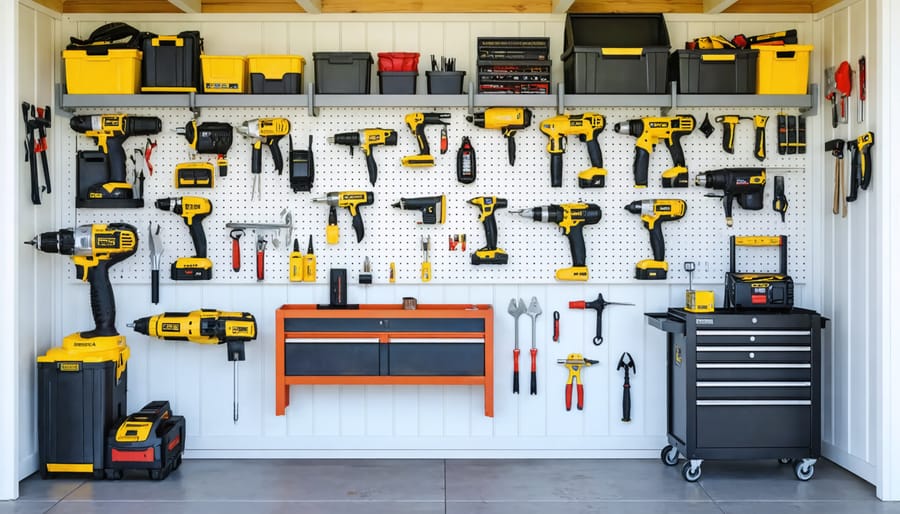
Transform your cluttered shed into an organized workshop paradise with strategic DIY storage solutions that protect and preserve your valuable tools. Mount pegboards on every available wall space, install adjustable shelving systems, and create custom wooden tool holders to maximize vertical storage while keeping frequently-used items within arm’s reach. Utilize the often-forgotten ceiling space by installing overhead racks for long-handled tools and seasonal equipment, effectively doubling your storage capacity without sacrificing floor space.
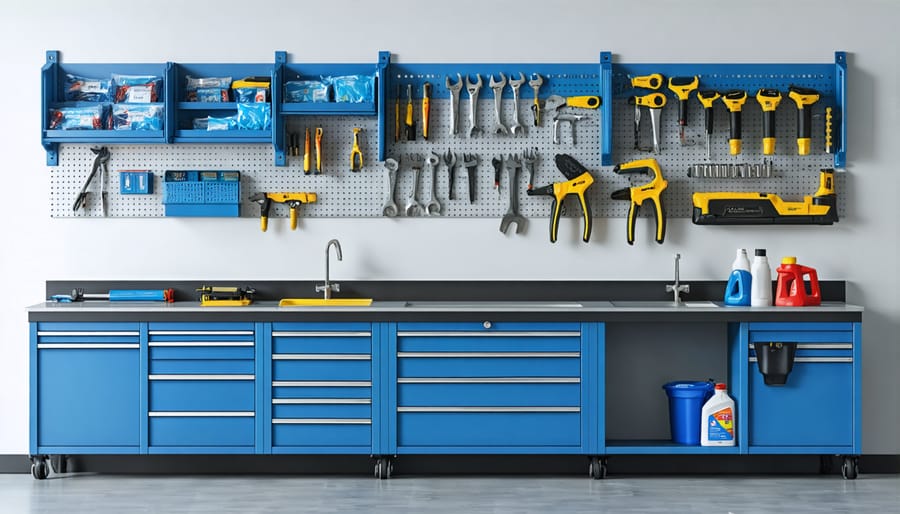
A well-planned tool storage system doesn’t just organize – it extends tool life and increases workshop efficiency. Implement a combination of wall-mounted magnetic strips for metal tools, rolling cart systems for heavy power equipment, and clear plastic bins for smaller items like screws and nails. This systematic approach ensures every tool has its designated space, protecting investments from rust, damage, and unnecessary wear while making your DIY projects smoother and more enjoyable.
These practical storage solutions can be completed in a weekend, using basic materials from your local hardware store. The key lies in customizing each storage element to your specific tool collection and workspace dimensions, creating a personalized system that grows with your DIY ambitions.
Creating the Perfect Storage Environment
Moisture Control Basics
Protecting your tools from moisture damage is crucial for maintaining their longevity and performance. To prevent rust damage, start by installing proper ventilation systems in your shed. A combination of roof vents and wall vents creates airflow that helps reduce humidity levels naturally.
Consider adding a vapor barrier beneath your shed’s flooring and installing a dehumidifier for year-round protection. To effectively control moisture in your shed, place moisture-absorbing products like silica gel packets or desiccant containers near your tool storage areas.
Keep tools elevated off the floor using shelves or pegboards, and consider applying a protective coating or light oil to metal surfaces. Store power tools in their original cases or sealed containers with moisture-absorbing packets. Regular maintenance, including wiping tools down after use and checking for early signs of rust, will help ensure your tools remain in top condition. During particularly humid seasons, running a small fan can help maintain air circulation and reduce moisture buildup.
Temperature Management
Maintaining a stable temperature in your tool shed is crucial for protecting your valuable equipment from rust and damage. Start by insulating your shed walls and roof using rigid foam boards or fiberglass insulation. Weather stripping around doors and windows helps prevent drafts and moisture infiltration, which can lead to temperature fluctuations.
Consider installing a small electric fan for summer ventilation and a compact space heater for winter months. However, always follow proper safety guidelines when using electrical equipment in your shed. Adding adjustable vents near the roof allows hot air to escape during warmer seasons while preventing excessive humidity buildup.
For passive temperature control, position your shed to minimize direct sunlight exposure during peak heat hours. Light-colored exterior paint reflects sunlight, while darker colors absorb heat. A properly installed vapor barrier beneath your flooring prevents ground moisture from affecting internal temperatures.
Store temperature-sensitive items like batteries, paints, and electronic tools on elevated shelves away from exterior walls where temperature changes are most noticeable. Check weather seals regularly and repair any gaps to maintain consistent indoor conditions year-round.
Wall-Mounted Storage Systems
Pegboard Organization
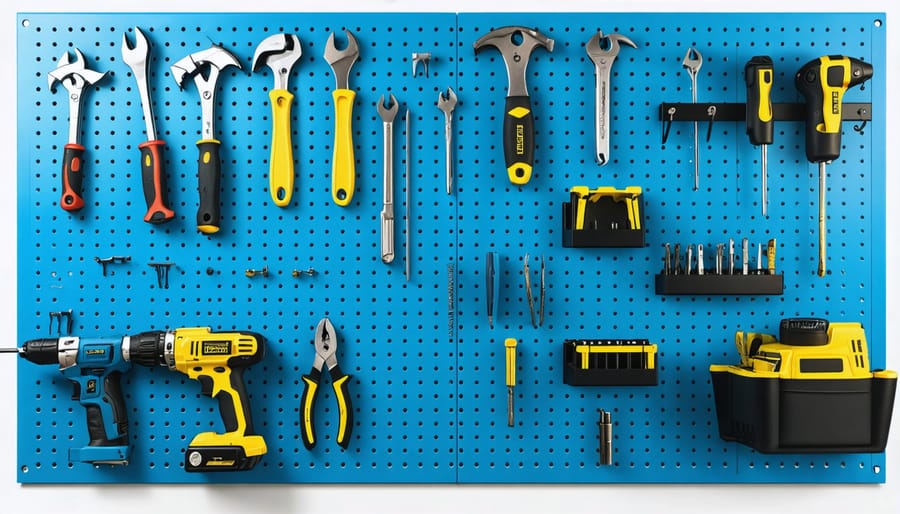
Pegboard storage is a game-changer for shed organization, offering a customizable wall system that keeps tools visible and easily accessible. Start by selecting high-quality pegboard panels – consider getting the 1/4-inch hardboard variety for durability. When installing, mount the pegboard at least 1/2 inch away from the wall using furring strips to allow room for hooks and hangers.
Before securing the pegboard, plan your tool layout by arranging items on the floor in their intended positions. This helps optimize space and ensures frequently used tools are within easy reach. Install the pegboard using washers and screws through the furring strips, ensuring it’s level and sturdy.
For maximum efficiency, invest in a variety of pegboard accessories: J-hooks for hanging individual tools, tool holders for oddly shaped items, and baskets for storing smaller accessories. Consider adding a pegboard border trim to create a polished look and prevent warping over time.
Pro tip: Take a photo of your organized pegboard and trace tool outlines with a marker to create a visual guide for tool placement. This helps maintain organization and quickly identify missing tools. For added convenience, group similar tools together and leave some empty space for future additions.
Regular maintenance includes checking hook security and cleaning the pegboard surface with a damp cloth to prevent dust buildup. Remember to adjust your layout as needed based on your changing tool collection and usage patterns.
Custom Tool Racks
Custom tool racks are game-changers when it comes to maximizing your shed’s storage potential. By building specialized racks tailored to your specific tools, you’ll not only save space but also protect your valuable equipment from damage.
Start by categorizing your tools by type and size. For long-handled tools like rakes, shovels, and hoes, consider building a vertical rack using 2x4s and PVC pipes. Simply cut the PVC pipes into 4-inch sections and attach them to the wooden frame at a slight upward angle to prevent tools from sliding out.
For hand tools, create a pegboard system with custom holders. Use scrap wood to build small shelves and hooks that can be arranged to accommodate different tool shapes. A magnetic strip mounted at eye level works wonders for metal tools like hammers and screwdrivers.
Power tools deserve special attention. Build a dedicated bench-height shelf with divided compartments and rubber mat lining to protect them from scratches. Include built-in charging stations by drilling holes for power cords to keep batteries ready for use.
Don’t forget about awkward items like levels and measuring tools. A simple ladder-style rack with graduated slots keeps these tools visible and protected. For smaller items like drill bits and screws, incorporate pull-out drawers with custom dividers underneath your workbench.
Remember to leave room for expansion and label each section clearly. This systematic approach ensures every tool has its place and is easily accessible when needed.
Storage Solutions for Power Tools
Charging Station Setup
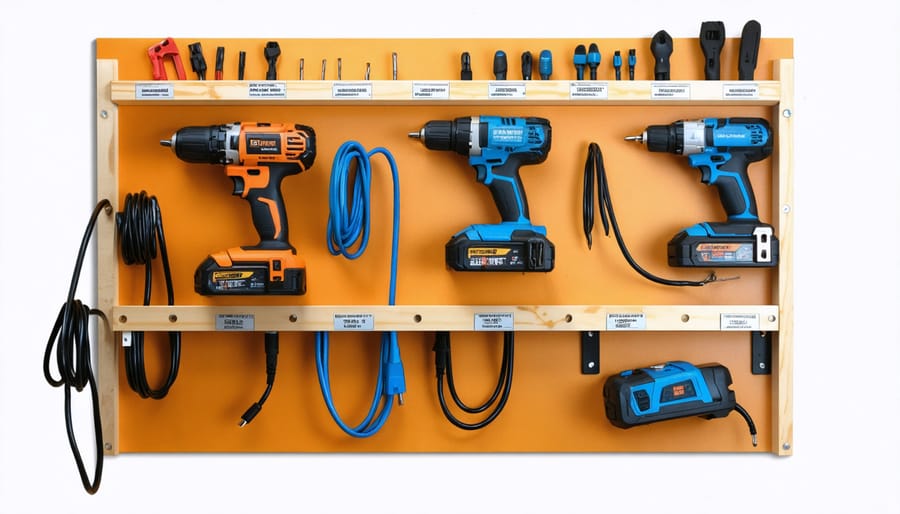
A well-organized charging station is essential for keeping your battery-powered tools ready for action. Start by selecting a dry, accessible corner of your shed near a power outlet. Install a sturdy shelf or workbench that can support multiple chargers and tools while charging.
Create dedicated spaces for each tool’s charger by mounting a power strip underneath the shelf to minimize cord clutter. Label each charging spot to avoid confusion and ensure tools return to their designated places. Consider adding small dividers between charging areas to keep cords separated and tangle-free.
For better organization, install a pegboard above the charging station to hang tools while they charge. This keeps your workspace clear and makes it easy to see which tools are ready for use. Add LED strip lighting under the shelf to illuminate the charging area and help you quickly check battery status indicators.
To protect your tools and chargers from dust, consider building a simple hinged cover or installing a curtain that can be drawn when the station isn’t in use. Don’t forget to leave enough ventilation space around chargers to prevent overheating. For frequently used tools, keep spare batteries in a nearby drawer or bin for quick swaps during bigger projects.
Protective Storage Cases
Protecting your valuable power tools from dust and moisture is essential for extending their lifespan. Creating DIY protective cases doesn’t have to be complicated or expensive. Start by repurposing sturdy plastic containers with snap-on lids – these make excellent dust-proof storage solutions when lined with foam padding cut to fit your tools’ shapes.
For custom-fit protection, try the foam-cutting method: trace your tool’s outline on a piece of thick foam, cut out the shape slightly smaller than the outline, and create a snug nest for each tool. This technique works particularly well for drills, sanders, and other handheld power tools.
Another effective solution is building wooden cases with weather stripping around the edges. Use ¾-inch plywood for durability, add carrying handles, and line the interior with felt or foam. For frequently used tools, consider making wall-mounted cases that open like cabinets, protecting tools while keeping them easily accessible.
Don’t forget about moisture control – add silica gel packets to your storage containers or make DIY moisture absorbers using coffee filters filled with rice. For extra protection, consider applying a coat of protective spray to wooden cases and adding rubber feet to keep them elevated off potentially damp surfaces.
Maintenance-Friendly Storage Ideas
Tool Cleaning Station
A dedicated cleaning station in your tool shed isn’t just about tidiness – it’s essential for extending the life of your tools and keeping them in peak condition. Set up a sturdy workbench with good lighting and arrange cleaning supplies in easy-reach containers. Include a wire brush, steel wool, mineral spirits, and WD-40 for basic maintenance. Install a pegboard above the cleaning area to hang frequently used cleaning tools and rags.
Consider adding a small utility sink if plumbing is available, or keep a bucket system for cleaning without water access. Include a rubber mat on the floor to catch spills and provide comfort while working. Store your cleaning supplies in sealed containers on a dedicated shelf, and keep a first-aid kit nearby for safety.
Remember to create a ventilated space by installing a small fan or opening windows when cleaning tools with chemical products. This cleaning station will become your go-to spot for regular tool maintenance and repair work.
Rust Prevention Systems
Protecting your tools from rust is crucial for their longevity, and there are several effective DIY solutions you can implement in your shed. Start by installing a small dehumidifier or placing silica gel packets in strategic locations throughout your storage area. For a budget-friendly option, create moisture-absorbing sachets using rice or chalk placed in breathable fabric bags.
Consider applying a protective coating to your metal tools using paste wax or mineral oil. After each use, wipe tools down with a cloth lightly dampened with WD-40 or specialized tool oil. For additional protection, create a vapor barrier by placing a piece of chalk or moisture-absorbing crystals in your toolbox compartments.
Install proper ventilation in your shed by adding vents or a small fan to promote air circulation. Keep tools elevated off the floor using wall-mounted systems or shelving units, and consider using anti-rust liner material in drawers and on shelves. For frequently used tools, magnetic strips not only provide easy access but also keep tools away from moisture-prone surfaces.
Organizing your shed tool storage doesn’t have to be a daunting task. By implementing the storage solutions we’ve discussed, you can transform your cluttered shed into an efficient workspace that makes finding and maintaining your tools a breeze. Remember that successful tool storage combines vertical space utilization, proper categorization, and protection from moisture and damage.
Start small by grouping similar tools together and gradually build your storage system using pegboards, wall-mounted racks, and custom shelving. Don’t forget to consider seasonal rotation of tools and leave room for future additions to your collection. The key is to create a system that works for your specific needs and habits.
Whether you choose to build custom storage solutions or opt for ready-made organizers, the most important thing is to take action. A well-organized tool shed not only saves you time and frustration but also extends the life of your valuable tools. With these storage ideas in hand, you’re now ready to tackle your shed organization project and create a workspace that will serve you well for years to come.
Remember, the best storage solution is one that you’ll actually use and maintain. Start your transformation today, and enjoy the satisfaction of a perfectly organized tool shed tomorrow.