
Smart Shed Connectivity: Transform Two Sheds into One Tech-Savvy Space
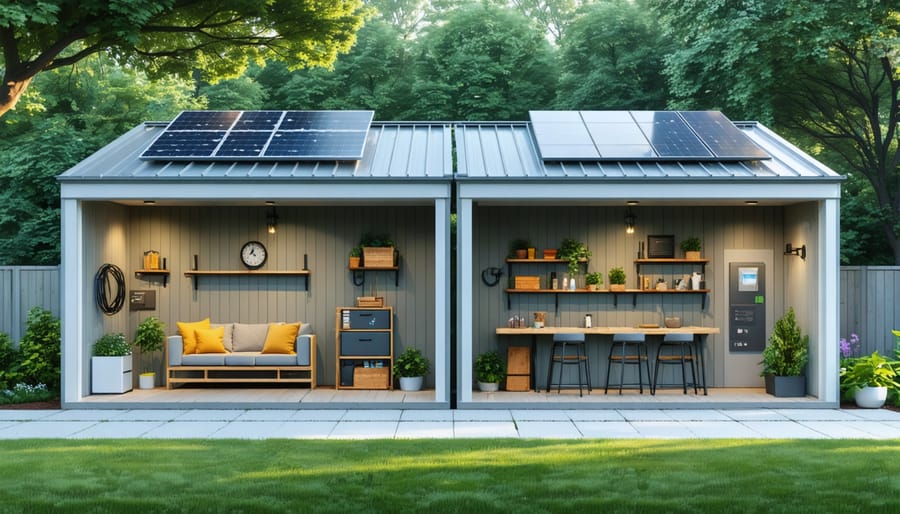
Transform your backyard storage into a streamlined workspace by connecting two sheds into one versatile structure. Modern high-tech storage solutions make it possible to create a seamless connection that maximizes space while maintaining structural integrity. Whether you’re expanding your workshop, creating a home office suite, or building the ultimate garden center, joining two sheds offers practical advantages over purchasing a single larger unit. This guide walks you through essential planning considerations, structural requirements, and innovative connection methods that ensure a professional-quality result. From selecting compatible shed designs to implementing weather-tight joining techniques, you’ll discover how to double your storage space while maintaining a cohesive, attractive appearance that enhances your property’s value.
Planning Your Connected Shed Project
Distance and Alignment Requirements
Before connecting your sheds, proper spacing and alignment are crucial for both functionality and aesthetics. Position your sheds at least 3 feet apart to allow adequate workspace for installation and future maintenance. This gap also ensures proper ventilation and prevents moisture buildup between the structures.
When aligning your sheds, ensure they’re perfectly level with each other. Even a slight misalignment can cause problems during connection and potentially compromise the structural integrity. Use a laser level to check both horizontal and vertical alignment, and adjust the foundation as needed.
Consider your property’s layout and local building codes when determining placement. Most municipalities require sheds to be at least 5 feet from property lines and 10 feet from your home. The connected structures should also have proper drainage away from their foundations to prevent water damage.
For the best results, place your sheds on a single continuous concrete pad or matching foundation materials. This helps maintain consistent leveling and prevents differential settling that could stress the connection points over time.
Remember to factor in door clearance and accessibility when determining the final positioning. You’ll want enough space to fully open all doors and easily move items between the connected spaces.
Smart Technology Infrastructure Planning
When connecting two sheds, planning for modern technology integration can transform your storage space into a smart workshop or functional area. Start by mapping out your smart energy infrastructure, including power outlets, LED lighting, and potential solar panel locations. Consider installing a dedicated electrical subpanel to handle the combined power needs of both sheds.
For networking, run weatherproof ethernet cables between the sheds during the connection process, or install a wireless mesh network system for seamless connectivity. This enables the use of smart security cameras, automated lighting, and environmental monitoring systems across both spaces.
Plan for smart device integration by positioning motion sensors, smart locks, and temperature monitors strategically. Include USB charging stations and smart power strips in your layout. Don’t forget about climate control – smart thermostats and ventilation systems can help maintain ideal conditions in both spaces.
Remember to leave room for future upgrades by installing extra conduit pipes and access points during the initial setup. This forward-thinking approach saves time and effort when adding new technology later.
Physical Connection Methods
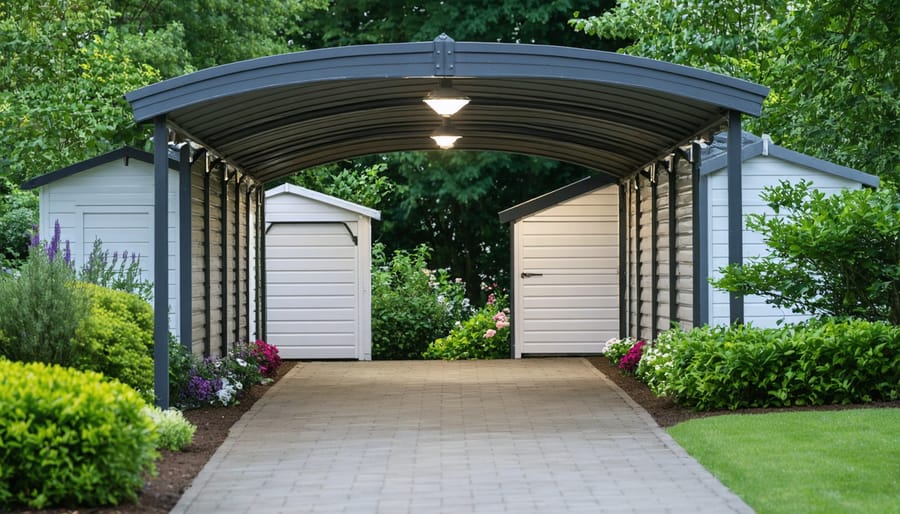
Covered Walkway Connection
A covered walkway provides an elegant and practical solution for connecting two sheds while protecting you and your belongings from the elements. Start by measuring the distance between the sheds and planning a pathway that’s at least 4 feet wide to allow comfortable passage with items in hand.
Begin construction by installing support posts at 6-8 foot intervals along the planned route. Pressure-treated 4×4 posts set in concrete provide sturdy anchoring points. Ensure the posts are perfectly plumb and at consistent heights to support the roof structure. Connect the posts with horizontal beams that will serve as the foundation for your roof framing.
For the roof, you have several options depending on your budget and aesthetic preferences. A simple gable roof design matches most shed styles and provides excellent water runoff. Alternatively, a single-slope lean-to style roof offers a modern look and simpler construction. Use weather-resistant materials like corrugated metal roofing or polycarbonate panels that allow natural light to filter through.
Consider adding features like motion-sensor lighting for nighttime visibility and gutters to manage rainwater. Installing weather stripping where the walkway meets each shed prevents water infiltration. For added functionality, incorporate built-in shelving or hooks along the walkway walls for frequently used tools or garden equipment.
Remember to check local building codes and obtain necessary permits before starting construction. Adding gravel or pavers beneath the walkway helps with drainage and creates a stable walking surface. This covered connection not only enhances the functionality of your storage space but also adds value to your property.
Direct Wall Integration
Direct wall integration is one of the most secure and visually appealing methods to connect two sheds together. Start by carefully removing the siding from the adjacent walls where the sheds will meet. This exposes the frame and allows for a stronger structural connection. You’ll want to ensure both sheds are perfectly level and aligned before proceeding with any permanent attachments.
Create a solid connection by installing horizontal support beams between the two shed frames. Use pressure-treated 2x4s or 2x6s, spacing them approximately 16 inches apart vertically. Secure these connecting beams with galvanized lag bolts or heavy-duty structural screws, making sure to hit the main studs of both sheds.
For weather protection, install flashing along the seam where the sheds meet at the roof line. This prevents water from seeping into the connection point. Apply waterproof caulking between the sheds’ frames before securing them together, creating an additional moisture barrier.
Once the structural connection is complete, you can either install new siding across the joined section for a seamless look or add trim pieces to cover the seam. If your sheds have different heights, you’ll need to create a custom transition piece to bridge the gap and ensure proper water runoff.
Remember to maintain proper ventilation in your newly connected space. Consider installing vents or small windows if the original ventilation systems are compromised by the connection. This helps prevent moisture buildup and maintains air quality in your expanded storage area.
The final step is to check all seams and joints annually for any signs of water infiltration or structural movement, ensuring your connection remains secure and weathertight for years to come.
Smart Technology Integration
Unified Lighting Control
Creating a unified lighting system across your connected sheds enhances both functionality and convenience. Start by planning your lighting zones – consider task lighting for workbenches, ambient lighting for general spaces, and security lighting for entrances. Smart bulbs or LED strips compatible with major platforms like Alexa or Google Home are ideal choices, as they can be controlled through a single app.
Install a smart hub in the main shed to ensure reliable connectivity throughout both spaces. This central controller will help maintain stable connections even in metal structures that might otherwise interfere with wireless signals. For seamless operation, use weatherproof junction boxes to house your electrical connections between the sheds, ensuring all wiring is properly protected from moisture and dust.
Motion sensors placed strategically at entrances and high-traffic areas can automatically trigger lights when you move between spaces. Consider installing smart switches as backup controls in case your phone isn’t handy. For energy efficiency, set up automated schedules to turn lights off during daylight hours or when the spaces aren’t in use.
Don’t forget emergency lighting – battery-powered smart lights can serve as backups during power outages. Label all switches and create a simple diagram of your lighting layout for future reference. Remember to test your system regularly and keep spare bulbs on hand for quick replacements when needed.
Security System Integration
Securing your connected sheds is essential, and modern technology makes it easier than ever. Start by installing weatherproof security cameras at key points – typically above the entrances and corners where the sheds meet. Opt for wireless cameras with night vision capabilities and motion detection features, which can send alerts directly to your smartphone.
Smart locks are a game-changer for connected sheds, eliminating the need to carry multiple keys. Install compatible smart locks on both shed doors, allowing you to control access through a single app. Many systems let you create temporary access codes for service providers or family members, and you can track who enters and when.
Consider installing a wireless bridge or hub inside the more weather-resistant shed to ensure stable connectivity for your security devices. This central hub can also support additional smart features like temperature sensors or motion-activated lighting.
For added security, install motion-sensor lights between the sheds and around entry points. These not only deter potential intruders but also provide convenient lighting when you’re accessing your sheds after dark.
Remember to choose devices rated for outdoor use and ensure all wiring is properly protected from the elements. It’s worth investing in a backup power supply for your security system to maintain protection during power outages.
Climate Control Solutions
Maintaining consistent temperature and humidity levels across connected sheds is crucial for protecting your stored items and creating a comfortable workspace. The key is to implement an effective temperature-controlled ventilation system that works across both spaces.
Start by installing adjustable vents in both sheds, positioning them strategically to create optimal airflow. Place intake vents near the bottom of one shed and exhaust vents near the top of the other to encourage natural air circulation. This creates a chimney effect that helps regulate temperature without requiring constant power usage.
Consider adding a combination of passive and active climate control solutions. Insulation is your first line of defense – apply it to both sheds’ walls, floors, and roofs, paying special attention to the connecting passage. Weather stripping around doors and windows helps maintain the desired environment while reducing energy costs.
For more precise control, install a small dehumidifier that can serve both spaces. Position it in the connecting passage to efficiently manage moisture levels throughout. Smart humidity sensors can help you monitor conditions remotely and adjust as needed.
During warmer months, solar-powered fans can help move air between the spaces while keeping energy costs down. For winter protection, consider adding a small electric heater with a thermostat to prevent freezing temperatures that could damage stored items.
Finishing Touches and Optimization
Weather Sealing
Proper weather sealing is crucial when connecting two sheds to prevent water damage and maintain the integrity of your storage space. Start by weatherproofing your shed connections using high-quality silicone caulk along all joining seams. Install rubber gaskets or foam weatherstripping between the shed walls where they meet, creating a tight seal that prevents drafts and moisture infiltration.
Pay special attention to the roof junction, as this area is particularly vulnerable to leaks. Apply roofing tape along the seam where the two roof sections meet, followed by metal flashing that overlaps both sides. Secure the flashing with waterproof roofing screws and seal all edges with roofing cement.
Don’t forget to address ground-level moisture protection. Install a continuous moisture barrier along the foundation where the sheds connect, and ensure proper drainage away from the structure. Consider adding gutters that span both sheds to direct rainwater away from the connection point. Regular inspection and maintenance of these weatherproofing elements will help ensure your connected sheds remain dry and protected for years to come.
Smart Hub Configuration
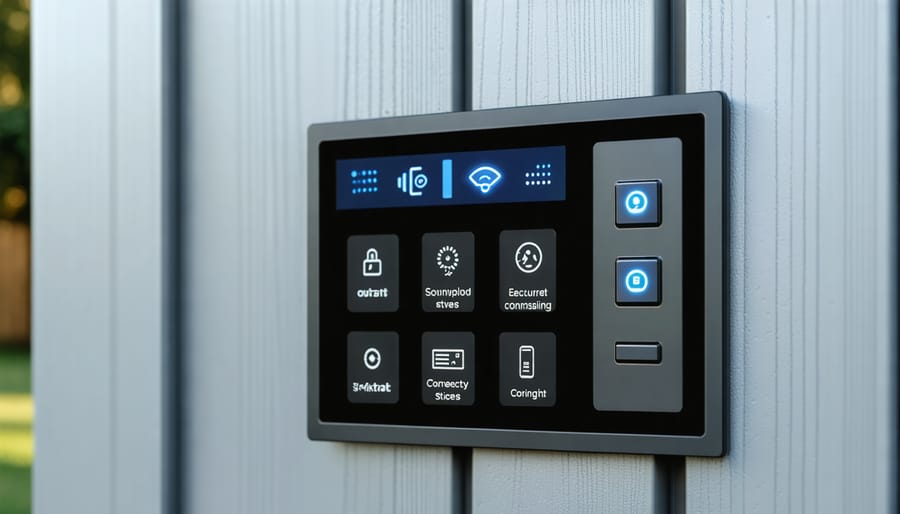
To bring your connected sheds into the smart age, setting up a central hub is essential. A smart hub acts as the brain of your operation, allowing you to control lighting, security cameras, and environmental sensors from one convenient location. Start by choosing a weather-resistant hub that can handle outdoor conditions – popular options include SmartThings or Hubitat, which work well in shed environments.
Position your hub in the larger of the two sheds, ideally near a power source and within range of your home’s Wi-Fi network. If Wi-Fi coverage is weak, consider installing a mesh network extender to ensure stable connectivity. Mount the hub at least 4 feet off the ground to protect it from potential water damage and ensure better signal distribution.
Connect your smart devices one at a time, following the hub’s setup instructions. Essential devices might include motion sensors for security, temperature monitors to protect sensitive items, and smart plugs for controlling power tools or charging stations. Remember to label each device in your hub’s app with clear names like “Shed 1 Light” or “Shed 2 Motion Sensor” for easy identification and control.
Connecting two sheds opens up a world of possibilities for expanding your storage space and creating a more functional outdoor setup. By following proper planning, ensuring structural integrity, and implementing the right connection methods, you can successfully join your sheds to create a larger, more versatile space. Remember to check local building codes, obtain necessary permits, and consider weather protection throughout the process. Looking ahead, you might consider adding smart storage solutions, installing solar panels for lighting, or creating a climate-controlled environment in your connected space. With regular maintenance and periodic inspections, your connected sheds can serve as a valuable addition to your property for years to come. Whether you’re using the space for a workshop, storage, or a combination of both, the possibilities for future upgrades are endless.