
Smart Space Solutions That Make Your Shed Feel Twice as Big
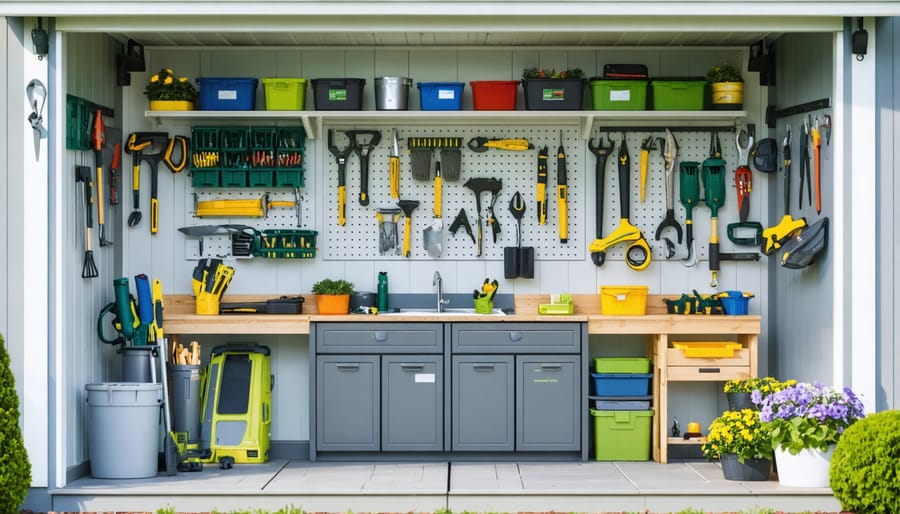
Transform your cluttered shed into an organizational masterpiece by learning to maximize your compact shed space through strategic planning and smart storage solutions. Install floor-to-ceiling adjustable shelving units along walls to triple vertical storage capacity while maintaining floor access. Create designated zones for frequently used items at eye level, seasonal equipment in upper areas, and bulky tools in corner spaces. Mount pegboards and magnetic strips at workbench height to keep essential tools visible and instantly accessible. Convert unused door space into storage gold with over-door organizers and hooks, instantly adding 20% more usable space without sacrificing square footage. These space-optimization techniques transform even the most modest shed into a highly efficient storage powerhouse, ensuring every square inch serves a purpose while maintaining easy access to all your belongings.
Vertical Storage Solutions That Transform Your Space
Wall-Mounted Storage Systems
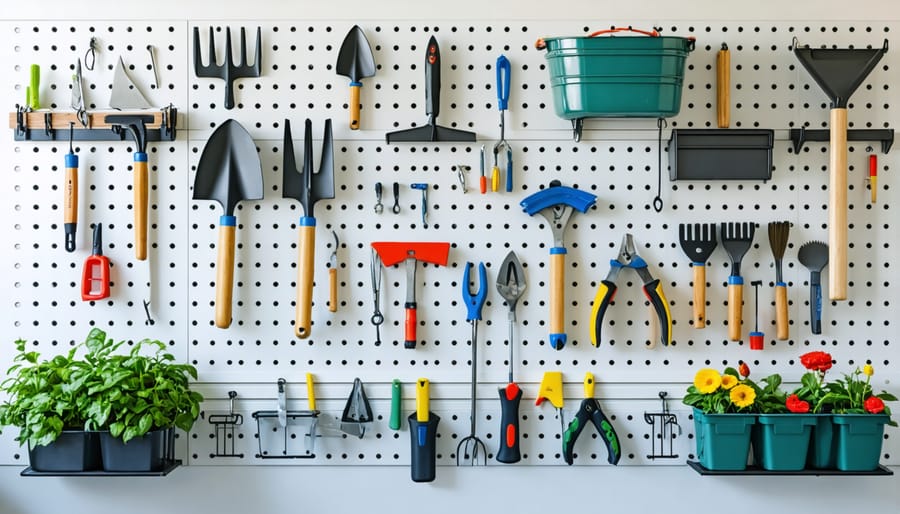
Transform your shed walls into efficient storage systems with versatile wall-mounted solutions that maximize every inch of vertical space. Pegboards offer incredible flexibility, allowing you to customize your tool arrangement and easily modify it as your needs change. Install hooks, brackets, and specialized holders to keep everything from garden tools to sports equipment organized and easily accessible.
Slatwall systems take organization to the next level with their robust design and professional appearance. These systems can handle heavier items and come with a variety of accessories, including shelves, baskets, and hooks. The horizontal grooves make it simple to adjust your storage configuration without additional drilling or mounting.
Don’t overlook the convenience of hanging organizers, which are perfect for storing smaller items like gardening gloves, spray bottles, and hand tools. These fabric or mesh organizers can be mounted directly to your wall or hung from existing hooks, providing instant organization for frequently used items.
For maximum effectiveness, consider combining different wall-mounted systems. For example, use pegboards for lightweight tools in your workspace area, slatwall systems for heavy equipment storage, and hanging organizers near the entrance for quick-grab items. This strategic approach ensures every wall serves a specific purpose while maintaining easy access to all your belongings.
Ceiling Storage Innovations
Often overlooked, your shed’s ceiling space offers incredible storage potential that can free up valuable floor and wall area. Overhead storage racks are a game-changer for storing seasonal items, holiday decorations, and rarely-used equipment. Consider installing adjustable ceiling-mounted racks that can handle up to 600 pounds of distributed weight – perfect for storing plastic bins, camping gear, or sports equipment.
For frequently accessed items, pulley systems provide an ingenious solution. These mechanical aids make it easy to raise and lower items like bikes, kayaks, or ladders without straining your back. Many homeowners have found success with simple rope-and-pulley configurations, while others prefer more sophisticated systems with safety locks and smooth-rolling mechanisms.
Hanging storage nets and mesh bags offer flexible solutions for lightweight items. These affordable options work wonderfully for storing pool toys, gardening supplies, or basic yard maintenance equipment. The key is to install them where they won’t interfere with your movement through the shed.
Before installing any ceiling storage, always check your shed’s structural integrity and ensure mounting points align with roof joists or trusses. For maximum efficiency, create a layout plan that positions heavier items near the walls where the structure is typically strongest. Remember to leave enough clearance for comfortable movement underneath – a good rule of thumb is maintaining at least 6.5 feet of headroom in primary walkways.
Zone-Based Organization That Maximizes Efficiency
Creating Functional Work Zones
Creating functional zones in your shed transforms it from a cluttered catch-all space into an organized, efficient storage solution. Start by mapping out distinct areas based on your specific needs and activities. For instance, designate a dedicated workbench area for DIY projects, a garden tool section for landscaping equipment, and separate zones for seasonal items.
Implementing smart organization solutions like pegboards and wall-mounted tool racks helps define these zones while maximizing vertical space. Consider creating a “frequently accessed” zone near the entrance for items you use regularly, while storing less-used items toward the back.
Make each zone work harder by incorporating multi-functional elements. A fold-down workbench can double as additional floor space when not in use, while mobile storage units allow for flexible zone arrangements as your needs change. Label each area clearly and use color-coding or visual markers to make items easy to locate and return to their designated spots.
Don’t forget to include a maintenance zone where you can store cleaning supplies and shed care items. Leave enough clearance between zones for comfortable movement and access to all storage areas. Remember, well-defined work zones not only improve organization but also enhance safety by preventing trip hazards and reducing the risk of items falling or becoming damaged.
By establishing these purposeful zones, you’ll create an efficient system that makes every square foot count while keeping your belongings accessible and protected.
Tool Organization Systems
Keeping your tools organized is essential for maximizing shed space and ensuring easy access when you need them. Start by implementing a pegboard system on your walls, which creates customizable storage for frequently used items like hammers, screwdrivers, and gardening tools. Magnetic strips are excellent for holding metal tools and can be installed at eye level for quick access.
Consider installing a mobile tool cart that can be wheeled around your shed as needed. These carts often feature multiple tiers and can hold both power tools and hand tools, making them perfect for projects that require various equipment. For smaller tools and accessories, clear plastic bins with labels work wonders – they stack efficiently and let you see contents at a glance.
Make use of corner spaces by installing rotating tool organizers or lazy Susan-style holders. These are particularly useful for storing items like paint brushes, utility knives, and measuring tools. For power tools, create a dedicated charging station with hooks for batteries and cords to keep everything neat and accessible.
Don’t forget about vertical space – install adjustable shelving units with bins or baskets for storing loose items. Tool pouches or aprons can be hung on hooks when not in use, keeping frequently accessed items within reach. Remember to position heavier tools at waist height to prevent strain, and keep seasonal tools towards the back of storage areas during their off-season.
Space-Saving Storage Furniture and Fixtures
Collapsible and Mobile Storage
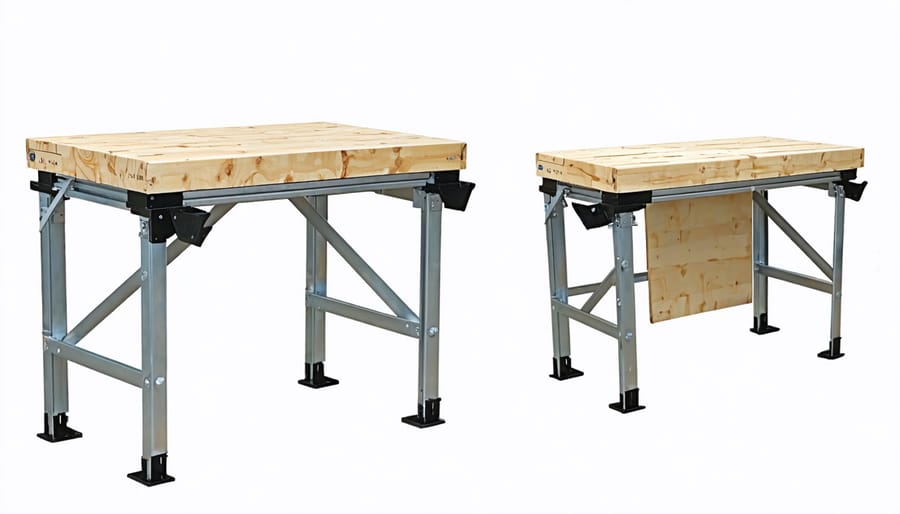
Maximize your shed’s versatility with collapsible and mobile storage solutions that adapt to your changing needs. Foldable workbenches are game-changers, providing a sturdy surface when needed and folding flat against the wall when not in use. Look for models with integrated tool storage or pegboard backing to double their utility.
Rolling storage units offer unmatched flexibility in small spaces. Consider investing in heavy-duty casters for plastic storage bins or building custom rolling carts for frequently used items. These mobile solutions can be easily moved to access items behind them or rolled outside when you need to work in the open air.
Tool cabinets and craft stations on wheels are particularly valuable, allowing you to create instant workspace wherever needed. Many homeowners find success with modular systems that can be configured differently as their storage needs evolve. For seasonal items, opt for collapsible storage boxes that can be compressed when empty, saving precious space during off-seasons.
Remember to choose storage units with locking wheels for safety, and consider the floor surface when selecting caster types. The beauty of mobile storage is that it allows you to reconfigure your space quickly for different projects while maintaining easy access to all your items.
Multi-Purpose Storage Solutions
Smart storage solutions that serve multiple purposes are game-changers when it comes to maximizing your space. Consider investing in storage benches that offer comfortable seating while concealing seasonal items or gardening supplies underneath. Fold-down workbenches are another excellent option, providing a sturdy surface for projects when needed and folding flat against the wall when not in use.
Rolling carts with multiple tiers can serve as mobile tool stations, potting benches, or general storage units, adapting to your needs throughout the year. Look for options with removable bins or adjustable shelves for maximum flexibility. Wall-mounted cabinets with fold-out tables are particularly clever additions, offering both enclosed storage and a workspace without permanently sacrificing floor space.
Storage ottomans and cubes can be arranged to create temporary seating areas while housing smaller items like hand tools, seeds, or painting supplies. Consider modular storage systems that can be reconfigured as your needs change – stackable bins that double as steps to reach higher shelves, or pegboard systems that can transform from tool storage to craft supply organization.
For maximum efficiency, choose furniture pieces with built-in organizers or compartments. A potting bench with integrated tool slots and hidden storage beneath can keep your gardening supplies organized while providing a dedicated workspace. Remember, the key is selecting pieces that offer flexibility and can adapt to your changing storage needs throughout the seasons.
Seasonal Storage Strategies
Rotating Seasonal Equipment
Efficiently managing seasonal equipment is key to maintaining an organized shed throughout the year. Start by dividing your items into clear seasonal categories: spring/summer (lawn mowers, gardening tools) and fall/winter (snow blowers, holiday decorations). Create a rotation schedule that aligns with your local climate patterns, typically transitioning items during early spring and late fall.
Implement a “front-to-back” system where current season items occupy easily accessible spaces near the entrance, while off-season equipment moves to the back or higher storage areas. Use clear, waterproof storage bins with detailed labels for smaller seasonal items, and consider vacuum storage bags for bulky items like pool accessories or winter covers.
Make the rotation process smoother by establishing a staging area in your shed. During transition periods, this space becomes your sorting zone, helping you inventory items and assess their condition before storage. Take advantage of wall-mounted pegboards with removable hooks that can be reconfigured based on seasonal needs.
Keep a simple checklist of seasonal items and their designated storage locations. This prevents the frustrating “where did I put it?” scenario when seasons change. Before storing equipment for extended periods, ensure everything is clean, dry, and properly maintained – this prevents unpleasant surprises when you need these items again.
Remember to leave some flexible storage space for items used year-round, like basic hand tools and safety equipment, keeping them easily accessible regardless of seasonal rotations.
Weather-Smart Storage Solutions
Protecting your stored items from seasonal weather changes is crucial for maintaining their condition and extending their lifespan. Start by implementing proper winter storage preparation techniques, including moisture barriers and adequate ventilation to prevent dampness and mold growth.
Consider installing weatherstripping around doors and windows to keep out dust and precipitation. For delicate items, use airtight plastic containers with silica gel packets to absorb excess moisture. Position these containers on elevated platforms or shelves to protect against potential flooding or ground moisture.
During summer months, proper ventilation becomes essential. Install battery-operated fans or passive vents to maintain air circulation and prevent heat buildup. Use UV-protective covers for items sensitive to sunlight, and consider adding reflective insulation to your shed’s roof to regulate temperature.
Create designated spaces for seasonal items, keeping winter equipment accessible during colder months and summer tools ready when warm weather arrives. Use clear, labeled containers to easily identify contents and rotate items as seasons change. Remember to check weather seals and drainage systems regularly, especially before extreme weather seasons.
For valuable items, consider climate-controlled storage solutions like insulated cabinets or specialized storage boxes. These extra measures might seem excessive, but they’re invaluable for protecting power tools, electronics, and other moisture-sensitive equipment throughout the year.
Transforming your shed from a cluttered space into an organized storage haven is within reach using the optimization techniques we’ve explored. By implementing vertical storage solutions, you can multiply your usable space while keeping items easily accessible. Zone organization ensures everything has its place, making it simpler to find what you need when you need it.
Remember that successful space optimization is an ongoing process. Start with a thorough decluttering session, then gradually incorporate storage solutions that match your specific needs. Whether it’s installing wall-mounted shelves, utilizing overhead space, or creating dedicated zones for seasonal items, each small improvement contributes to a more functional storage space.
Don’t be afraid to get creative with your solutions. Simple additions like pegboards, magnetic strips, or custom-built shelving can dramatically improve your shed’s functionality. The key is to maintain the system once it’s in place, regularly reassessing your storage needs and adjusting accordingly.
Take action today by implementing just one optimization technique. Start small with a single wall organization system or by creating clearly labeled zones. As you experience the benefits of an organized space, you’ll be motivated to incorporate more solutions. With these strategies in place, you’ll transform your shed into an efficient, organized space that serves your storage needs for years to come.