
Transform Your Old Shed Into a Thriving Year-Round Greenhouse
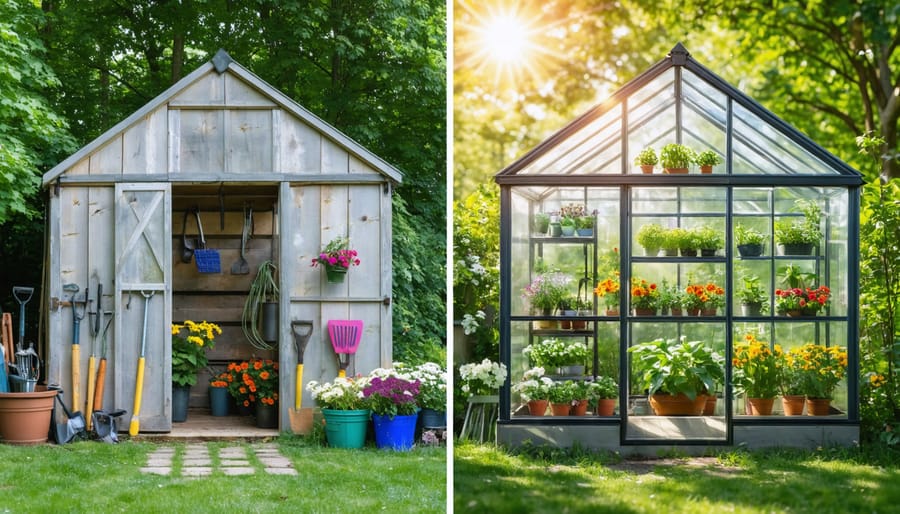
Transform your underutilized shed into a thriving greenhouse sanctuary, where ordinary storage space becomes a year-round growing haven. Converting an existing shed offers a brilliant way to jumpstart your greenhouse dreams without starting from scratch – saving both time and materials while creating the perfect environment for nurturing plants, extending growing seasons, and cultivating fresh produce throughout the year.\n\nThe beauty of shed conversion lies in its practical simplicity: existing walls provide the fundamental structure, windows can be strategically added for optimal light exposure, and proper insulation transforms basic shelter into a climate-controlled growing space. Whether you’re an experienced gardener looking to expand your growing capabilities or a sustainability enthusiast seeking to maximize your property’s potential, this sustainable transformation project delivers exceptional value.\n\nBy repurposing your shed, you’re not just creating a greenhouse – you’re establishing a sustainable growing solution that combines the charm of upcycling with the functionality of modern gardening techniques. This guide will walk you through the essential steps to convert your outdoor storage space into a productive greenhouse that serves your gardening ambitions while maintaining structural integrity and environmental efficiency.\n\n\n
 \n
\n\n\n
Assessing Your Shed’s Conversion Potential
\n\n
Location and Sunlight Requirements
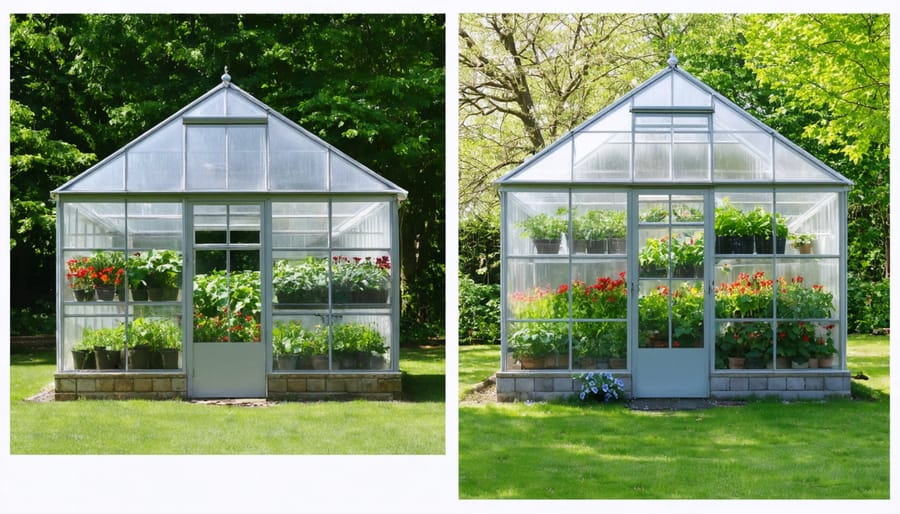
\n\nWhen converting your shed into a greenhouse, proper location and sun exposure are crucial greenhouse planning essentials. Ideally, position your greenhouse to receive maximum sunlight during growing seasons. South-facing orientations work best in most regions, capturing sunlight throughout the day. If a southern exposure isn’t possible, southeast or southwest positions are good alternatives.\n\nConsider nearby structures and trees that might cast shadows on your greenhouse. While some afternoon shade can be beneficial in hot climates, most plants need 6-8 hours of direct sunlight daily. Take time to observe your shed’s location throughout different times of the day and seasons to ensure optimal light exposure.\n\nThe existing foundation should be level and well-draining to prevent water accumulation. If you’re planning to relocate the shed before conversion, choose a spot that’s easily accessible for maintenance and close to water sources. Remember that proper positioning not only affects plant growth but also helps regulate temperature naturally, reducing the need for artificial heating and cooling.\n\n
Structural Integrity Check
\n\nBefore beginning your shed-to-greenhouse conversion, it’s crucial to thoroughly assess your existing structure’s condition. Start by examining the foundation – look for any signs of settling, cracking, or water damage. A solid foundation is essential for supporting your future greenhouse, especially when considering the added weight of plants, soil, and water.\n\nNext, inspect the walls for structural integrity. Check for rotting wood, pest damage, or loose boards that might compromise stability. If you’re planning on installing windows in your shed, ensure the frame can support these modifications without weakening the overall structure.\n\nThe roof deserves special attention as it will play a vital role in light transmission and temperature control. Look for sagging areas, water damage, or missing shingles. Remember that your greenhouse roof may need reinforcement to support new panels or additional lighting fixtures.\n\nDocument any issues you find and address them before proceeding with the conversion. Small problems can become major headaches if left unattended, potentially affecting your greenhouse’s functionality and longevity.\n\n\n
Sustainable Materials and Methods
\n\n
Recycled and Upcycled Materials
\n\nConverting your shed into a greenhouse presents a perfect opportunity to embrace sustainable practices through the use of recycled and upcycled materials. Old windows are perhaps the most valuable salvaged items you can find, offering both functionality and character to your greenhouse conversion. Check local salvage yards, online marketplaces, or home renovation sites for discarded windows – they often come at a fraction of the cost of new materials.\n\nDon’t limit yourself to just windows. Sliding glass doors, shower doors, and even old storm doors can be repurposed as greenhouse walls or roofing panels. These materials are typically tempered and designed to withstand weather conditions, making them ideal for greenhouse use.\n\nFor framing and support structures, consider using reclaimed lumber from pallets or construction sites. Just ensure the wood is untreated and free from harmful chemicals. Old metal pipes or conduit can serve as excellent supports for plant shelving or hanging systems.\n\nCreative upcycling opportunities abound – old gutters can become vertical growing spaces, while wire shelving units make perfect plant stands. Even broken terra cotta pots can find new life as drainage material for your greenhouse floor.\n\nRemember to thoroughly clean and sanitize all salvaged materials before installation, and inspect glass panels for cracks or damage that could compromise their safety. While using recycled materials requires more planning and sourcing effort, the environmental and cost benefits make it well worth the extra time.\n\n
Energy-Efficient Insulation Options
\n\nWhen converting your shed into a greenhouse, choosing the right insulation is crucial for maintaining optimal growing temperatures while keeping energy costs down. Natural materials like sheep’s wool offer excellent insulation properties while being eco-friendly. This renewable resource regulates humidity effectively and can last for many years with proper installation.\n\nStraw bales provide another sustainable option, particularly effective for wall insulation. When properly sealed and protected from moisture, straw creates a highly efficient thermal barrier. For those seeking readily available materials, recycled cotton or denim insulation offers similar performance to traditional fiberglass without the harmful chemicals.\n\nCork panels present a premium choice that’s both sustainable and highly effective. While initially more expensive, cork’s durability and natural resistance to mold make it a worthwhile long-term investment. For budget-conscious gardeners, bubble wrap offers a temporary solution that’s surprisingly effective, especially for windows and roof panels.\n\nConsider creating a double-wall system with an air gap between panels, which provides additional insulation without extra materials. You can enhance this setup by adding reflective foil backing to redirect heat into your growing space. Remember to focus on sealing any gaps around windows, doors, and joints, as these are common areas where heat escapes.\n\nFor maximum efficiency, combine these natural insulation methods with strategic ventilation to maintain ideal growing conditions while minimizing energy loss.\n\n\n
 \n
\n\n\n
Essential Greenhouse Features
\n\n
Ventilation Systems
\n\nProper ventilation is crucial for maintaining optimal growing conditions in your converted greenhouse. A combination of natural and mechanical ventilation methods will help regulate temperature and humidity while ensuring healthy air circulation for your plants.\n\nFor natural ventilation, consider installing roof vents that can be manually opened and closed. These work wonderfully with side vents or windows to create a natural chimney effect, drawing cool air in from below while allowing hot air to escape through the top. If your shed has existing windows, modify them to be operational for additional airflow control.\n\nMechanical options include installing electric exhaust fans, which are particularly useful during peak summer hours. A 20-inch fan typically provides adequate ventilation for a standard shed-turned-greenhouse. Consider adding a thermostat-controlled fan that automatically kicks in when temperatures rise above your set point.\n\nFor budget-friendly solutions, solar-powered vent openers work great for roof vents, requiring no electricity while automatically adjusting to temperature changes. Adding a small oscillating fan at ground level helps prevent stagnant air and reduces the risk of fungal diseases in your plants.\n\nRemember to position your ventilation features away from prevailing winds to prevent drafts that could harm sensitive plants.\n\n
Water Management
\n\nEfficient water management is crucial for your greenhouse’s success, and converting your shed provides excellent opportunities for sustainable irrigation solutions. Start by installing gutters along the roof edges to capture rainwater, directing it into storage barrels or tanks positioned at strategic points around your greenhouse. A typical shed roof can collect hundreds of gallons of water annually, significantly reducing your reliance on municipal water supplies.\n\nConsider implementing a drip irrigation system, which delivers water directly to your plants’ roots while minimizing waste. Connect this system to your rainwater collection tanks using a small solar-powered pump for automated watering. For additional efficiency, install a timer to regulate watering schedules based on your plants’ needs.\n\nDon’t forget to incorporate proper drainage solutions. Install slightly sloped flooring or create drainage channels to prevent water pooling, which can damage both plants and structure. Adding a layer of gravel beneath your growing beds helps maintain optimal moisture levels while preventing oversaturation.\n\nFor humid-loving plants, consider installing a misting system that can be activated during hot days. This not only provides moisture but also helps regulate temperature. Remember to monitor water quality regularly, as rainwater collection systems may need occasional cleaning to prevent algae growth and maintain optimal plant health.\n\n
Temperature Control
\n\nMaintaining optimal temperature in your converted greenhouse requires a combination of passive and active control methods. Start by implementing basic four-season greenhouse design principles, such as proper insulation and strategic ventilation placement.\n\nFor passive cooling, install adjustable vents near the roof and base to create natural airflow. Shade cloth or UV-resistant panels can reduce intense summer heat, while thermal mass elements like water barrels or stone flooring help regulate temperature fluctuations. Paint your interior walls white to reflect light and maintain consistent warmth.\n\nActive temperature control methods include installing thermostat-controlled fans for ventilation and small space heaters for winter warmth. Consider adding a misting system for hot days and an electric heating mat for seedlings. Automatic vent openers are a worthwhile investment, as they respond to temperature changes even when you’re away.\n\nMonitor temperature patterns throughout the day using a min-max thermometer. This helps you identify potential issues and adjust your heating and cooling strategy accordingly. Remember that different plants have varying temperature requirements, so zone your greenhouse space based on these needs.\n\n\n
Maximizing Growing Space
\n\n
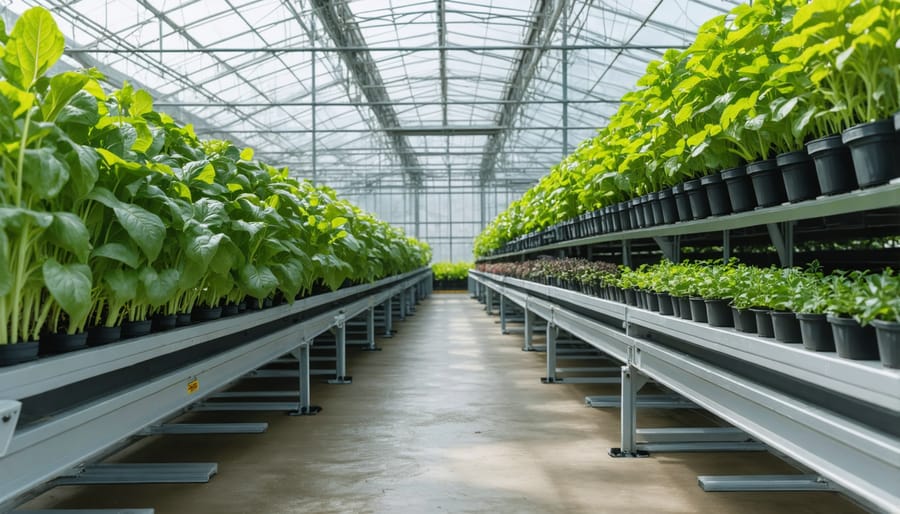
Vertical Growing Systems
\n\nMaximizing vertical space is crucial when converting your shed into a greenhouse, and the right growing systems can dramatically increase your planting capacity. Start by installing sturdy wall-mounted shelving units, ensuring they can handle the weight of potted plants and growing trays. Metal or treated wood shelving works best, as they resist moisture and provide long-lasting support.\n\nConsider implementing a combination of fixed and adjustable shelving to accommodate plants of varying heights throughout their growth cycles. Hanging systems, such as rod-mounted planters or pulley systems, allow you to suspend plants from the ceiling, making use of otherwise unused space. These are particularly effective for trailing plants or hanging baskets.\n\nFor an efficient use of corner spaces, install triangular shelving units or utilize vertical garden towers. Multi-tiered growing racks can be placed along walls, while tension rods between shelves create additional hanging opportunities for smaller pots. Don’t forget to incorporate a mix of heights to ensure all plants receive adequate light exposure.\n\nPopular vertical growing solutions include:\n- Wall-mounted gutters for herbs and small plants\n- Repurposed pallets as vertical planters\n- Wire grid systems for climbing plants\n- Stackable container systems\n- Pocket planters attached to walls\n\nRemember to leave enough space between shelving units for air circulation and easy access to your plants. Position taller plants and shelving units on the north side to prevent shading of smaller plants.\n\n
 \n
\n\n\n
Space-Saving Layout Design
\n\nMaking the most of your converted greenhouse space requires thoughtful planning and strategic arrangement of your plants. Start by creating vertical growing zones using adjustable shelving along the walls, leaving the central area accessible for movement and maintenance. Consider installing hanging baskets from the ceiling for trailing plants and herbs, maximizing otherwise unused space.\n\nOrganize your plants based on their light requirements. Place sun-loving plants like tomatoes and peppers where they’ll receive the most direct sunlight, typically on the south-facing side. Shade-tolerant plants can thrive on north-facing shelves or under the canopy of taller plants.\n\nCreate dedicated areas for different growing needs: seedling stations with heat mats near ground level, medium-height benches for potted plants, and taller spaces for climbing vegetables with trellises. Remember to leave room for your gardening tools and supplies – a small workbench against one wall can serve as both storage and a potting station.\n\nFor maximum efficiency, use corner spaces for compact spiral shelving units, perfect for small pots and starter plants. Install pulleys or adjustable chains for hanging planters, allowing you to modify heights as plants grow. Keep pathways at least 2 feet wide to ensure comfortable access to all your plants while maintaining good airflow throughout the space.\n\n\nConverting your shed into a greenhouse is not just about creating a new growing space – it’s about embracing sustainable gardening practices and making the most of existing resources. Throughout this transformation journey, we’ve explored various aspects of turning an unused shed into a thriving greenhouse environment. By repurposing your existing structure, you’re already taking a significant step toward sustainable living.\n\nRemember to prioritize proper insulation, ventilation, and lighting to create the optimal growing environment for your plants. The use of recycled materials and energy-efficient solutions not only reduces your environmental impact but also keeps operating costs low. Consider installing a rainwater collection system and using sustainable growing methods like composting to further enhance your greenhouse’s eco-friendly features.\n\nAs you begin enjoying your new greenhouse, maintain regular maintenance schedules and monitor temperature and humidity levels to ensure your plants thrive year-round. Don’t forget to experiment with different plant varieties and growing techniques – your converted greenhouse offers endless possibilities for both seasonal and year-round growing.\n\nBy transforming your shed into a greenhouse, you’ve created a sustainable solution for growing your own food and plants while reducing waste and environmental impact. Whether you’re growing vegetables, starting seedlings, or nurturing exotic plants, your converted greenhouse represents a perfect blend of practicality and environmental consciousness. Happy growing!