
Transform Your Tin Shed: Smart Insulation Tricks That Actually Work

Transform your tin shed into a comfortable, year-round space with proper insulation techniques that prevent heat loss and moisture buildup. Installing the right insulation not only regulates temperature but can reduce energy costs by up to 50% while protecting your stored items from extreme weather conditions. Start with cost-effective insulation solutions like reflective foil barriers, which create an effective thermal break between the metal exterior and interior space. Combine multiple insulation layers – rigid foam boards against the walls, fiberglass batts between studs, and a vapor barrier to prevent condensation – for maximum efficiency. Whether you’re storing temperature-sensitive equipment or creating a workshop space, proper insulation transforms a basic tin shed into a functional, climate-controlled environment that serves your needs year-round.
Why Your Tin Shed Needs Proper Insulation
Temperature Control Problems
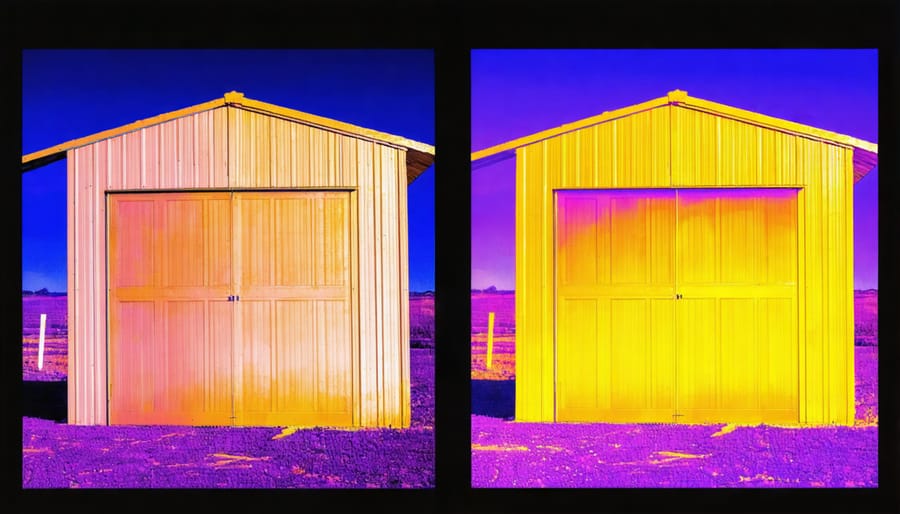
Tin sheds present a significant challenge when it comes to temperature control. During hot summer months, the metal surface absorbs and radiates heat, turning your shed into a virtual oven that can reach temperatures well above the outside air. This excessive heat can damage stored items and make working in the shed unbearable.
In winter, the opposite problem occurs. Metal conducts cold extremely efficiently, causing the interior temperature to plummet. The thin walls offer little resistance to heat loss, making the space uncomfortably cold and potentially causing condensation issues that can lead to rust and mold growth.
These temperature swings aren’t just uncomfortable – they can affect everything stored inside your shed. Tools can rust, paint can freeze or become too hot, and sensitive equipment may malfunction. Without proper insulation, your tin shed will continue to experience these extreme temperature fluctuations, making it less functional and potentially damaging to your belongings.
Moisture and Condensation Issues
One of the biggest challenges with tin sheds is dealing with moisture and condensation. When warm air meets the cool metal surface, water droplets form, potentially leading to rust, mold, and damage to stored items. To prevent moisture damage, proper ventilation is crucial. Install vents near the roof and base of your shed to create airflow, and consider adding a dehumidifier during particularly humid seasons.
A vapor barrier between your insulation and the tin walls helps manage condensation by preventing warm, moist air from reaching cold surfaces. Look for signs of moisture problems, such as water stains, musty odors, or rust spots, and address them promptly. Using moisture-resistant insulation materials and maintaining proper drainage around your shed’s foundation will also help keep your storage space dry and protected. Regular inspections of seals around windows and doors can catch potential water entry points before they become serious issues.
Best Insulation Materials for Tin Sheds
Reflective Foil Insulation
Reflective foil insulation, also known as radiant barriers, offers an excellent solution for year-round temperature control in tin sheds. This lightweight material consists of a highly reflective aluminum surface that bounces back up to 97% of radiant heat, making it particularly effective in hot climates.
Installing reflective foil is relatively straightforward. Start by measuring the interior walls and ceiling of your shed. Cut the foil to size, leaving a small overlap at the edges. Secure the material using construction staples or foil tape, ensuring the shiny side faces the direction of heat flow. For maximum effectiveness, maintain a small air gap between the foil and the tin walls.
One of the biggest advantages of reflective foil is its dual-action performance. During summer, it prevents heat from entering your shed, while in winter, it helps retain warmth by reflecting internal heat back into the space. This material is also moisture-resistant, helping to prevent condensation issues common in metal sheds.
For best results, combine reflective foil with traditional insulation materials. Install it either directly under your roof sheets or as an additional layer over bulk insulation. Remember to wear protective gloves during installation, as the foil edges can be sharp, and always ensure proper ventilation in your shed to prevent moisture buildup.
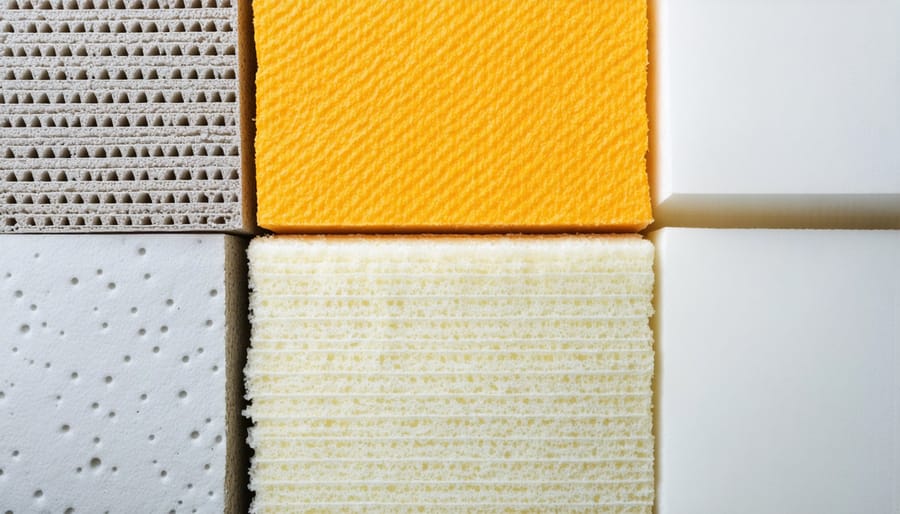
Fiberglass Batts and Rolls
Fiberglass batts and rolls are a tried-and-true insulation solution that works exceptionally well in tin sheds. These pink or yellow insulation materials are designed to fit snugly between wall studs and ceiling joists, creating an effective thermal barrier. The beauty of fiberglass insulation lies in its affordability and widespread availability at any home improvement store.
When installing fiberglass batts in your tin shed, make sure to choose the right thickness (R-value) for your climate zone. For most regions, an R-13 to R-19 rating works well for walls, while ceiling installations might benefit from R-30 or higher. The material comes in pre-cut widths to match standard stud spacing, making installation relatively straightforward for DIY enthusiasts.
Remember to wear proper safety gear during installation, including gloves, a dust mask, and eye protection, as fiberglass can irritate skin and airways. Start by measuring the spaces between studs and cut the batts slightly larger than needed for a snug fit. Press the insulation gently into place, being careful not to compress it too much, as this reduces its effectiveness.
For the best results, pair fiberglass insulation with a vapor barrier to prevent moisture buildup. This combination creates a reliable insulation system that will keep your tin shed comfortable throughout the seasons while remaining budget-friendly.
Spray Foam Solutions
Spray foam insulation offers one of the most effective solutions for insulating your tin shed, providing excellent coverage and superior air-sealing properties. Two main types are available: closed-cell and open-cell foam, each with unique benefits for your project.
Closed-cell spray foam is the heavyweight champion of insulation, creating a dense, moisture-resistant barrier that delivers an impressive R-value of 6-7 per inch. This variety is particularly well-suited for tin sheds because it adds structural strength to your walls and provides an excellent vapor barrier. While it costs more initially, its durability and performance make it a worthwhile investment.
Open-cell spray foam, on the other hand, is lighter and more affordable. Though it offers a lower R-value of about 3.5 per inch, it excels at sound dampening and can effectively fill irregular spaces. This option works well in tin sheds where moisture isn’t a major concern and budget considerations are important.
Both types expand significantly upon application, reaching into corners and sealing gaps that other insulation materials might miss. Professional installation is recommended for the best results, as proper application requires specialized equipment and expertise. The foam adheres directly to your shed’s metal walls, creating a seamless barrier that prevents heat loss and air infiltration.
When choosing between the two, consider your local climate, budget, and specific needs. For unheated storage sheds, open-cell foam might suffice, while workshops or frequently used spaces might benefit more from closed-cell’s superior insulating properties.
Step-by-Step Installation Process
Preparation and Safety
Before starting your DIY installation techniques, gather all necessary materials and tools. You’ll need insulation material (fiberglass batts, foam boards, or reflective foil), a utility knife, measuring tape, safety gloves, protective eyewear, dust mask, staple gun with staples, and a sturdy ladder. For foam board installation, also include adhesive and screws.
Prioritize safety by wearing appropriate personal protective equipment (PPE). Fiberglass can irritate skin and airways, so wear long sleeves, pants, and a properly fitted dust mask. When working with sharp tools or at heights, always use cut-resistant gloves and maintain three points of contact on the ladder.
Clear the work area of any obstacles and ensure proper ventilation. If your shed contains valuable items, consider temporarily relocating them to prevent damage. Check weather conditions before starting – avoid working during wet or windy days. Have a first aid kit nearby and work with a partner when possible, especially when handling large insulation panels or working on elevated surfaces.
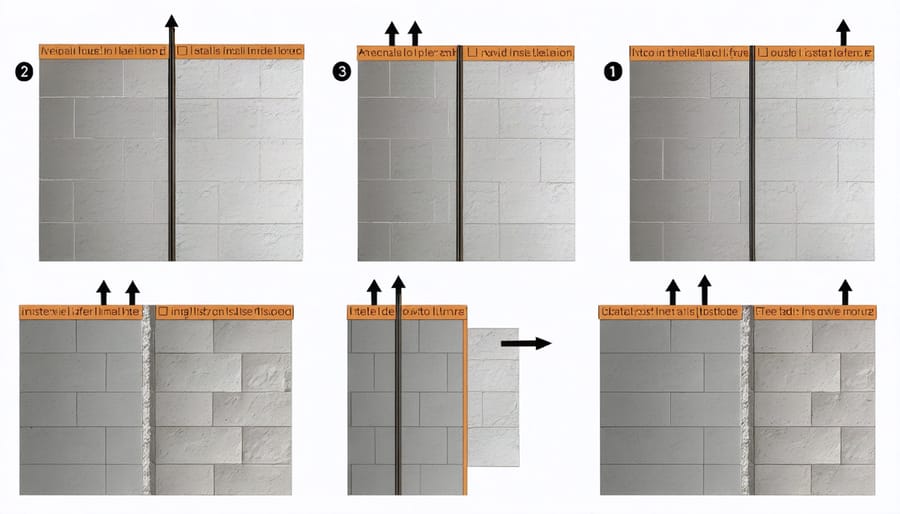
Wall Insulation Steps
Start by clearing the wall cavity of any debris and checking for gaps or holes that need patching. Use a wire brush to remove rust spots and apply a rust-inhibiting primer to prevent future corrosion. This preparation ensures your insulation will perform optimally.
For the actual installation, begin at the bottom of one wall and work your way up. If using batts or rolls, cut the insulation to fit snugly between the wall studs, leaving no gaps. Make sure the vapor barrier, if present, faces the interior of the shed. For rigid foam boards, measure and cut panels to fit precisely between studs, securing them with adhesive or mechanical fasteners.
When installing multiple layers, stagger the joints to prevent thermal bridging. Pay special attention to areas around windows, doors, and electrical outlets, ensuring proper sealing while maintaining safety clearances. Use expanding foam to fill any small gaps around these areas.
For loose-fill insulation, install a mesh or fabric barrier between the studs first, then blow in the material until reaching the desired density. This method works particularly well for irregular spaces and hard-to-reach areas.
Finally, cover the insulation with appropriate wall cladding to protect it from damage and improve aesthetics. Consider using moisture-resistant materials like plywood or oriented strand board (OSB) for added durability. Remember to leave small gaps at the bottom for ventilation and moisture control.
Pro tip: Take photos of any electrical wiring or plumbing before covering them with insulation. This documentation will prove invaluable for future maintenance or modifications.
Roof Insulation Techniques
When it comes to insulating your tin shed’s roof, several effective techniques can help maintain a comfortable temperature year-round. The most popular method involves installing rigid foam boards directly underneath the roof panels. These boards create an excellent thermal barrier and are relatively easy to work with.
Another proven approach is using reflective foil insulation, which works particularly well in hot climates. Simply attach the foil to the underside of your roof rafters, leaving a small air gap between the foil and the tin roof. This gap enhances the insulation’s effectiveness by creating an additional thermal barrier.
For a budget-friendly solution, consider installing fiberglass batts between your roof rafters. While installing, ensure you wear appropriate safety gear and maintain a vapor barrier on the warm side of the insulation to prevent moisture buildup.
Spray foam insulation offers perhaps the most comprehensive coverage, sealing all gaps and creating an airtight barrier. Though more expensive, it provides superior insulation and can help reduce noise from rain and hail.
Remember to pay special attention to edges and corners during installation. These areas often become weak points where heat can escape or enter. Using foam tape or weatherstripping around these spots helps create a complete thermal envelope. For best results, combine your chosen insulation method with proper ventilation to prevent condensation issues.
Maintenance and Long-term Care
Regular maintenance is key to ensuring your insulated tin shed remains energy-efficient and comfortable year-round. Start by conducting seasonal inspections, paying special attention to the seals around windows, doors, and any penetration points. Check for gaps or damaged insulation, particularly after severe weather events or strong winds.
Keep an eye out for any signs of moisture, as this can significantly impact insulation effectiveness. Ensure proper ventilation is maintained to prevent condensation buildup, which can lead to mold growth and deteriorating insulation. Clean your gutters regularly and maintain good drainage around the shed to prevent water from seeping into the walls.
If you notice any tears or compression in the insulation material, address these issues promptly. Small repairs are much more manageable and cost-effective than complete replacements. Use appropriate patching materials that match your existing insulation type.
Consider applying a fresh coat of reflective paint to your shed’s exterior every few years to maintain its heat-reflecting properties. This simple step can significantly extend the life of your insulation system and improve its overall performance.
Document any maintenance work you perform and keep a regular schedule for inspections. This helps you track the condition of your insulation over time and anticipate when replacements might be needed. Remember that well-maintained insulation can last 15-20 years or more, making your initial investment worthwhile.
For optimal long-term performance, avoid storing items directly against insulated walls, as this can compress the material and reduce its effectiveness. Keep the space between your stored items and walls clear to maintain proper air circulation.
Insulating your tin shed is a worthwhile investment that can transform your storage space into a comfortable, energy-efficient structure. By choosing the right insulation materials, following proper installation techniques, and addressing ventilation needs, you can significantly improve your shed’s functionality throughout the year. Remember to consider factors like climate conditions, budget, and intended use when planning your insulation project. Whether you choose fiberglass batts, foam boards, or reflective foil, the key is to create a complete thermal barrier that protects against both heat and cold. Don’t wait for extreme weather to take action – start your shed insulation project today and enjoy the benefits of a more comfortable, protected storage space year-round. With proper planning and execution, you’ll wonder why you didn’t insulate your tin shed sooner.