
Why Your 8×10 Shed Roof Leaks (And How to Protect It for Years)
Your 8×10 shed roof faces constant assault from rain, snow, UV rays, and wind—making it the most vulnerable part of your entire structure. Choose asphalt shingles for budget-friendly protection lasting 15-20 years, metal roofing for superior durability spanning 40+ years, or rubber membrane for flat roofs requiring minimal maintenance. Ensure proper roof pitch (minimum 3:12 slope) to prevent water pooling that leads to leaks and rot within months.\n\nMost shed roof failures stem from three preventable issues: inadequate flashing around edges, missing drip edges that allow water to seep under shingles, and improper ventilation causing moisture buildup. Address these during installation by overlapping flashing layers by at least 3 inches, installing continuous drip edge along all eaves, and adding ridge vents or gable vents for airflow.\n\nWhether you’re building new, troubleshooting leaks, or planning a roof replacement, understanding material options and weatherproofing techniques saves hundreds in future repairs. This guide walks you through selecting the right roofing system for your climate, installing it correctly the first time, and maintaining it for maximum lifespan—helping you protect your storage investment for decades.\n\n\n
Why 8×10 Sheds Face Unique Roofing Challenges
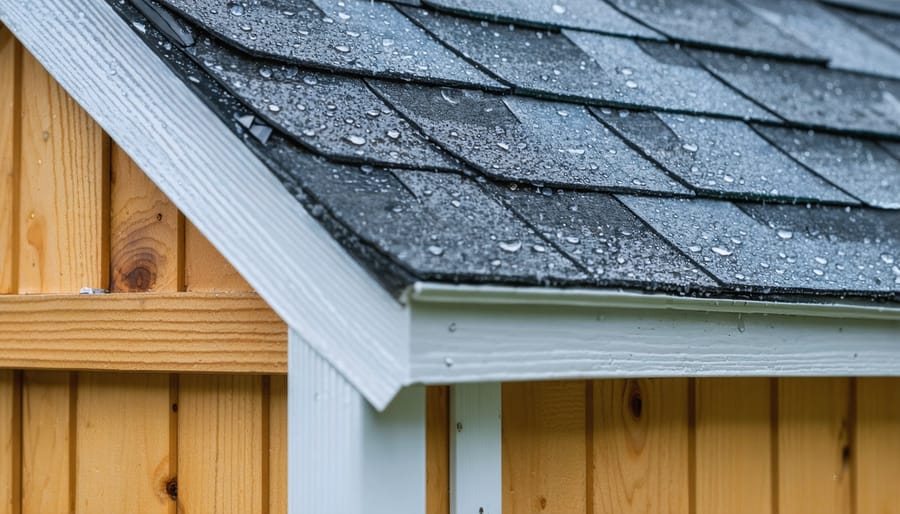
\n\nYour 8×10 shed might be compact, but don’t let its smaller footprint fool you—these structures face some surprisingly tough roofing challenges that larger buildings often avoid.\n\nThe biggest issue? Location, location, location. Most homeowners tuck their 8×10 sheds in corner yards or open garden areas where they’re fully exposed to the elements. Without the protection of surrounding structures or mature trees, your shed roof bears the full brunt of driving rain, intense sun, and gusty winds. That constant exposure accelerates wear and tear in ways you might not expect.\n\nSize also plays a tricky role. While a smaller roof means less square footage to maintain, it often means tighter budgets during construction. Many 8×10 sheds use thinner materials or simplified roof designs to keep costs down. We’ve heard from countless homeowners who discovered—too late—that their “budget-friendly” shed came with minimal weatherproofing. One customer shared how her garden tool shed developed leaks within the first year simply because the manufacturer used standard felt paper instead of proper underlayment.\n\nThe compact design creates another vulnerability: poor ventilation. Without adequate airflow, moisture gets trapped inside, leading to condensation that damages the roof from underneath. This is especially problematic in humid climates or when you’re storing damp equipment.\n\nUnderstanding these unique challenges is your first step toward protecting your investment and keeping your belongings dry for years to come.\n\n
 \n
\n\n\n\n
 \n
\n\n\n
Choosing the Right Roofing Material for Your 8×10 Shed
\n\n
Asphalt Shingles: The Budget-Friendly Classic
\n\nAsphalt shingles remain the go-to choice for most 8×10 shed roofs, and for good reason. They’re incredibly budget-friendly, typically costing between $100-$200 for materials to cover your entire shed roof. Installation is straightforward enough for confident DIYers—you’ll simply nail overlapping rows of shingles onto your roof deck, starting from the bottom edge and working upward.\n\nThese classic shingles offer a respectable 15-20 year lifespan when properly installed, which is plenty of time to protect your garden tools, lawn equipment, or seasonal decorations. They’re also widely available at any home improvement store, so you won’t waste time hunting down specialty materials.\n\nOne homeowner shared: “I installed asphalt shingles on my backyard shed five years ago. They’ve handled heavy snow and summer storms without any issues, and the whole project took just one weekend.”\n\nThe biggest advantage? If damage occurs, replacing individual shingles is simple and inexpensive. This makes asphalt shingles perfect for those wanting reliable protection without breaking the bank.\n\n
Metal Roofing: Maximum Durability
\n\nMetal roofing stands out as one of the most durable options for your 8×10 shed, often lasting 40-70 years with minimal maintenance. This material excels at shedding rain, snow, and debris while standing strong against high winds and fire hazards. Many homeowners appreciate that metal roofs are lightweight yet incredibly sturdy, making installation more manageable for DIY projects.\n\nThe main considerations? Metal roofing typically costs more upfront than asphalt shingles, though the longevity often makes it cost-effective over time. You’ll also want to think about noise during heavy rain—though many find the sound pleasant, adding insulation underneath can quiet things down if needed. Metal roofs reflect sunlight beautifully, helping keep your shed cooler in summer months. For those storing temperature-sensitive items or spending time in their shed workspace, this natural cooling benefit is a real bonus that saves energy year-round.\n\n
Roll Roofing and Rubber Membranes
\n\nFor flat or low-slope 8×10 shed roofs, rolled roofing materials offer an affordable and straightforward installation option. Roll roofing, which comes in large rolls of mineral-surfaced material, is perfect if you’re working with a nearly flat roof and want a quick DIY solution. It’s budget-friendly and can last 5-8 years with proper care.\n\nEPDM rubber membrane is another excellent choice that’s gaining popularity among shed owners. This durable black rubber material creates a watertight seal and can last 20+ years. Many DIYers appreciate how forgiving EPDM is during installation—you simply roll it out, trim to size, and secure the edges. One homeowner shared that her EPDM-covered shed roof survived heavy storms without a single leak, while her neighbor’s traditional shingles needed repair twice in the same period.\n\nThe key advantage of both options is their suitability for roofs with minimal pitch. If your 8×10 shed has a slope less than 3:12, these materials will perform far better than standard shingles, which can allow water infiltration on low slopes.\n\n
Cedar Shakes and Alternative Materials
\n\nCedar shakes bring timeless beauty to your 8×10 shed roof with their natural wood grain and rustic charm. They’re perfect if you want your shed to blend seamlessly with wooded surroundings or complement a cottage-style home. However, they require commitment—regular cedar roof maintenance includes annual treatments and inspections to prevent rot and moss growth.\n\nAlternative specialty materials worth considering include synthetic slate, which offers the elegant look of stone without the weight concerns, and rubber roofing made from recycled tires that provides excellent weather resistance. Metal panels in copper or standing seam styles create striking modern aesthetics while lasting decades. Composite shingles designed to mimic wood or slate deliver curb appeal with minimal upkeep.\n\nThese premium materials make sense when your shed is highly visible from your home, serves as a focal point in your landscape design, or you’re matching existing structures. One homeowner shared that synthetic cedar shakes on her garden shed eliminated yearly maintenance while preserving the natural aesthetic she loved. While initial costs run higher than standard asphalt, the reduced maintenance and extended lifespan often balance the investment over time.\n\n\n
Essential Weatherproofing Techniques That Actually Work
\n\n
Proper Underlayment Installation
\n\nBefore you install a single shingle on your 8×10 shed roof, you’ll need to lay down quality underlayment—think of it as your roof’s insurance policy against moisture damage. Roofing felt (often called tar paper) or synthetic underlayment creates a critical waterproof barrier that protects your shed’s wooden structure from rain, snow, and condensation.\n\nStart at the bottom edge of your roof and work your way up, overlapping each row by at least 2-4 inches. This overlap pattern ensures water flows downward without sneaking underneath. Secure the underlayment with staples or roofing nails, keeping it smooth and wrinkle-free—any bumps or gaps become potential leak points later.\n\nMany DIYers skip this step to save time or money, but that’s a mistake you’ll regret during the first heavy storm! Proper underlayment installation is essential when weatherproofing your shed, adding years to your roof’s lifespan. Synthetic options cost more upfront but offer superior tear resistance and UV protection—worth considering if your project timeline spans several weeks.\n\n
Flashing and Drip Edge Protection
\n\nFlashing and drip edge are your shed roof’s first line of defense against water infiltration. Think of them as insurance for those vulnerable spots where water loves to sneak in—along roof edges, around vents, and at valleys.\n\nStart by installing drip edge along all eaves before laying your underlayment. This simple metal strip extends beyond the fascia board, directing water away from wood components. The drip edge should overlap by at least two inches at joints.\n\nFor roof penetrations like vents or chimneys, use step flashing that works with your roofing material. Here’s a practical tip: apply roofing cement generously but neatly beneath and around flashing pieces. Many homeowners discover leaks years later because they skimped on this step during installation.\n\nAt valleys where two roof planes meet, install valley flashing before shingles. Ensure it extends at least eight inches on each side of the valley center. One DIY enthusiast shared how proper valley flashing saved her shed during a particularly harsh winter—while her neighbor’s shed developed multiple leaks.\n\nDon’t forget to seal all nail heads with roofing cement for complete protection.\n\n
Sealing Seams and Fasteners
\n\nProtecting your 8×10 shed roof from water infiltration starts with properly sealing every potential entry point. Focus on exposed fasteners first—apply a high-quality roofing sealant or exterior-grade caulk over nail and screw heads to create a waterproof barrier. This simple step prevents rust and stops water from seeping through puncture holes.\n\nPay special attention to seams where roofing panels overlap or meet trim pieces. Run a consistent bead of flexible sealant along these joints, smoothing it with your finger for better adhesion. For metal roofing, use a sealant specifically designed for metal-to-metal contact that won’t degrade from temperature fluctuations.\n\nDon’t forget the ridge caps and flashing areas—these spots take the most weather exposure. Homeowners often share that taking an extra hour to thoroughly seal these vulnerable points saves them from costly repairs down the road. Recheck all sealed areas annually, as caulks can crack over time, and touch up any gaps before small problems become big headaches.\n\n
 \n
\n\n\n
Ventilation Considerations
\n\nYour 8×10 shed roof needs to breathe! Without proper shed ventilation, moisture gets trapped inside, leading to mold, mildew, and wood rot that can shorten your roof’s lifespan by years. Even in a small shed, temperature fluctuations create condensation that collects on the underside of your roof, especially during seasonal changes.\n\nThe good news? Simple ventilation solutions work beautifully for compact 8×10 spaces. Ridge vents along the roof peak allow hot air to escape naturally, while soffit vents or gable vents near the eaves let fresh air circulate. For budget-conscious DIYers, even basic turbine vents or small louvered vents make a remarkable difference. One homeowner shared that adding two gable vents eliminated the musty smell plaguing her garden shed for years. Think of ventilation as insurance for your roof investment—a small upfront effort that prevents costly repairs down the road.\n\n\n
Common 8×10 Shed Roof Problems (And Quick Fixes)
\n\n
Sagging Roof Decking
\n\nA sagging roof deck on your 8×10 shed is more than just an eyesore—it’s a warning sign that shouldn’t be ignored. The most common culprits include inadequate rafter spacing (they should be no more than 24 inches apart), water damage from leaks that has weakened the plywood or OSB decking, and using sheathing that’s too thin for your roof’s span. Snow loads can also overwhelm an undersized structure over time.\n\nHere’s the good news: catching the problem early makes a big difference. Minor sagging—less than half an inch over an 8-foot span—can often be reinforced by adding extra rafters or installing blocking between existing ones. However, if you notice significant dips, water stains, or soft spots when you walk on the roof, replacement is your safest bet. One homeowner shared how reinforcing her shed roof with additional 2×4 supports cost under $50 and extended her shed’s life by years. Don’t wait until the problem worsens—addressing sagging promptly protects everything stored inside your shed.\n\n
Water Pooling and Drainage Issues
\n\nStanding water on your 8×10 shed roof is more than just an eyesore—it’s a fast track to rot, leaks, and structural damage. The good news? This problem is totally preventable with the right approach.\n\nFirst, check your roof pitch. A minimum slope of 3:12 (three inches of rise for every twelve inches of horizontal run) ensures proper water runoff. If your existing roof is too flat, adding a layer of tapered insulation or installing sleepers can create the drainage angle you need without rebuilding from scratch.\n\nNext, inspect your gutters and downspouts regularly. Clogged gutters force water to pool on the roof instead of flowing away. Clean them seasonally and consider installing gutter guards to minimize debris buildup.\n\nFor persistent pooling spots, a roof coating designed for low-slope applications can fill minor depressions and create a smoother drainage path. Many DIYers have found success simply by identifying the lowest point and ensuring water has a clear exit route—sometimes it’s as simple as adjusting a sagging support beam underneath.\n\n
Missing or Damaged Shingles
\n\nCatching damaged or missing shingles early can save you from costly water damage down the road. Start by inspecting your 8×10 shed roof after storms or at least twice yearly. Look for curled edges, cracks, or bare spots where granules have worn away.\n\nReplacing a few shingles is surprisingly straightforward! You’ll need a pry bar, roofing nails, and matching shingles. Gently lift the shingles above the damaged one, remove the old nails, and slide out the broken piece. Slide your new shingle into place, secure it with four roofing nails, and seal the edges with roofing cement. \n\nOne homeowner shared that replacing just three damaged shingles prevented a leak that could have ruined stored family heirlooms. The repair took only 30 minutes and cost under $20.\n\nPro tip: Keep a few extra shingles from your original installation stored inside the shed. They’ll match perfectly and be ready when you need them!\n\n\n
Maintenance Schedule to Keep Your Shed Roof Protected
\n\nProtecting your 8×10 shed roof doesn’t require hours of work—just consistent attention at the right times. Following a seasonal maintenance schedule helps you catch small issues before they become expensive repairs.\n\n**Spring (March-May):** After winter’s harsh conditions, inspect for loose or damaged shingles and check for any leaks inside. Clean out gutters if your shed has them, and look for signs of water damage around the roof edges. Sarah from Vermont shares: “I always do my spring check right after the last snow melts. Last year, I caught three loose shingles that would’ve caused major leaks during spring rains.”\n\n**Summer (June-August):** Check for any sun damage or curling shingles. This is the perfect time for minor repairs since materials seal better in warm weather. Trim back any overhanging branches that could damage the roof during storms.\n\n**Fall (September-November):** Clear away leaves and debris that trap moisture. Inspect flashing and seals before winter arrives. Many shed owners apply a protective coating during this season for added winter protection.\n\n**Winter (December-February):** After heavy snow, gently remove excessive buildup to prevent weight stress. Do quick visual checks after major storms.\n\nMark from Ohio notes: “I spend maybe 30 minutes each season on my shed roof. In five years, I haven’t had a single leak—just small preventive fixes here and there.”\n\n\nInvesting time and effort into properly roofing and weatherproofing your 8×10 shed isn’t just about construction—it’s about protecting everything you store inside. Whether it’s gardening equipment, power tools, or seasonal decorations, moisture damage from a poorly maintained roof can lead to costly replacements and frustrating losses. The good news? A well-built shed roof can last for decades with minimal upkeep, making it one of the smartest investments you can make for your property.\n\nTaking the DIY approach is absolutely within reach for most homeowners, especially when you arm yourself with the right knowledge and quality materials. While it might be tempting to cut corners with bargain supplies, remember that your roof faces sun, rain, snow, and wind year-round. Quality shingles, proper underlayment, and reliable sealants make all the difference between a roof that performs well for years and one that requires repeated repairs.\n\nReady to get started? Explore our selection of shed materials, roofing supplies, and weatherproofing products designed specifically for DIY enthusiasts like you. Your shed—and everything in it—will thank you for the extra care.