
Why Your Backyard Shed Office Needs Better WiFi (And How to Fix It)
Extend your home WiFi to your backyard shed using a wireless range extender—the simplest solution that plugs into an outdoor outlet and rebroadcasts your existing signal up to 150 feet. Install a dedicated outdoor WiFi access point connected via ethernet cable for reliable connections in structures beyond 200 feet from your router, ensuring consistent video calls and file uploads. Create a mesh network system with weatherproof nodes positioned between your house and workspace to eliminate dead zones and maintain seamless connectivity as you move around your property. Upgrade to a business-grade router with enhanced range and bandwidth management if you’re powering your backyard office with multiple devices or hosting client meetings.\n\nThe right solution depends on three factors: distance from your main router, number of connected devices, and your shed’s construction materials. Metal siding and thick walls significantly weaken signals, while wood and vinyl structures pose minimal interference. Most homeowners find success with mid-range options costing $80-$200, achieving professional-grade connectivity without requiring technical expertise or expensive installations.\n\n\n
The WiFi Problem Nobody Talks About When Setting Up a Shed Office
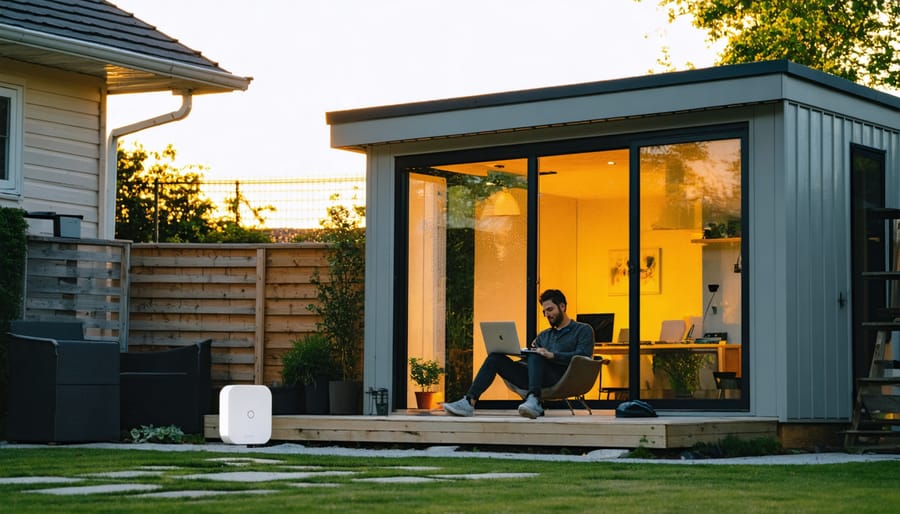
\n\nYou’ve finally finished setting up your shed office—desk assembled, chair positioned perfectly, laptop ready to go. You flip open your computer, eager to start your first productive workday, and then you see it: one measly WiFi bar. Or worse, no connection at all.\n\nSound familiar? You’re not alone. This is the moment countless homeowners realize their home’s WiFi wasn’t designed to stretch beyond the house walls.\n\nHere’s what’s happening: Your router is probably sitting in your living room or office, happily broadcasting its signal throughout your house. But getting that signal to travel another 50, 75, or 100 feet to your backyard shed? That’s asking a lot.\n\nThink of WiFi signals like your voice trying to reach someone in another room. Every wall between you muffles the sound a bit more. Now add exterior walls (which are thicker than interior ones), vinyl or metal siding, your shed’s wooden walls, insulation, and possibly some landscaping or fencing in between. Each of these obstacles absorbs and deflects your WiFi signal.\n\nDistance alone is a challenge—most standard routers effectively cover about 150 feet indoors, but that drops significantly when signals have to pass through multiple barriers. And if your shed has metal roofing or siding? That’s particularly problematic, as metal acts like a shield that blocks WiFi signals almost entirely.\n\nThe good news is that you’re not stuck with spotty internet or endless buffering. Understanding why standard home WiFi struggles with outdoor spaces is the first step toward finding a solution that actually works for your backyard workspace.\n\n
 \n
\n\n\n\n
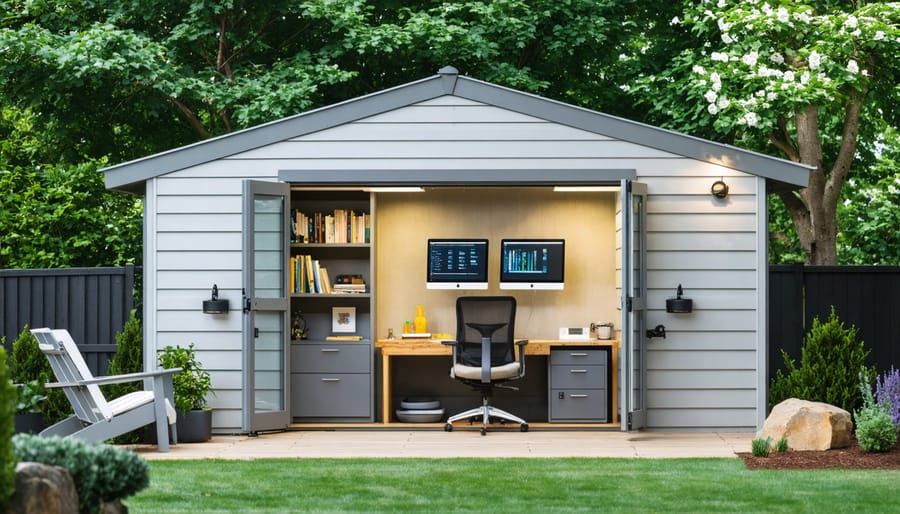
Simple WiFi Solutions That Actually Work for Small Business Sheds
\n\n
WiFi Extenders: The Budget-Friendly Starting Point
\n\nWiFi extenders represent the most wallet-friendly entry point for boosting wireless coverage in your backyard office or workshop. These plug-in devices work by capturing your existing WiFi signal from your home router and rebroadcasting it to extend the coverage area. Think of them as a relay station that helps your signal reach those previously dead zones.\n\nFor small outdoor spaces within 50-75 feet of your house, extenders can be surprisingly effective. They’re particularly useful if you’ve converted a shed into a home office and only need basic internet connectivity for email, web browsing, and video calls. You’ll typically spend between $30-$100 for a quality extender—making it an attractive option when you’re testing the waters of outdoor workspace life.\n\nHere’s a real-world example: Sarah transformed her 10×12 garden shed into a craft studio for her Etsy business. Her router sits in her living room about 40 feet away. A simple WiFi extender plugged into an outlet on her back porch gives her reliable coverage for uploading product photos and processing orders—without breaking the bank.\n\nHowever, extenders do have limitations. They typically cut your internet speed in half because they’re using the same channel to both receive and transmit data. They’re also less reliable through multiple walls or when dealing with extreme weather conditions. If you’re running bandwidth-heavy applications like video editing or hosting client video conferences, you’ll likely find extenders frustratingly inadequate for professional demands.\n\n
 \n
\n\n\n
Mesh Network Systems: When You Need Rock-Solid Connectivity
\n\nIf your outdoor workspace spans multiple structures or covers significant ground—think a workshop shed at the back of your property plus a greenhouse or office shed near the house—a mesh network system might be your best friend. Unlike basic extenders that simply repeat your signal (often with reduced speed), mesh systems create a seamless blanket of connectivity across your entire property.\n\nHere’s what makes mesh systems special: instead of juggling multiple network names, you get one unified network that your devices automatically connect to as you move around. The mesh nodes communicate with each other, intelligently routing your data through the strongest path available. This means no more dropped video calls when you walk from your main office to check on equipment in your storage shed.\n\nSarah, a landscape designer who runs her business from a converted shed 80 feet from her house, shares: “My old extender would cut out constantly during client video consultations. Since switching to a mesh system, I haven’t had a single dropped call in six months.”\n\nThe setup is refreshingly straightforward—most systems guide you through installation via smartphone app in under 15 minutes. You’ll typically place one node near your router and position additional nodes throughout your property, creating overlapping coverage zones.\n\nWhen does the investment make sense? If your connected outdoor workspace is more than 50 feet from your house, you regularly experience dead zones, or you’re running bandwidth-hungry activities like video conferencing or large file transfers, mesh systems deliver reliability that justifies their $200-400 price tag. They’re particularly valuable if your livelihood depends on stable internet access.\n\n
Outdoor Access Points: The Professional Solution
\n\nIf you’re running a serious home business from your backyard office or workshop, or if your outdoor space sits far from your main house, weatherproof outdoor access points might be your best solution. These specialized devices are built to handle rain, snow, heat, and cold—something standard indoor equipment simply can’t manage.\n\n**When Does It Make Sense?**\n\nConsider outdoor access points if your workspace is more than 100 feet from your house, if you need coverage across multiple outdoor structures, or if you’ve tried everything else without success. Sarah, who runs a pottery studio in her converted barn, switched to an outdoor access point after going through three indoor routers damaged by humidity. “It was a game-changer,” she says. “No more signal drops during video calls with clients.”\n\nThese units typically mount on exterior walls or poles, creating a dedicated wireless bridge between your main network and outdoor areas. Many models can withstand temperatures from -40°F to 140°F and are rated for outdoor electrical safety.\n\n**Installation Basics**\n\nWhile you’ll likely want a professional electrician for the power connection, the concept is straightforward. The access point mounts outside your main building, pointed toward your workspace. You’ll run an ethernet cable from your indoor router to the outdoor unit—this cable provides both data and power through a technology called PoE (Power over Ethernet).\n\nMost homeowners invest between $150-$400 for the equipment, plus installation costs if hiring help. It sounds like a bigger commitment, and it is—but for dedicated workspaces where reliability matters, it’s a permanent solution that just works.\n\n\n
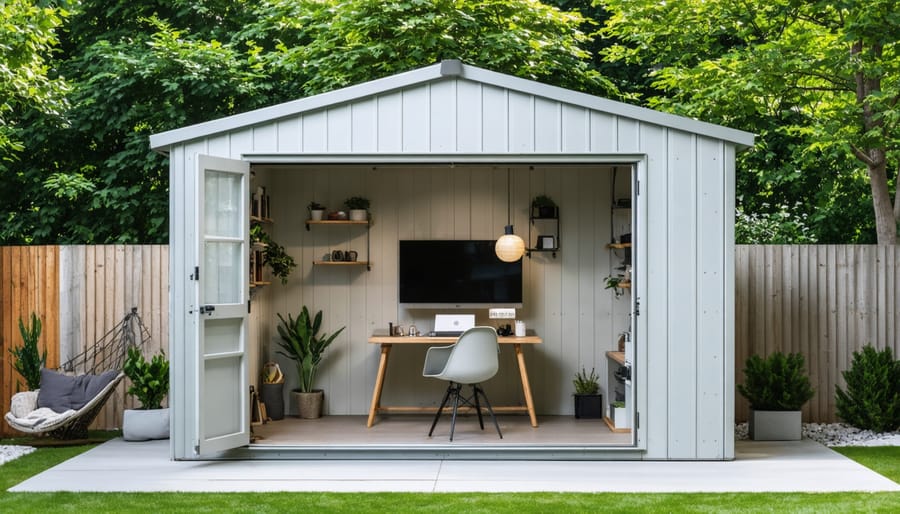
What to Consider Before You Buy
\n\nBefore investing in a WiFi solution for your shed or outdoor workspace, take time to evaluate your specific situation. Getting these factors right from the start will save you frustration and potentially costly do-overs down the road.\n\n**Distance and Obstacles Matter Most**\n\nMeasure the actual distance from your main house router to your shed workspace. Standard WiFi typically works well up to 150 feet indoors, but outdoor distances present different challenges. Walk the path between buildings and note what’s in between—thick trees, metal fences, or neighboring structures can all weaken signals significantly.\n\nYour shed’s construction materials play a crucial role too. Sarah, a graphic designer who converted her backyard shed into a studio, learned this the hard way: “I thought 50 feet would be no problem, but my shed’s metal siding basically acted like a shield against my home WiFi.” Wooden sheds are generally WiFi-friendly, while metal or concrete structures often require dedicated solutions.\n\n**Know Your Bandwidth Requirements**\n\nCount how many devices you’ll actually use simultaneously. A single laptop for emails needs minimal bandwidth, but video conferencing requires much more—especially if others at home are also streaming or gaming. If you’re planning regular Zoom calls or uploading large files to clients, you’ll need a robust connection that can handle 25+ Mbps consistently.\n\n**Don’t Overlook the Practical Stuff**\n\nWeather protection becomes essential for outdoor equipment. If you’re mounting an access point or extending cables outside, ensure everything is weatherproof and properly sealed. One overlooked detail can mean equipment failure during the first heavy rain.\n\nFinally, verify power access in your shed. Many WiFi solutions require electrical outlets—either for access points, mesh units, or powerline adapters. If your shed lacks power, you’ll need to address this first or consider solar-powered options.\n\n\n
Getting the Most Out of Your Shed Office WiFi
\n\nOnce you’ve chosen your WiFi solution, a few smart strategies will ensure you’re getting reliable, fast internet in your shed office day after day.\n\n**Positioning Makes All the Difference**\n\nIf you’re using a WiFi extender or mesh system, placement is crucial. Position your extender halfway between your main router and shed, preferably with a clear line of sight and minimal walls blocking the signal. For mesh units inside your shed, place them centrally on a shelf or desk rather than tucked behind filing cabinets or in corners. I learned this the hard way when my extender sat behind a metal toolbox—my video calls kept dropping until I moved it!\n\n**Keep Your Network Secure**\n\nYour shed office contains business data, so don’t skip network security. Always change default passwords to something strong and unique, enable WPA3 encryption (or WPA2 if your equipment doesn’t support WPA3), and create a separate guest network if clients visit your workspace. Consider weatherproofing your outdoor equipment by housing any outdoor access points in weatherproof enclosures designed for networking gear.\n\n**Test and Troubleshoot Regularly**\n\nRun speed tests monthly using free tools like Speedtest.net to catch issues early. If speeds suddenly drop, try these quick fixes: restart your router and extenders, check for firmware updates, or scan for interference from other devices. Heavy rain or extreme temperatures can affect outdoor equipment, so inspect cables and connections after severe weather.\n\n**Weatherproofing Outdoor Components**\n\nAny cables running to your shed should be buried in conduit or secured along walls protected from direct rain and sun exposure. Use outdoor-rated Ethernet cables, and seal entry points with weatherproof cable glands to prevent moisture damage.\n\nRegular maintenance—like clearing debris from equipment and checking connections—prevents most problems before they interrupt your workday.\n\n
 \n
\n\n\n\nTransforming your backyard shed into a functional workspace isn’t just about adding a desk and chair—it’s about creating an environment where you can actually get work done. Reliable WiFi is the cornerstone that makes this transformation possible, turning what was once simple storage into a legitimate extension of your home office or small business headquarters.\n\nThe good news? You don’t need to be a tech expert to make it happen. Whether you’ve opted for a simple WiFi extender, invested in a mesh network system, or installed a dedicated access point, the right solution for your specific situation is within reach and budget.\n\nTake a moment to assess your shed’s distance from your router, the types of work you’ll be doing, and how many devices you’ll need to connect. Then choose the solution that matches your needs and DIY comfort level. Remember, homeowners just like you have successfully tackled this project—from the weekend warrior who set up a mesh node in thirty minutes to the remote worker who now confidently video conferences from their backyard office.\n\nYour outdoor workspace deserves connectivity that works as hard as you do. Make it happen.