
Why Your Shed Needs a Vented Roof (And How to Build One Right)
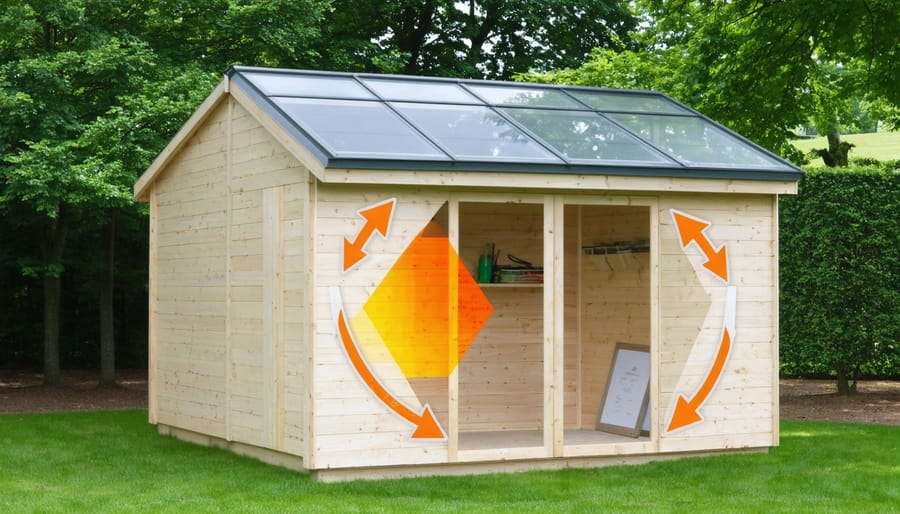
Protect your storage investment with a vented roof assembly that prevents moisture damage, extends structural life, and maintains ideal internal temperatures year-round. Proper ventilation strategies transform a basic shed roof into a dynamic system that works with nature, not against it. A well-designed vented roof assembly creates continuous airflow that whisks away trapped heat and moisture, preventing the devastating effects of condensation and mold growth that plague poorly ventilated structures. By incorporating soffit vents, ridge vents, and proper insulation layers, your shed’s roof actively regulates temperature while protecting valuable items stored below. This proven approach to roof construction has become the gold standard for modern storage solutions, offering superior performance compared to traditional unvented designs. Whether you’re building new or upgrading existing storage, understanding vented roof assembly principles ensures your shed remains a reliable, long-lasting investment.
The Science Behind Vented Roof Assemblies
How Air Flow Protects Your Shed
Proper airflow in your shed’s roof assembly acts like a natural climate control system, protecting your valuable belongings from moisture damage and extending the life of your structure. As warm air naturally rises, it carries moisture with it. Without adequate ventilation, this moisture becomes trapped, leading to condensation that can drip onto your stored items and potentially cause wood rot or mold growth.
A well-ventilated roof creates a continuous flow of air that sweeps away moisture and regulates temperature. In summer, this airflow helps expel hot air that could otherwise turn your shed into an oven. During winter, it prevents warm, moist air from condensing on cold surfaces, which could lead to water damage and mildew.
Think of your shed’s ventilation system as its breathing apparatus – intake vents draw in fresh air at the lower points while exhaust vents at the peak allow warm, humid air to escape. This natural circulation keeps your shed dry and your possessions protected year-round.
Temperature Management Benefits
A vented roof assembly plays a crucial role in temperature control in sheds, helping maintain comfortable conditions throughout the year. During hot summer months, proper ventilation allows warm air to escape through the upper vents while drawing in cooler air from below, creating a natural airflow that prevents heat buildup. This continuous air movement helps protect your stored items from excessive heat and moisture damage.
In winter, vented roofs continue to work by reducing condensation that forms when warm air meets cold surfaces. This helps prevent mold growth and protects wooden structures from rot. The regulated airflow also helps maintain more consistent temperatures, which is especially important if you’re storing temperature-sensitive items like electronics, garden chemicals, or wooden furniture.
Many shed owners report that properly vented roofs can help reduce indoor temperatures by up to 10-15 degrees compared to non-vented structures, making a significant difference in storage conditions and comfort while working in the shed.
Essential Components of a Vented Roof System
Intake and Exhaust Vents
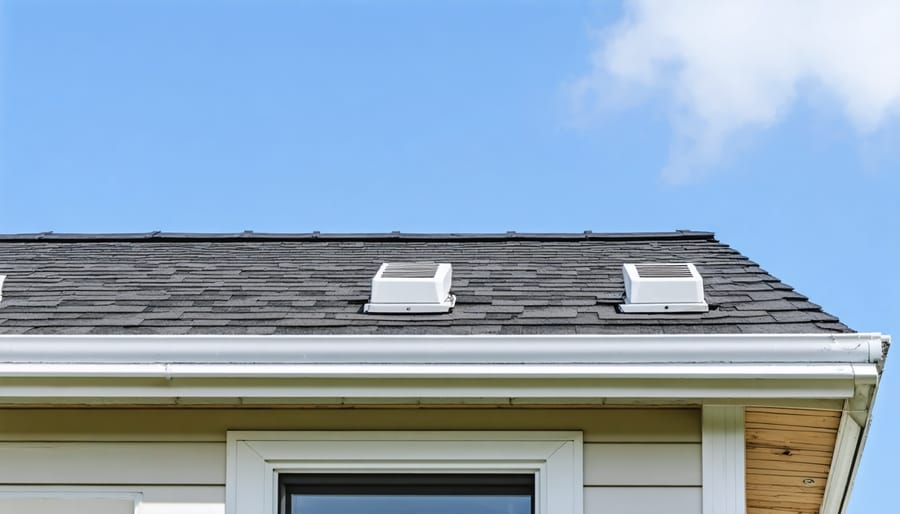
Proper placement of intake and exhaust vents is crucial for creating effective airflow in your shed’s roof assembly. Intake vents are typically installed along the eaves or soffits, allowing cool air to enter at the lowest point of your roof. These should be evenly spaced to ensure consistent airflow across the entire underside of your roof.
Exhaust vents, positioned near or at the roof peak, allow warm air to escape naturally through convection. Popular exhaust vent options include ridge vents, which run along the entire roof peak, and static vents, which are installed as individual units. For optimal performance, aim for a balanced ratio of intake to exhaust ventilation – typically 1:1 in terms of square inches of vent space.
A well-designed system might include continuous soffit vents paired with a full-length ridge vent, or several evenly-spaced soffit vents matched with corresponding static vents near the peak. Remember that proper spacing between vents is just as important as the type you choose – aim for even distribution to prevent dead spots where air might stagnate.
Insulation and Vapor Barriers
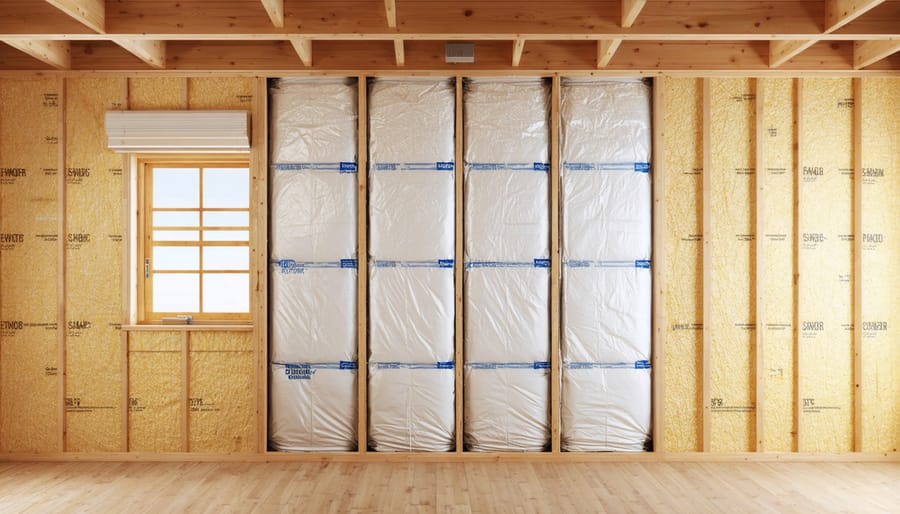
Proper insulation and vapor barriers are crucial components of a vented roof assembly. Start with a high-quality insulation material, such as fiberglass batts or rigid foam boards, ensuring it fills the space between rafters completely without compression. Leave a 1-2 inch gap between the insulation and roof deck to maintain proper airflow through the ventilation channel.
Install a vapor barrier on the warm side of the insulation (typically the interior side) to prevent moisture from migrating into the roof assembly. A 6-mil polyethylene sheet is commonly used, but smart vapor retarders are also excellent choices as they adapt their permeability based on seasonal conditions.
When installing the vapor barrier, ensure all seams overlap by at least 6 inches and are properly sealed with vapor barrier tape. Pay special attention to areas around light fixtures, vents, and other penetrations, using appropriate gaskets or sealants to maintain the barrier’s integrity.
Remember that the vapor barrier must be continuous and well-sealed to be effective. Even small gaps can allow moisture to accumulate, potentially leading to mold growth and reduced insulation effectiveness.
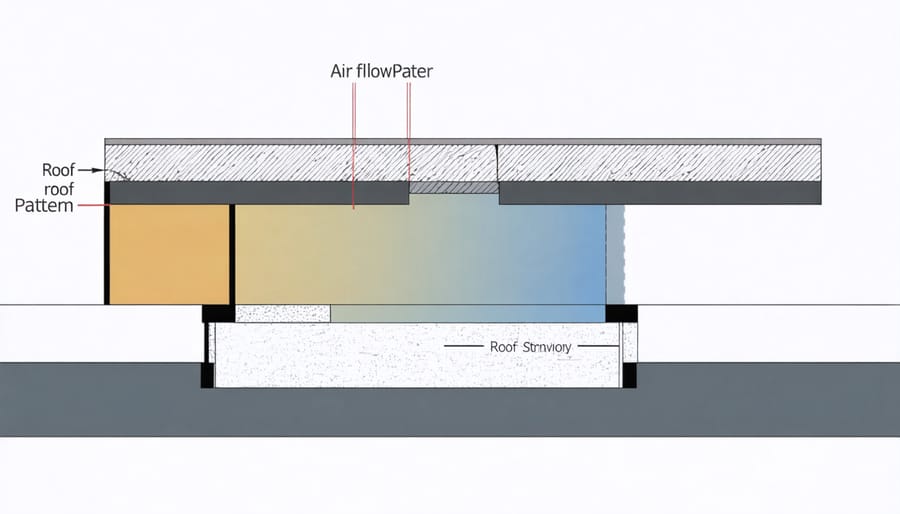
Air Gap Requirements
Proper air gap spacing is crucial for your vented roof assembly to function effectively. The standard requirement is a minimum 1-inch continuous air space between the roof sheathing and insulation, though 2 inches is often recommended for optimal airflow. This gap should run uninterrupted from the soffit to the ridge vent. At the eaves, ensure ventilation baffles or proper blocking maintains this spacing to prevent insulation from blocking the airflow. For cathedral ceilings, consider increasing the gap to 2.5 inches to accommodate higher air volume needs. Remember to keep the air channel clear of debris, insulation, or other materials that might obstruct proper ventilation. A well-maintained air gap helps prevent ice dams in winter and reduces heat buildup in summer.
Installation Best Practices
Planning Your Ventilation Strategy
An effective ventilation strategy starts with calculating your shed’s square footage and determining the optimal ratio of ventilation space to floor area. For a long-lasting roof design, aim for a 1:300 ratio of vent area to floor space. For example, a 120-square-foot shed would need about 0.4 square feet of total vent space.
Position intake vents (soffit vents) along the eaves at the lowest point of your roof, and exhaust vents at or near the ridge. This creates a natural flow as warm air rises and exits through the top while fresh air enters from below. Space your vents evenly along the length of your shed for balanced airflow.
When selecting vent sizes, remember that multiple smaller vents often work better than fewer large ones. For most backyard sheds, a combination of 4-6 soffit vents and 1-2 ridge vents provides excellent circulation. If your shed is in a particularly humid area or stores moisture-sensitive items, consider increasing the ventilation slightly above the minimum requirements.
Keep vents at least 2 feet apart to prevent short-circuiting, where exhaust air gets immediately drawn back into intake vents. This ensures proper air movement throughout the entire roof space.
Common Installation Mistakes to Avoid
When installing a vented roof assembly, several common mistakes can compromise its effectiveness. One frequent error is blocking soffit vents with insulation, which prevents proper airflow. Always use baffles or vent chutes to maintain clear paths for air movement from the soffits to the ridge vent.
Another mistake is incorrect spacing between roof vents. For optimal performance, maintain consistent distances between vents and ensure the total ventilation area meets local building codes. Many homeowners also overlook the importance of proper sealing around vent penetrations, leading to moisture issues down the line.
Installing ridge vents without adequate soffit ventilation is another typical error. Remember, your roof needs both intake and exhaust vents to create effective air circulation. Think of it like breathing – you need both inhaling and exhaling for the system to work properly.
Watch out for misaligned vapor barriers and insufficient insulation gaps. Leave a minimum 1-inch space between the roof sheathing and insulation to allow for proper airflow. These small details make a big difference in the overall performance of your vented roof assembly.
Maintenance Requirements
Regular maintenance is key to keeping your vented roof assembly performing at its best. Schedule bi-annual inspections in spring and fall to check for debris buildup in vents and ensure proper airflow. Clear leaves, twigs, and other materials from soffit and ridge vents using a leaf blower or soft brush. Look for signs of pest intrusion, such as damaged vent screens or nesting materials, and repair or replace screens as needed.
Monitor your attic space for any signs of moisture or condensation, which could indicate ventilation problems. Keep insulation clear of vent openings to maintain proper airflow. During winter, check that snow isn’t blocking ridge vents, and remove any ice dams that might form. If you notice increased energy bills or indoor temperature fluctuations, it may be time to have a professional assess your roof ventilation system’s effectiveness.
Climate-Specific Considerations
Different climates demand different approaches to roof ventilation, and getting it right can make a huge difference in your shed’s longevity. In hot, humid regions, increased ventilation is crucial to prevent moisture buildup and reduce cooling costs. Consider installing additional soffit vents and a larger ridge vent to maximize air flow during those steamy summer months.
For cold climate areas, while ventilation remains important, you’ll need to balance it with proper insulation. The key is preventing ice dams and managing condensation from warm indoor air meeting cold roof surfaces. Installing baffles to maintain a clear ventilation channel above the insulation is especially important in snowy regions.
In coastal areas, your vented roof assembly needs extra protection against salt air and strong winds. Using corrosion-resistant materials for all ventilation components and ensuring secure fastening of vents is crucial. Consider installing mesh screens with smaller openings to prevent salt spray from entering while maintaining adequate airflow.
For desert climates, dust control becomes a priority. Installing filtered vents can help keep sand and debris out while allowing necessary air movement. You might also want to consider slightly reduced ventilation areas to minimize dust infiltration while still maintaining adequate airflow to combat extreme heat.
Remember to check local building codes, as ventilation requirements often vary by region and climate zone. A properly adapted vented roof system will significantly extend your shed’s lifespan and improve its performance in any climate.
A well-designed vented roof assembly is more than just an add-on feature – it’s an essential component that protects your investment and extends the life of your shed. By implementing proper ventilation, you’ll create a more comfortable storage environment while preventing moisture damage and maintaining structural integrity. Remember that effective ventilation doesn’t have to be complicated; even simple solutions like ridge vents paired with soffit vents can make a significant difference. Whether you’re tackling this as a DIY project or working with a professional, taking the time to properly ventilate your shed roof will pay dividends in reduced maintenance costs and improved durability. Don’t wait until you notice problems – incorporate proper ventilation from the start, and enjoy the peace of mind that comes with knowing your shed is built to last.