
Keep Your Shed Cozy: Smart Insulation That Actually Works
Properly insulating your shed roof transforms a basic storage space into a weather-resistant, energy-efficient structure that protects valuable tools and equipment year-round. From preventing condensation damage to maintaining stable internal temperatures, effective roof insulation stands as your first line of defense against moisture, heat loss, and environmental challenges. Modern insulation materials like rigid foam boards, spray foam, and mineral wool offer exceptional performance while remaining cost-effective for DIY installation. Whether you’re building a new shed or upgrading an existing structure, investing in quality roof insulation pays dividends through reduced maintenance costs, enhanced durability, and improved comfort during all seasons. The key lies in selecting the right insulation material and installation method for your specific climate and shed usage needs.\n\n\n
Why Your Shed Roof Needs Proper Insulation
\n\n
Temperature Control Benefits
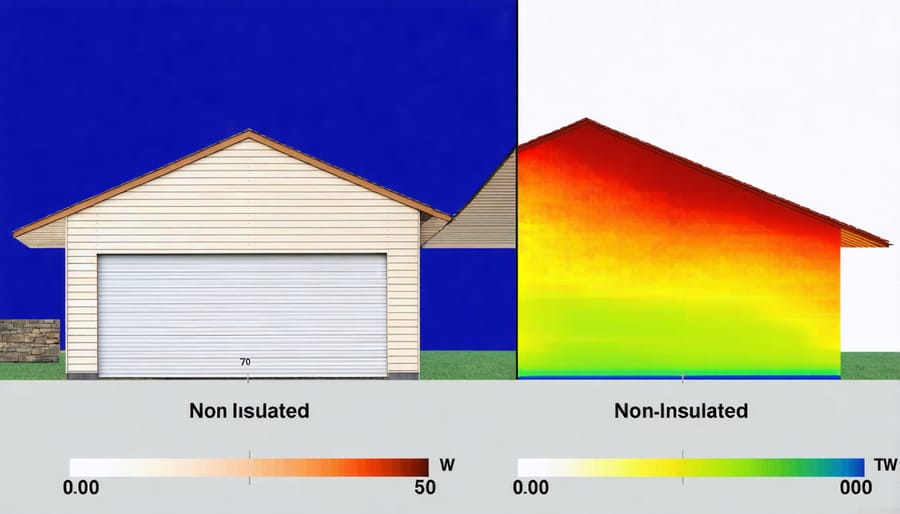
\n\nA well-insulated shed roof plays a crucial role in creating a temperature-controlled storage space that protects your belongings throughout the year. During summer months, proper insulation prevents excessive heat from penetrating the roof, keeping your shed significantly cooler and protecting heat-sensitive items. In winter, the same insulation works to retain warmth and prevent cold air from seeping in, reducing the risk of moisture buildup and protecting against frost damage. This consistent temperature control not only safeguards your stored items but also makes the shed more comfortable when you’re working inside. For those using their shed as a workshop or hobby space, this temperature stability is particularly valuable, allowing year-round use without the discomfort of extreme temperatures.\n\n
 \n
\n\n\n
Moisture Protection
\n\nProper insulation plays a crucial role in preventing moisture-related issues in your shed. By creating an effective weather-resistant protection barrier, insulation helps control condensation that could otherwise damage your stored belongings. When warm air meets cold surfaces inside an uninsulated shed, condensation forms, leading to mold growth and rust on tools and equipment. Quality insulation creates a thermal barrier that maintains consistent temperatures, reducing the risk of condensation buildup. This protection is especially important in regions with significant temperature fluctuations or high humidity levels. To maximize moisture protection, combine your insulation with proper ventilation and ensure all roof joints are properly sealed. This comprehensive approach will keep your stored items dry and protected throughout the year.\n\n\n
 \n
\n\n\n
Best Insulation Materials for Shed Roofs
\n\n
Rigid Foam Insulation
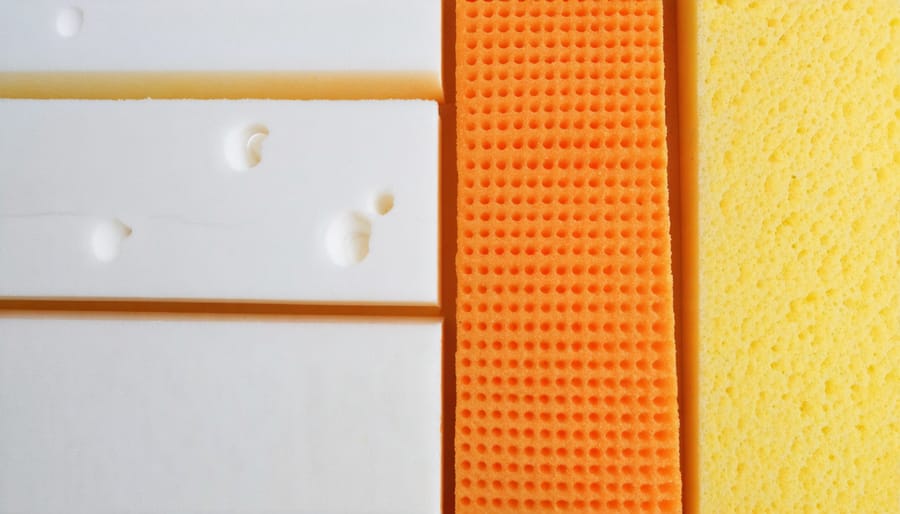
\n\nRigid foam insulation boards offer excellent thermal protection for your shed roof while being lightweight and easy to handle. These moisture-resistant panels come in various thicknesses and typically provide an R-value of 5 to 6.5 per inch, making them highly efficient for space-saving installations.\n\nWhen installing foam board insulation, start by measuring and cutting panels to fit snugly between roof rafters. Leave a small gap (about 1/4 inch) around the edges to allow for expansion. Secure the panels using either construction adhesive, insulation fasteners, or both. For best results, seal the seams between panels with foil tape to create an effective vapor barrier.\n\nA major advantage of rigid foam is its ability to create a continuous insulation layer that minimizes thermal bridging. This means better temperature control and reduced energy costs for your shed. Plus, the smooth surface of foam boards creates a clean, finished look that’s perfect for sheds used as workshops or hobby spaces.\n\nPro tip: Consider using faced foam boards with a reflective surface pointing toward the interior space for enhanced thermal performance in both summer and winter months.\n\n
Fiberglass Batts
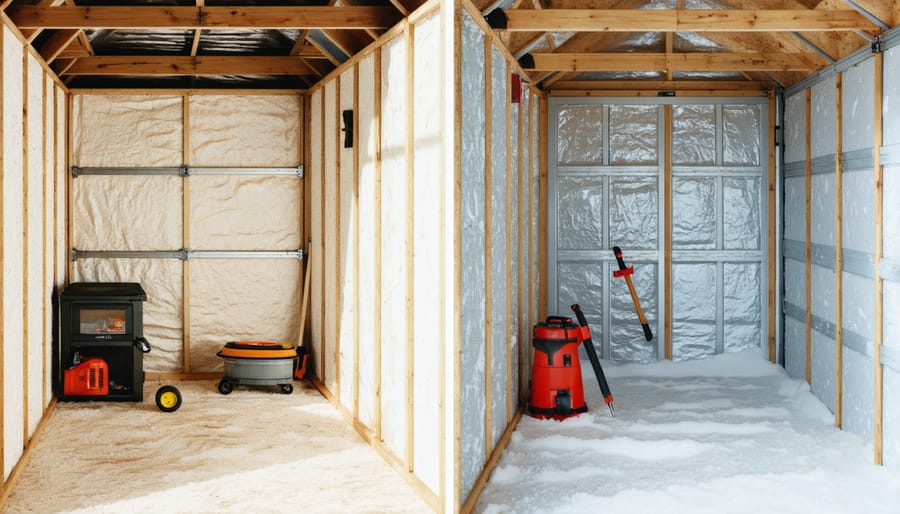
\n\nFiberglass batts remain one of the most popular and cost-effective options for insulating shed roofs. These pink or yellow fluffy rolls are easy to handle and fit snugly between roof joists or rafters. When installing fiberglass batts, make sure to choose the correct thickness (R-value) for your climate zone – typically R-13 to R-30 for most shed applications.\n\nInstallation is relatively straightforward, but proper safety gear is essential. Always wear a dust mask, safety goggles, and long sleeves when handling fiberglass. Start by measuring the spaces between your roof joists and cut the batts to fit with a utility knife, leaving about half an inch of extra width for a snug fit. The paper or foil backing should face the interior of your shed.\n\nBe careful not to compress the batts during installation, as this reduces their insulating effectiveness. Also, ensure there are no gaps between pieces, as these can create cold spots. While fiberglass isn’t the most advanced insulation option available, it offers reliable performance and excellent value for most standard shed applications. Just remember to pair it with proper ventilation to prevent moisture buildup.\n\n
Reflective Insulation
\n\nReflective insulation, often called foil-faced insulation, offers a smart solution for shed roofs by combining a radiant barrier with traditional insulating materials. These products typically feature a highly reflective aluminum foil surface bonded to materials like bubble wrap, foam, or fiberglass. The foil works by reflecting up to 97% of radiant heat, keeping your shed cooler in summer and warmer in winter.\n\nWhat makes this option particularly appealing for shed owners is its slim profile and ease of installation. The lightweight nature of foil-faced insulation means it won’t put extra stress on your shed’s structure. It’s also moisture-resistant, helping to prevent condensation issues that can damage stored items. Many DIY enthusiasts appreciate that it can be easily cut to size with scissors and secured using a staple gun or adhesive tape.\n\n\n
Step-by-Step Installation Guide
\n\n
Preparation Steps
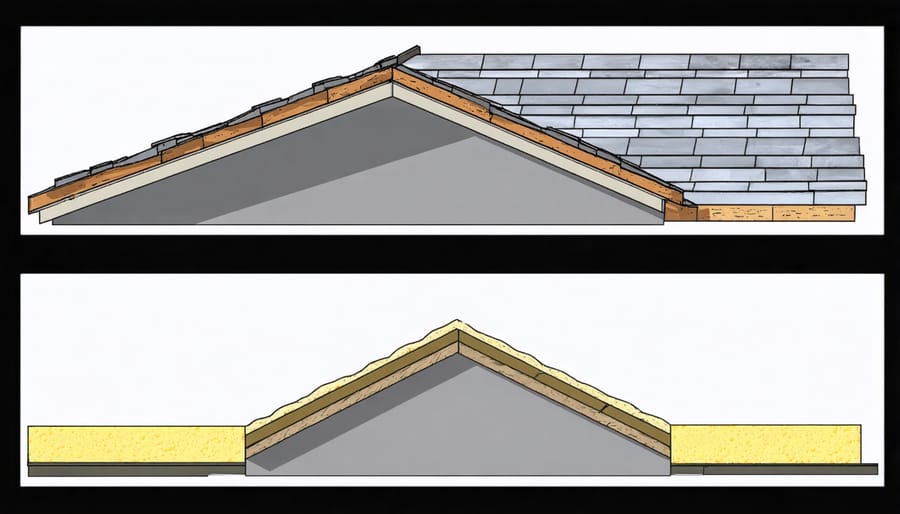
\n\nBefore starting your shed roof insulation project, gather these essential tools: a tape measure, utility knife, protective gear (safety glasses, gloves, and dust mask), staple gun with staples, and a straight edge or ruler. You’ll also need a sturdy ladder, pry bar for removing any existing materials, and a reliable light source for working in dim conditions.\n\nPrepare your workspace by clearing the shed’s interior and exterior of any obstacles. Thoroughly inspect the roof structure for signs of damage, water leaks, or rot that need addressing before insulation installation. Take precise measurements of your roof area, adding 10% extra to account for mistakes or awkward corners.\n\nCreate a ventilation plan by marking spots for vents if they’re not already present. Good airflow is crucial to prevent moisture buildup. Clean the surface thoroughly, removing dust, cobwebs, and debris. If working with faced insulation, ensure the vapor barrier will face the correct direction – typically toward the heated side.\n\nSet up your work area with all materials within easy reach, and consider having a helper to assist with handling larger pieces and maintaining safety while working at height.\n\n
Installation Process
\n\nStart by clearing the roof surface of any debris and checking for damage that needs repair. Measure your roof dimensions carefully to ensure you purchase enough insulation material. For safety, work on a dry day and wear protective gear, including gloves and a dust mask.\n\nBegin installation at one corner of the roof, working systematically across the surface. If using rigid foam boards, cut them to fit snugly between rafters using a utility knife. Leave a small gap (about 1-2 inches) between the roof deck and insulation for ventilation to prevent moisture buildup.\n\nSecure the insulation in place using insulation supports or staples, depending on your material choice. For fiberglass batts, ensure the vapor barrier faces the heated side of the space. Overlap seams between pieces to prevent heat loss through gaps.\n\nConsider adding a layer of reflective foil insulation beneath the main insulation for enhanced temperature control. Use appropriate fasteners to secure it, ensuring it doesn’t sag or create air pockets.\n\nFinally, cover the insulation with a suitable interior finish like plywood or oriented strand board (OSB) to protect it and create a clean appearance. Seal any gaps around edges with expanding foam or weatherstripping tape to maximize efficiency.\n\nRemember to maintain proper ventilation throughout the shed to prevent condensation issues. Check your work periodically during the first few weeks to ensure everything stays securely in place.\n\n
 \n
\n\n\n
Finishing Touches
\n\nAfter securing all insulation materials, conduct a thorough inspection of your work. Check for any gaps or areas where insulation might have shifted during installation. Use spray foam to fill small gaps around edges and corners, ensuring a complete thermal barrier. Install vapor barriers if you haven’t already, making sure they overlap properly at the seams. Finally, seal any roof vents or penetrations with appropriate weatherstripping or caulk. Step back and observe your shed from different angles to spot any missed areas or potential issues. Remember to clean up any insulation debris and dispose of it properly. For best results, wait 24 hours before storing items against newly insulated walls or directly under the roof to allow any adhesives or sealants to cure completely.\n\n\n
Maintenance and Long-Term Care
\n\nRegular maintenance of your shed’s insulation is crucial for maintaining its effectiveness and protecting your stored items. Start by conducting seasonal inspections, particularly before winter and after severe weather events. Look for signs of moisture, which can compromise insulation performance and potentially lead to mold growth. When weatherproofing your shed, pay special attention to gaps around vents, windows, and where the roof meets the walls.\n\nWatch for sagging insulation, which indicates it’s becoming compressed and losing its effectiveness. If you notice any dark spots or discoloration on your ceiling, this could signal water penetration that needs immediate attention. Keep ventilation paths clear and ensure your roof’s vapor barrier remains intact to prevent condensation from building up.\n\nSmall tears or damaged sections of insulation can often be repaired with insulation tape or patches. However, if you notice widespread deterioration, significant moisture damage, or pest infestation, it’s time to consider replacing the affected sections. Remember to wear appropriate protective gear when handling insulation materials during maintenance.\n\nFor optimal performance, check that your roof’s drainage system is functioning properly, as blocked gutters can lead to water damage that affects insulation. Consider applying a fresh coat of weatherproof sealant every few years to maintain the roof’s weather resistance and protect your insulation investment.\n\n\nInsulating your shed roof is a worthwhile investment that pays dividends in comfort, energy efficiency, and protection for your stored belongings. By choosing the right materials and following proper installation techniques, you can create a weather-resistant space that maintains consistent temperatures year-round. Whether you opt for traditional fiberglass, modern foam boards, or eco-friendly alternatives, the key is to ensure proper ventilation and moisture control. Don’t let your valuable items suffer from extreme temperatures or dampness – take action today to insulate your shed roof. With the right approach and materials, you can complete this project over a weekend and enjoy the benefits for years to come. Remember, a well-insulated shed is more than just a storage space; it’s an investment in protecting your belongings and expanding your usable outdoor space.
Looking for a storage sheds?
Browse our full range of storage sheds from authorized dealer brands. Free shipping to the continental US.