
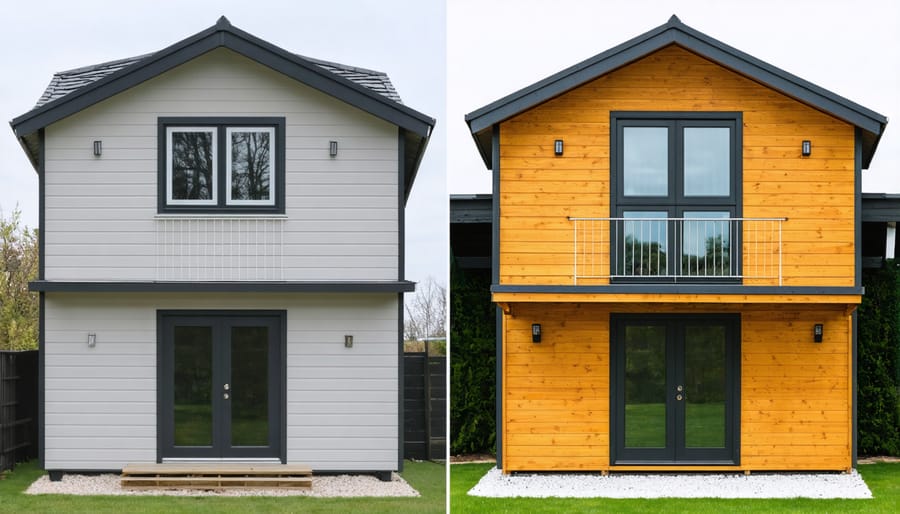
Transform Your Two-Story Shed Into a Cozy Modern Home (Real Project Walkthrough)
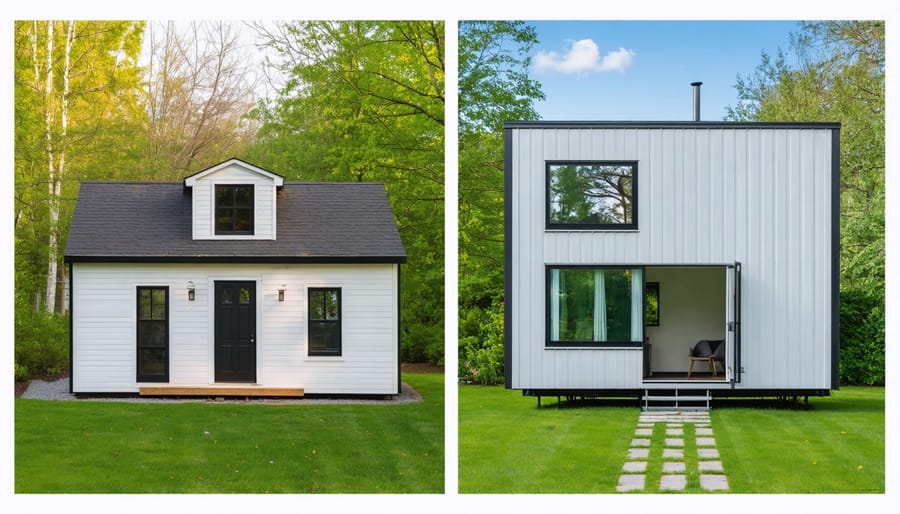
Transform an ordinary two-story shed into a stunning tiny home with strategic planning and innovative design techniques. A successful shed to living space conversion requires careful attention to building codes, structural integrity, and efficient space utilization. Modern homeowners are increasingly discovering the potential of these conversions, which offer an affordable alternative to traditional housing while maximizing existing structures.
The journey from storage space to living quarters demands thoughtful consideration of insulation, plumbing, electrical systems, and natural light integration. By incorporating proper ventilation, strategic window placement, and space-saving furniture solutions, a two-story shed can evolve into a comfortable, fully-functional dwelling. This innovative approach to housing not only provides additional living space but also demonstrates the remarkable versatility of existing structures when reimagined with purpose and creativity.
Whether you’re seeking an in-law suite, rental property, or primary residence, converting a two-story shed presents an opportunity to create a unique living space that combines practicality with architectural interest. The key lies in balancing structural modifications with interior design elements that maximize every square foot while maintaining a welcoming atmosphere.
Planning Your Two-Story Shed Conversion
Legal Requirements and Permits
Before starting your shed-to-house conversion, it’s crucial to navigate the legal requirements and obtain proper permits. Most municipalities require specific approvals for converting a shed into a living space, as this changes the building’s primary use. Start by contacting your local planning and zoning department to understand residential zoning requirements and whether your property allows for accessory dwelling units (ADUs).
You’ll typically need building permits, electrical permits, and plumbing permits. The structure must comply with residential building codes, including minimum ceiling heights, proper insulation, adequate ventilation, and emergency exits. Many areas require the living space to have windows that meet egress requirements for safety.
Foundation requirements are particularly important for two-story structures. Your converted shed must sit on a proper foundation that meets local building codes, and you may need an engineer’s approval for the structural modifications.
Utility connections also require permits and inspections. You’ll need approval for connecting to water, sewer, and electrical systems. Some jurisdictions may require additional permits for HVAC installation or solar panel systems if you’re planning on alternative energy sources.
Remember that skipping permit requirements can result in hefty fines, forced demolition, or difficulties when selling your property. Working with a licensed contractor familiar with local regulations can help ensure your conversion project meets all legal requirements.
Budget and Timeline Planning
Converting a two-story shed into a livable house typically requires a budget between $15,000 to $40,000, depending on your location, materials chosen, and the extent of necessary modifications. This estimate includes essential components like insulation ($2,000-$3,500), electrical work ($3,000-$6,000), plumbing ($4,000-$8,000), and HVAC installation ($3,000-$5,000).
The timeline for such a conversion project usually spans 3-6 months. The first month focuses on planning, permits, and initial structural modifications. Weeks 4-8 typically involve installing utilities and weatherproofing. The middle phase (weeks 9-16) centers on interior work like insulation, drywall, and basic fixtures. The final 4-8 weeks are dedicated to finishing touches, including flooring, painting, and final inspections.
To keep costs manageable, consider these budget-saving strategies:
– Phase the project over time
– Source materials during sales or from salvage yards
– Handle simple tasks yourself (painting, basic carpentry)
– Work with local contractors for better rates
– Choose cost-effective but durable materials
Remember to set aside 10-15% of your total budget for unexpected issues. Timing your project during off-peak construction seasons (late fall to early spring) can often result in better contractor rates and material prices. Additionally, proper planning and obtaining all necessary permits upfront can prevent costly delays and modifications later in the project.
Essential Structural Modifications
Foundation and Support
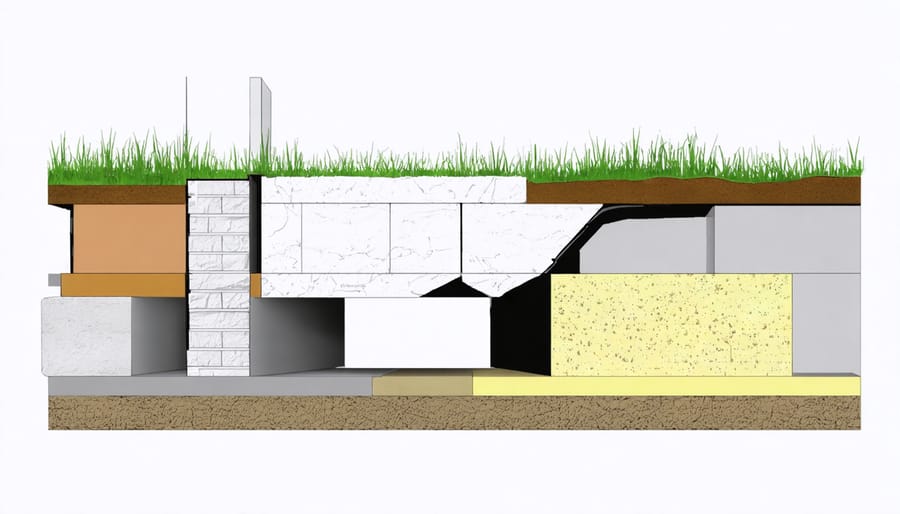
Converting a two-story shed into a livable space requires significant attention to the foundation and support structure. Start with proper site preparation to ensure your foundation can handle the increased load of a residential structure. Most sheds aren’t originally built to support residential living, so reinforcing the foundation is crucial.
Begin by installing concrete footings that extend below the frost line, typically 36-48 inches deep depending on your location. These footings should be properly sized to distribute the weight of the converted structure. Add a concrete slab or crawl space foundation if one isn’t already present, ensuring it’s properly waterproofed and insulated.
For the support system, install load-bearing beams and posts to handle the weight of two floors. Use pressure-treated lumber for ground contact areas and engineer-grade support beams for the floor joists. The typical spacing for floor joists should be 16 inches on center, with additional support beneath load-bearing walls.
Consider adding steel support columns in key locations, particularly where the second floor meets the first. Install proper headers above windows and doors to maintain structural integrity. Remember to consult local building codes, as residential structures often require specific beam sizes and support configurations that may differ from standard shed construction.
Insulation and Weatherproofing
Proper insulation and weatherproofing are crucial steps in converting your shed into a comfortable living space. Start by installing a vapor barrier on the walls, floor, and ceiling to prevent moisture from seeping in. Use 6-mil polyethylene sheeting, ensuring all seams overlap by at least 6 inches and are properly sealed with tape.
For wall insulation, choose high-quality fiberglass batts or rigid foam boards with an R-value of at least R-13 for 2×4 walls or R-19 for 2×6 walls. Install the insulation carefully between studs, making sure there are no gaps or compressed areas that could reduce its effectiveness. Pay special attention to corners and areas around windows and doors.
The roof requires particular attention, as it’s your primary defense against the elements. Use R-30 or higher insulation in the ceiling, and ensure proper ventilation through soffit and ridge vents to prevent moisture buildup. Consider adding a layer of reflective radiant barrier in the attic space to help with temperature control.
Weatherproof all windows and doors with proper flashing, weatherstripping, and high-quality caulk. Install drip edges above windows and doors, and ensure all exterior joints are properly sealed. Don’t forget to insulate water pipes to prevent freezing in winter months.
Finally, consider adding an exterior wrap like Tyvek house wrap before installing your siding to create an additional weather barrier. This multi-layered approach to insulation and weatherproofing will help maintain comfortable indoor temperatures and protect your investment for years to come.
Windows and Doors
Proper ventilation and access points are crucial when converting a two-story shed into a livable space. Start by planning window placement strategically – aim for at least one window per room to ensure adequate natural light and airflow. Consider double-hung windows for bedrooms and living areas, as they offer excellent ventilation control and meet emergency egress requirements.
When installing shed windows, ensure proper weatherproofing and insulation around each frame. Standard residential windows work well, but be sure to choose energy-efficient models with double-pane glass to maintain comfortable indoor temperatures.
For doors, install a solid exterior door as your main entrance, preferably 36 inches wide to accommodate furniture moving. Consider adding a second entrance for safety and convenience, particularly if you’re planning separate living areas on each floor. French doors or sliding glass doors can create an appealing indoor-outdoor connection while providing additional natural light.
Don’t forget about interior doors – hollow-core doors work well for bedrooms and bathrooms, while pocket doors can be excellent space-savers in tight areas. Install proper weatherstripping and door sweeps to prevent drafts and maintain energy efficiency.
Remember to check local building codes regarding minimum window sizes for bedrooms and required emergency exits. Position windows to maximize cross-ventilation and take advantage of natural light throughout the day.
Interior Layout and Design
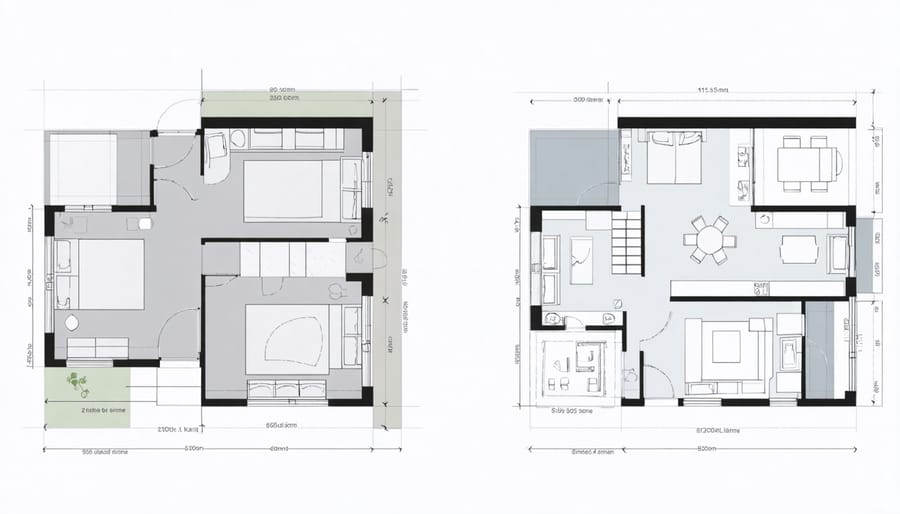
First Floor Layout
The first floor of your converted shed house serves as the heart of your living space, combining functionality with comfort. The open-concept layout maximizes the available square footage while creating a welcoming atmosphere. The main living area occupies roughly 60% of the ground floor, featuring large windows that flood the space with natural light and make the room feel more spacious.
The kitchen area is strategically positioned along one wall, utilizing a galley-style layout that optimizes efficiency without sacrificing style. We recommend installing upper and lower cabinets to maximize storage while maintaining an airy feel. A breakfast bar or island can serve double duty as both a food prep area and casual dining space, perfect for morning coffee or quick meals.
Consider incorporating multi-functional furniture pieces to make the most of your space. A convertible sofa can provide additional sleeping accommodations for guests, while built-in storage benches offer both seating and storage solutions. The remaining floor space can accommodate a compact dining area or home office nook, depending on your lifestyle needs.
Smart storage solutions are essential in this layout. Under-stair storage cabinets make use of otherwise wasted space, while floating shelves add both storage and visual interest to the walls. We’ve found that light-colored finishes and reflective surfaces help maintain an open, airy feeling throughout the first floor, making your converted shed feel like a proper home.
Second Floor Configuration
The second floor of your converted shed offers the perfect opportunity to create comfortable living spaces. When planning your bedroom layout design, consider maximizing natural light by strategically placing windows on both ends of the space. A typical configuration includes a master bedroom spanning approximately two-thirds of the upper floor, with the remaining space dedicated to a full bathroom.
For the bedroom area, incorporate built-in storage solutions along the knee walls to make the most of otherwise awkward spaces. Consider adding dormers to increase headroom and create cozy window nooks perfect for reading or relaxation. Installing proper insulation in the walls and ceiling is crucial for maintaining comfortable temperatures year-round.
The bathroom layout should include essential fixtures while maintaining adequate clearance. A space-saving corner shower, standard toilet, and vanity with storage can fit comfortably in a 6×8 foot area. Remember to plan your plumbing layout carefully, ensuring proper connection to the main water lines and efficient drainage systems.
Don’t forget about safety features like proper railings along the staircase and emergency egress windows in the bedroom area. Adding sound insulation between floors will help create a more peaceful living environment and maintain privacy between spaces.
Storage Solutions
When converting a two-story shed into a living space, clever storage solutions become essential for maintaining an organized and clutter-free environment. Vertical storage is your best friend in these conversions, with floor-to-ceiling shelving units maximizing every inch of wall space. Consider installing built-in cabinets under stairs, which transforms otherwise wasted space into valuable storage areas.
Multi-functional furniture plays a crucial role in small-space living. Opt for beds with built-in drawers, ottoman storage benches, and fold-down tables that can be tucked away when not in use. Installing hooks and pegboards on walls creates versatile storage for frequently used items while keeping them easily accessible.
The often-overlooked spaces between wall studs can be transformed into recessed shelving units, perfect for storing smaller items or displaying decorative pieces. In the kitchen area, magnetic knife strips and hanging pot racks free up precious counter and cabinet space.
For clothing storage, consider installing a compact wardrobe system with sliding doors to minimize the space needed for door clearance. Vacuum-sealed bags can help compress seasonal clothing and bedding, while clear storage containers with labels make it easy to identify contents at a glance.
Don’t forget about exterior storage solutions – adding a small storage shed or outdoor cabinet can house items that don’t need frequent access, keeping your living space clean and organized.
Essential Systems Installation
Plumbing and Electrical
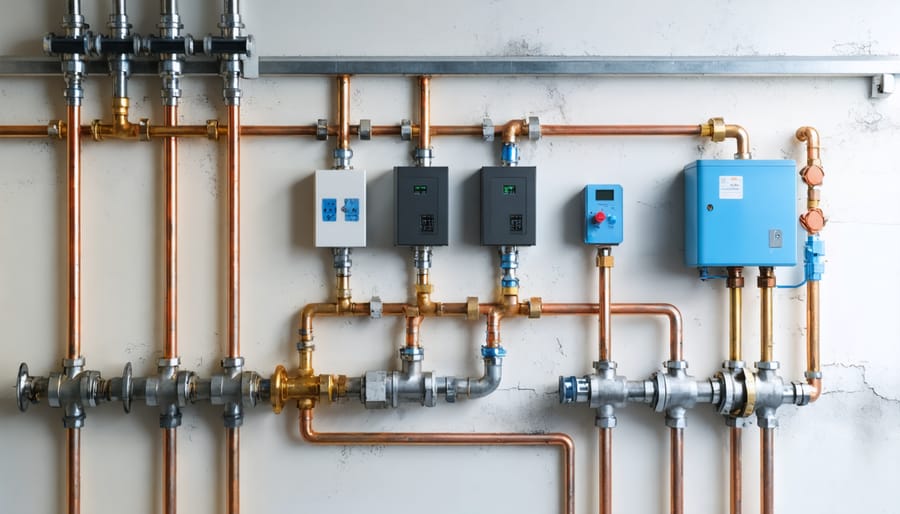
Installing utilities in your converted shed requires careful planning and often professional assistance. Start with the electrical system by running a dedicated line from your main house panel to a new subpanel in the shed. This setup should include proper grounding and weatherproof connections to ensure safety. Install electrical boxes and run wiring for outlets, lighting, and any planned appliances before closing up the walls.
For plumbing, you’ll need to connect to your existing water supply and sewer lines. Consider installing PEX piping for water distribution due to its flexibility and ease of installation. Plan your bathroom and kitchen layouts strategically to minimize pipe runs and maximize efficiency. Don’t forget to include proper venting for all plumbing fixtures and ensure adequate slope for drain lines.
Key considerations for your utility installation:
– Install GFCI outlets in wet areas
– Use frost-free hose bibs for external water access
– Include shut-off valves for all water supplies
– Ensure proper insulation around pipes in exterior walls
– Plan for adequate heating and cooling systems
– Install carbon monoxide and smoke detectors
– Consider a mini-split system for efficient climate control
Remember to obtain necessary permits and inspections before beginning any utility work. While some tasks can be DIY projects, complex electrical and plumbing installations should be handled by licensed professionals to ensure safety and code compliance. This investment in proper utility installation will make your converted shed comfortable and functional for years to come.
HVAC Considerations
Proper heating and cooling are essential for making your converted shed comfortable year-round. Since two-story structures present unique challenges for air circulation, a multi-zone HVAC system is often the most effective solution. Mini-split systems work particularly well, offering independent temperature control for each floor while avoiding the need for extensive ductwork installation.
For maximum efficiency, consider incorporating ceiling fans on both levels to help distribute air and reduce your energy costs. Proper insulation is crucial – focus on the walls, floors, and especially the roof, as heat tends to rise and escape through the upper level. When planning your eco-friendly shed conversion, look into energy-efficient windows with good ventilation options.
Don’t forget about humidity control, which is vital for both comfort and protecting your structure from moisture damage. A dedicated dehumidifier might be necessary, especially in basement-level areas or regions with high humidity. For supplemental heating, electric baseboards or radiant floor heating can provide consistent warmth without taking up valuable living space.
Remember to size your HVAC system appropriately for your converted space – an oversized system will cycle too frequently and waste energy, while an undersized one won’t maintain comfortable temperatures effectively. Working with a qualified HVAC professional during the planning phase will help ensure you select the right system for your specific needs.
Converting a two-story shed into a livable house is an ambitious yet rewarding project that can transform an ordinary storage space into a cozy, functional home. Throughout this guide, we’ve explored the essential steps, from initial planning and permits to the final touches that make your converted shed feel like home. Remember that success lies in careful preparation, adherence to local building codes, and attention to crucial elements like insulation, plumbing, and electrical systems.
Whether you’re creating an in-law suite, a rental property, or your own tiny home, a shed conversion offers an affordable alternative to traditional housing options. By following the guidelines we’ve discussed, you can ensure your project meets safety standards while maximizing available space and maintaining aesthetic appeal.
Before starting your conversion journey, take time to assess your budget, skills, and timeline realistically. Don’t hesitate to consult with professionals for complex aspects like electrical work or structural modifications. Many successful shed-to-house conversions begin with a solid plan and evolve through careful execution of each phase.
Ready to begin your transformation? Start by contacting your local planning department to understand permit requirements, then create a detailed project timeline. With dedication, proper planning, and the right resources, your two-story shed can become the comfortable living space you’ve envisioned. Take that first step today, and watch your dream of a converted shed home become reality.
Looking for a wood shed kits?
Browse our full range of wood shed kits from authorized dealer brands. Free shipping to the continental US.