
Why Your Shed Floor Needs Insulation (And How to Do It Right)
Transform your cold, damp shed into a comfortable year-round workspace by insulating the floor—a step many overlook but one that prevents up to 15% of heat loss. Whether you’re converting your shed into a home office, gym, or hobby room, proper floor insulation creates a thermal barrier between the ground and your space, eliminating that bone-chilling cold that seeps through bare floors.\n\nStart by assessing your shed’s existing floor structure and intended use. A weekend workshop needs different insulation than a daily office. Concrete slab floors require moisture-resistant rigid foam boards, while raised timber floors work perfectly with fiberglass batts or spray foam fitted between joists. The good news? Most shed floor insulation projects take just a weekend and cost between $100-$400, depending on your shed size and material choice.\n\nThe installation process is straightforward for DIY enthusiasts. Measure your floor area, choose materials that match your climate and budget, seal any gaps where cold air sneaks in, and layer your chosen insulation before adding a protective subfloor. This foundation complements wall and roof insulation, creating a complete thermal envelope that keeps your shed comfortable in summer and winter while reducing energy costs for any heating or cooling systems you add later.\n\n\n
The Real Cost of Skipping Floor Insulation
\n\nSkipping floor insulation might seem like a minor cost-saving measure, but the consequences can significantly impact both your comfort and your wallet. Let’s look at what actually happens when you leave that shed floor unprotected.\n\nFirst, there’s the moisture problem. An uninsulated floor allows ground moisture to rise through the flooring, creating a perpetually damp environment. Sarah, a teacher who converted her shed into a home office, learned this the hard way. Within six months, she noticed musty odors and discovered mold creeping up the corners of her stored boxes. The dampness made the space feel cold and unwelcoming, even on mild days.\n\nHeat loss is another major concern. Studies show that up to 15% of heat escapes through uninsulated floors, forcing your heater to work overtime. If you’re planning to use your shed as a workshop or gym during winter months, you’ll notice the difference immediately. Your feet will feel uncomfortably cold, and maintaining a comfortable temperature becomes nearly impossible without cranking up the heating.\n\nThe financial impact adds up quickly. Homeowners report spending 20-30% more on heating costs for uninsulated garden buildings compared to properly insulated ones. Over a typical heating season, that could mean an extra $100-$200 in energy bills for a modest-sized shed.\n\nBeyond comfort and costs, there’s the functionality factor. Temperature fluctuations damage tools, equipment, and stored items. Electronics become unreliable, wooden furniture warps, and metal tools develop surface rust more readily in damp, poorly insulated environments. What starts as a small saving becomes a much larger expense when you’re replacing damaged belongings or abandoning your shed during colder months altogether.\n\n\n
When Your Shed Floor Actually Needs Insulation
\n\nNot every shed needs floor insulation, so let’s figure out if yours does. The decision really comes down to how you’ll use your space and what conditions you’re dealing with.\n\nIf you’re planning a heated or cooled workspace like a home office, craft studio, or workout area, floor insulation becomes essential. Cold feet and drafty floors make these spaces uncomfortable and drive up energy costs dramatically. Anyone spending hours in their shed will appreciate the difference insulation makes, especially when paired with an electrical power system for heating or cooling.\n\nClimate plays a huge role too. In regions with harsh winters or extreme temperature swings, uninsulated floors create a thermal bridge that sucks warmth right out of your shed. Even in milder climates, ground moisture can seep through concrete or soil, creating dampness issues that insulation helps prevent.\n\nStorage-only sheds in moderate climates typically don’t require floor insulation unless you’re storing temperature-sensitive items like paint, electronics, or gardening supplies that could freeze or overheat.\n\nHere’s a quick reality check: If you’re already running a heater or air conditioner in your shed, you’re literally throwing money away without proper floor insulation. One homeowner shared that adding floor insulation to his workshop reduced heating costs by nearly forty percent during winter months.\n\nBottom line? Plan to spend significant time in your shed or control its temperature? Insulate that floor. Using it occasionally for basic storage in a temperate area? You can probably skip it and invest those dollars elsewhere.\n\n\n
Choosing the Right Insulation Material for Your Shed Floor
\n\n
 \n
\n\n\n
Rigid Foam Board: The DIY Favorite
\n\nRigid foam board has earned its reputation as a go-to choice for DIY shed floor insulation, and for good reason. These lightweight panels offer impressive R-values ranging from R-3.5 to R-6.5 per inch, depending on whether you choose expanded polystyrene (EPS), extruded polystyrene (XPS), or polyisocyanurate (polyiso). The real beauty lies in how user-friendly they are – simply cut them to size with a utility knife or handsaw, fit them snugly between floor joists, and you’re well on your way to a warmer shed.\n\nWhat makes rigid foam particularly appealing is its moisture resistance, which is crucial since shed floors often face ground dampness. XPS and polyiso boards won’t absorb water like some other materials, helping prevent mold and maintaining their insulating properties over time.\n\nBest use cases? If you’re converting your shed into a year-round workshop or home office, rigid foam delivers excellent thermal performance without breaking the bank. It pairs wonderfully with other eco-friendly shed upgrades too. One homeowner shared that after installing two-inch XPS boards under their shed floor, their space heater cut runtime by nearly half during winter months – a win for both comfort and energy bills.\n\n
Spray Foam: Maximum Performance with Professional Help
\n\nSpray foam delivers the highest R-value per inch and creates an excellent moisture barrier, making it ideal for sheds in damp climates or those serving as year-round workshops. However, it requires professional installation and costs significantly more than DIY options—typically $3-$5 per square foot versus under $1 for fiberglass batts.\n\nThis premium makes most sense when you’re transforming your shed into a heated office or gym where temperature control is critical. The expanding foam seals every gap and crack, preventing air leakage that undermines other insulation types. One homeowner shared that spray foam in her art studio shed eliminated the drafts that previously made winter painting sessions unbearable.\n\nThe built-in vapor barrier means one less installation step, and unlike rigid foam boards, there are no seams for moisture to penetrate. If your budget allows and you need maximum performance, spray foam is worth considering—just get quotes from licensed contractors experienced with outbuildings.\n\n
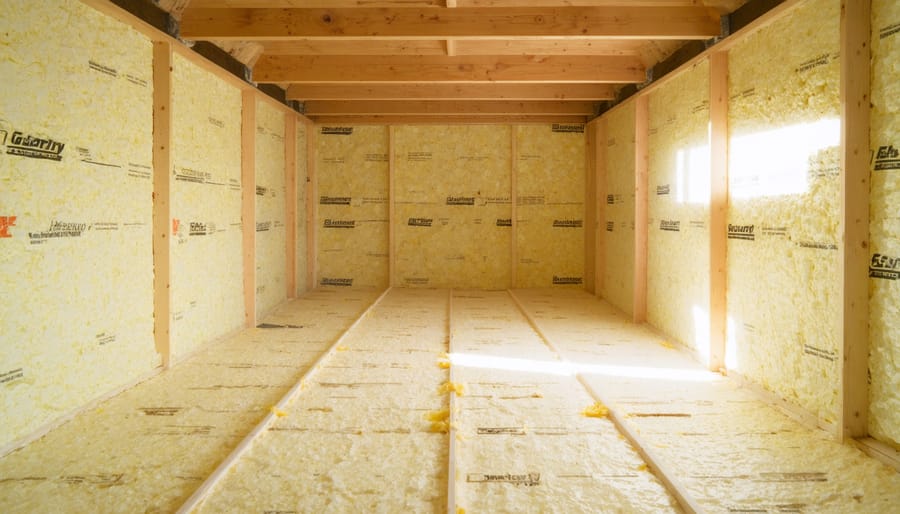
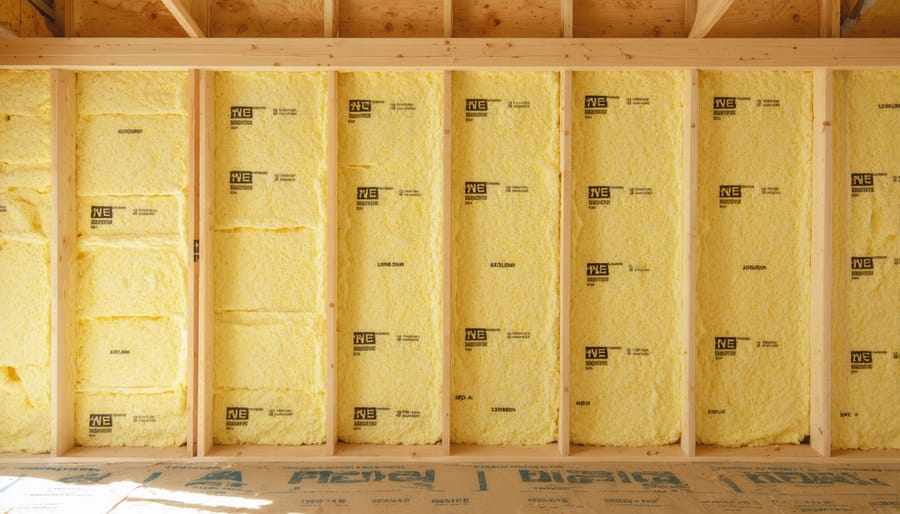
Fiberglass Batts and Other Options
\n\nFiberglass batts offer a budget-friendly alternative that many DIYers already know from home insulation projects. These pink or yellow rolls fit snugly between floor joists and provide decent R-value for the price. The downside? They can absorb moisture if your shed’s vapor barrier fails, reducing effectiveness over time. You’ll also want to wear protective gear during installation since the fibers can irritate skin and lungs.\n\nReflective foil insulation works brilliantly in warmer climates where you’re mainly fighting heat gain. It’s lightweight, easy to staple up, and bounces radiant heat away from your shed floor. However, it won’t do much against conductive cold in winter months.\n\nMineral wool is worth considering if fire resistance matters to you, perhaps for a workshop with power tools. It handles moisture better than fiberglass but costs more per square foot. For most homeowners converting a basic storage shed into occasional workspace, rigid foam still delivers the best balance of performance and ease of installation.\n\n
What About Vapor Barriers?
\n\nVapor barriers can be your best friend or worst enemy when insulating your shed floor. The key is understanding moisture flow. If your shed sits on a concrete slab, placing a vapor barrier between the concrete and insulation prevents ground moisture from seeping up into your insulation and causing mold or rot. However, if you install vapor barriers on both sides of your insulation, you risk trapping moisture inside with nowhere to escape. As a general rule, use a single vapor barrier on the cold side (closest to the ground). For sheds built on gravel or dirt with proper ventilation underneath, you might skip it altogether. One homeowner shared how adding a simple 6-mil polyethylene sheet under their foam boards kept their workshop floor dry for years. When in doubt, consult local building codes, as climate variations affect recommendations significantly.\n\n\n
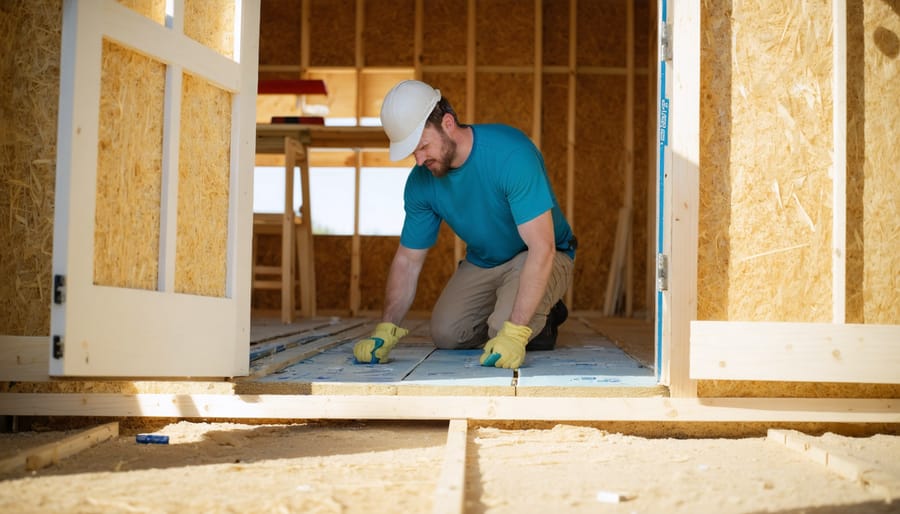
Step-by-Step: Installing Insulation Under Your Shed Floor
\n\n
What You’ll Need
\n\nBefore you begin your shed floor insulation project, gather these essential supplies. You’ll need insulation material like rigid foam boards, which cost around $30-50 per 4×8 sheet, or fiberglass batts at approximately $0.50-1.50 per square foot. Pick up a utility knife for cutting insulation, work gloves for protection, and measuring tape for accuracy. A caulk gun with expanding foam sealant runs about $5-15 and helps seal gaps effectively. Consider vapor barrier sheeting at roughly $0.10-0.30 per square foot to prevent moisture damage. You’ll also want basic tools like a straightedge, pencil for marking, and safety glasses. If you’re adding a subfloor over your insulation, budget for plywood or OSB boards at $25-40 per sheet. Most homeowners spend between $100-400 total depending on shed size and insulation type chosen. Having everything ready beforehand makes the installation process smoother and helps avoid frustrating mid-project trips to the hardware store.\n\n
Preparing Your Shed Floor
\n\nBefore diving into insulation, proper preparation is essential for lasting results. Start by thoroughly sweeping and cleaning your shed floor, removing all dirt, debris, and cobwebs. A clean surface helps insulation materials adhere properly and prevents moisture from becoming trapped underneath.\n\nNext, conduct a careful inspection for damage. Look for rotting wood, cracks in concrete, or signs of pest activity. Address these issues immediately, as insulating over problems will only worsen them over time. Check for moisture issues too—damp patches or musty odors indicate drainage problems that need fixing first.\n\nVentilation is crucial for preventing condensation buildup, which can undermine your insulation efforts. Ensure your shed has adequate airflow through vents or gaps near the roofline. If you’re planning electrical work for heating or lighting, review important shed safety considerations before proceeding. Taking time to prepare now saves headaches later and ensures your insulation performs at its best.\n\n
 \n
\n\n\n
Installing the Insulation
\n\nNow that you’ve selected your insulation material, it’s time to get it installed. Follow these straightforward steps to ensure a snug, effective fit that’ll keep your shed comfortable year-round.\n\n1. Measure each joist cavity carefully. Don’t assume they’re all identical—sheds can have surprising variations. Write down the dimensions before cutting anything.\n\n2. Cut your insulation panels slightly larger than your measurements (about 1/4 inch wider). This ensures a friction fit that won’t leave gaps. For rigid foam boards, use a utility knife and straightedge. For batts, a serrated bread knife works wonderfully.\n\n3. Press the insulation firmly between the joists, working from one end to the other. The material should fit snugly without compressing too much, which reduces its effectiveness. If you’re using batts with a vapor barrier, position the paper or foil side facing up toward the living space.\n\n4. Fill any gaps around edges with expanding foam spray. This prevents air infiltration—one of the biggest culprits behind heat loss.\n\n5. Secure loose edges with staples or insulation supports if needed, especially for batts that might sag over time.\n\nA common mistake? Rushing the measuring step. Take your time here, and you’ll avoid wasteful recuts and frustrating gaps that compromise your hard work.\n\n
Sealing and Finishing
\n\nOnce your insulation is in place, sealing everything properly makes all the difference. Use expanding foam or caulk to fill any gaps around the edges and between boards where drafts could sneak through. If moisture is a concern in your area, consider laying a vapor barrier over the insulation before adding your finished flooring. This plastic sheeting prevents condensation from damaging your insulation over time. Finally, install your plywood or OSB flooring, securing it firmly to the joists. Take a moment to walk around and check for any squeaks or loose spots. A well-sealed floor keeps your shed comfortable year-round and protects your investment for the long haul.\n\n\n
Insulating an Existing Shed Floor (Without Tearing It Up)
\n\nIf your shed already has a solid floor and you can’t easily access the space underneath, don’t worry. You still have options to improve insulation, though it’s worth being realistic about the results. Adding insulation on top of an existing floor won’t be quite as effective as installing it beneath, but it can definitely help reduce cold transfer and make your shed more comfortable.\n\nThe most straightforward approach is creating a floating insulated floor on top of what you already have. Start by laying down a vapor barrier directly on your existing floor to prevent moisture issues. Next, install rigid foam insulation boards, which work wonderfully because they’re moisture-resistant and provide decent R-value without eating up too much headroom. Secure these boards with construction adhesive to keep them in place.\n\nOnce your insulation layer is down, you’ll need a new walking surface. Tongue-and-groove plywood or OSB panels work great here. Simply lay them over the foam boards and secure them together at the joints. Some DIYers even add a second thin layer of foam between the boards for extra protection. Yes, you’ll lose a couple inches of height inside your shed, so check your doorway clearance before starting.\n\nAnother option is using insulated subfloor panels designed specifically for this purpose. These prefabricated systems combine insulation and a structural layer, making installation faster and easier.\n\nKeep your expectations reasonable. This top-down approach won’t match the performance of properly installed underfloor insulation, but it’s far better than nothing. One homeowner shared that after adding a floating foam floor to his workshop shed, the space felt noticeably warmer underfoot during winter mornings, making those early projects much more pleasant.\n\n\n
 \n
\n\n\n
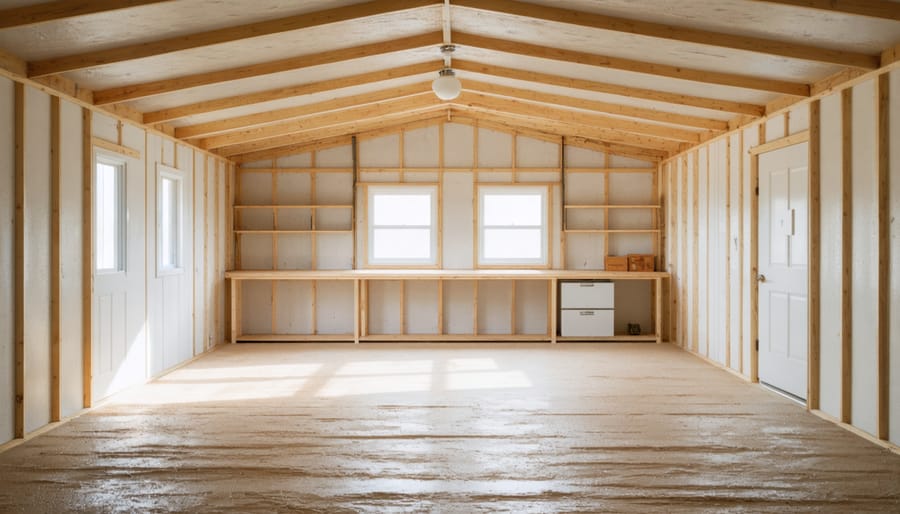
Beyond the Floor: Complete Shed Heat Management
\n\nWhile floor insulation makes a noticeable difference in comfort, it delivers the best results when part of a complete thermal envelope. Think of your shed like a thermos—if you only insulate the bottom, you’re still losing precious warmth through the walls, ceiling, and gaps around doors and windows.\n\nFor homeowners converting sheds into year-round workshops or offices, addressing all areas creates a consistent, comfortable environment. Start with wall insulation using foam boards or fiberglass batts between studs, then tackle the ceiling where heat naturally rises and escapes. Many DIYers report that ceiling insulation alone can reduce heating costs by up to 25 percent.\n\nDon’t overlook the smaller details either. Weatherstripping around doors and windows prevents drafts that undermine your insulation efforts. Even a quarter-inch gap under a door can let in cold air and moisture, making your space feel chilly despite proper insulation elsewhere.\n\nIf you’re planning a heated workspace, consider pairing your insulation strategy with modern conveniences like smart shed technology for temperature monitoring and workspace lighting solutions that generate minimal heat.\n\nThe investment in comprehensive insulation pays dividends through lower energy bills and a shed that’s genuinely pleasant to use during any season. Your floor insulation becomes the foundation of comfort, working harmoniously with walls, ceiling, and weatherproofing to create the functional space you’ve envisioned.\n\n\nInsulating your shed floor is more than just a practical upgrade—it’s an investment in comfort, functionality, and the long-term health of your structure. Whether you’re transforming your shed into a cozy workshop, a productive home office, or simply want to protect stored items from moisture and temperature swings, proper floor insulation delivers real benefits you’ll appreciate year-round.\n\nThe beauty of this project is its flexibility. You can tackle it as a weekend DIY job with basic materials, or opt for more advanced solutions depending on your budget and intended use. The key is choosing an approach that matches your specific needs and climate conditions.\n\nRemember, a well-insulated floor works hand-in-hand with wall and roof insulation to create a truly comfortable space. It prevents heat loss, blocks ground moisture, and protects your belongings from the damaging effects of condensation. This relatively modest improvement pays dividends in enhanced comfort and extended shed longevity, making every hour you spend in your shed more enjoyable and productive.