
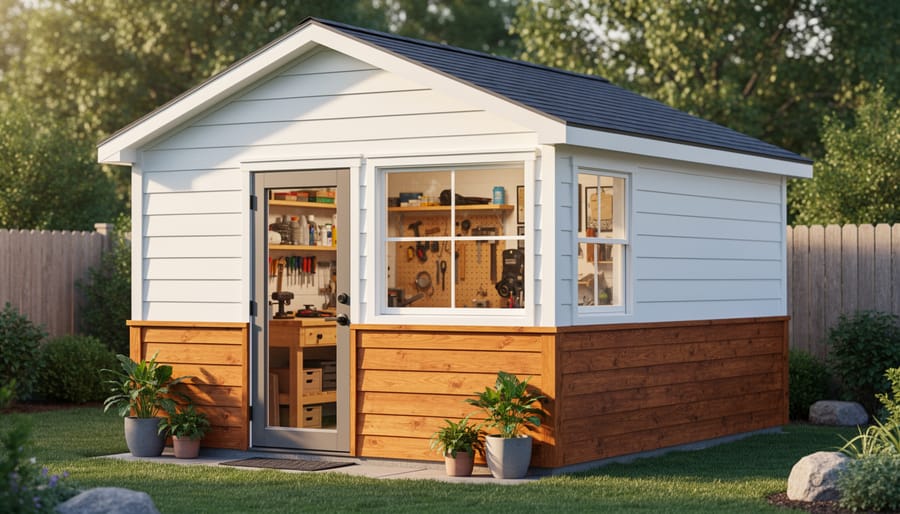
Transform Your Shed Interior From Boring to Beautiful
Transform your bare shed walls into a polished, functional space by selecting the right interior finish for your specific needs. Whether you’re creating a workshop, garden storage area, or backyard office, the walls you choose determine both durability and aesthetics. Plywood offers the most versatile solution, providing a sturdy surface for hanging tools and shelves while keeping costs manageable at $30-50 per sheet. Oriented strand board delivers similar functionality at an even lower price point, perfect for basic storage sheds where appearance takes a backseat to practicality. For moisture-prone environments, consider tongue-and-groove pine boards that add natural warmth while resisting humidity damage. Pegboard installations maximize vertical storage in workshops, turning empty wall space into organized tool displays. Drywall creates a finished look for sheds converted into hobby rooms or home offices, though it requires more skill to install properly. The key is matching your wall choice to how you’ll actually use the space—heavy-duty applications need reinforced materials, while decorative spaces benefit from attractive finishes. Budget between $200-800 for materials depending on shed size and your selected finish, with DIY installation cutting costs significantly compared to professional help.
Why Your Shed’s Interior Walls Deserve Attention
Many shed owners overlook their interior walls, treating them as purely functional structures that don’t need much thought. But here’s the thing—finishing your shed’s walls isn’t just about making the space look good, though that’s certainly a nice bonus. It’s about creating a genuinely better environment for whatever you’re storing or building inside.
First, let’s talk about protection. Bare wood or metal walls expose your shed’s structure to potential damage from humidity and temperature swings. Proper wall finishing provides essential moisture protection, creating a barrier that helps prevent rot, rust, and mold growth. This simple step can add years to your shed’s lifespan.
Then there’s comfort. If you’re using your shed as a workshop, hobby space, or anything beyond basic storage, the insulation value of finished walls makes a remarkable difference. You’ll notice more stable temperatures year-round, making those winter projects far more tolerable and summer work sessions less sweaty.
Finished walls also work wonders for your lighting situation. Lighter-colored materials reflect natural and artificial light much better than bare studs or dark plywood, meaning you’ll see better without adding more fixtures. One homeowner shared with us that simply painting his shed walls white cut his lighting costs by using fewer bulbs.
Don’t forget about pest prevention either. Gaps between bare studs create perfect hiding spots for spiders, mice, and insects. A smooth, finished wall eliminates these cozy nooks, keeping unwanted visitors out of your space.
Finally, there’s the psychological benefit. A finished interior simply feels better to work in. When your shed looks intentional and complete, you’ll actually want to spend time there, transforming it from a dumping ground into a functional extension of your home.
Plywood Panels: The Classic Choice for Good Reason
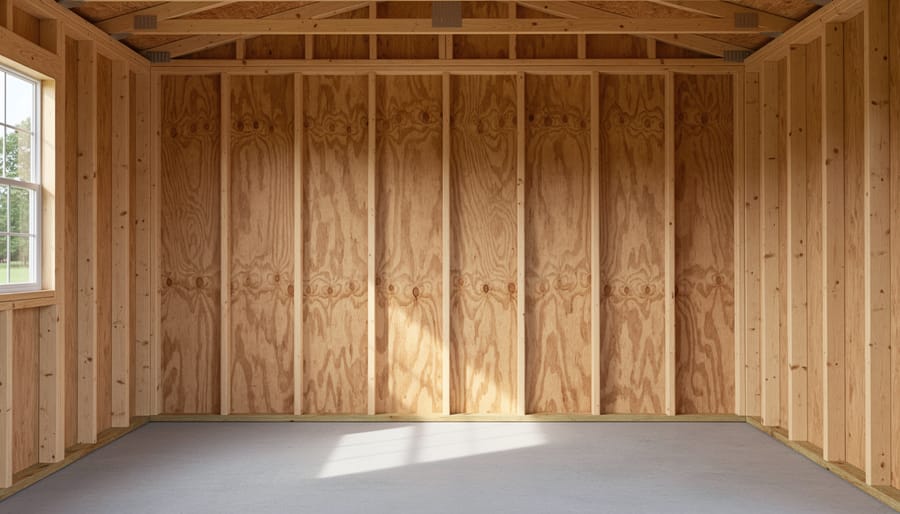
Best Practices for Installing Plywood Walls
Plywood remains a go-to choice for shed walls thanks to its affordability and durability. For most sheds, half-inch thick plywood strikes the perfect balance between strength and cost, though three-quarter-inch panels work better if you plan to hang heavy tools or shelving.
Start by measuring your wall height from floor to ceiling, accounting for any irregularities in your shed wall framing. Cut panels to fit using a circular saw with a fine-tooth blade to minimize splintering. Here’s a helpful tip from experienced DIYers: mark your studs clearly before installation so you’ll know exactly where to hang items later.
When securing panels, apply construction adhesive to the studs first, then fasten with screws every 8-12 inches along each stud. This double-securing method prevents warping over time. Always start from one corner and work your way across, checking for plumb as you go.
For a cleaner look, consider sanding edges before installation and apply a primer coat within 48 hours to protect against moisture. One homeowner shared that pre-finishing her plywood panels before installation saved hours of awkward overhead work and resulted in a much neater appearance.
Protecting Your Plywood Investment
Plywood is an excellent choice for shed walls, but it needs proper protection to last for years. The key to preserving your investment lies in three simple steps: waterproofing, sealing, and finishing.
Start by learning how to waterproof plywood properly before installation. Apply a quality wood primer to all surfaces, including edges where moisture loves to sneak in. This creates a protective barrier that prevents warping and rot. For sheds that experience temperature fluctuations or occasional dampness, this step is essential.
Once your primer is dry, add a coat of paint or polyurethane sealant. Paint not only protects but also brightens your workspace and makes it easier to spot tools and supplies. Choose moisture-resistant paint formulated for wood surfaces. If you prefer a natural wood look, opt for clear polyurethane or marine-grade varnish.
Don’t forget the edges and seams. These vulnerable spots need extra attention with caulk or wood filler to block moisture pathways. One homeowner shared that after properly sealing her plywood walls, her garden shed stayed dry and beautiful through five rainy seasons without a single sign of damage. That’s the difference good protection makes.
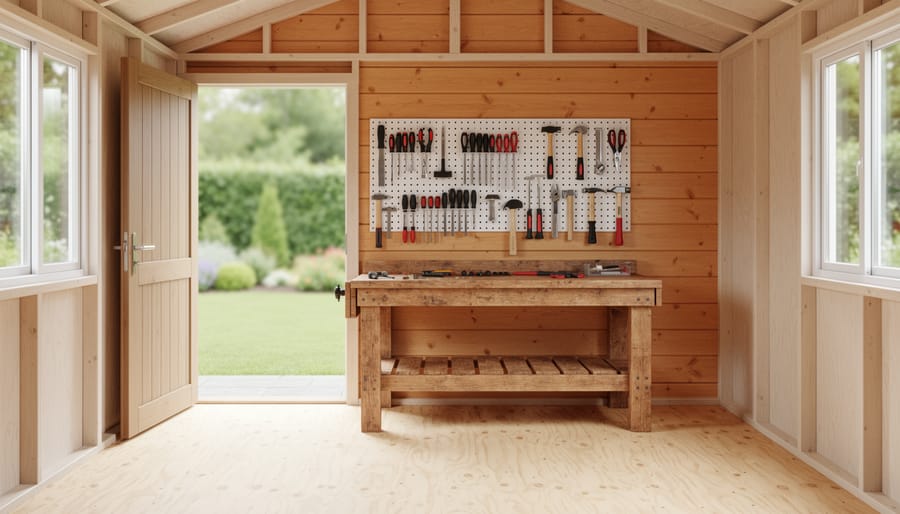
Pegboard Walls: Maximum Storage in Minimum Space
If you’re looking to transform your shed into a highly organized workspace, pegboard walls offer an unbeatable combination of flexibility and functionality. This classic storage solution has stood the test of time for good reason—it puts every tool within arm’s reach while maximizing your vertical space.
Pegboard comes in several materials, each with different weight capacities. Standard tempered hardboard pegboard is the most affordable option and works well for lightweight tools, supporting up to 5 pounds per hook when properly anchored. For heavier equipment, consider metal pegboard panels that can handle up to 100 pounds when installed correctly. You’ll find these at most home improvement stores in 2×4 or 4×8 foot sheets.
Installation is straightforward, but there’s one crucial step many DIYers miss: creating an air gap. Mount horizontal furring strips to your wall studs first, then secure the pegboard to these strips. This 1-inch gap behind the panel allows hooks to fit through the holes properly. Without it, your pegboard becomes decorative rather than functional—a frustrating discovery after installation.
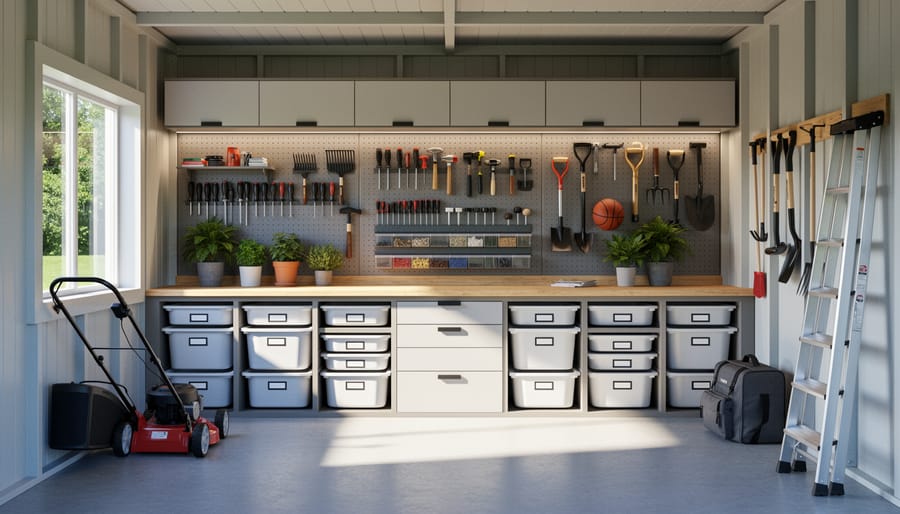
When planning your layout, group tools by task rather than size. Sarah, a weekend woodworker from Oregon, shared that arranging her tools by project type cut her setup time in half. “I have a section for painting supplies, another for measuring tools, and my most-used items at eye level,” she explains.
For maximum impact, paint your pegboard a contrasting color to make tools easier to spot. Many people trace their tools with markers to create shadow outlines, ensuring everything returns to its proper place. This simple trick keeps your workspace organized even during busy projects.
Consider combining pegboard with small shelves or bins for screws, nails, and other small items that don’t hang well on hooks alone.
Vinyl and Plastic Paneling for Low-Maintenance Walls
If you need walls that can handle moisture, temperature swings, and the occasional bump or scrape, vinyl and plastic paneling deserve serious consideration. These synthetic wall panel options shine in sheds used for gardening, lawn equipment storage, or workshops where humidity and dirt are daily realities.
The biggest advantage? Cleanup is a breeze. Unlike wood that can absorb stains and odors, vinyl and plastic panels wipe clean with just soap and water. Spilled fertilizer, grease splatters, or muddy handprints disappear in seconds. Many homeowners report that a quick wipe-down is all they need to keep their shed walls looking fresh year after year.
Installation is straightforward too. Most panels feature interlocking edges or tongue-and-groove systems that snap together easily, making this a manageable weekend project even for DIY beginners. You can attach them directly to wall studs or over existing surfaces with basic tools.
Durability is another strong point. Quality vinyl panels resist warping, cracking, and fading, maintaining their appearance without painting or sealing. They stand up well to temperature fluctuations that would cause other materials to expand and contract problematically.
This option makes the most sense for utility-focused sheds where practicality trumps aesthetics. While available in various colors and textures, vinyl and plastic won’t provide the same warmth as wood. However, for garden sheds, potting areas, or spaces housing pool equipment and chemicals, the moisture resistance and easy maintenance make vinyl paneling an incredibly smart choice.
Wood Planks and Shiplap for a Rustic Touch
If you’re dreaming of a cozy, cottage-style shed interior, wood planking and shiplap deliver that warm, rustic charm beautifully. These decorative wall treatments transform a basic storage space into an inviting area you’ll actually enjoy spending time in, whether you’re crafting, gardening, or simply organizing your belongings.
Shiplap boards feature a distinctive overlapping joint that creates subtle shadow lines, giving walls character and visual interest. Tongue-and-groove planking offers a similarly attractive finish with interlocking edges that create seamless coverage. Both options provide a polished, finished appearance that feels like an extension of your home rather than a utilitarian outbuilding.
The aesthetic value is undeniable, but let’s talk budget. Expect to spend between $1.50 to $4.00 per square foot for materials, depending on wood species and quality. Pine and cedar are popular choices, with cedar offering natural rot resistance that’s worth the extra investment in humid climates. Installation is reasonably DIY-friendly if you’re comfortable with basic carpentry tools.
Here’s an important consideration: moisture control matters. Even decorative wood needs protection in shed environments. Sarah from Portland learned this firsthand when she installed beautiful pine shiplap without sealing it first. After one rainy season, she noticed warping near the floor. Now she recommends applying a quality wood sealer before installation and ensuring proper ventilation to prevent moisture buildup.
For best results, leave small expansion gaps between boards to accommodate seasonal wood movement, and consider adding a vapor barrier behind the planking if your shed experiences temperature fluctuations.
Metal Panels: Industrial Strength and Style
If you’re after a rugged, modern aesthetic for your shed interior, metal panels deliver both industrial charm and serious durability. Corrugated metal and aluminum panels are fire-resistant, moisture-proof, and incredibly tough—perfect for workshops where sparks might fly or garages prone to humidity.
These panels typically cost between $2-$5 per square foot, making them a mid-range option. The installation can be straightforward if you’re comfortable with metal snips and a drill, though cutting panels to fit requires patience and proper safety gear. One homeowner shared that after installing aluminum panels in his woodworking shed, cleanup became a breeze—sawdust simply brushed right off the smooth surface.
The main challenge? Metal panels can amplify noise and require careful handling to avoid sharp edges during installation. They also conduct temperature, so insulation becomes essential if you’re working in your shed year-round. However, for tool storage, hobby workshops, or any space where durability trumps sound dampening, metal panels are hard to beat. They’re especially popular in modern farmhouse-style sheds where that industrial vibe enhances the overall design.
Budget-Friendly Alternatives That Still Look Great
You don’t need to spend a fortune to create an attractive shed interior. With some creativity and elbow grease, there are plenty of budget-friendly options that deliver impressive results.
Painted OSB (oriented strand board) has become surprisingly popular among DIYers. While it was once considered purely utilitarian, a coat of paint transforms it into a clean, modern finish. The textured surface adds visual interest, and at a fraction of plywood’s cost, it’s perfect for basic storage sheds. Use a primer first to prevent the wood from absorbing too much paint.
Reclaimed materials offer character without the price tag. Old barn wood, pallet boards, or salvaged fence panels bring rustic charm to your shed walls. Sarah, a weekend DIYer from Oregon, shared her experience: “I used weathered fence boards from a neighbor’s renovation and created a beautiful accent wall for under fifty dollars. Everyone thinks it’s professionally done!”
Fabric wall coverings provide another creative solution. Heavy-duty canvas or drop cloths stapled to framing create a clean backdrop for tool storage. You can even paint designs directly onto the fabric for a personalized touch.
Don’t overlook simply painting exposed framing and leaving some wall areas open. This industrial look works great for garden sheds where you’ll hang tools on pegboards anyway. Add a few colorful accents between studs for storage cubbies, and you’ve got a functional, attractive space that costs almost nothing beyond paint.
Choosing the Right Option for Your Shed’s Purpose
Selecting the perfect wall finish for your shed comes down to understanding how you’ll actually use the space. A workshop handling power tools and heavy equipment needs durable, impact-resistant walls like plywood or OSB that can support shelving and withstand daily wear. Meanwhile, a garden storage shed housing seasonal items might work beautifully with budget-friendly pegboard or simple painted drywall.
Consider your local climate when making this decision. If you live in humid areas or experience temperature swings, moisture-resistant options like treated plywood or vinyl-coated panels will save you headaches down the road. One homeowner in coastal Virginia shared how switching from standard drywall to cement board in her craft shed eliminated the mildew problems that plagued her first attempt.
Budget naturally plays a role, but think long-term value rather than just upfront costs. OSB offers excellent bang for your buck in workshops, while hobby spaces might justify spending more on attractive tongue-and-groove paneling that creates an inspiring environment.
Here’s a practical framework: List your shed’s primary purpose, then identify your must-haves. Does it need to support heavy items? Require easy cleaning? Stay looking good for guests? Match your wall choice to these priorities. A potting shed benefits from washable surfaces like FRP panels, while a backyard office deserves the finished look of painted drywall or shiplap. Your shed’s purpose should drive every decision, ensuring you create a space that truly works for your lifestyle.
Now it’s time to turn those interior shed wall ideas into reality! The perfect wall cladding solution is out there waiting for you—whether it’s budget-friendly plywood, moisture-resistant PVC panels, or rustic shiplap that adds character. Consider how you’ll use your shed, what your climate demands, and what fits your budget. Remember, there’s no one-size-fits-all answer here.
Don’t let your shed remain that cluttered, uninspiring space you avoid. With the right wall treatment, you can transform it into a workshop you’re proud to spend time in, a cozy hobby retreat, or an organized storage haven that actually makes your life easier. Start with one wall if that feels more manageable—many homeowners find that taking it step-by-step makes the project less overwhelming and more enjoyable. Your shed has incredible potential, and with these ideas in hand, you’re ready to create a space that truly works for you.
Looking for a storage sheds?
Browse our full range of storage sheds from authorized dealer brands. Free shipping to the continental US.