
Build a Cozy 3-Sided Shed That Keeps Your Gear Warm and Dry

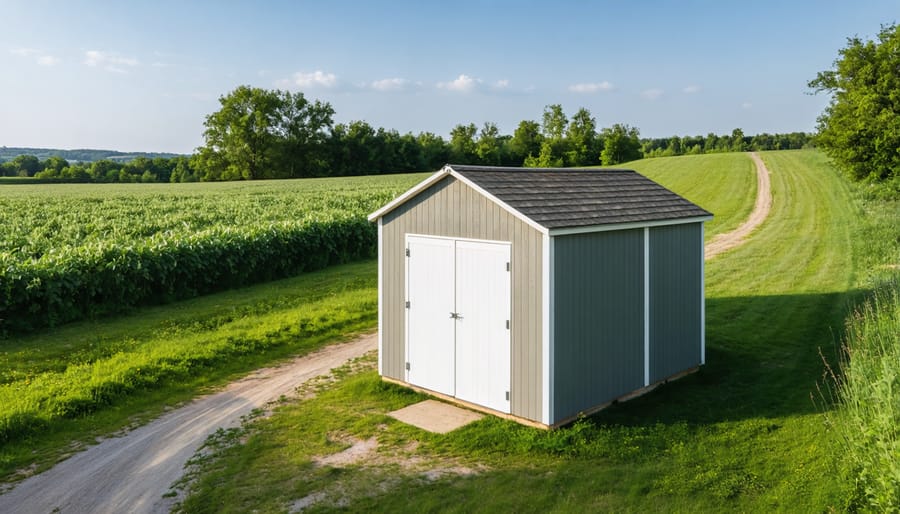
Transform your outdoor storage needs with a three-sided shed – the perfect balance of accessibility and protection for equipment, livestock, or workshop space. These versatile structures combine open-front convenience with robust weather protection on three sides, making them ideal for everything from tractor storage to creating a covered workspace. Whether you’re planning a lean-to design against an existing wall or a standalone structure, the right three-sided shed can maximize your property’s functionality while maintaining a clean, architectural appeal.
Modern three-sided shed designs go far beyond basic agricultural shelters, incorporating innovative features like adjustable ventilation panels, modular storage systems, and weather-resistant materials that extend service life. Smart design choices in roof pitch, overhang depth, and wall configuration can significantly enhance protection from wind-driven rain while maintaining the open-front accessibility that makes these structures so practical.
Looking for inspiration? Popular options include traditional post-and-beam construction with metal roofing for durability, contemporary designs featuring translucent panels for natural lighting, and rustic varieties using reclaimed materials for environmental consciousness. Each style offers unique advantages for specific uses, from equipment storage to creating an outdoor workshop space that stays dry year-round.
Smart Design Considerations for Your 3-Sided Shed
Optimal Placement and Orientation
The success of your 3-sided shed largely depends on its placement and orientation on your property. Position the open side away from prevailing winds and driving rain to protect your stored items. In most regions, facing the opening south or southeast provides optimal sunlight while minimizing exposure to harsh weather conditions.
Consider natural windbreaks like trees or existing structures, but maintain enough distance to prevent falling branches or moisture problems. Place the shed on slightly elevated ground with a gentle slope away from the opening to prevent water pooling and ensure proper drainage.
For maximum weather protection, orient the solid back wall against the direction of strongest winds in your area. If possible, position the shed where it receives morning sun but afternoon shade, helping regulate temperature extremes. Leave enough clearance around all sides for maintenance and air circulation – typically 2-3 feet from property lines or other structures.
Remember to check local building codes and HOA regulations regarding shed placement before finalizing your location. Smart positioning now will save you maintenance headaches later.
Size and Layout Planning
Before starting your 3-sided shed project, careful planning of size and layout is essential for maximizing functionality. Begin by measuring your available space and considering the items you’ll store. A typical 3-sided shed ranges from 8×8 feet for basic storage to 12×16 feet for larger equipment. Remember to account for proper clearance around the open side for easy access.
When planning the internal layout, divide your space into zones based on usage frequency. Position frequently used items near the front opening, while seasonal equipment can go toward the back. Installing adjustable shelving along the two side walls offers flexible storage options, while the back wall is perfect for hanging tools and equipment.
Height is another crucial factor – aim for at least 7 feet of interior clearance to accommodate taller items and ensure comfortable movement. Don’t forget to consider the slope of your land when determining the final dimensions, as this will affect choosing the best foundation for your shed. Leave enough space between stored items for easy navigation and air circulation, typically 3-4 feet of walkway width.
Insulation Techniques for Maximum Efficiency
Wall Insulation Systems
Proper wall insulation is crucial for maintaining a comfortable environment in your three-sided shed while protecting your stored items from temperature fluctuations and moisture. Before diving into insulation costs and materials, let’s explore the most effective options for your shed walls.
Fiberglass batts remain a popular choice for wall insulation, offering excellent thermal protection at an affordable price point. Installation is straightforward: simply fit the batts between wall studs and secure them with a vapor barrier. For enhanced protection, consider faced batts with built-in vapor barriers.
Rigid foam boards provide superior insulation with minimal thickness, making them ideal for maximizing interior space. These boards can be cut to size and installed directly against the wall sheathing, creating a tight seal that prevents air leakage. They’re particularly effective in humid climates due to their moisture-resistant properties.
Spray foam insulation, while more expensive, offers unmatched coverage and air-sealing capabilities. It expands to fill every nook and cranny, creating an exceptional thermal barrier. This option works especially well for three-sided sheds where weather exposure might be more significant on open sides.
For a more eco-friendly approach, consider natural insulation materials like sheep’s wool or recycled denim. These alternatives provide good thermal performance while being sustainable and safe to handle during installation.
Remember to install a proper vapor barrier regardless of your chosen insulation method. This crucial layer prevents moisture buildup that could compromise both the insulation and your stored items. For three-sided sheds, pay special attention to sealing the corners where the walls meet, as these areas are particularly vulnerable to air infiltration.
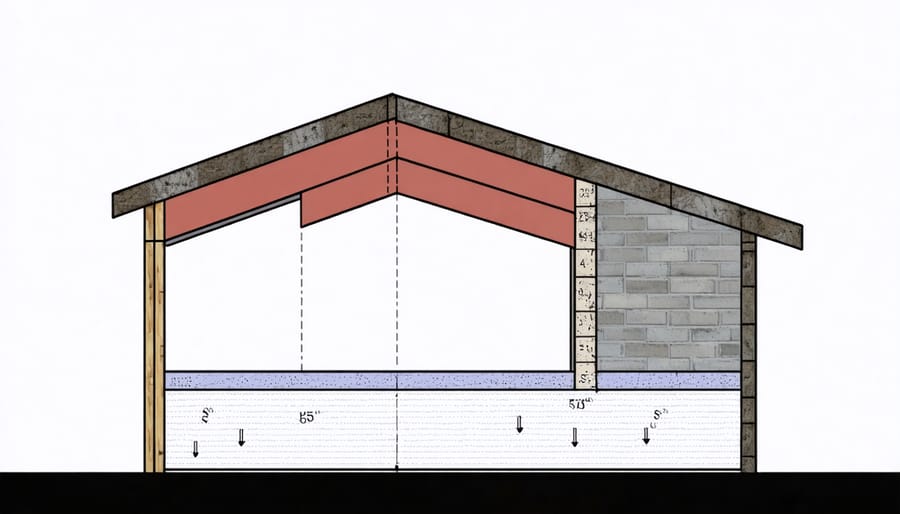
Roof Insulation Strategies
Proper roof insulation is crucial for your three-sided shed, protecting your stored items from temperature fluctuations and moisture. Start by installing a vapor barrier directly beneath your roofing material to prevent condensation from seeping through. A 6-mil polyethylene sheet works perfectly for this purpose and creates an effective moisture barrier.
For the insulation itself, consider using rigid foam boards or fiberglass batts rated R-30 or higher. Rigid foam offers excellent protection while being relatively easy to install in the confined space of a shed roof. If using fiberglass batts, ensure they’re properly sized to fit between your roof joists without compression, as compressed insulation loses effectiveness.
Create a ventilation gap of about 1-2 inches between your insulation and the roof deck to prevent moisture buildup. Install roof vents or soffit vents to maintain proper airflow throughout the space. This ventilation system helps regulate temperature and prevents mold growth.
Don’t forget to seal any gaps around electrical fixtures or vents with expanding foam insulation. Pay special attention to the areas where the roof meets the walls, as these joints are common spots for heat loss and moisture infiltration.
For added protection, consider installing a reflective radiant barrier on the underside of your roof. This affordable addition reflects heat away during summer months and helps retain warmth during winter, making your shed more energy-efficient year-round.
Finally, finish the interior ceiling with moisture-resistant plywood or oriented strand board (OSB) to protect the insulation and create a clean, finished look. This covering also provides an extra barrier against pests and weather elements.
Weather-Proofing Your Open Side
Overhang Design Options
When designing a 3-sided shed, protecting the open side from weather elements is crucial for keeping your stored items safe and dry. A well-planned overhang can make all the difference in preventing rain and snow from entering your shed while maintaining easy access.
The classic extended roof overhang is the most popular option, typically extending 2-4 feet beyond the open side. This design works particularly well in areas with moderate rainfall and provides sufficient protection without compromising accessibility. For added protection, consider installing gutters along the overhang to direct water away from the shed’s entrance.
A more robust solution is the full-length awning, which can extend up to 6 feet from the open side. This design offers maximum weather protection and can create a covered workspace in front of your shed. You can choose between fixed awnings or retractable options that provide flexibility based on weather conditions.
For areas with heavy snowfall, consider a steeper pitched overhang to prevent snow accumulation. A pitch of at least 4:12 (rising 4 inches for every 12 inches of horizontal run) is recommended for effective snow shedding. Some homeowners opt for clear polycarbonate panels in their overhang design, allowing natural light while maintaining protection.
Remember to factor in your local climate and typical weather patterns when selecting an overhang design. The right choice will enhance both the functionality and longevity of your 3-sided shed.
Floor Solutions
A solid foundation is crucial for your three-sided shed, and choosing the right flooring solution can make a difference in longevity and functionality. Start with a level base of compacted gravel, which provides excellent drainage and prevents moisture buildup. Layer this with a heavy-duty moisture barrier to protect against ground dampness.
For the actual floor, pressure-treated lumber is an excellent choice, particularly 2×6 joists topped with 3/4-inch pressure-treated plywood. This combination creates a sturdy platform that resists rot and supports heavy equipment. Consider spacing your joists 16 inches on center for maximum stability. Waterproofing your shed materials is essential for long-term durability, especially in a three-sided structure where one side remains open to the elements.
Another popular option is a concrete slab foundation, which offers unmatched durability and requires minimal maintenance. If choosing concrete, include a slight slope (about 1 inch per 8 feet) toward the open side to prevent water pooling. Add a textured finish for better traction when wet.
For a more budget-friendly approach, consider using gravel throughout the entire floor area. Use landscape fabric underneath to prevent weed growth, and opt for angular gravel that compacts well. This solution provides excellent drainage and can be easily replenished as needed.
Practical Storage Solutions
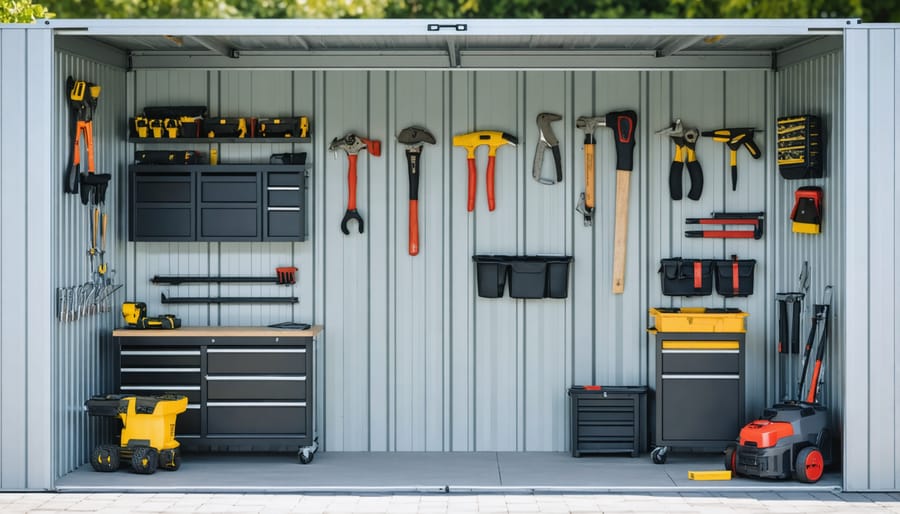
Wall-Mounted Organization
Making the most of your wall space is crucial to maximize your storage space in a three-sided shed. Start by installing sturdy pegboards or slatwall panels, which offer versatile storage options for tools and equipment. These systems allow you to easily rearrange hooks and holders as your storage needs change.
Consider mounting heavy-duty shelving units at different heights to create multiple storage levels. Install lower shelves for heavier items like power tools and paint cans, while upper shelves can hold lighter, less frequently used items. Remember to leave enough space between shelves for easy access and visibility.
Tool organizers are essential for keeping your workspace tidy. Install magnetic strips for metal tools, rotating tool racks for garden implements, and specialized holders for longer items like rakes and shovels. Don’t forget to utilize the space behind the door – this often-overlooked area is perfect for hanging lightweight items or installing a slim organizer.
For frequently used items, create designated zones with clearly labeled storage solutions. Use clear plastic bins or metal baskets that can be easily mounted on the walls. This not only keeps items organized but also protects them from dust and moisture. Consider adding adjustable brackets and hooks that can be modified as your storage needs evolve throughout the seasons.
Modular Storage Systems
Maximizing storage in a 3-sided shed requires smart, adaptable solutions that can work with the open-faced design. Modular storage systems offer the perfect balance of flexibility and functionality, allowing you to customize your space as your needs change.
Wall-mounted track systems are particularly effective in these structures, as they keep items off the ground and protected from the elements. These systems typically feature adjustable brackets and hooks that can be easily repositioned, making them ideal for storing garden tools, sports equipment, and seasonal items.
Consider installing adjustable shelving units that can be reconfigured based on your storage needs. Look for heavy-duty brackets and sturdy shelves that can withstand various weather conditions. Clear plastic bins with secure lids work well on these shelves, protecting contents from dust and moisture while keeping them visible and accessible.
For frequently used items, rolling storage carts offer convenient access and can be easily moved under cover during inclement weather. Choose weather-resistant materials like galvanized steel or heavy-duty plastic for longer-lasting performance.
Vertical storage solutions are especially valuable in 3-sided sheds. Consider installing pegboard panels or slatwall systems that can accommodate various hooks, baskets, and tool holders. These systems make excellent use of wall space while keeping items organized and within easy reach.
Remember to incorporate a mix of open and closed storage options. While open storage provides quick access, sealed containers protect sensitive items from exposure to the elements that might enter through the open side.
A three-sided shed offers the perfect balance of accessibility and protection for your outdoor storage needs. Throughout this guide, we’ve explored various design options, material choices, and practical considerations to help you create the ideal storage solution for your property.
Remember that successful three-sided shed implementation starts with careful planning. Consider your specific storage needs, local weather patterns, and available space before settling on a final design. Whether you choose a lean-to style against an existing wall or a standalone structure, ensure your foundation is level and sturdy to support your investment for years to come.
Don’t forget the importance of proper drainage and weather protection. While the open side provides easy access, strategic placement and appropriate roof overhang will help keep your stored items dry and protected. Adding features like adjustable shelving, wall-mounted organizers, or even a small workbench can maximize your shed’s functionality.
For those in areas with harsh weather conditions, consider installing removable panels or tarps for temporary closure during storms. Regular maintenance, including checking for loose hardware and treating wood surfaces, will extend your shed’s lifespan and preserve its appearance.
By following these guidelines and adapting them to your specific needs, you’ll create a practical, durable, and attractive three-sided shed that enhances your property’s functionality while maintaining a clean, organized outdoor space.