
How Your Elevated Shed Foundation Prevents Costly Damage (Expert Tips Inside)
Elevate your shed above ground-level threats by choosing the right foundation – a critical decision that protects your investment from moisture damage, pest intrusion, and structural instability. Whether you’re planning a new build or upgrading an existing structure, exploring the best foundation options ensures your shed stands strong for decades. A properly elevated foundation not only prevents wood rot and extends your shed’s lifespan but also creates valuable air circulation underneath, maintaining the integrity of both your stored items and the structure itself. From concrete blocks to engineered pier systems, modern elevation solutions offer the perfect balance of durability, accessibility, and aesthetic appeal – transforming your basic storage space into a lasting investment that enhances your property’s value.
Why Your Shed Needs to Be Elevated
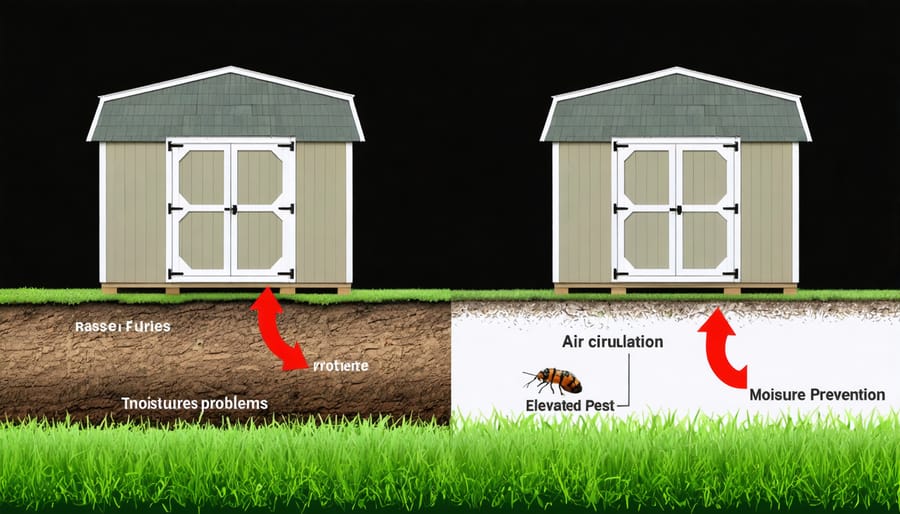
Moisture Protection and Rot Prevention
Elevating your shed above ground level creates a crucial barrier against one of storage buildings’ biggest enemies: moisture. This smart design choice helps prevent moisture damage by allowing air to circulate freely underneath the structure, quickly drying any dampness that might accumulate after rain or snow.
The space between the ground and your shed’s floor acts as a natural ventilation system, significantly reducing the risk of wood rot, mold growth, and structural deterioration. This airflow is particularly important in areas with high humidity or frequent precipitation, where ground moisture can slowly seep upward into building materials.
Additionally, elevation protects your shed’s floor joists and bottom plates from direct contact with soil and splashing rainwater, which are common causes of premature aging in storage buildings. By keeping these crucial components dry and well-ventilated, you can extend your shed’s lifespan by many years and maintain its structural integrity, ultimately protecting your investment and the items stored inside.
Pest Control Benefits
Elevating your shed foundation provides a powerful defense against unwanted pest invasions. By creating a gap between the ground and your shed’s floor, you significantly reduce the risk of infestations from common garden pests like termites, carpenter ants, and rodents. These creatures typically prefer dark, moist environments close to the ground, and an elevated foundation eliminates their direct access path to your storage space.
The airflow beneath an elevated shed also helps maintain drier conditions, making the environment less appealing to moisture-loving insects and reducing the likelihood of wood rot that can attract destructive pests. This natural ventilation acts as a passive pest deterrent, working around the clock to protect your investment.
For enhanced protection, you can easily inspect the underside of an elevated shed and spot any early signs of pest activity. This visibility allows for prompt treatment before small problems become major infestations. Additionally, you can install pest barriers or mesh screens between the foundation and shed floor, creating an extra layer of defense against determined critters seeking shelter in your storage space.
Popular Elevated Foundation Types
Concrete Block Foundations
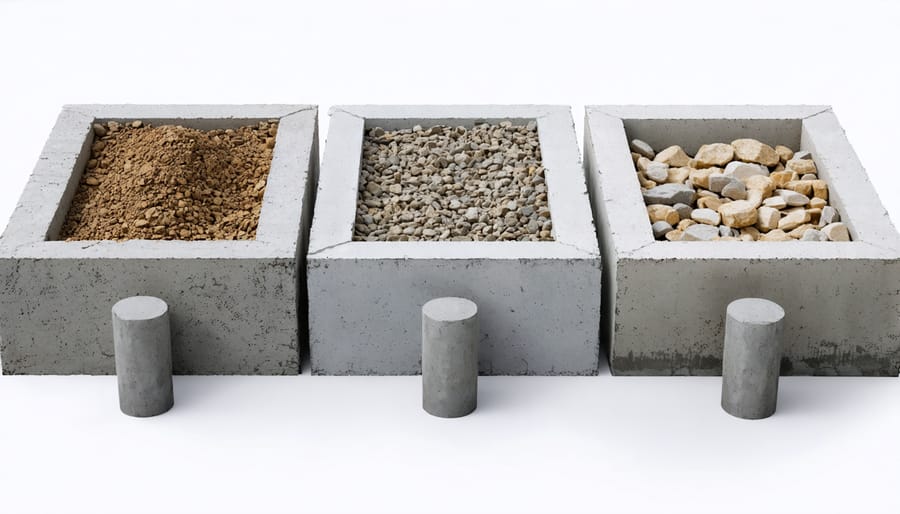
Concrete blocks offer a reliable and cost-effective foundation solution for elevated sheds. These blocks, typically 8x8x16 inches, provide excellent stability and can be arranged in various configurations to suit your shed’s dimensions. One of the main advantages is their versatility – you can adjust the height of your foundation by stacking blocks or using different sizes.
When using concrete blocks, it’s essential to create a level base with gravel or crushed stone first. This helps with drainage and prevents the blocks from settling unevenly. Space your blocks no more than 6 feet apart to ensure proper support for your shed’s floor joists.
The benefits of concrete block foundations include their durability, resistance to rot and insects, and excellent load-bearing capacity. They’re also easily replaceable if damaged and allow for good airflow beneath your shed, which helps prevent moisture-related issues.
However, there are some considerations to keep in mind. Concrete blocks can shift over time if not properly installed on a well-prepared base. They may also require periodic leveling and adjustment. In areas with extreme freeze-thaw cycles, additional precautions might be needed to prevent movement.
For best results, use solid concrete blocks rather than hollow ones for corner supports, and consider using pressure-treated lumber between the blocks and your shed’s floor frame to create a more secure connection. This combination provides both stability and protection against moisture transfer.
Gravel Pad with Post Foundations
A gravel pad with post foundations offers an excellent compromise between elevation and stability for your shed. This method starts with pressure-treated posts set in concrete footings, typically placed at the corners and strategic points along the shed’s perimeter. The posts elevate your shed 6-12 inches above ground level, while a carefully prepared gravel base provides additional drainage and support.
To create this foundation, begin by marking your shed location and digging holes for the posts, ensuring they extend below the frost line in your area. Install the posts in concrete and ensure they’re perfectly level. Next, create a border using pressure-treated lumber to contain the gravel pad. Fill the enclosed area with 4-6 inches of crushed stone or gravel, compacting it thoroughly in layers.
This hybrid approach offers several advantages: the posts provide elevation to protect against moisture and pests, while the gravel base ensures excellent drainage and helps prevent weed growth underneath. The system is particularly effective in areas with moderate soil movement or seasonal water issues.
For best results, use 6×6 pressure-treated posts and ensure proper spacing based on your shed’s dimensions. Add cross-bracing between posts for enhanced stability, especially in areas prone to high winds. Remember to slope the gravel pad slightly away from the center to direct water away from your shed.
Pre-Cast Pier Systems
Pre-cast pier systems offer a modern and efficient solution for elevating your shed. These professionally manufactured concrete piers combine durability with easy installation, making them increasingly popular among homeowners. Each pier consists of a solid concrete base with an integrated metal bracket designed to securely hold your shed’s floor joists.
What makes pre-cast piers particularly appealing is their versatility and reliability. They can be adjusted to various heights, allowing you to level your shed on uneven terrain while maintaining proper airflow underneath. The engineered design ensures consistent quality and load-bearing capacity, giving you peace of mind about your shed’s stability.
Installation is straightforward and typically doesn’t require heavy machinery. The piers are placed on a prepared gravel bed, which helps with drainage and prevents settling. Most systems come with adjustable tops, letting you fine-tune the height and level of your shed even after installation.
These systems also offer excellent protection against moisture and pests. By keeping your shed elevated and creating a barrier between the ground and your structure, pre-cast piers help extend the life of your storage building. They’re particularly beneficial in areas with poor drainage or seasonal ground freezing.
While initially more expensive than some traditional foundation methods, pre-cast pier systems often prove cost-effective in the long run through reduced maintenance needs and superior longevity.
Installation Considerations
Height Requirements
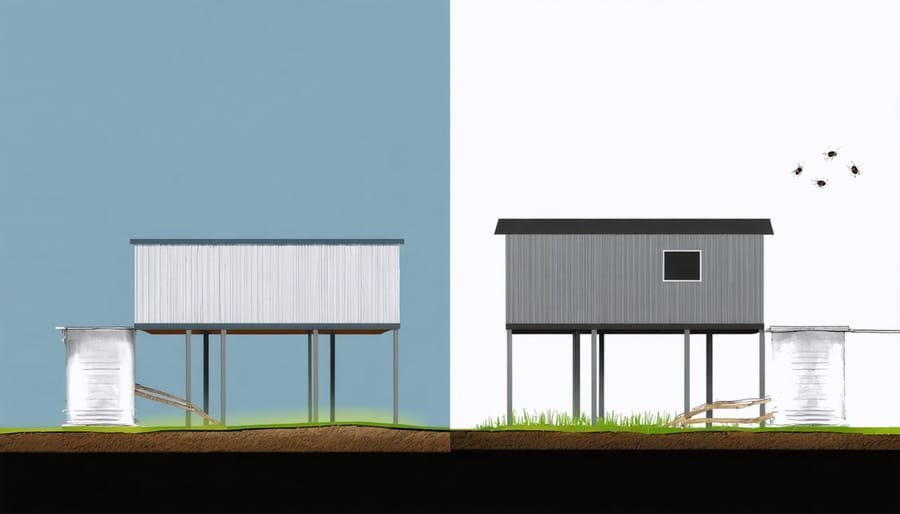
When determining the ideal height for your elevated shed foundation, aim for a minimum of 6 inches above ground level to protect against moisture and pests. However, depending on your location and specific needs, you might want to go higher. In areas prone to flooding or heavy rainfall, consider raising the foundation 12-18 inches above grade level.
Local building codes often specify minimum height requirements, so check with your municipality before starting. As a general rule, if your yard has a slight slope or drainage issues, add an extra few inches to account for water runoff. For areas with severe weather conditions or high humidity, elevating your shed 24 inches or more provides excellent air circulation and protection.
Remember that the final height should also consider practical access. If you’ll be using lawn equipment or wheeling items in and out, ensure the elevation allows for a comfortable ramp angle. A good tip is to measure your tallest piece of equipment and factor that into your foundation height calculations. This way, you’ll create a foundation that’s both protective and functional for your specific needs.
Load Bearing Capacity
Calculating the load-bearing capacity of your elevated shed foundation is crucial for long-term stability and safety. Start by determining the total weight your foundation needs to support, including the shed’s structural weight, stored items, and potential snow load for your region.
For a typical 10×12 foot shed, plan for approximately 15-20 pounds per square foot for the structure itself. Add another 10-15 pounds per square foot for stored items, and if you live in a snowy area, factor in an additional 20-30 pounds per square foot for snow load.
To ensure proper support, space your foundation posts or piers no more than 6 feet apart. Each post should be capable of supporting at least 1,500 pounds. When using concrete blocks or piers, choose products rated for your calculated load requirements and local building codes.
Here’s a simple calculation example:
– 10×12 shed = 120 square feet
– Structure weight (20 lbs/sq ft) = 2,400 lbs
– Storage load (15 lbs/sq ft) = 1,800 lbs
– Snow load (25 lbs/sq ft) = 3,000 lbs
– Total load = 7,200 lbs
Divide this total by the number of support points to determine the minimum load capacity needed for each foundation post. Always round up and add a 20% safety margin to your calculations. When in doubt, consult a local contractor or structural engineer to ensure your foundation meets all requirements.
Local Building Codes
Before starting your elevated shed foundation project, it’s crucial to check your local building codes and obtain necessary permits. Most municipalities have specific requirements for shed foundations, including minimum height above ground, setback distances from property lines, and maximum structure size before requiring a permit.
Common regulations include requirements for proper drainage, minimum distance from the main dwelling, and foundation type specifications. Many areas require sheds to be elevated at least 6 inches above ground level to prevent moisture damage and ensure proper airflow. Some locations may also have specific requirements for anchoring systems, especially in areas prone to high winds or flooding.
It’s worth noting that regulations can vary significantly between jurisdictions. While some areas may only require a simple building permit, others might need detailed construction plans and inspections. Contact your local building department or planning office early in your project planning phase. This proactive approach can save you time, money, and potential headaches down the road by ensuring your shed foundation meets all local requirements from the start.
Maintenance and Long-Term Care
Regular maintenance of your elevated shed foundation is crucial for ensuring its longevity and protecting your investment. Start by conducting seasonal inspections of your foundation’s key components, particularly after severe weather events. Check for any signs of structural movement, cracks, or deterioration in the support posts, beams, and connection points.
To effectively protect against water damage, keep the area around your foundation clear of debris, leaves, and vegetation. Maintain proper drainage by regularly cleaning gutters and ensuring downspouts direct water away from the foundation. Consider applying a waterproof sealant to exposed wooden components every 2-3 years.
Pay special attention to the ventilation beneath your shed. Good airflow prevents moisture buildup and discourages pest infestation. Trim any vegetation that might obstruct air circulation and check that existing ventilation openings remain unblocked. Install or maintain pest barriers around support posts to prevent unwanted visitors from making homes underneath your shed.
Monitor the levelness of your foundation annually using a spirit level. Minor settling is normal, but significant changes may require professional adjustment. Tighten any loose hardware and replace corroded fasteners promptly. For wooden foundations, check for signs of rot, termite damage, or wood-boring insects during your inspections.
If your foundation includes adjustable support posts, verify their stability and adjust as needed to maintain proper elevation. Keep detailed records of any maintenance performed and take photos during inspections to track changes over time. This documentation helps identify developing issues before they become major problems.
Consider scheduling professional inspections every 3-5 years to ensure your foundation remains structurally sound. While DIY maintenance is important, expert eyes can spot potential issues you might miss and provide specialized maintenance recommendations for your specific foundation type.
Choosing the right elevated shed foundation is a crucial step in protecting your storage investment and ensuring its longevity. Throughout this guide, we’ve explored various foundation options, from concrete blocks to post-and-beam systems, each offering unique advantages for different situations. Remember that proper elevation not only prevents moisture damage and rot but also improves ventilation and provides easier access for maintenance.
When planning your elevated shed foundation, always consider your local climate, soil conditions, and building codes. Take time to prepare the site thoroughly and ensure proper drainage. While the initial investment in an elevated foundation might be higher than ground-level alternatives, the long-term benefits far outweigh the costs.
For best results, we recommend working with high-quality materials, following proper installation procedures, and performing regular maintenance checks. Don’t hesitate to consult with local professionals if you’re unsure about any aspect of the project. With careful planning and proper execution, your elevated shed foundation will provide a stable, durable base for your storage solution for many years to come.