
Transform Your Backyard Shed into a Cozy Guest House (Without Breaking the Bank)
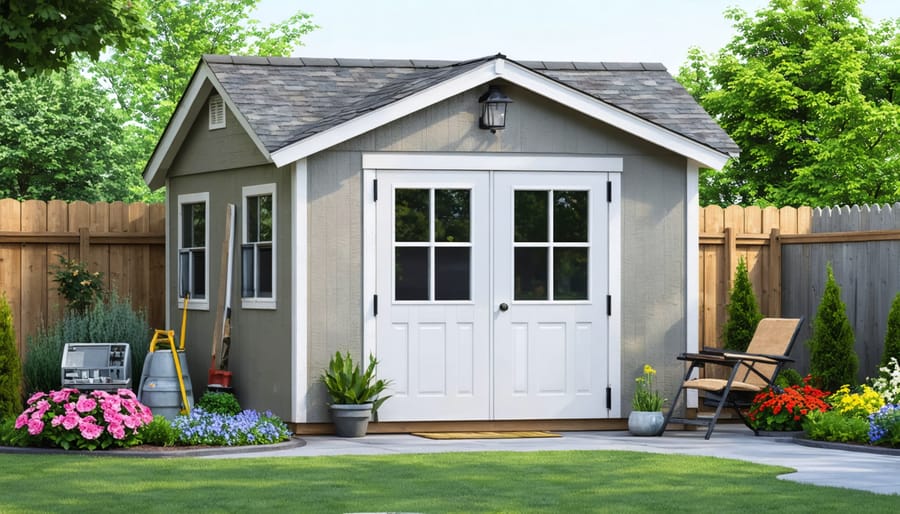
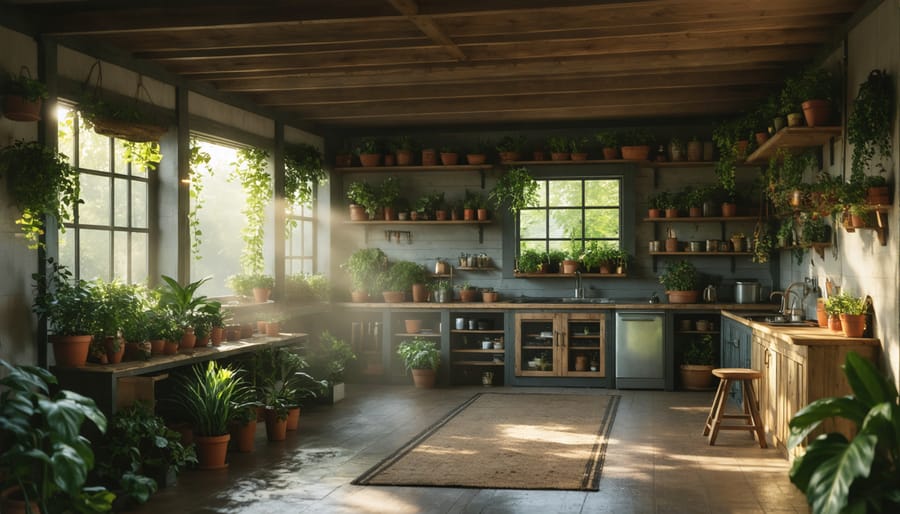
Transform your backyard shed into a guest house and create valuable living space without the cost of a full home addition. The process to transform your shed into living space requires careful planning but delivers outstanding returns. Start by checking local zoning laws and obtaining necessary permits – many municipalities have specific requirements for converting outdoor structures into habitable spaces. Evaluate your shed’s structural integrity, ensuring it has a solid foundation, weather-tight roof, and adequate support for residential features. Consider essential upgrades like insulation, electrical wiring, plumbing connections, and climate control to meet building codes and create comfortable living conditions. From simple weekend retreats to fully-equipped guest quarters, a thoughtfully converted shed adds immediate value to your property while providing flexible accommodation for visitors, home offices, or rental opportunities.
Planning Your Shed-to-Guest House Conversion
Local Permits and Regulations
Before starting your shed conversion project, it’s crucial to understand and comply with local regulations. Most municipalities require specific permits for converting an outbuilding into a habitable space. Start by contacting your local building department to learn about zoning requirements, setback rules, and whether guest houses are permitted in your area.
Typical permit requirements include building permits, electrical permits, and plumbing permits if you’re adding bathroom facilities. You’ll need to ensure your conversion meets current building codes for residential spaces, including minimum ceiling height, proper insulation, adequate ventilation, and emergency exits.
Many areas also have specific requirements for utilities, such as separate meter installations or connection to existing systems. Some neighborhoods may have homeowners’ association (HOA) restrictions that could affect your project.
Keep detailed records of all permits and inspections throughout the process. Working with a local contractor familiar with area regulations can help navigate these requirements smoothly. Remember that skipping proper permits could result in fines or having to undo your conversion work.
Budget Planning and Cost Analysis
Converting a shed into a guest house typically costs between $5,000 and $25,000, depending on the existing structure’s condition and your desired amenities. The biggest expenses usually include insulation ($500-1,500), electrical work ($1,000-3,000), plumbing installation ($1,500-4,000), and HVAC systems ($2,000-5,000).
To manage costs effectively, start by creating a detailed budget spreadsheet. Include essential elements like foundation repairs, weatherproofing, windows, and doors. Don’t forget to factor in permit fees, which typically range from $100 to $500 depending on your location.
Save money by tackling DIY-friendly tasks like painting, basic carpentry, and decor. Consider these eco-friendly conversion tips that can help reduce both initial costs and long-term energy expenses. Repurposing existing materials and shopping at salvage yards can significantly cut expenses – many homeowners save 30-40% through smart material sourcing.
Break down your project into phases if budget constraints exist. Start with essential structural improvements and basic utilities, then gradually add finishing touches like flooring and furniture. Keep a contingency fund of about 20% of your total budget for unexpected issues.
Money-saving tips:
– Use multi-functional furniture to maximize space
– Install energy-efficient windows and insulation
– Choose durable, low-maintenance materials
– Consider pre-fabricated bathroom units
– Source materials during off-season sales
– Hire contractors for specialized work only
– Explore second-hand appliances and fixtures
Remember that investing in quality materials for critical elements like roofing and insulation will save money long-term through reduced maintenance and better energy efficiency.
Essential Construction Steps
Foundation and Structural Reinforcement
Before starting any conversion work, it’s crucial to prepare your site properly and assess your shed’s existing foundation. Most storage sheds aren’t built to support living spaces, so structural reinforcement is typically necessary. Begin by examining the current foundation – whether it’s a concrete slab, blocks, or skids – to determine if it can handle the additional weight of insulation, drywall, and furniture.
For concrete foundations, check for cracks or settling issues. If you find problems, consult a professional to repair them before proceeding. When working with block foundations, ensure they’re level and properly spaced. You may need to add additional supports or replace existing ones to meet residential building codes.
Consider installing a moisture barrier between the ground and foundation to prevent water damage and mold growth. Adding floor joists and proper support beams will help distribute weight evenly and create a stable living space. For walls, reinforce existing studs and add additional framing where needed, especially around windows and doors.
Remember that local building codes often require specific foundation requirements for living spaces. Working with a structural engineer can help ensure your conversion meets all necessary safety standards while providing peace of mind for your future guest house.
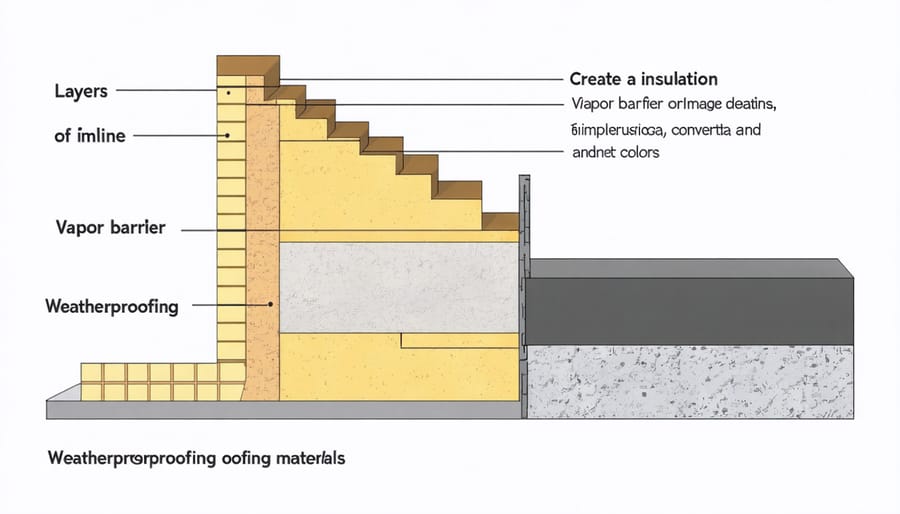
Insulation and Weatherproofing
Proper insulation and weatherproofing are crucial steps in transforming your shed into a comfortable guest house that can be enjoyed throughout the year. Start by examining your shed’s current condition, paying special attention to any gaps, cracks, or areas where moisture might seep in.
Begin with the walls by installing a vapor barrier to prevent moisture buildup. Follow this with quality insulation material – fiberglass batts or rigid foam boards are popular choices for shed conversions. For optimal temperature control, aim for an R-value of at least R-13 in the walls and R-30 in the ceiling. Don’t forget to insulate the floor, which can be a significant source of heat loss.
Weather stripping around doors and windows is essential for preventing drafts. Apply caulk to seal any visible gaps around window frames, electrical outlets, and where walls meet the floor and ceiling. Consider installing double-pane windows if your budget allows – they provide superior insulation compared to single-pane alternatives.
For the roof, ensure proper ventilation to prevent moisture accumulation while maintaining consistent indoor temperatures. Install soffit vents and a ridge vent to create natural airflow. This ventilation system works alongside your insulation to keep the space dry and comfortable.
Pay special attention to the foundation area. If your shed sits directly on the ground, consider adding a moisture barrier underneath and installing proper drainage around the perimeter to prevent water damage and maintain a dry interior.
For additional comfort, think about installing a small heating and cooling unit. A ductless mini-split system can be an efficient solution for maintaining comfortable temperatures year-round without taking up much space. During summer months, proper insulation will help keep the space cool, while in winter, it will retain heat effectively, reducing energy costs and ensuring your guests stay comfortable regardless of the season.
Remember to factor in local climate conditions when choosing insulation materials and weatherproofing methods. What works in a dry climate might not be suitable for areas with high humidity or frequent rainfall.
Electrical and Plumbing Installation
Installing proper electrical and plumbing systems is crucial for transforming your shed into a comfortable guest house. Start by consulting a licensed electrician to assess your power needs and determine if your main house’s electrical panel can handle the additional load. Most guest house conversions require a separate sub-panel, which should be installed by a professional to ensure compliance with local codes.
For electrical work, you’ll need to run underground conduit from your main house to the shed, ensuring proper depth requirements are met. Essential electrical elements include multiple 120V outlets, dedicated circuits for major appliances, exterior lighting, and GFCI protection for wet areas. Consider installing LED lighting fixtures to maximize energy efficiency while providing adequate illumination throughout the space.
Plumbing installation typically involves connecting to your home’s existing water supply and sewer lines. If your property uses a septic system, verify that it can accommodate the additional waste flow. Installing PEX piping is often the most cost-effective and DIY-friendly option for water lines, though you’ll still want a professional plumber to handle critical connections and ensure proper venting.
Key plumbing features should include:
– Hot and cold water lines
– A small water heater (tankless models work well in limited spaces)
– Basic bathroom fixtures (toilet, sink, and shower)
– A kitchen sink if you’re planning a kitchenette
– Proper drainage systems with appropriate slope
Remember to insulate all water lines to prevent freezing in cold weather, and install shut-off valves for both water and electrical systems. This allows for easy maintenance and emergency control. While some minor electrical and plumbing work can be DIY-friendly, always obtain necessary permits and inspections, and don’t hesitate to hire professionals for complex installations. This ensures your guest house meets safety standards and provides reliable utility service for years to come.
Interior Design and Comfort Features
Space-Saving Layout Ideas
When converting a shed into a guest house, making the most of every square inch becomes crucial. Start by exploring space-saving bedroom design ideas that combine functionality with comfort. Consider installing Murphy beds or convertible furniture that can serve multiple purposes – like a daybed that transforms into a full-sized sleeping area or a desk that folds away when not in use.
Vertical storage solutions are your best friends in small spaces. Install floor-to-ceiling shelving units or cabinets along one wall to maximize storage while minimizing the footprint. Use the area under windows for built-in seating with hidden storage compartments beneath. Don’t forget about overhead space – mounting shelves or storage units near the ceiling can house seasonal items or rarely-used belongings.
Create distinct zones within your guest house using room dividers that double as storage. A bookshelf that separates the sleeping area from a small sitting space not only defines the areas but also provides valuable storage. Consider installing pocket doors or sliding barn doors that don’t require swing space, keeping pathways clear and accessible.
Make use of corners by adding corner shelving units or installing a compact corner desk. Choose furniture with built-in storage, such as ottoman beds or side tables with drawers. Remember to incorporate multi-functional pieces like nesting tables or expandable dining solutions that can be tucked away when not needed.
The key is to think creatively about every nook and cranny while maintaining a welcoming atmosphere. Even the smallest guest house can feel spacious and comfortable with thoughtful space-saving solutions.
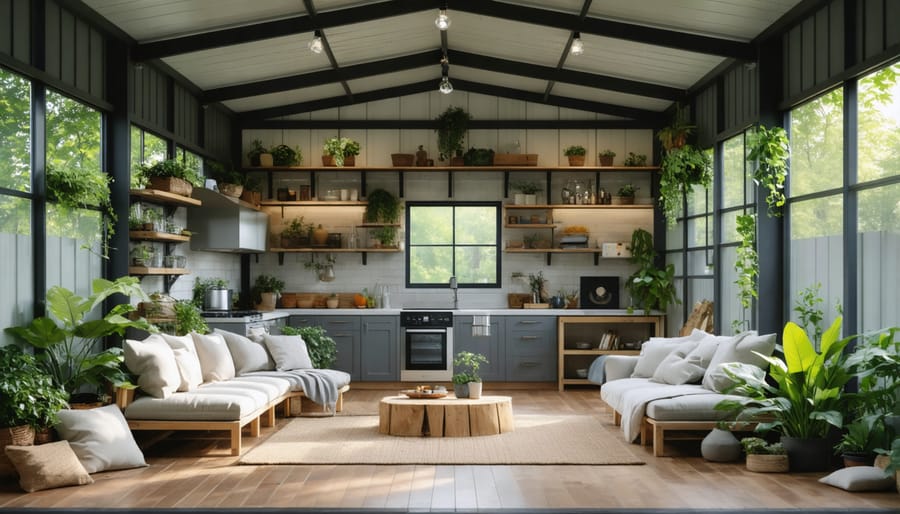
Furniture and Storage Solutions
When furnishing your converted guest house, focus on multi-functional pieces that maximize your limited space. Consider a comfortable pull-out sofa bed or Murphy bed that can transform from seating to sleeping quarters. Add ottoman storage cubes that serve as both seating and storage space for extra linens and pillows.
Wall-mounted shelves and floating cabinets are excellent space-savers, providing storage without consuming precious floor space. Install hooks or a slim coat rack near the entrance for guests to hang their belongings. A fold-down desk or table can create a workstation that disappears when not in use.
For clothing storage, consider a compact wardrobe or install a tension rod with curtains to create a makeshift closet area. Under-bed storage containers work perfectly for seasonal items or extra bedding. If space allows, incorporate a small dresser that can double as a TV stand.
In the kitchenette area, magnetic knife strips and wall-mounted spice racks keep essentials within reach without cluttering counter space. Consider collapsible or nesting kitchenware that can be easily stored when not in use.
Remember to include bedside tables with drawers for additional storage and convenience. Use vertical space wisely by installing floor-to-ceiling shelving units in corners or unused wall areas. The key is selecting pieces that serve multiple purposes while maintaining a welcoming, uncluttered atmosphere for your guests.
Lighting and Ventilation
Proper lighting and ventilation are essential elements that transform a basic shed into a comfortable guest house. To create a bright and welcoming space, you’ll want to install windows for natural lighting on multiple walls if possible. Consider adding skylights for additional daylight and a more open feel, especially if your shed has limited wall space for traditional windows.
For artificial lighting, layer your approach with ambient, task, and accent lighting. Install overhead fixtures for general illumination, desk or reading lamps for specific activities, and wall sconces or LED strips for atmosphere. Make sure to include outdoor lighting near the entrance for safety and convenience.
Ventilation is equally crucial for maintaining good air quality and preventing moisture buildup. Install a combination of passive and active ventilation solutions. Cross-ventilation can be achieved by placing windows on opposite walls, while ceiling vents or small gable vents help release warm air. Consider adding a ceiling fan to improve air circulation and provide comfort during warmer months.
For year-round comfort, include operable windows with screens to allow fresh air while keeping insects out. Mini-split air conditioning systems are excellent options for climate control, as they’re energy-efficient and don’t require extensive ductwork. If your climate permits, a simple exhaust fan in conjunction with well-placed windows might be sufficient for maintaining comfortable temperatures and fresh air circulation.
Remember to weatherstrip all openings and ensure proper insulation around windows and vents to maintain energy efficiency while still allowing for adequate ventilation.
Finishing Touches and Maintenance
Once your guest house conversion is nearly complete, it’s time for those final touches that transform it from a basic structure into a welcoming retreat. Start by deep cleaning the entire space, paying special attention to windows, floors, and any new fixtures. Add weatherstripping around doors and windows to ensure optimal energy efficiency and comfort for your guests.
Consider installing motion-sensor lights along the path to the guest house and near the entrance for safety and convenience. Add finishing touches like house numbers, a doorbell, and perhaps a small welcome sign to make the space feel more like a proper residence.
Don’t forget practical elements like a fire extinguisher, carbon monoxide detector, and a basic first aid kit. Create a guest manual with important information about the space, including Wi-Fi passwords, heating and cooling controls, and emergency contact numbers.
For long-term maintenance, establish a regular inspection schedule. Check the roof, gutters, and foundation seasonally for any signs of wear or damage. Test all safety devices monthly, including smoke detectors and carbon monoxide alarms. Inspect plumbing fixtures regularly for leaks and ensure proper drainage.
During periods when the guest house isn’t in use, run the water occasionally to prevent pipe issues, and adjust the thermostat to maintain appropriate temperature and humidity levels. Consider using a dehumidifier during humid months to prevent moisture-related problems.
Keep basic maintenance supplies on hand, and create a checklist for cleaning and inspection between guest stays. This attention to detail will help preserve your investment and ensure your converted shed remains a comfortable, safe, and welcoming space for years to come.
Transforming your shed into a guest house is an exciting project that can add significant value to your property while creating a comfortable space for visitors. By following the steps outlined in this guide, you can successfully navigate the conversion process, from initial planning and permits to the final decorative touches. Remember that proper insulation, electrical work, and plumbing installations are crucial for creating a livable space that meets local building codes.
While the project requires careful planning and investment, the rewards of having a dedicated guest space make it worthwhile. Whether you’re looking to accommodate visiting family members, create a rental opportunity, or establish a peaceful retreat, a shed-to-guest-house conversion offers endless possibilities.
Don’t be intimidated by the scope of the project – take it one step at a time, work with qualified professionals when needed, and focus on creating a space that reflects your style while meeting your guests’ needs. With proper planning, attention to detail, and a clear vision, you can transform your humble shed into a charming and functional guest house that you’ll be proud to share with visitors for years to come.