
Transform Your Shed into a Solar-Powered Workspace (Easy DIY Solutions)
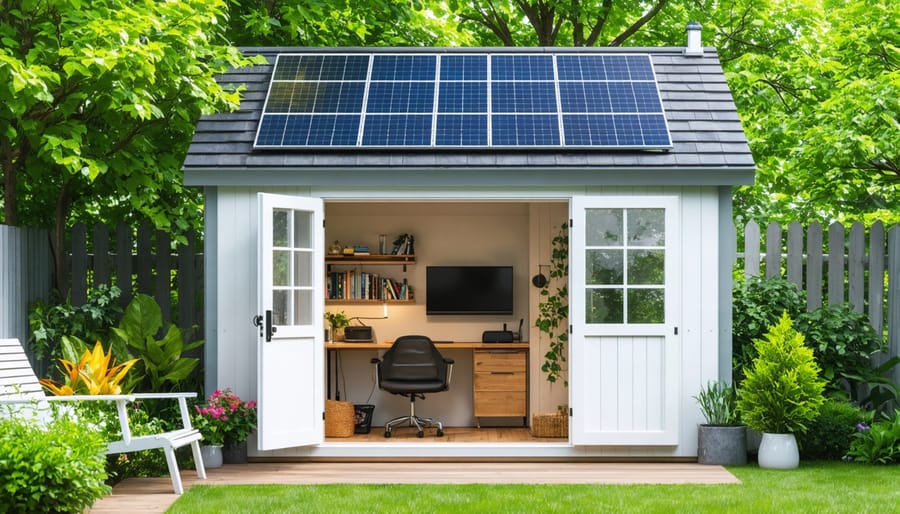
Transform your backyard shed into a self-sustaining powerhouse by installing integrated energy systems that harness solar power. A properly designed solar setup delivers reliable electricity for lighting, tool charging, and basic power needs while reducing your environmental impact and utility costs. Calculate your shed’s power requirements by listing essential devices and their wattage ratings, then add 20% capacity for future expansion. Position solar panels on the south-facing roof at a 30-45 degree angle to maximize sun exposure throughout the year, ensuring nearby trees or structures won’t cast shadows during peak sunlight hours. Select weather-resistant components rated for outdoor installation, including marine-grade batteries for energy storage and waterproof junction boxes to protect electrical connections. With basic DIY skills and careful planning, adding solar power to your shed creates a practical, eco-friendly workspace that functions independently from the grid.
Assessing Your Shed’s Solar Power Needs
Calculate Your Power Usage
Before installing solar power in your shed, you’ll need to calculate your total power requirements. Start by creating a detailed list of all electrical devices you plan to use, including lights, tools, and any climate control requirements. For each device, locate the wattage rating, typically found on a label or in the user manual.
Multiply each device’s wattage by the number of hours you expect to use it daily. For example, if you have two 60-watt light bulbs that you’ll use for 4 hours per day, that’s 480 watt-hours (60W × 2 × 4 hours). Add up all your daily watt-hour calculations to determine your total daily power needs.
Remember to account for power surges from tools that require more electricity when starting up. A good rule of thumb is to add 20% to your total for safety margin. Also consider seasonal variations in usage – you might need more power during winter months for heating or summer months for cooling and ventilation.
Keep a written record of these calculations to help when selecting your solar panels and battery storage system.
Choose Your Power System Size
Once you’ve calculated your power needs, selecting the right solar system size becomes much simpler. For basic shed lighting and occasional power tool use, a 100-watt solar panel paired with a 50Ah battery might suffice. This setup can power LED lights for several hours and charge small devices.
For more demanding needs, like running a mini-fridge or multiple power tools, consider stepping up to a 200-400 watt system with a 100-200Ah battery bank. This larger setup provides enough juice for extended use of power-hungry appliances while maintaining a reliable power reserve.
Remember to factor in your location’s average sun hours when sizing your system. Northern regions might need larger panels to compensate for fewer daylight hours, while sunny areas can often get by with smaller setups. It’s better to slightly oversize your system than to come up short – aim for about 20% more capacity than your calculated needs to account for cloudy days and future expansions.
Don’t forget to match your inverter size to your maximum expected power draw. A 1000-watt inverter works well for most basic shed setups, while heavy users might need to consider 2000 watts or more.
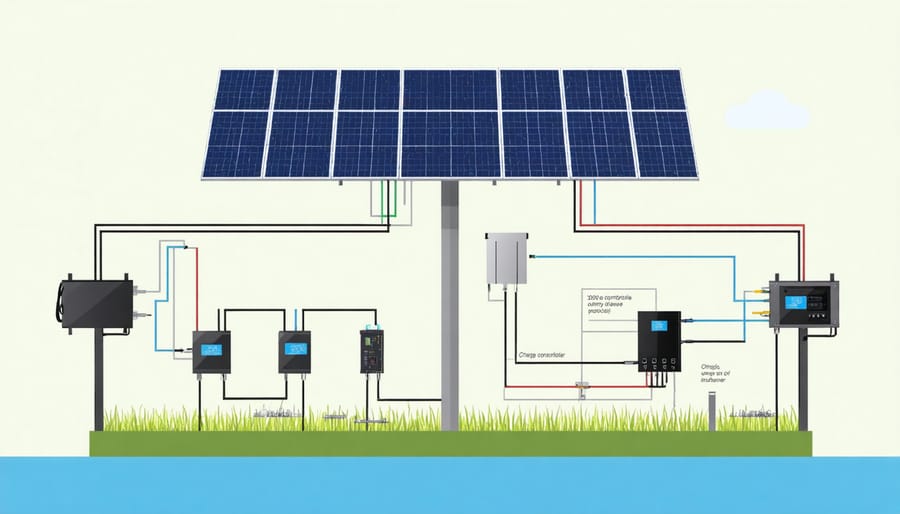
Solar Power System Components
Solar Panels and Mounting Options
When selecting solar panels for your shed, you’ll want to consider both efficiency and practicality. Monocrystalline panels are often the best choice for shed installations due to their higher efficiency and compact size, though polycrystalline panels can be a more budget-friendly alternative. For most shed applications, panels ranging from 100W to 400W should suffice, depending on your power needs.
Mounting options fall into three main categories: roof mounts, wall mounts, and ground mounts. Roof mounting is the most popular choice, as it maximizes sun exposure and keeps panels out of the way. Be sure your shed’s roof can support the additional weight, and consider integrating solar heating solutions during installation for added efficiency.
Wall mounting can be an excellent alternative if your roof isn’t suitable or faces the wrong direction. This method allows for easier panel cleaning and maintenance but requires careful positioning to capture optimal sunlight. Ground mounting offers the most flexibility in terms of panel angle and orientation but takes up yard space and may require additional permits.
For DIY installations, adjustable mounting brackets are recommended as they allow you to modify the panel angle seasonally for maximum energy collection. Remember to factor in your local climate – areas with heavy snow might need steeper mounting angles, while windy regions require more robust mounting hardware.
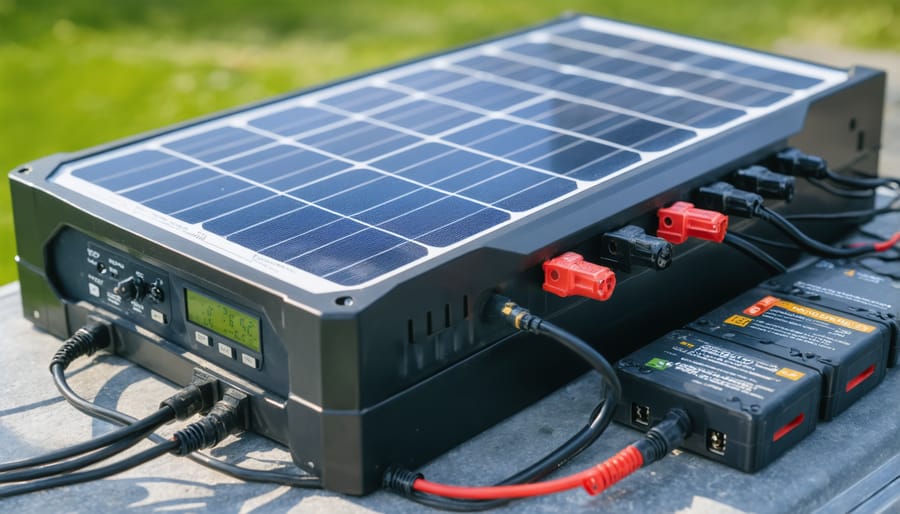
Batteries and Power Storage
Selecting the right battery system is crucial for maintaining a reliable power supply in your solar-powered shed. Deep-cycle lead-acid batteries remain a popular choice due to their affordability and proven track record. For those willing to invest more upfront, lithium-ion batteries offer longer lifespans and better performance, typically lasting 10-15 years compared to 5-7 years for lead-acid options.
To determine your battery capacity needs, list all devices you plan to power and their daily usage hours. A basic setup might include LED lights, small tools, and perhaps a fan, requiring a 100Ah battery. For more demanding applications like power tools or a mini-fridge, consider a 200Ah system or larger.
Proper battery storage is essential for system longevity. Install your batteries in a ventilated battery box to protect them from temperature extremes and moisture. Place them off the ground on a sturdy shelf or platform, and ensure easy access for maintenance. Consider adding a battery monitor to track charge levels and prevent over-discharge.
Remember to include a charge controller in your setup – it’s vital for preventing overcharging and extending battery life. Most modern controllers offer features like temperature compensation and various charging modes to optimize battery performance throughout the seasons.
For backup power during extended cloudy periods, some shed owners opt for a small portable generator as a supplementary power source. This hybrid approach ensures you’ll never be left in the dark.
Installation Steps and Safety
Preparing Your Shed
Before installing solar power, your shed needs to be structurally sound and properly prepared. Start by inspecting the roof – it should be sturdy enough to support the weight of solar panels and mounting hardware. Check for any loose shingles, water damage, or weak spots that need repair. A solid roof is essential for both safety and optimal solar performance.
Next, evaluate your shed’s orientation. South-facing roofs receive the most sunlight throughout the day in the Northern Hemisphere. If your shed roof isn’t ideally positioned, you might need to consider alternative mounting solutions, such as adjustable brackets or ground-mounted panels.
Your shed’s interior needs attention too. Clean out any unnecessary items and create a dedicated space for the solar system components. You’ll need room for batteries, an inverter, and charge controller. Consider installing proper ventilation to prevent overheating of electrical components – a small vent or fan can make a big difference.
Check the shed’s walls and floor for any signs of moisture or pest intrusion. Seal any gaps or cracks to protect your electrical equipment. It’s also wise to install a moisture barrier if your shed doesn’t already have one. Finally, map out your wiring route from the roof to your interior components, ensuring you have clear, unobstructed paths for cable runs.
Remember to check local building codes and obtain necessary permits before making any structural modifications to your shed.
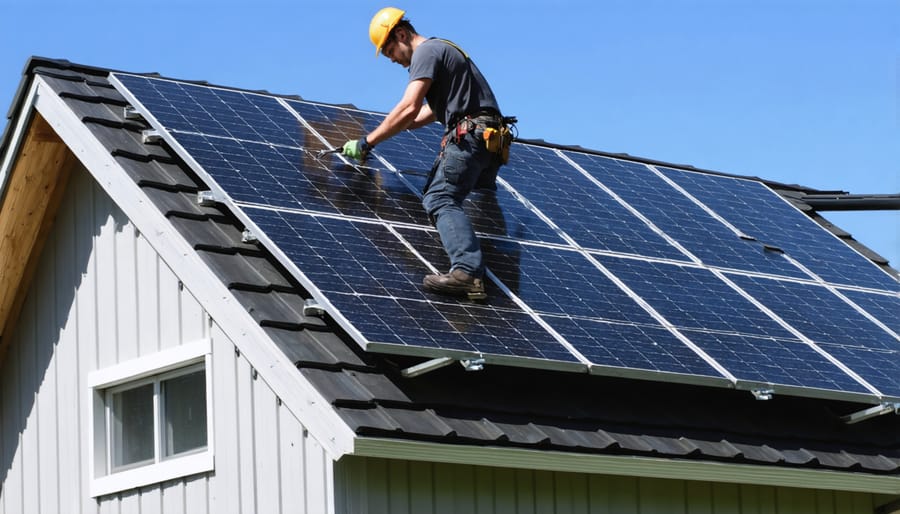
Mounting Solar Panels
With your mounting hardware and safety equipment ready, start by marking the panel locations on your shed’s roof. Use a pencil to outline where each panel will sit, ensuring they’re positioned to catch maximum sunlight and avoid any shade from nearby trees or structures.
Begin by installing the mounting rails. These should run perpendicular to your roof rafters for optimal support. Secure them with lag bolts, making sure to drill pilot holes first to prevent wood splitting. Don’t forget to apply weatherproof sealant around each mounting point to prevent water leaks.
Next, attach the panel clamps to your mounting rails. Most systems use end clamps for the outer edges of your array and mid clamps between panels. Position your first panel carefully – this will set the alignment for the entire array. Have a helper support the panel while you secure it with the clamps, working from one end to the other.
Once the panels are mounted, double-check all connections and ensure each panel is firmly secured. Give each panel a gentle tug to verify it’s properly fastened. Remember to leave enough space between panels for maintenance access and proper airflow, which helps maintain optimal performance.
For added protection, install a simple skirt or barrier around the bottom edge of your array to prevent birds from nesting underneath. This small detail can save you maintenance headaches down the road.
Wiring and Connection Safety
Proper wiring and electrical connections are crucial for a safe and reliable solar power system in your shed. Always start by creating a detailed wiring diagram before touching any cables. If you’re not confident with electrical work, it’s best to hire a certified electrician – safety should always come first!
When handling wiring, ensure all components are properly rated for your system’s voltage and current requirements. Use weather-resistant cables and connectors specifically designed for solar installations, and make sure all connections are housed in waterproof junction boxes. Double-check that your wire gauge is appropriate for the distance and power requirements to prevent voltage drops and potential fire hazards.
Install a proper grounding system to protect against electrical surges and lightning strikes. This includes grounding both the solar panels and the shed’s electrical system. Consider adding surge protectors to safeguard sensitive equipment, especially if you’re planning security system integration or other electronic devices.
Label all wires and connections clearly, and create a simple diagram showing the system layout. Keep this documentation inside the shed for future reference. Remember to test all connections with a multimeter before powering up the system, and perform regular checks to ensure connections remain tight and corrosion-free.
Maintenance and Troubleshooting
Routine Maintenance Schedule
To keep your shed’s solar power system running smoothly, establish a regular maintenance routine. Every month, wipe down the solar panels with a soft cloth and clean water to remove dust, leaves, and bird droppings. Check that panels remain firmly mounted and adjust their angle if needed for optimal sunlight exposure.
Every three months, inspect all electrical connections and wiring for signs of wear, damage, or loose connections. Check your batteries’ water levels if you’re using flooded lead-acid batteries, and top up with distilled water if necessary. Clean any corrosion from battery terminals using a mixture of baking soda and water.
Twice yearly, conduct a thorough system check. Test your charge controller’s functionality, verify that your inverter is operating correctly, and ensure all safety switches work properly. Look for any signs of water damage or pest intrusion around electrical components and seal any gaps you find.
During winter, clear snow from panels promptly and check that your batteries are protected from extreme cold. Consider installing a small heater in your battery compartment if temperatures regularly drop below freezing.
Keep a maintenance log to track your system’s performance and schedule upcoming tasks. If you notice any significant drop in power output or unusual system behavior, consult a professional solar technician for a thorough inspection.
Common Issues and Solutions
Even well-planned solar shed systems can encounter occasional hiccups. Here are common issues you might face and their straightforward solutions:
Battery not charging properly? First, check if your solar panels are clean and unobstructed. Leaves, dirt, or shade can significantly reduce charging efficiency. Ensure all connections are tight and corrosion-free. If the problem persists, your charge controller settings might need adjustment.
Flickering lights are often a sign of loose connections or a failing battery. Inspect all wiring points and tighten as needed. For battery issues, check its voltage with a multimeter – if it’s consistently low, it might be time for a replacement.
During cloudy periods, you might notice reduced power output. This is normal, but you can minimize impact by reducing power usage or adding battery capacity. Consider installing LED lights and energy-efficient appliances to extend your power reserve.
If your inverter keeps shutting off, it’s likely due to overloading. Add up the wattage of all connected devices to ensure you’re within system capacity. For sudden system shutdowns, check your circuit breakers and fuses first – they might have tripped to protect your system.
Experiencing reduced efficiency over time? Annual maintenance is key. Clean panels regularly, check battery water levels if applicable, and inspect all connections. Most issues can be prevented with routine care and monitoring.
Adding solar power to your shed is a rewarding project that can transform your outdoor space into a self-sufficient workspace or storage area. By following the steps outlined in this guide, you can successfully install a solar power system that meets your energy needs while being environmentally friendly. Remember to carefully assess your power requirements, choose the right components, and prioritize safety during installation. Whether you’re planning to use your shed as a workshop, garden center, or storage space, solar power offers a reliable and sustainable energy solution. Take action today by starting with a thorough assessment of your needs, and don’t hesitate to consult professionals when necessary. With proper planning and execution, you’ll soon enjoy the benefits of a solar-powered shed that adds value to your property and supports your outdoor activities.
Looking for a shed accessories?
Browse our full range of shed accessories from authorized dealer brands. Free shipping to the continental US.