
Why Your Shed Needs the Same Security as Your Home (And How to Make It Happen)
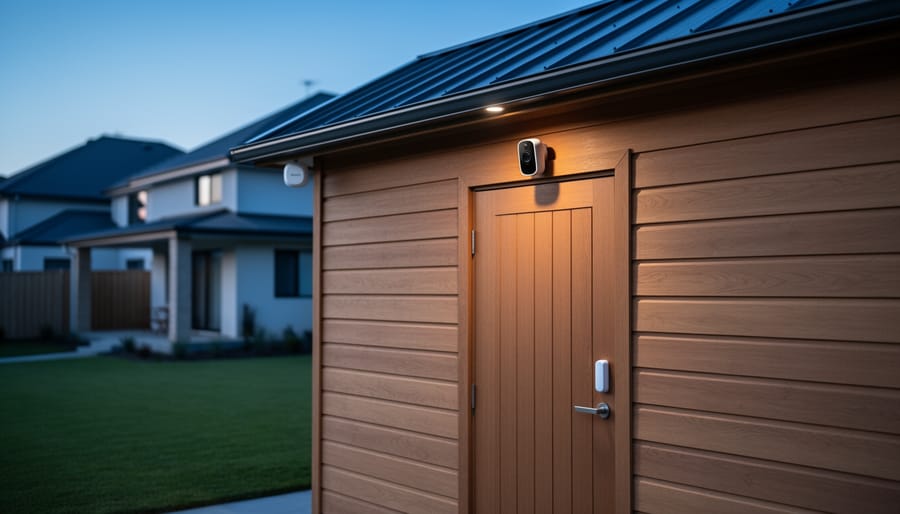
Connect your shed security system to your home’s existing setup by using compatible wireless protocols like Z-Wave or Wi-Fi, ensuring all devices communicate through a single hub or smartphone app. Check your current home security system’s specifications first—most modern systems from Ring, SimpliSafe, or ADT support external sensors and cameras that work seamlessly with outdoor structures up to 300 feet away.\n\nInstall motion-activated cameras with night vision at shed entry points, positioning them at a downward angle to capture faces rather than just bodies. Pair these with wireless door and window sensors that send instant alerts to your phone when triggered, creating multiple layers of detection that deter thieves before they gain entry.\n\nExtend your home’s network coverage to reach your shed using outdoor-rated Wi-Fi extenders or mesh network nodes, placing them midway between your house and shed to maintain strong signal strength. Without reliable connectivity, your security devices can’t send real-time alerts or record footage to cloud storage, leaving gaps in your protection during critical moments.\n\nBudget between 150 and 600 dollars for a complete shed integration, depending on whether you’re adding to an existing system or starting fresh. This investment typically includes two to three sensors, one outdoor camera, and any necessary network equipment—far less expensive than replacing stolen tools, lawn equipment, or recreational gear worth thousands. Many homeowners report that visible security devices alone reduce break-in attempts, as thieves typically target unsecured outbuildings where they can work undetected.\n\n\n
The Real Cost of an Unsecured Shed
\n\n
What Thieves Are After in Your Backyard
\n\nYour backyard shed is likely a treasure trove for thieves, and they know it. Power tools like circular saws, drills, and sanders can easily fetch hundreds of dollars on resale markets. Lawn equipment, including mowers, trimmers, and leaf blowers, rank among the most commonly stolen items due to their high value and easy transportability. Bicycles are another prime target, especially higher-end models that can disappear in seconds.\n\nBeyond the obvious, seasonal items like camping gear, sporting equipment, and holiday decorations also attract unwanted attention. Thieves love sheds because they’re typically located away from the main house, poorly lit, and lack the security features of your home. Many sheds have simple locks that can be bypassed in under a minute, and their distance from living areas means break-ins often go unnoticed until it’s too late.\n\nWhat makes matters worse is that homeowners often underestimate their shed’s contents value. Add up everything inside, and you might be surprised to find thousands of dollars worth of equipment at risk. The good news? Fortifying your shed door and integrating proper security solutions can dramatically reduce your vulnerability to theft.\n\n
Beyond the Price Tag: Hidden Costs of Shed Break-Ins
\n\nA shed break-in costs far more than replacing stolen tools. Sarah from Colorado learned this the hard way when thieves took $800 worth of equipment, but her insurance deductible was $1,000—meaning she paid everything out of pocket. Beyond immediate losses, you’ll spend valuable weekends shopping for replacements and dealing with paperwork instead of enjoying your hobbies.\n\nThe emotional toll shouldn’t be overlooked either. Many homeowners report feeling violated and anxious after discovering someone rifled through their belongings. That uneasy feeling when you walk to your shed at dusk? It’s real and persistent.\n\nPerhaps most frustrating is what happens next with your home insurance. Multiple claims can trigger rate increases of 20-40%, costing hundreds annually for years. Some insurers may even decline renewal after repeated incidents. Investing in integrated security now protects not just your belongings, but your peace of mind and long-term financial stability.\n\n\n
How Shed Security Integration Actually Works
\n\n
 \n
\n\n\n
The Three Main Connection Methods
\n\nConnecting your shed security to your home system comes down to three main approaches, each with distinct advantages depending on your situation.\n\nWireless connections are the most popular choice for shed security, especially if your outbuilding sits within 300 feet of your home. These systems use radio frequencies or Wi-Fi to communicate between your shed sensors and your main security panel. The big advantage? No trenching or running cables across your yard. Installation is straightforward enough for most DIYers, and you can reposition equipment if needed. The downside is that signal interference from thick walls, metal siding, or other wireless devices can occasionally cause hiccups. Weather can also affect reliability, though quality systems handle this well.\n\nHardwired connections offer the most reliable option if you’re willing to do the groundwork—literally. By running cables underground from your main panel to your shed, you create a stable connection that won’t drop signals or need battery changes. This method works brilliantly if you’re already digging trenches for electrical lines or during new shed construction. The trade-off is the labor intensity and permanence of installation.\n\nSmart home hub connections represent the modern middle ground. These systems link your shed security to platforms like Alexa, Google Home, or dedicated security apps. They’re incredibly user-friendly, letting you monitor everything from your phone, but they depend on your home’s internet connection. If your Wi-Fi goes down, so does your monitoring capability, though most systems continue recording locally until connectivity returns.\n\n
What You Need Before You Start
\n\nBefore diving into your shed security integration project, let’s make sure you have everything in place for a smooth installation. First, you’ll need a compatible home security system that supports wireless expansion or additional zones. Most modern systems from Ring, SimpliSafe, and ADT work well, but check your system’s specifications to confirm it can connect to external sensors.\n\nNext, consider your WiFi coverage. Walk to your shed with your smartphone and test the signal strength. If you’re getting weak or spotty connectivity, you might need a WiFi extender positioned between your house and shed. This is crucial for wireless cameras and smart locks to function reliably.\n\nPower availability is another key consideration. Does your shed have electrical outlets, or will you rely on battery-powered devices? Solar-powered options work great for sunny locations but may struggle during winter months. Many homeowners find success with a combination approach, using hardwired devices where possible and battery backups as secondary options.\n\n\n
Security Components That Work Best for Sheds
\n\n
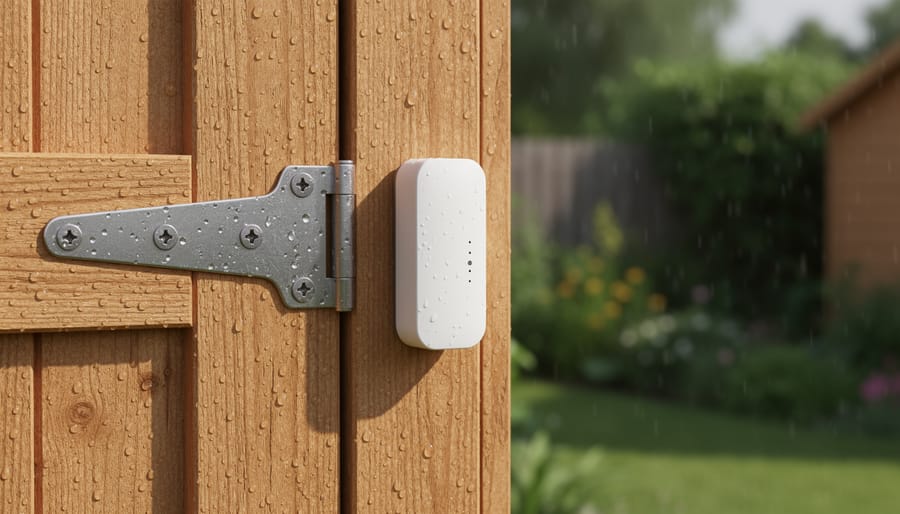
Door and Window Sensors: Your First Line of Defense
\n\nDoor and window sensors serve as your shed’s watchful guardians, instantly alerting you when someone attempts entry. These clever devices work through a simple two-part system: one piece attaches to the door or window frame, while the other mounts on the moving part. When the two pieces separate, the sensor triggers an alert to your smartphone or home security panel.\n\nFor shed applications, weather resistance is non-negotiable. Look for sensors with at least an IP65 rating, which means they’ll handle rain, dust, and temperature swings without missing a beat. Many homeowners find that wireless sensors are easiest to install since they eliminate the need for running cables through walls.\n\nInstallation takes just minutes per sensor using strong adhesive strips or screws. Position them on the hinge side of doors rather than the handle side to prevent tampering. For sliding shed windows, place sensors where the sashes meet when closed.\n\nReal-world feedback consistently shows that properly positioned door sensors prevent most break-in attempts simply because intruders hear the alarm and flee. One homeowner shared that within weeks of installing sensors, her system caught someone attempting to pry open her shed door at 2 AM, allowing her to alert authorities immediately while the alarm scared off the would-be thief.\n\n
 \n
\n\n\n
Motion Detectors and Cameras for Outdoor Use
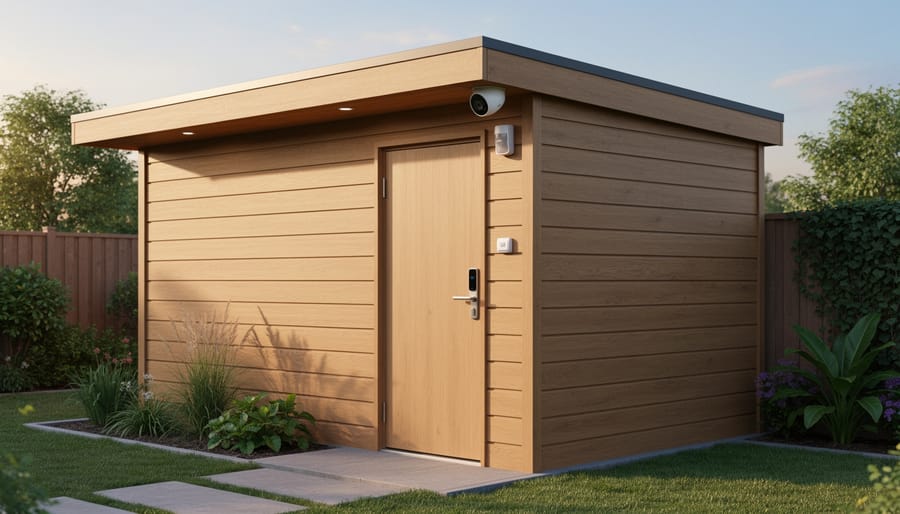
\n\nProtecting the exterior of your shed starts with choosing weather-resistant equipment designed specifically for outdoor conditions. Modern motion detectors and cameras built for outdoor use can withstand rain, snow, and temperature extremes while integrating seamlessly with your existing smart security systems.\n\nWhen selecting outdoor motion sensors, look for models with IP65 or higher weather ratings. Position sensors at entry points like doors and windows, typically mounting them 6-8 feet high for optimal coverage. One homeowner shared that angling her motion detector slightly downward eliminated false alerts from passing wildlife while still catching human movement.\n\nFor cameras, placement matters tremendously. Install them under eaves or use models with built-in weather shields to prevent lens fogging. Corner mounting provides the widest field of view, covering multiple sides of your shed with fewer cameras. Many modern outdoor cameras connect directly to your home Wi-Fi network, sending alerts to your smartphone within seconds of detecting movement.\n\nThe real advantage comes from integration. When your outdoor sensors communicate with your home security hub, you receive unified alerts whether the activity happens at your front door or shed. This connected approach means you monitor everything from one convenient app, eliminating the hassle of juggling multiple systems.\n\n
Smart Locks and Access Control
\n\nGone are the days of fumbling with traditional padlocks in the dark or worrying about lost keys. Modern smart access control systems bring your shed security into the 21st century with electronic locks that connect directly to your smartphone.\n\nSmart padlocks and electronic deadbolts offer features like temporary access codes for contractors, activity logs showing who entered and when, and instant alerts if someone tampers with your lock. Popular options like August, Yale, and Wyze locks integrate seamlessly with home security apps you might already be using.\n\nInstallation is straightforward for most DIY enthusiasts—many smart locks simply replace your existing deadbolt using a screwdriver. Battery-powered models eliminate wiring concerns, typically lasting 6-12 months per charge. The real peace of mind comes from checking your shed’s security status from anywhere, whether you’re at work or on vacation.\n\n
Lighting Integration That Deters and Alerts
\n\nMotion-activated lights are one of your best defenses against shed break-ins. When integrated with your security system, these lights instantly illuminate your property when movement is detected, startling potential intruders and making them think twice. Smart outdoor lighting takes this further by connecting to your home’s network, allowing you to control lights remotely through your phone or set custom schedules that mimic your presence even when you’re away. The combination creates a powerful deterrent while alerting you to unexpected activity. Many homeowners report that simply adding coordinated lighting reduced suspicious activity around their sheds within weeks of installation.\n\n\n
Step-by-Step: Integrating Your Shed Security
\n\n
Planning Your Security Layout
\n\nStart by walking around your shed with fresh eyes, imagining you’re trying to break in. Where would you go first? Most homeowners discover their sheds are more vulnerable than they realized. Check all doors, windows, and any gaps in the structure where someone could peek inside or reach through.\n\nNext, identify your priority entry points. The main door is obviously first on the list, but don’t overlook side windows, especially those hidden from your house’s view. If you store expensive equipment like lawn mowers or power tools, these are prime targets for thieves who’ve been watching your property.\n\nCreate a simple sketch of your shed showing all entry points and note which areas are visible from your home. This helps you decide where cameras and sensors will be most effective. Consider lighting too—dark corners around your shed make perfect hiding spots.\n\nThink about your daily routine as well. Will you need easy access for disarming sensors when grabbing your lawnmower? One homeowner shared that placing her main sensor on the door she uses most, connected to her phone, gave her peace of mind without constant false alarms from family members accessing garden tools.\n\n
Installation Tips for Different Shed Materials
\n\nDifferent shed materials require unique approaches to installing security devices without causing damage or compromising protection. Let’s break down the best methods for each material type.\n\nFor metal sheds, avoid drilling whenever possible to prevent rust. Instead, use industrial-strength adhesive mounts designed for outdoor use, or magnetic mounts for sensors and cameras. If drilling is unavoidable, seal holes immediately with weatherproof sealant to keep moisture out. One homeowner shared that magnetic door sensors saved her metal shed from unsightly drill marks while still providing reliable protection.\n\nWood sheds offer the most flexibility since they naturally accommodate screws and mounting hardware. Pre-drill pilot holes slightly smaller than your screws to prevent splitting, especially near edges. Apply a dab of exterior wood glue before installing screws for extra holding power. The wood’s natural strength makes it ideal for heavier equipment like cameras with solar panels.\n\nVinyl and plastic sheds present unique challenges since they can crack under pressure. Use mounting brackets that distribute weight across larger surface areas rather than single-point attachments. Marine-grade adhesive strips work wonderfully for lightweight sensors. For heavier devices, consider mounting posts or backing boards installed during shed assembly. Many DIY enthusiasts recommend testing adhesives on inconspicuous spots first to ensure compatibility with your specific material.\n\n
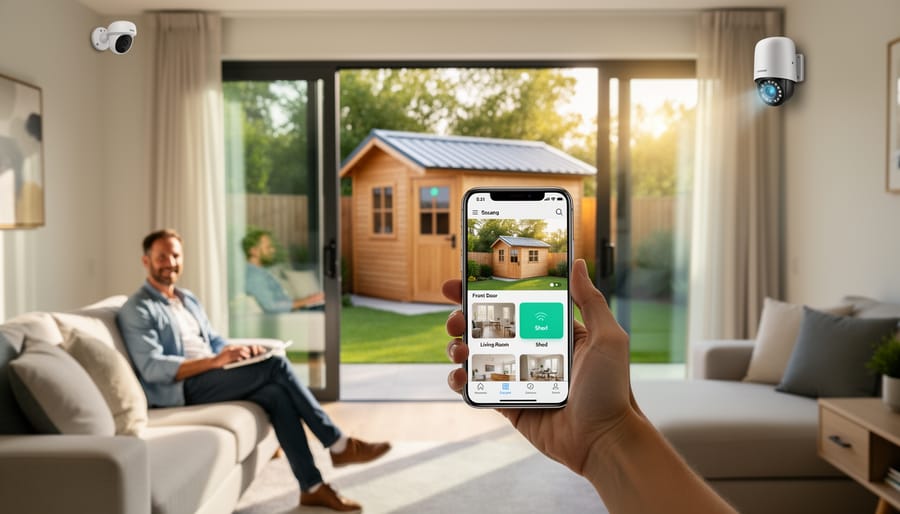
Connecting to Your Home System
\n\nGetting your shed security system talking to your home setup is easier than you might think. Most modern systems use your existing WiFi network, so start by downloading the manufacturer’s app on your smartphone. Follow the simple pairing process, which typically involves scanning a QR code on your device and entering your WiFi password.\n\nOnce paired, test each component individually. Open your shed door to trigger motion sensors, and verify you receive notifications on your phone. Check camera feeds from different rooms in your house to ensure signal strength remains strong.\n\nIf devices won’t connect, move your WiFi router closer to the shed or invest in a weatherproof WiFi extender for about $30-50. Sarah from Minnesota shared that adding an extender solved her connectivity issues completely: “I was frustrated at first, but the extender made everything work perfectly.”\n\nCommon hiccups include weak passwords blocking connections or devices placed in metal sheds that block signals. Simple solutions like repositioning sensors near windows or using battery-powered devices with stronger antennas can resolve most issues within minutes.\n\n
 \n
\n\n\n\n
Solving Common Shed Security Challenges
\n\n
When Your WiFi Doesn’t Reach the Shed
\n\nDistance doesn’t have to be a dealbreaker for shed security. If your WiFi signal fades before reaching your shed, you’ve got several practical solutions. WiFi extenders are the budget-friendly starting point, typically costing $30-80, and they boost your existing network’s range. Just plug one in halfway between your house and shed to bridge the gap. For larger properties or obstacles like thick walls, mesh network systems offer more reliable coverage by using multiple nodes that communicate with each other, creating a seamless blanket of connectivity across your yard.\n\nCan’t get a stable signal no matter what? Cellular-based security cameras and systems run independently using 4G or 5G connections, much like your smartphone. They require a monthly data plan but eliminate WiFi dependency entirely. One homeowner in rural Vermont shared that after struggling with spotty WiFi, switching to a cellular camera gave her crystal-clear footage without the frustration. These systems are particularly valuable if your shed is far from the house or surrounded by interference from metal structures or dense landscaping.\n\n
Power Options for Sheds Without Electricity
\n\nDon’t let the absence of electricity stop you from securing your shed! You have several practical options that work beautifully. Battery-powered security devices are the easiest solution—modern cameras and motion sensors can run for months on rechargeable batteries, and many homeowners simply swap them out during routine yard maintenance. For a more permanent setup, solar panel kits designed for security systems are surprisingly affordable and effective, even in areas with moderate sunlight. A small panel mounted on your shed roof can power cameras, lights, and alarms continuously. If your shed is within 100 feet of your home, consider low-voltage wiring that runs underground or along fence lines. This option connects directly to your home’s power supply and provides reliable, uninterrupted energy. One homeowner shared that his solar-powered camera system caught package thieves within the first week of installation, proving you don’t need traditional electricity to protect what matters.\n\n
Weather and Temperature Concerns
\n\nYour shed’s security equipment faces unique challenges from Mother Nature, but a few smart precautions keep everything running smoothly through every season. Extreme temperatures, moisture, and direct sunlight can affect camera performance and sensor reliability, so choosing weatherproof-rated equipment is your first line of defense.\n\nStart by selecting devices with appropriate IP ratings—at minimum IP65 for outdoor exposure. Position cameras under eaves or install protective housings to shield them from direct rain and snow. For weatherproofing security cameras, consider adding sun shades to prevent glare and heat damage during summer months.\n\nTemperature extremes deserve special attention. Many homeowners don’t realize that batteries in wireless sensors drain faster in freezing conditions. If you live in a cold climate, opt for hardwired systems or position wireless components in slightly warmer areas. During summer, ensure adequate ventilation around equipment to prevent overheating.\n\nRegular maintenance makes all the difference. Clean camera lenses quarterly, check cable connections for moisture damage, and test backup batteries before severe weather seasons. One homeowner shared how simply clearing spider webs from motion sensors eliminated false alarms—small tasks that ensure your security system stays reliable year-round.\n\n\n
What It Actually Costs (And How to Save)
\n\n
Budget-Friendly Starter Systems
\n\nStarting your shed security journey doesn’t require a massive investment. For under $200, you can set up basic motion-sensor lights paired with wireless outdoor cameras that connect to your smartphone. Many homeowners find that simple contact sensors on shed doors, combined with a battery-powered alarm, provide excellent protection without monthly fees. These entry-level systems are surprisingly effective—one DIY enthusiast shared how a $150 setup deterred thieves who moved on to easier targets. Look for weatherproof devices with at least 90-day battery life and clear night vision capabilities. While these systems won’t integrate with sophisticated smart home networks, they deliver real peace of mind and can be upgraded later as your needs grow.\n\n
Mid-Range Complete Protection
\n\nIf you’re ready to step up your shed security, mid-range systems offer excellent value around $300-600. These comprehensive packages typically include multiple door and window sensors, motion detectors with pet-immunity features, and wireless connectivity to your smartphone. Many homeowners find this sweet spot ideal because you get professional-grade monitoring without the complexity of high-end systems.\n\nReal user Sarah from Michigan shared that her mid-range system alerted her when neighborhood kids accidentally triggered her shed door sensor while retrieving a lost ball—she appreciated knowing exactly what was happening in real-time. These systems often integrate seamlessly with popular home security platforms like Ring or SimpliSafe, letting you monitor everything from one convenient app. The installation remains DIY-friendly, usually taking just an afternoon with basic tools and clear instructions included.\n\n
Ways to Cut Costs Without Cutting Corners
\n\nYou don’t need to break the bank to secure your shed effectively. Consider tackling the installation yourself—many modern security systems feature user-friendly setup processes that homeowners can complete in an afternoon with basic tools. You’ll save hundreds on professional installation fees while gaining valuable knowledge about your system.\n\nLook into bundling options with your existing home security provider. Many companies offer substantial discounts when you add shed monitoring to your current package, often reducing monthly fees by 20-30%. Plus, managing everything through one app simplifies your daily routine.\n\nTiming matters too. Shop during holiday sales periods or end-of-season clearances when retailers slash prices on security equipment. One homeowner shared how waiting until Black Friday saved her nearly $200 on the exact system she’d been eyeing for months—patience paid off without compromising on quality or features she needed.\n\n\nSecuring your shed doesn’t have to be complicated or expensive. As we’ve explored throughout this guide, integration security solutions are far more accessible than most homeowners realize. Whether you’re protecting a few garden tools or thousands of dollars in equipment, starting with even basic measures makes a significant difference in deterring theft and providing peace of mind.\n\nThe beauty of modern shed security integration is that you can start small and expand over time. A simple wireless sensor connected to your existing home security system costs less than replacing a single stolen power tool. Add a smart camera, improve your lighting, and suddenly your shed becomes part of your home’s protective umbrella rather than a vulnerable blind spot.\n\nRemember, thieves target easy opportunities. When your shed shows visible signs of security integration, whether through cameras, motion-sensing lights, or alarm system decals, most intruders simply move on to softer targets. You’re not just installing technology; you’re investing in the security of your belongings and the comfort of knowing your property is protected around the clock.\n\nDon’t wait until after a break-in to take action. Implementing comprehensive shed security today means protecting your investment and avoiding the frustration and expense of replacing stolen items tomorrow. Start with one or two solutions that fit your budget and needs, then build from there. Your shed, your equipment, and your peace of mind are worth it.