


How to Enclose Eaves for Fire Protection When Attaching a Carport to Your Home

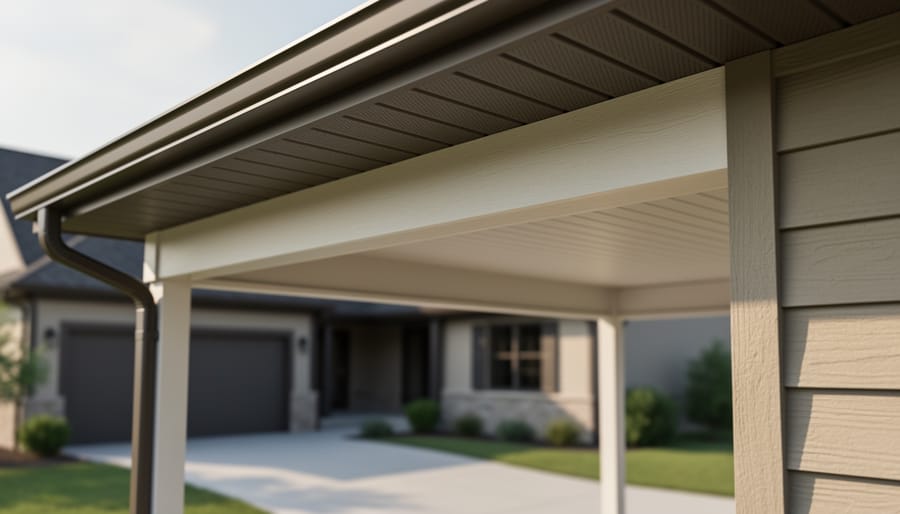
Planning an attached carport or storage shed means meeting fire safety codes, and one of the most critical requirements is enclosing your eaves where the structure meets your home. Enclosed eaves create a fire barrier that prevents flames from entering the gap between your roof decking and the overhang, blocking a common path for fire to spread into your home’s attic. This simple construction step, typically completed in a weekend using basic materials like fire-rated drywall or cement board, can satisfy building codes and protect your biggest investment.
Most homeowners discover this requirement when their permit application gets flagged or during a pre-inspection walkthrough. The gap beneath your eaves acts like a chimney during a fire, drawing flames and embers directly into combustible spaces. By sealing this opening with proper materials, you eliminate that pathway and create the separation distance fire codes demand for attached structures.
The good news? This is a straightforward DIY project that doesn’t require specialized skills. You’ll need common tools, about four to six hours of work time, and materials that cost a fraction of what you’d pay a contractor. Whether you’re adding a carport for vehicle protection or a shed for lawn equipment, understanding how to properly enclose your eaves ensures your project passes inspection the first time and gives your family real protection against fire spread.
Key Takeaway: Enclosed eaves block embers and flames from entering the gap between your roof and wall, creating a critical fire barrier when your carport or shed connects to your home. Most jurisdictions require this protection for attached structures as part of fire separation compliance.
Why Enclosed Eaves Matter for Attached Carports and Storage Structures
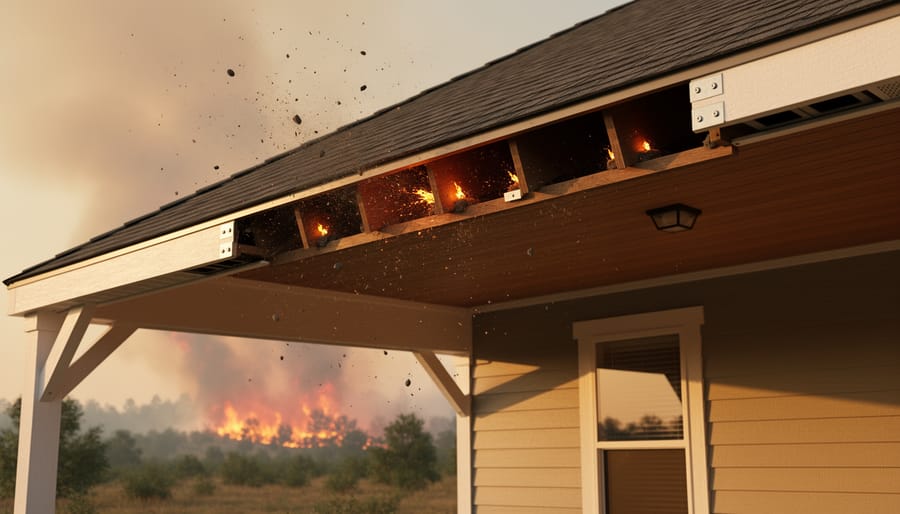
Open eaves create a direct pathway for disaster when fire threatens your property. Those gaps between your roof rafters and the exterior wall allow wind-driven embers to enter during a wildfire or house fire, where they can ignite combustible materials stored in your carport or shed. Even in everyday conditions, open eaves collect dry leaves, old bird nests, and debris that become perfect kindling.
The risk increases dramatically when you attach a carport, storage shed, or gazebo to your home. Fire can spread along the roofline from the attached structure directly into your house through unprotected eaves. Building codes recognize this vulnerability, which is why fire separation requirements typically mandate enclosed eaves for structures within a certain distance of your home, usually those sharing a wall or within three feet.
Think about the typical homeowner scenario: you’ve added a carport to protect your vehicles or built a storage shed against your house to maximize yard space. Without proper eave enclosure, you’ve essentially created a combustible bridge between the new structure and your home. One spark in accumulated debris, one ember landing in a bird’s nest tucked up in those rafters, and the fire has a protected space to grow before moving into your main residence.
Enclosing your eaves creates a continuous barrier that blocks this pathway. Properly installed soffit and fascia close off entry points while still allowing necessary ventilation through screened vents that filter out embers. This simple upgrade transforms a vulnerable area into a protective shell that significantly improves your home’s fire resistance.
What You’ll Need: Tools and Materials for Enclosing Eaves
Getting your materials together before you start makes the job smoother and safer. Here’s what you’ll need to enclose your eaves properly for fire protection.
Essential Tools:
- Measuring tape (25-foot minimum), for accurate dimensions of your eave spans and material cuts
- Circular saw or hand saw, to cut soffit panels and fascia boards to exact lengths
- Power drill with bits, for pre-drilling holes and driving screws into fascia and rafters
- Sturdy ladder or scaffolding, tall enough to reach your eaves comfortably without overreaching
- Safety glasses and work gloves, protect your eyes from sawdust and your hands from sharp edges
- Carpenter’s square, ensures your cuts and installations stay straight and square
- Caulking gun, for applying sealant to close small gaps
Materials You’ll Need:
- Soffit panels, vinyl, aluminum, or fiber cement work well; choose fire-resistant options for best protection
- Fascia boards, typically 1×6 or 1×8 lumber, or pre-finished aluminum fascia
- Continuous soffit vents or perforated panels, maintain airflow while keeping embers out
- Galvanized screws or nails, rust-resistant fasteners rated for outdoor use
- Fire-resistant caulk or sealant, specifically rated for exterior use and high temperatures
- J-channel or F-channel trim, helps secure soffit panels cleanly against the house wall
When selecting soffit materials, fiber cement offers excellent fire resistance compared to vinyl, though it costs more and weighs more. Aluminum soffits provide a good middle ground with decent fire performance and easier installation. Look for products labeled as ignition-resistant or fire-rated when available. Your local building supplier can help you choose materials that meet your area’s fire codes, which is especially important for structures attached to your home.
Safety First: What to Know Before You Start
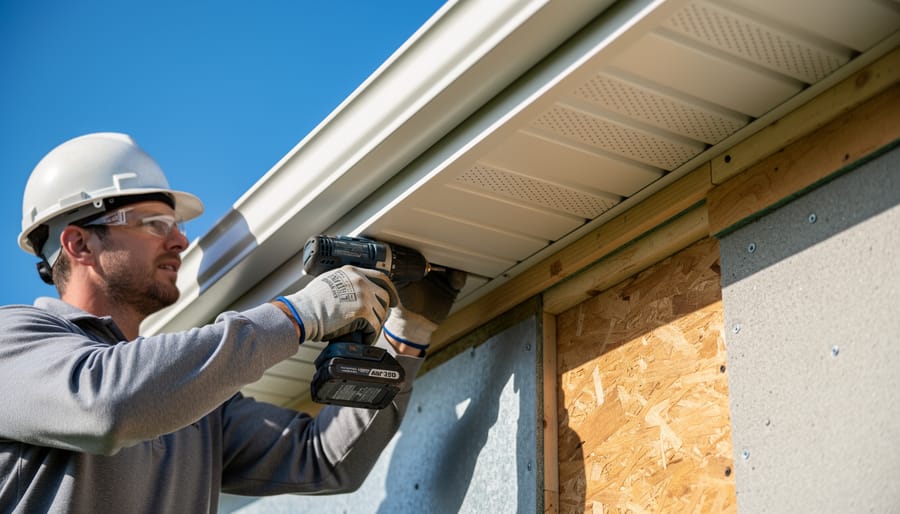
Working at heights and modifying your home’s structure requires careful attention to safety. Before you climb that ladder or fire up a power tool, take the time to prepare properly and understand the risks.
Ladder and Height Safety
Set your ladder on firm, level ground and ensure it extends at least three feet above the eave line. Always maintain three points of contact while climbing, and never lean or overreach, move the ladder instead. If you’re uncomfortable working at heights or your eaves sit more than ten feet up, consider hiring a professional. Working alone at height is risky; have someone nearby to steady the ladder and hand up tools.
Power Tool and Material Handling
Wear safety glasses, work gloves, and a dust mask when cutting soffit panels or fascia boards. Keep power cords away from the ladder’s path and never use tools with frayed cords. Cut materials on the ground whenever possible rather than balancing them on a ladder. Check that your saw blades are sharp and appropriate for the material you’re cutting.
Hidden Hazards in Existing Eaves
Before you start removing old materials or drilling into eaves, inspect carefully for electrical wiring, plumbing vents, or cable lines running through the area. Turn off power to nearby outlets if you’re uncertain. Look for wasp nests, bird nests, or evidence of rodents, these are common in open eaves and require careful removal. Wear long sleeves and have pest spray handy just in case.
Warning: If you discover active electrical wiring, extensive rot or structural damage, or large pest infestations during inspection, stop work immediately and consult licensed professionals before proceeding.
Building Codes and Fire-Safe Materials
Contact your local building department before starting. Many areas require permits for eave enclosures on attached structures, and inspectors will verify that your materials meet fire-resistance requirements. Using non-compliant materials can void your home insurance or create liability issues. Fire-rated soffit panels and proper ventilation aren’t just good practice, they’re often legally required for structures within a certain distance of your home. Keep your permit paperwork accessible and schedule inspections as required.
Step-by-Step: How to Enclose Your Eaves for Fire Protection
Step 1: Measure and Plan Your Enclosure
Start by measuring the full length of your eave from one end to the other along the roofline. Use a sturdy tape measure and note the measurement in your planning notebook. Next, measure the depth from the fascia board (or where it will go) back to where the eave meets your home’s wall. This tells you how wide your soffit panels need to be.
For attached carports, pay special attention to where the structure connects to your house. Measure this junction carefully since it’s your critical fire separation point. Check if the existing roofline is level by using a spirit level, you might need to account for slight slopes when cutting materials.
Plan for ventilation by calculating that roughly 1 square foot of vent space is needed for every 150 square feet of attic or enclosed space. Mark on your sketch where vented soffit panels will go, typically spaced evenly along the eave length.
Draw a simple diagram showing your measurements and where each piece will go. This visual guide prevents costly material mistakes. Add an extra 10% to your material order to cover cutting waste and errors, you’d rather have leftovers than run short mid-project.
Step 2: Prepare the Eave Area
Start by removing all debris from the eaves, including leaves, twigs, old nests, and accumulated dirt. Use a garden hose to flush out stubborn material, then let the area dry completely before proceeding.
Inspect the existing rafters and roof sheathing for rot, water damage, or insect infestation. Pay special attention to the fascia board and rafter tails, these need to be solid enough to support your new enclosure. If you discover soft or damaged wood, replace those sections now rather than building over problems.
Remove any old, deteriorated soffit material or flaking paint that could interfere with your new installation. A clean, sound surface ensures proper adhesion and a professional finish that actually protects against ember intrusion.
Step 3: Install Fascia Boards
With your eave area prepped and ready, it’s time to install the fascia boards that close off the outer edge where your roof meets the carport structure.
Start by positioning your first fascia board against the rafter tails or existing structure. Check alignment with a level, this first board sets the standard for the rest, so take your time getting it perfectly straight. Mark your fastener locations every 16 inches along the board.
Pre-drill pilot holes to prevent splitting, especially near the board ends. Use galvanized or stainless steel screws or nails suitable for outdoor exposure. Drive fasteners firmly but don’t overtighten, which can crack the material or create warping.
Work your way along the eave, butting boards tightly together at joints. For corners, measure carefully and cut precise 45-degree miters for a professional finish. If you’re working with fiber cement or fire-resistant composite fascia, wear a dust mask when cutting and follow the manufacturer’s fastening guidelines.
Double-check that the fascia creates a solid, continuous barrier with no gaps where embers could sneak through.
Step 4: Add Soffit Panels
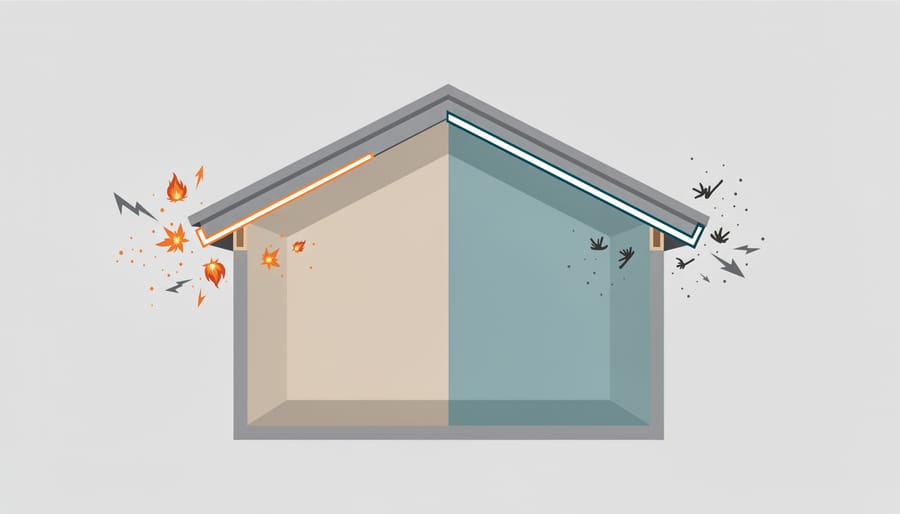
With the fascia boards securely in place, you’re ready to install the soffit panels that will seal the underside of your eaves. Start by measuring the distance from the fascia board back to the wall where your carport attaches. Cut your soffit panels to this exact length using a circular saw or fine-tooth hand saw, make sure to support the material properly to prevent cracking or splintering.
For fire protection purposes, consider using fiber cement soffit panels or aluminum panels rather than vinyl. These materials resist heat and won’t melt or ignite as easily when exposed to radiant heat from a nearby fire. If you’re using vented soffit panels for airflow (which we’ll address in the next step), position them strategically rather than installing them continuously.
Slide each panel into the receiving channel on your fascia board, then secure the opposite edge to the wall or ledger board using corrosion-resistant screws spaced every 16 inches. Work methodically from one end to the other, ensuring each panel sits flush and level before moving on. If panels have interlocking edges, make sure they snap together tightly with no visible gaps where embers could penetrate.
Step 5: Install Ventilation
Position vented soffit panels strategically along the enclosed eave to allow airflow while blocking embers. Space vents every 6 to 8 feet for balanced air circulation, or follow your local building code’s ventilation requirements. Choose vents with fine mesh screens (1/8-inch or smaller openings) designed specifically for ember resistance, these let air through but stop glowing debris from entering.
Cut openings in your soffit panels to match the vent dimensions, then secure each vent with corrosion-resistant screws. Make sure the mesh sits flush against the soffit with no gaps around the edges where embers could sneak through. If you’re using continuous vented soffit panels instead of individual vents, verify they include ember-resistant screening built in.
Test your ventilation by feeling for airflow on a breezy day. You want enough air movement to prevent moisture and heat buildup in the eave space, but not so much that you’ve created large openings. The goal is a barrier that breathes just enough to stay dry while keeping fire hazards out.
Step 6: Seal and Finish
With your soffit panels and ventilation in place, it’s time to seal everything up tight. This final step is crucial for fire protection, even small gaps can let embers sneak through during a wildfire.
Start by inspecting every joint where your soffit meets the fascia board and where it touches the wall. Run a bead of high-quality exterior caulk along these seams, pressing it firmly into place. For maximum fire protection, use a fire-resistant silicone sealant rated for outdoor use. These products stay flexible through temperature changes and won’t crack over time.
Pay special attention to corners and any spots where you made cuts around obstacles like pipes or electrical conduits. These are prime spots for gaps. A good trick: look for daylight showing through from below. If you can see light, embers can get in too.
Don’t forget the ends of your soffit runs where they meet the wall. Apply sealant here and smooth it with a wet finger or caulking tool for a clean finish. Let the sealant cure according to the manufacturer’s instructions before moving on to painting or staining if desired.
How to Verify Your Work and What Comes Next
Once your eave enclosure is complete, take time to inspect your work thoroughly before considering the job done. A careful verification now prevents problems later and ensures your fire protection measures will actually work when needed.
Start by walking around the entire perimeter of your attached carport or structure during daylight. Look up at the enclosed eaves from multiple angles, checking that all soffit panels sit flush against both the fascia and the wall. Run your hand along seams and joints to feel for any gaps or rough edges that might indicate incomplete sealing. Next, grab a bright flashlight and inspect the enclosure from inside your carport after dark, any light penetrating through signals a gap that embers could exploit during a wildfire. Pay special attention to corners, where panels meet the house wall, and around any vents you installed.
Give each fastener a gentle tug to confirm secure attachment. Your soffit panels shouldn’t flex or rattle when pressed. Check that vents are properly seated and screened to block embers while allowing airflow. If you used fire-resistant sealant, verify it’s cured according to the product instructions and hasn’t shrunk away from joints.
Your verification checklist should include:
- No visible gaps or openings anywhere in the eave enclosure
- All fasteners tight and panels firmly attached
- Ventilation adequate but properly screened against embers
- Sealant applied at all joints and fully cured
- Flashlight test passed, no light penetration from inside
Contact your local building department to schedule an inspection if one is required in your area. Many jurisdictions mandate inspections for fire separation work on attached structures, and this verification ensures your carport meets code. While waiting for inspection, you can apply exterior paint or stain to protect the materials and match your home’s appearance, but avoid covering areas the inspector needs to examine until after approval.
Going forward, inspect your enclosed eaves twice yearly, spring and fall work well. Look for any cracks in sealant, loose panels, pest intrusion attempts, or debris accumulation in vents. This simple maintenance preserves your fire protection and extends the life of your enclosure, keeping your home safer for years to come.
Common Questions About Enclosed Eaves and Fire Protection
Homeowners tackling eave enclosures often have similar questions about materials, costs, and compliance. Here are the answers to help you move forward with confidence.
Do I need special fire-rated materials for enclosed eaves?
For attached structures like carports, using fire-resistant materials such as fiber cement or metal soffits is highly recommended and often required by local codes. Standard vinyl may not provide adequate protection in fire-prone areas.
How much ventilation do I need if I enclose my eaves?
A general rule is one square foot of ventilation for every 150 square feet of attic space, split between soffit and ridge vents. Use ember-resistant vent screens to maintain fire protection while allowing airflow.
What does it typically cost to enclose eaves for fire protection?
DIY projects usually run between $300 and $800 for materials, depending on the length of eaves and material choice. Professional installation can add $500 to $1,500 in labour costs.
Should I hire a professional or do this myself?
If you’re comfortable working on a ladder and have basic carpentry skills, this is a manageable DIY project. However, hire a professional if you’re working above one storey, dealing with electrical wiring in the eaves, or unsure about local building code requirements.
Remember that enclosed eaves are just one piece of the fire separation puzzle. When you’re attaching a carport, shed, or gazebo to your home, you’ll also need to address wall cladding, door ratings, and clearances from windows. Check with your local building department early in the planning stage to understand all the requirements that apply to your specific project and location.