


How to Soundproof a Shed: Complete Acoustic Treatment for Your Space

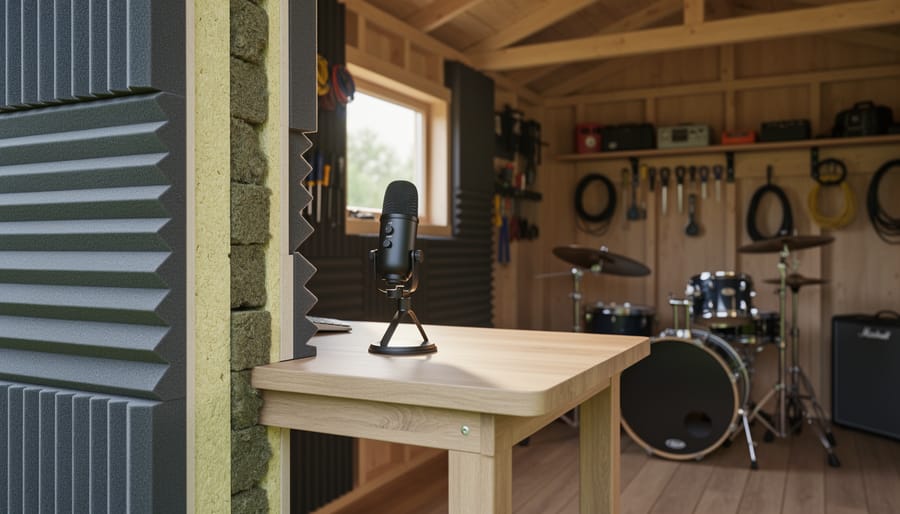
You can turn your garden shed into a quiet music studio or peaceful workshop in a single weekend by adding soundproofing materials to the walls, ceiling, and floor. The process costs between $300 and $1,200 depending on your shed’s size and the level of noise reduction you need, and most homeowners complete it with basic tools and no professional help.
If you’re tired of neighbors complaining about your band practice or you need a retreat from household noise, shed acoustics offer a practical solution. The right combination of mass-loaded vinyl, acoustic insulation, and sealed gaps can reduce sound transmission by 60 to 80 percent. That means you can play drums at reasonable volumes, run power tools without disturbing anyone, or simply enjoy a quiet space away from lawn mowers and barking dogs.
The challenge isn’t just blocking sound from escaping. You also want to control echoes and reverb inside the shed so your music sounds clean or your podcast recordings come out crisp. Many DIYers assume adding foam panels will solve everything, but true soundproofing requires adding mass and creating air gaps that absorb vibrations before they travel through walls.
Whether you’re adapting an existing structure or building from scratch using workshop shed plans the key is layering the right materials in the correct order. Skipping steps or choosing the wrong products wastes money and leaves you with disappointing results.
This guide walks you through every material you’ll need, the exact installation sequence, and how to test your work so you know it’s effective. You’ll learn which corners you can cut and which details make all the difference between a mediocre result and a truly quiet space.
Key Takeaway: Soundproofing blocks sound transmission through walls and gaps, while acoustic treatment controls echo and reverb inside the space. You’ll likely need both: soundproofing stops neighbors from hearing your band, and acoustic treatment makes your recordings sound professional.
Understanding Shed Acoustics: What You’re Really Solving
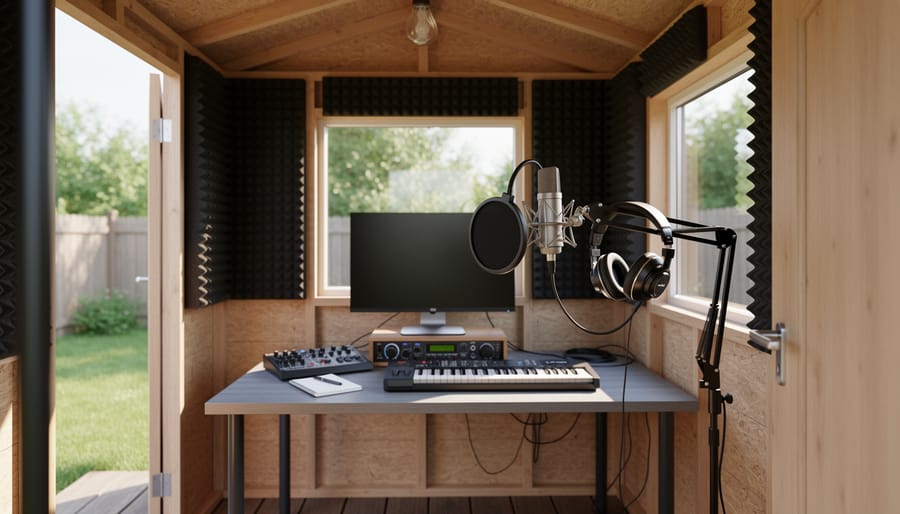
When you think about shed acoustics, you’re actually tackling two distinct problems that need different solutions. The first challenge is containment: keeping noise inside your shed so your drum practice, power tool projects, or gaming sessions don’t disturb neighbors or family members. The second is exclusion: blocking outside noise from ruining your concentration when you’ve set up a peaceful home office, reading nook, or meditation space in your backyard retreat.
Sound travels through shed structures in ways that might surprise you. Unlike your home’s insulated walls, most sheds feature thin wooden panels, metal siding, or vinyl walls with minimal insulation. These lightweight barriers vibrate easily when sound waves hit them, transmitting noise straight through. Even worse, the typical DIY shed layout includes gaps around doors, windows, vents, and floor joints where sound leaks freely. A tiny quarter-inch gap under a door can undermine thousands of dollars of soundproofing work elsewhere.
Real homeowners see dramatic results when they address these issues properly. Mike in Portland converted his 10×12 shed into a drum practice studio by sealing every gap, adding mass-loaded vinyl to the walls, and installing a solid-core door. His neighbor reports hearing only faint rhythmic thumps instead of the previous full-volume assault. Sarah in Austin transformed her metal shed into a voiceover recording booth, combining external soundproofing with internal acoustic panels to eliminate both outside traffic noise and the tinny echo that plagued her first recordings.
The structural weaknesses in your shed right now, those loose door frames, uninsulated wall cavities, and thin roof panels, are actually opportunities. Each one represents a clear target for improvement that will measurably reduce noise transfer in both directions.
Tools and Materials You’ll Need
Before you start tearing into your shed walls, let’s gather everything you need for the job. Having the right materials and tools on hand saves you frustration and multiple trips to the hardware store. I’ve organized this by what each item actually does for soundproofing, so you understand why you’re buying it.
Soundproofing Materials by Function
Different materials tackle different aspects of the sound problem. Here’s what works and why:
- Mass/Barrier Materials: Mass-loaded vinyl (MLV) at $1.50-$2.50 per square foot blocks sound transmission; additional drywall layer (5/8-inch) at $12-$18 per sheet adds density to walls
- Absorption Materials: Rockwool insulation batts at $0.60-$1.20 per square foot absorb sound energy inside wall cavities; fiberglass insulation at $0.40-$0.80 per square foot offers a budget alternative
- Sealing Materials: Acoustic caulk at $8-$12 per tube fills gaps and cracks; Green Glue damping compound at $18-$25 per tube reduces vibration between layers; weather stripping at $10-$20 per roll seals door and window edges; door sweeps at $15-$30 each block the gap under doors
- Basic Tools: Heavy-duty staple gun, utility knife with extra blades, cordless drill with screwdriver bits, 25-foot measuring tape, caulk gun, carpenter’s square, stud finder
The mass-loaded vinyl is your workhorse for blocking sound. It’s a thin, heavy rubber-like sheet that adds serious density without taking up space. One layer can cut sound transmission by 20-30 decibels when installed properly. Rockwool insulation goes inside the walls and does double duty: it absorbs sound waves bouncing around and provides thermal insulation for year-round comfort.
Green Glue deserves special mention. This viscoelastic compound sandwiches between two rigid layers and converts sound vibrations into tiny amounts of heat. It’s not glue in the traditional sense, it stays slightly flexible, which is exactly how it works. Two tubes cover one 4×8 sheet of drywall.
For a typical 10×12 shed, budget $800-$1,500 for materials depending on how thorough you go. Doors and windows eat up the budget fast, so start with walls and ceiling if money’s tight. You can always upgrade the door later once you’ve tackled the basics.
Safety Warnings and Precautions
Before you start any soundproofing work, understand the safety risks and take proper precautions. Fiberglass and mineral wool insulation release tiny glass or stone fibers that irritate skin, eyes, and lungs. Wear heavy-duty gloves, safety glasses, and a respirator-grade mask rated N95 or higher when cutting or installing insulation. Work in a well-ventilated space and shower immediately after to remove fibers from your skin and hair.
Soundproofing materials add significant weight to shed walls and ceilings. Most sheds weren’t built to support multiple layers of drywall, mass-loaded vinyl, and dense insulation. Check your shed’s framing strength before loading walls with heavy materials. If your shed has thin studs or shows any structural weakness, reinforce the frame first or consult shed construction tips for proper bracing techniques. Adding 50 to 100 pounds per wall section without adequate support can cause sagging or collapse.
If you’re running electrical outlets for studio equipment or tools, hire a licensed electrician. DIY electrical work in outbuildings creates fire hazards and often violates local codes. Ground fault circuit interrupters are essential in shed environments where moisture is present.
Warning: Sealing a shed tightly without adequate ventilation traps moisture inside, leading to condensation, mold growth, and structural rot that ruins your soundproofing investment and creates health hazards.
The EPA emphasizes maintaining proper ventilation during weatherization projects. Install passive vents near the roof peak or add a small ventilation fan to prevent moisture buildup. If your project involves structural changes, adding substantial weight, or complex electrical work, consult a professional before proceeding.
Step-by-Step Soundproofing Process
Step 1: Seal All Gaps and Cracks
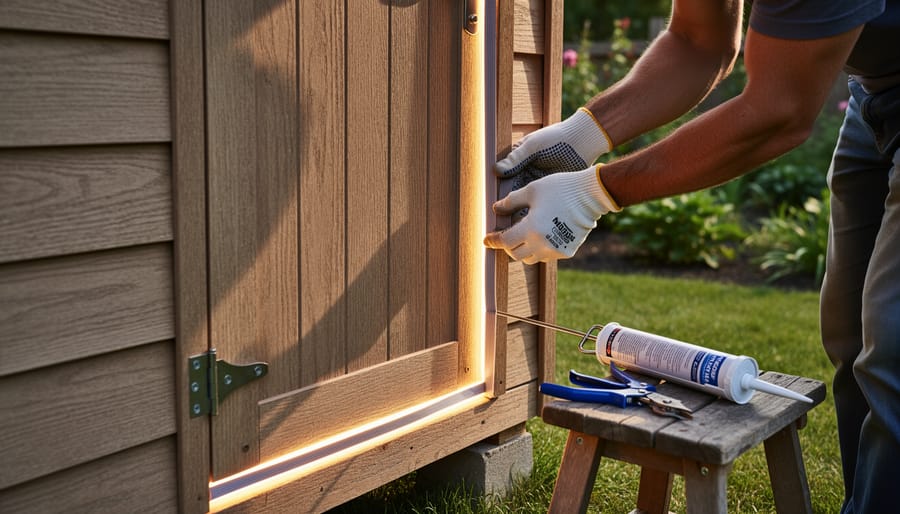
Start at the door frame. Run your hand slowly along the edges while a friend shines a flashlight from outside, any light bleeding through reveals a gap that sound will exploit mercilessly. Sound waves behave like water; they’ll find and flood through the tiniest opening before your expensive wall treatments matter at all.
Check every window frame, wall corner, and floor-to-wall joint. Metal sheds show gaps at panel seams and bolt holes. Wood sheds leak sound where boards meet the floor or ceiling joists. Push on weather stripping around doors, if it’s compressed flat or cracked, it’s doing nothing.
For gaps under a quarter-inch, use acoustic sealant. Unlike regular caulk, it stays flexible and won’t crack when your shed expands in summer heat. Apply it to window frames, electrical outlets, and anywhere two materials join. Tooling it smooth with a wet finger creates an airtight seal.
Door gaps need a two-part fix: adhesive-backed weather stripping along the top and sides, plus a door sweep screwed to the bottom edge. The sweep should drag slightly on the threshold when closed. If your door sits a half-inch above the floor, install a threshold ramp first.
For larger gaps, around pipes, vents, or poorly fitted windows, stuff them with backer rod before caulking over. This blocks the void completely rather than bridging it with a thin layer that can tear.
Step 2: Add Mass to Walls and Ceiling
Adding mass to your shed’s walls and ceiling is the single most effective way to block sound transmission. Sound waves lose energy when they hit heavy, dense materials, so increasing the mass of your shed’s surfaces dramatically reduces noise passing through.
Mass-loaded vinyl (MLV) offers the best mass-to-thickness ratio. This flexible, heavy membrane typically weighs one to two pounds per square foot and can be stapled directly to wall studs before finishing with drywall. Unroll the MLV from floor to ceiling, overlapping seams by at least two inches, and seal all edges with acoustic caulk. For wood sheds, attach MLV to the interior side of existing walls using a heavy-duty staple gun every six inches. The material will conform to slight irregularities in the framing.
Adding a second layer of drywall achieves similar results at lower cost. Use 5/8-inch drywall rather than standard 1/2-inch for extra mass. Apply a layer of Green Glue damping compound between the existing wall and new drywall sheet, this viscoelastic material converts sound energy into heat. One tube covers approximately 16 square feet. Screw the new drywall into studs every 12 inches, offsetting seams from the original layer.
Metal sheds present unique challenges since you can’t easily attach materials to thin corrugated walls. Build an interior wooden frame two inches inside the metal walls, creating an air gap. Install MLV or insulation between the new studs, then finish with drywall. This decoupled wall system prevents vibrations from traveling directly from the metal exterior to your interior space.
Don’t forget the ceiling, overhead sound transmission matters just as much as walls. The same MLV and drywall techniques apply, though you’ll need help supporting heavy sheets during installation.
Step 3: Install Acoustic Insulation
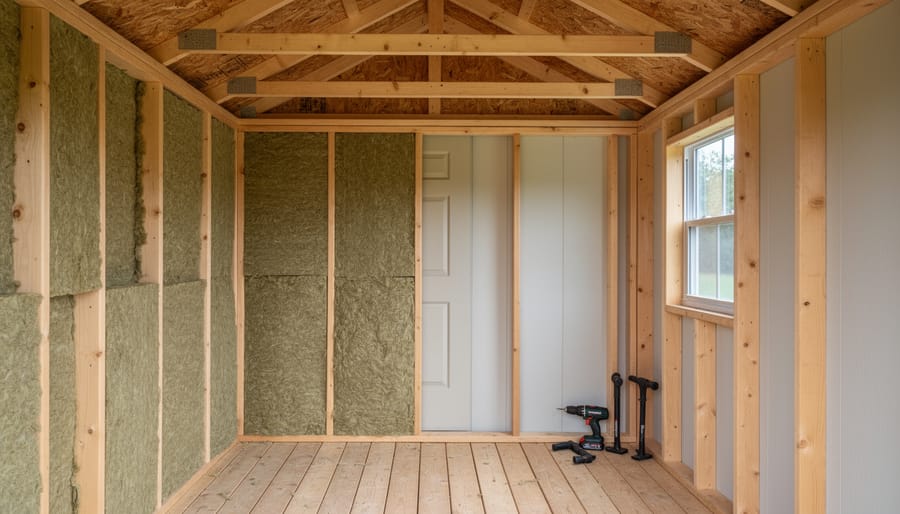
Start by measuring each wall and ceiling cavity between the shed’s framing studs or joists. Cut your rockwool or fiberglass insulation batts to fit snugly without forcing them, compressed insulation loses its sound-absorbing ability because the air pockets get squeezed out. Those air pockets are what trap sound waves and convert them into tiny amounts of heat through friction.
For walls, friction-fit the insulation between studs, pressing gently so it stays in place without sagging. If your shed has metal siding, work carefully to avoid compressing the insulation against the metal panels, which would create direct sound transmission paths. Leave about a half-inch gap between the insulation and the exterior wall to maintain the material’s effectiveness.
Ceiling cavities need extra attention because insulation can settle over time. Use wire supports or staple the insulation’s paper facing to the joists if your product has one. Never leave gaps at the top or bottom of cavities, sound will find these paths and leak through. Cut around electrical boxes and pipes precisely, filling any odd-shaped spaces with loose-fill insulation or smaller batt pieces.
Wear a respirator mask, long sleeves, and gloves throughout this step. Fiberglass particles irritate skin and lungs. Work in sections, taking breaks to ventilate the shed. The goal is complete cavity coverage with the insulation at its full loft thickness, creating a continuous sound-absorbing barrier from floor to ceiling.
Step 4: Upgrade Doors and Windows
Doors and windows are the weakest points in any soundproofing effort. Most shed doors are hollow-core or thin metal, essentially sound funnels. Your first move: swap to a solid-core wood door or a steel-faced insulated door. These add significant mass, blocking far more noise than what they replace. If buying a new door isn’t in the budget right now, layer your existing door with mass-loaded vinyl or a second sheet of plywood screwed directly to the interior surface.
Door sweeps make a massive difference for minimal cost. Install a rubber or silicone sweep along the bottom edge of your door to eliminate the gap where sound escapes. Pair this with weatherstripping around the entire door frame, the adhesive foam type works, but compression gaskets last longer and seal tighter.
Windows present a tougher challenge. Double-pane or laminated glass helps, but full window replacement costs add up. For a fraction of that expense, install acrylic secondary glazing: cut clear acrylic sheets to fit inside the window frame, leaving a small air gap between the original glass and the new layer. This dead air space disrupts sound waves effectively.
Heavy acoustic curtains offer another practical fix. Look for curtains with multiple dense layers and grommeted edges that seal against the wall. They won’t match a secondary glazing system’s performance, but they’re removable and work surprisingly well for late-night jam sessions or power tool use.
Step 5: Treat the Floor
Floor treatment is often overlooked, but it’s crucial for stopping impact noise and vibrations from traveling through the ground. Sound waves can transmit through your shed’s foundation and into the earth, then radiate outward to neighboring properties, especially if you’re running equipment, playing drums, or doing woodworking.
For concrete foundations, start with dense rubber gym mats (3/4-inch thick minimum) or interlocking foam tiles rated for soundproofing. These materials decouple your floor from the slab, absorbing vibrations before they transfer. Lay them wall-to-wall without gaps, and secure edges with construction adhesive if needed.
Wood floor sheds benefit from a floating floor system: install a layer of mass-loaded vinyl directly on the existing floor, add 1/2-inch rubber underlayment, then lay tongue-and-groove plywood or laminate flooring on top. This creates an air gap that interrupts sound transmission.
For maximum isolation in music studios or workshops, build a true floating floor by placing the entire floor assembly on neoprene pads or acoustic isolation mounts. This prevents low-frequency vibrations from coupling with the structure underneath, though it adds 2-3 inches of height and requires careful leveling.
Testing Your Results and Fine-Tuning
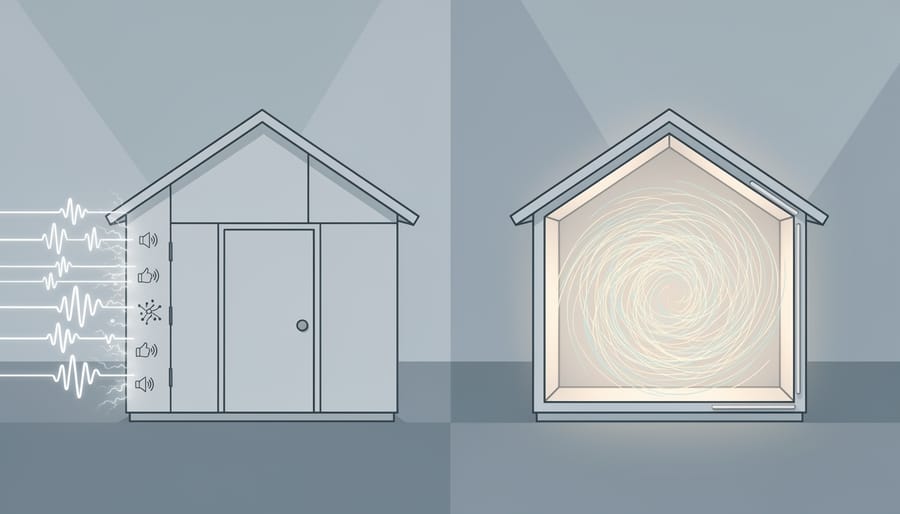
After completing your soundproofing installation, you need to know if it actually worked. Start with a simple conversation test: have someone speak normally inside the shed while you walk around the outside perimeter. Can you hear distinct words, or just muffled noise? Next, play music at typical volume levels and repeat the walk-around. The goal isn’t complete silence outside, that’s nearly impossible in a residential shed, but rather a significant reduction where conversations become unintelligible and music loses its punch.
For objective measurements, download a free decibel meter app on your smartphone. Measure sound levels inside the shed at your typical activity volume, then take readings from various spots outside where neighbors or family would be affected. A reduction of 10-15 decibels represents a noticeable improvement, while 20-30 decibels is excellent for a DIY project. Document your baseline measurements before soundproofing so you can compare results.
If you’re still hearing too much noise, inspect your work systematically. Run your hand around door frames, windows, and wall seams while someone makes noise inside, you’ll feel air movement at leak points. Check that door sweeps make full contact with thresholds and window seals compress completely when closed. These gaps sabotage everything else you’ve done.
Echo and reverb inside the shed indicate a different problem than soundproofing. If your workshop shed ideas include recording or practicing music, you’ll want acoustic panels on interior walls to absorb reflections and improve sound quality. Soundproofing blocks transmission through walls; acoustic treatment manages what happens inside the space. Many sheds need both for optimal results.
Common Questions About Shed Soundproofing
How much soundproofing is realistic in a shed?
Expect to reduce external noise by 20-30 decibels with proper sealing, insulation, and mass-adding techniques, enough to turn loud drum practice into a muffled background hum for neighbors. Complete silence isn’t achievable without professional studio-grade construction, but these DIY methods make a dramatic difference for most hobby and music applications.
Can you soundproof a metal shed?
Yes, though metal sheds require extra attention because thin steel walls transmit sound easily. Focus on adding mass-loaded vinyl directly to interior walls, installing thick insulation batts, and decoupling materials from the metal frame to prevent vibration transfer. The process costs slightly more than treating wood sheds but delivers similar results.
What’s the difference between cheap and expensive soundproofing solutions?
Budget approaches like weather stripping, basic fiberglass insulation, and door sweeps cost $200, $500 and handle 60-70% of sound issues. Premium options, mass-loaded vinyl, multiple drywall layers, solid-core doors, and specialized acoustic sealants, run $1,500, $3,000 but achieve professional-grade noise reduction. Most homeowners get excellent results mixing both: splurge on doors and gap sealing, then use standard insulation.
Do I need to soundproof if my shed sits far from neighbors?
Distance helps, but soundproofing still improves your experience inside the shed by reducing echo, controlling reverb, and creating better audio quality for recording or video calls. If you’re 100+ feet from the nearest house and only doing moderate-volume activities, you might skip exterior soundproofing and focus on interior acoustic treatment instead.
How much does professional installation cost?
Hiring contractors for complete shed soundproofing typically runs $2,500, $6,000 depending on shed size and material choices. Professionals work faster and guarantee structural integrity when adding heavy materials, but the labor often doubles your total project cost. Most DIYers can handle this work over a few weekends and save significantly.
One question that comes up repeatedly: what if you’ve already soundproofed but still hear too much noise? Start by rechecking door seals and window gaps, since even a quarter-inch crack undermines your other efforts. Use a flashlight test, shine it around door frames in a darkened shed, and any light leaking through marks a sound leak. If your walls and doors are solid but the space sounds echo-y or tinny, you’re dealing with internal acoustics rather than soundproofing, which means adding foam panels or bass traps will help more than another layer of drywall.
The timeline matters too. Rushed soundproofing jobs miss details like outlet boxes, ventilation gaps, and floor-to-wall junctions where sound sneaks through. Take your time sealing every penetration, and test as you go rather than discovering problems after finishing all the walls.
Soundproofing your shed doesn’t require a contractor’s budget or expert skills. Most homeowners can tackle this project step by step, starting with the highest-impact fixes. Seal those gaps and cracks first, they’re your biggest noise leaks and the cheapest problem to solve. Upgrade your door with a sweep and weather stripping before you even think about expensive wall treatments. Once you’ve handled the basics, layer in mass and insulation where your budget allows.
The transformation is worth the effort. A properly soundproofed shed becomes a true sanctuary where you can crank up your amp, run power tools at odd hours, or record videos without tiptoeing around the neighbors. Your hobby space stops being a compromise and starts being a perfect DIY space where you can actually focus and create. Start with one room-changing upgrade this weekend, and you’ll wonder why you waited so long to reclaim your shed.