
Keep Your Shed Bone-Dry: Simple Waterproofing Steps That Actually Work
Transform your outdoor storage space into a weather-resistant sanctuary with proven waterproofing techniques that protect your belongings and extend your shed’s lifespan. Start by inspecting the entire structure for existing water damage, paying close attention to seams, joints, and the foundation where moisture typically penetrates. Apply a high-quality exterior sealant to all wooden surfaces, focusing on vulnerable areas like window frames, door jambs, and corner joints. Install proper drainage solutions, including gutters and downspouts, to direct water away from the foundation, and establish a slight ground slope around the perimeter for optimal water runoff. Combined with regular shed maintenance, these waterproofing measures create a robust defense against moisture damage, ensuring your investment remains protected through every season.\n\n\n
Assessing Your Shed’s Current Condition
\n\n
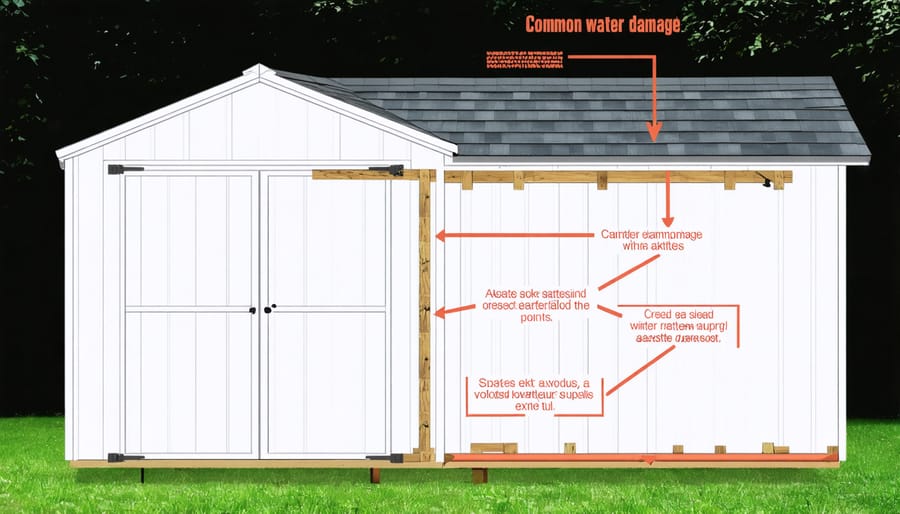
Common Problem Areas
\n\nWater typically finds its way into sheds through several vulnerable areas that require special attention. The roof’s edges and corners are particularly susceptible, especially where different materials meet or join. These junction points often develop gaps over time as materials expand and contract with weather changes. It’s crucial to regularly inspect for damage in these areas.\n\nThe base of your shed is another common trouble spot, particularly where the walls meet the foundation. This area can suffer from splash-back during heavy rain, potentially leading to rot and deterioration. Windows and doors are also frequent culprits, with their frames and seals being natural entry points for moisture.\n\nVentilation points, while necessary, can become problematic if not properly sealed or maintained. Look out for gaps around utility entries, such as spots where electrical lines enter the shed. The roof valley (where two roof slopes meet) and any penetrations for vents or chimneys are also notorious for leaks if not properly flashed and sealed.\n\nRegular monitoring of these areas can help catch issues before they become major problems, saving you time and money in the long run.\n\n
 \n
\n\n\n
Signs of Water Damage
\n\nBefore diving into waterproofing your shed, it’s crucial to check for existing water damage. Start by examining your shed’s interior on a sunny day – any streams of light coming through the walls or roof indicate potential entry points for water. Look for dark stains or discoloration on the walls, ceiling, and especially around windows and doors, as these often signal ongoing water issues.\n\nPay close attention to the corners and floor edges where water tends to collect. Soft, spongy wood or surfaces that feel damp to the touch are clear indicators of moisture problems. Musty odors and visible mold growth, particularly in darker corners, suggest long-term water exposure that needs immediate attention.\n\nCheck the exterior base of your shed where it meets the ground – deteriorating wood, peeling paint, or rusty metal fixtures are telltale signs of water damage. During rainfall, observe how water flows around your shed. Puddles forming near the foundation or water splashing back onto walls can lead to serious structural issues if left unchecked.\n\nThe severity of water damage often correlates with how long it’s been present, so addressing these signs early can save you significant repair costs down the line.\n\n\n
 \n
\n\n\n
Essential Waterproofing Materials
\n\n
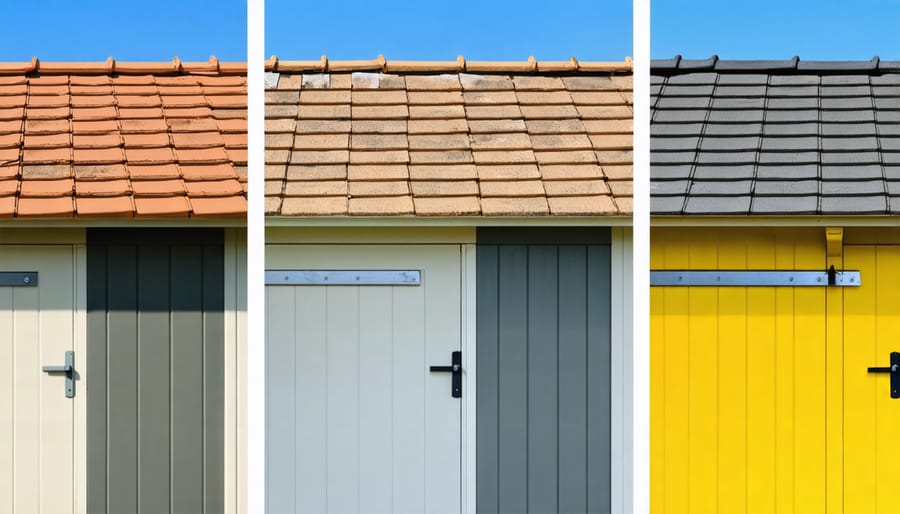
Choosing the Right Sealants
\n\nWhen it comes to preventing moisture damage, selecting the right sealant is crucial for your shed’s longevity. For wooden sheds, opt for oil-based or water-based wood sealers that offer UV protection and deep penetration. Look for products labeled specifically for exterior use, as these contain additional weather-resistant properties.\n\nMetal sheds require different considerations. Choose rust-inhibiting primers and sealants designed specifically for metal surfaces. Elastomeric coatings work particularly well as they create a flexible barrier that moves with temperature changes without cracking.\n\nFor plastic or vinyl sheds, specialized plastic sealants that bond well with synthetic materials are your best bet. These usually come in clear finishes that won’t alter the appearance of your shed.\n\nWhen choosing any sealant, consider your local climate. Areas with heavy rainfall need products with superior water resistance, while sunny regions require excellent UV protection. Always check the product’s durability rating and reapplication recommendations to ensure long-lasting protection for your shed.\n\n
Tools You’ll Need
\n\nBefore starting your shed waterproofing project, gather these essential tools to ensure a smooth process. You’ll need a wire brush for surface preparation, a sturdy ladder to access higher areas, and a power washer for thorough cleaning. Don’t forget a caulking gun for applying sealants and a paint roller with extension pole for covering larger surfaces. Essential safety gear includes protective gloves, safety goggles, and a dust mask. For measuring and inspection, grab a moisture meter to check dampness levels and a tape measure for accurate coverage calculations. A utility knife, putty knife, and screwdriver will help with repairs and preparation work. Keep a bucket handy for mixing materials and cleaning tools. All these items are readily available at your local hardware store and will make your waterproofing project much more manageable.\n\n\n
Step-by-Step Waterproofing Process
\n\n
Roof Waterproofing
\n\nThe roof is your shed’s first line of defense against water damage, so let’s make sure it’s properly protected. Start by thoroughly cleaning the roof surface, removing any debris, loose materials, or old sealant. If you spot any existing holes or cracks, patch them with roofing cement before proceeding with the waterproofing process.\n\nFor metal roofs, apply a rust-inhibiting primer first, followed by a specialized metal roof coating. If you have a wooden roof, treat it with a quality wood preservative before applying your waterproofing solution. Asphalt roofs benefit from a dedicated asphalt roof coating that fills minor cracks and creates a protective barrier.\n\nRoll or brush on your chosen waterproofing membrane in even strokes, working from the lowest point upward. Pay special attention to joints, edges, and around any roof fixtures like vents or skylights. Apply at least two coats, allowing proper drying time between applications as per the manufacturer’s instructions.\n\nDon’t forget to check and seal the roof’s flashings – these are the metal strips that prevent water from seeping in where the roof meets the walls. Apply a generous bead of roofing sealant along these areas and any other potential entry points.\n\nFor added protection, consider installing drip edges along the roof’s perimeter and ensure your gutters are properly aligned to direct water away from the shed’s foundation. Remember to recheck your roof’s waterproofing annually and touch up as needed to maintain its effectiveness.\n\n
 \n
\n\n\n
Wall Protection
\n\nProtecting your shed’s walls is crucial for long-term waterproofing success. Start by applying a high-quality exterior wood sealer to all wooden surfaces, including siding and trim. Work the sealer deep into the wood grain using a brush or roller, paying special attention to joints and corners where water tends to collect.\n\nFor metal or vinyl siding, thoroughly clean the surfaces and check for any gaps or loose panels. Apply weatherproof caulk to seal any gaps around windows, doors, and where different materials meet. Consider installing moisture-resistant wall wrap or house wrap behind the siding if you’re working on a new shed or replacing old siding.\n\nOne often-overlooked aspect is proper ventilation. Install soffit vents or wall vents to prevent moisture buildup inside the walls. This airflow helps keep the interior dry and extends the life of your waterproofing efforts.\n\nFor added protection, consider applying a water-repellent coating specifically designed for your shed’s siding material. These coatings create an invisible barrier that allows the material to breathe while keeping water out. Remember to reapply every few years, depending on your local climate and the product’s specifications.\n\nIf you notice any warped or damaged siding, replace it promptly to prevent water from seeping behind the walls. Regular inspections of your wall protection measures will help catch any issues before they become major problems.\n\n
Foundation and Floor Sealing
\n\nA solid foundation is your first line of defense against moisture damage in your shed. Start by ensuring your shed sits on a level surface, ideally elevated 4-6 inches above the surrounding ground. For the foundation, a concrete slab or concrete blocks provide excellent moisture resistance, but you’ll need to seal them properly.\n\nBegin by thoroughly cleaning the foundation surface, removing any debris, dirt, or old sealant. Once clean and dry, apply a high-quality concrete sealer using a roller or brush, paying special attention to the edges and corners where moisture tends to accumulate. For added protection, consider installing a vapor barrier between the ground and your foundation.\n\nThe floor requires special attention, as it’s constantly exposed to ground moisture. If you have a wooden floor, treat it with a water-resistant wood sealer, applying at least two coats for maximum protection. For concrete floors, use a penetrating sealer that bonds with the concrete to create a moisture-proof barrier.\n\nPro tip: Create a slight slope (about 1-2 degrees) in your foundation away from the shed’s entrance. This subtle grade helps water naturally flow away from your structure, preventing pooling around the base. Also, consider adding a French drain around your shed’s perimeter for additional moisture control in areas with high rainfall or poor drainage.\n\nRemember to reapply sealants every 2-3 years or sooner if you notice any signs of wear or water penetration. This maintenance routine will significantly extend your shed’s lifespan and protect your stored items.\n\n\n
Maintenance Tips
\n\n
Seasonal Checks
\n\nRegular seasonal checks are your best defense against water damage and can help protect against pests. Make it a habit to inspect your shed at the start of each season, paying special attention before winter and during spring thaws. Check the roof for loose or damaged shingles, examining all seams and joints for potential weak spots. Look closely at the foundation area, noting any signs of water pooling or soil erosion. Don’t forget to test doors and windows for smooth operation, as sticking could indicate water damage or warping. Inspect gutters and downspouts for debris, ensuring proper water flow away from the structure. Inside, look for water stains on walls or ceiling, musty odors, or dampness in corners. Keep a maintenance log to track issues and repairs, making it easier to spot recurring problems before they become serious.\n\n
Quick Fixes
\n\nCatching water issues early can save you time and money in the long run. Start by inspecting your shed’s exterior for small cracks and gaps, which you can quickly fill with exterior-grade caulk. For minor roof leaks, apply roofing sealant around vents, edges, and any visible holes. If you notice loose shingles, secure them with roofing nails and seal the edges.\n\nCheck the door and window frames for deteriorating weather stripping and replace as needed. A quick coat of water-resistant paint or sealant on exposed wood surfaces can provide immediate protection against moisture. For ground-level seepage, ensure proper drainage by clearing gutters and adding gravel around the shed’s perimeter.\n\nDon’t forget to address condensation issues by improving ventilation – installing a small vent or dehumidifier can make a big difference. These simple fixes take just a few hours but can prevent major water damage down the line.\n\n\nProtecting your shed from water damage is an ongoing commitment that pays dividends in the long run. By following the waterproofing steps we’ve discussed, you can significantly extend your shed’s lifespan and keep your stored items safe and dry. Remember to regularly inspect your shed’s exterior, particularly after severe weather, and address any issues promptly before they become major problems.\n\nMake it a habit to check your shed’s waterproofing elements at least twice a year, ideally in spring and fall. Pay special attention to the roof, foundation, and any seals around windows and doors. Small maintenance tasks like clearing gutters, touching up sealant, or replacing damaged materials can prevent costly repairs down the line.\n\nKeep in mind that different climates may require different approaches to waterproofing, so adjust your maintenance schedule accordingly. With proper care and attention, your waterproofed shed will continue to serve as a reliable storage solution for years to come, protecting your valuable tools and equipment from moisture damage while maintaining its structural integrity.