
Level Up Your Shed Foundation: Smart Solutions for Sloped and Uneven Ground
Building a shed on uneven ground demands precise site preparation and a rock-solid foundation strategy. While sloped terrain presents unique challenges, several proven foundation methods ensure your shed stands perfectly level and remains stable for decades.
Gravel pad foundations excel on mild slopes, offering excellent drainage and cost-effective installation. For moderate slopes, concrete pier foundations elevate your shed above ground level, providing superior stability while minimizing excavation work. On severely uneven terrain, engineered block foundations with adjustable footings allow precise leveling and load distribution across the entire structure.
Choosing the right foundation not only prevents structural issues but also protects your investment from moisture damage, settling, and seasonal ground movement. The key lies in matching your foundation type to your specific slope conditions, local building codes, and budget constraints. Let’s explore each option in detail, complete with installation guidelines and cost considerations that help you make an informed decision for your particular situation.
Gravel Pad with Retaining Blocks

Material Requirements
To build a proper foundation for your shed on uneven ground, you’ll need these essential materials and tools:
Foundation Materials:
– Gravel (3/4″ crushed stone)
– Concrete blocks or pier blocks
– Pressure-treated lumber for beams and joists
– Post level
– Construction-grade string
– Wooden stakes
– Landscape fabric to protect against water damage
Tools Required:
– Shovel and spade
– Wheelbarrow
– Tape measure
– Spirit level (4-foot recommended)
– String line level
– Hammer
– Saw (circular or hand)
– Work gloves
– Safety glasses
– Marking spray paint
– Tamper or plate compactor
Optional but Recommended:
– Transit level or laser level (for precise measurements)
– Rubber mallet
– Adjustable post bases
– Concrete mix (if pouring footings)
– Ground anchoring system
Remember to check local building codes, as they may require specific materials or additional components for your foundation project.
Installation Steps
Begin by marking the shed’s perimeter, extending it by 2 feet on all sides for the gravel pad. Clear the area of vegetation, rocks, and debris, ensuring a clean workspace. Using a shovel and level, dig down approximately 6 inches, maintaining a consistent depth across the site.
Install landscape fabric over the excavated area to prevent weed growth and improve drainage. Secure it with landscape pins every few feet. For the retaining structure, install pressure-treated timber or concrete blocks around the perimeter, ensuring they’re level and secure.
Pour a 4-inch layer of coarse gravel (#3 or #4) as your base layer. Compact it thoroughly using a plate compactor, working in a systematic pattern from the edges to the center. Add a 2-inch layer of finer gravel (#57) on top, leveling it with a rake. Compact this layer as well, checking frequently with a level to ensure an even surface.
For significantly uneven areas, create “steps” in the terrain, ensuring each level is properly compacted before moving to the next. Use a laser level or string level to verify the entire pad is even. Once complete, perform a final check by placing a long straight board across various points of the pad, ensuring no low spots exist.
Remember to account for water drainage by maintaining a slight slope away from the shed’s intended location, approximately 1 inch per 8 feet.
Concrete Pier Foundation
Benefits for Uneven Terrain
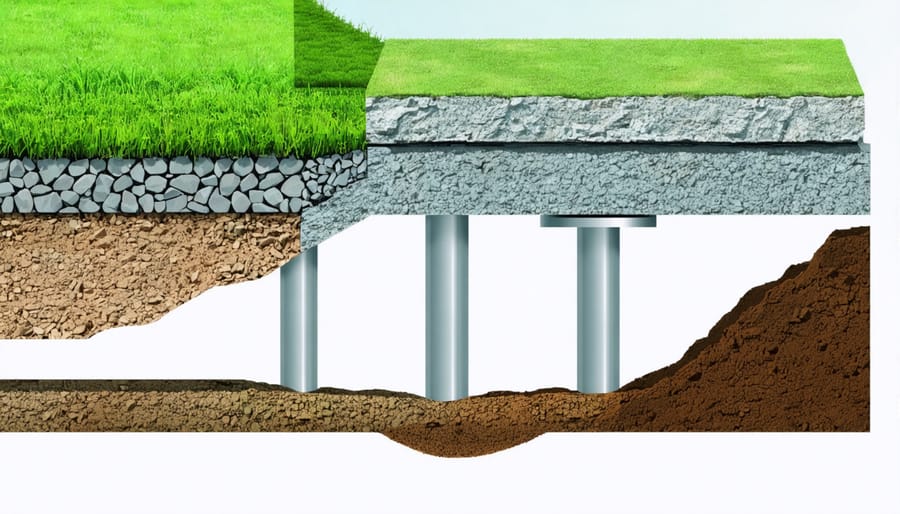
Pier foundations offer exceptional versatility when dealing with uneven terrain, making them one of the most reliable foundation solutions for sloped ground. By elevating your shed above the irregular surface, piers eliminate the need for extensive grading or excavation work, saving both time and money. This elevation also creates beneficial air circulation underneath the structure, helping prevent moisture-related issues and extending your shed’s lifespan.
One of the biggest advantages of pier foundations is their adjustable height capability. Each pier can be individually sized to match the specific contours of your yard, ensuring your shed remains perfectly level regardless of the ground beneath it. This flexibility also makes it easier to adapt to future ground shifts or settling without compromising the structure’s stability.
Additionally, pier foundations minimize environmental impact by reducing the need for major ground disturbance. They work particularly well in areas with protected root systems or where preserving natural drainage patterns is important. Their minimal footprint also makes them ideal for properties with strict permitting requirements or environmental restrictions.
Installation Process
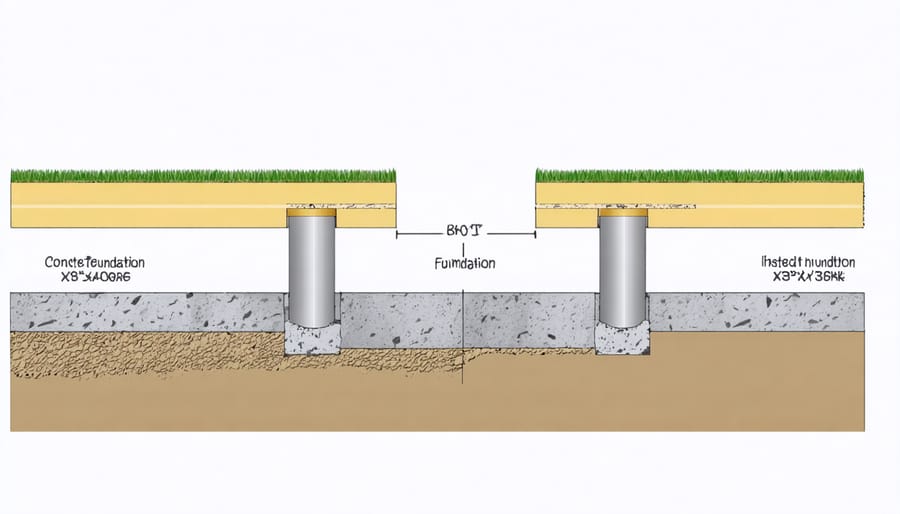
Start by marking your pier locations using stakes and string, ensuring they’re level and properly spaced according to your shed’s dimensions. Dig holes at each marked spot, typically 24 inches deep or below the frost line in your area. The holes should be wider at the bottom than the top, creating a bell shape that provides better stability.
Pour about 6 inches of gravel into each hole for drainage, then place your concrete tube forms. Use a level to ensure they’re perfectly vertical. Mix your concrete according to manufacturer instructions and pour it into the forms, filling them completely. Insert J-bolts into the wet concrete at the top of each pier, positioning them to align with your shed’s floor frame.
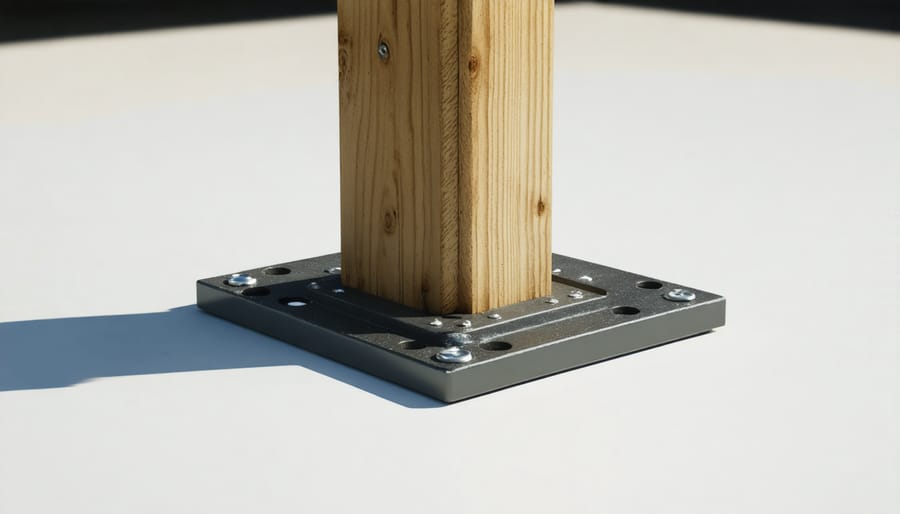
Allow the concrete to cure for at least 24 hours. Once cured, attach post brackets to the J-bolts. These brackets will secure your floor joists and create a sturdy base for your shed. Check that all piers are level with each other using a long level or laser level, adding shims if needed to achieve perfect alignment.
Adjustable Post Foundation System
Components and Setup
To build a reliable foundation for your shed on uneven ground, you’ll need several key components. Start with concrete deck blocks or adjustable post bases as your primary support system. These should be paired with pressure-treated lumber for the base frame, typically 4×4 posts for vertical supports and 2×6 or 2×8 boards for the horizontal frame.
For proper leveling, you’ll need gravel or crushed stone for creating a stable base, a laser level or traditional carpenter’s level for accuracy, and metal joist hangers to secure your frame connections. Don’t forget about hardware like galvanized lag screws, washers, and nuts for securing everything together.
If you’re working with significant slopes, you may also need concrete for footings, rebar for reinforcement, and additional lumber for creating a stepped foundation design. Include a roll of landscape fabric underneath your foundation to prevent weed growth and improve drainage.
Keep all your tools handy: post hole digger, shovel, measuring tape, pencil, circular saw, and wrench set. Having these components ready before you start will ensure a smooth installation process.
Adjustment Techniques
When dealing with uneven ground, several effective adjustment techniques can help you create a stable foundation for your shed. Start by thoroughly measuring the slope using a laser level or string level to determine the height difference across your site. For mild slopes (up to 6 inches), gravel and crushed stone can be used to create a level base, working from the lowest point upward.
For moderate slopes, concrete blocks or pre-cast pier blocks offer excellent adjustability. Stack them strategically at key points, using shims or additional blocks to achieve perfect levelness. Remember to ensure each support point bears an equal load to prevent future settling.
On significantly uneven terrain, consider implementing adjustable post brackets or screw piles. These allow for precise height adjustments even after installation, which is particularly valuable if ground settling occurs. Always use pressure-treated lumber for any wooden components in contact with the ground or concrete, and install drainage solutions around your foundation to prevent water accumulation.
For long-term stability, check your foundation’s level annually and make minor adjustments as needed using shims or by repositioning support blocks.
Cost Comparison and Recommendations
When comparing best foundation options for uneven ground, cost varies significantly based on slope severity and materials chosen. For gentle slopes (1-4 degrees), gravel pad foundations typically range from $300-$600, making them the most budget-friendly choice. On-grade block foundations cost approximately $400-$800, offering a good balance of affordability and stability.
For moderate slopes (5-10 degrees), pier and beam foundations become more practical, though costs increase to $800-$1,500. While pricier, they provide excellent stability and require less ground preparation. Concrete slab foundations, ranging from $1,000-$2,500, offer maximum durability but demand significant initial investment.
Steep slopes (over 10 degrees) usually require engineered solutions like reinforced concrete piers or retaining walls, pushing costs between $2,000-$4,000 or more. However, these provide the most reliable long-term solution for challenging terrain.
For optimal value, we recommend:
– Gentle slopes: Gravel pad or on-grade block foundations
– Moderate slopes: Pier and beam systems
– Steep slopes: Engineered solutions with concrete piers
Remember that investing in a proper foundation prevents costly repairs and structural issues down the line. Factor in local material costs and consider professional installation for complex terrain to ensure the best long-term results.
Building a shed foundation on uneven ground doesn’t have to be a daunting task when you choose the right solution for your specific situation. For gentle slopes under 2 feet, gravel pad foundations offer a cost-effective and relatively simple solution that most DIY enthusiasts can tackle. When dealing with moderate slopes between 2-4 feet, post and beam foundations provide excellent stability while being adaptable to various terrain challenges.
For severely uneven ground, pier block foundations or concrete slab foundations with retaining walls are your best options, though they require more investment and possibly professional help. Remember to always prioritize proper drainage and soil stability, regardless of which foundation type you choose.
Consider your budget, local building codes, and long-term maintenance requirements when making your final decision. If you’re working with a slope greater than 4 feet or have particularly challenging soil conditions, it’s worth consulting a professional to ensure your shed’s longevity and safety. Whatever foundation you choose, taking the time to properly prepare your site and install adequate drainage will save you headaches down the road.