
Save Your Cedar Shed Roof: Expert Preservation Tips That Really Work
Protect your cedar roof’s natural beauty and extend its lifespan with professional-grade preservation techniques proven to combat moisture damage and UV deterioration. Regular maintenance, including twice-yearly inspections and prompt repairs, prevents costly replacements while maintaining your home’s distinctive architectural charm. As part of essential garden shed maintenance, cedar roofs require specialized care to prevent common issues like moss growth, water penetration, and wood rot. Today’s advanced preservation methods combine traditional craftsmanship with modern sealants and treatments, offering homeowners practical solutions that protect their investment while preserving the wood’s natural oils and resistance to insects. Whether you’re maintaining a newly installed cedar roof or restoring an aging one, understanding proper preservation techniques ensures your roof remains both beautiful and functional for decades to come.\n\n\n
Why Cedar Roofs Need Special Care
\n\n
Natural Enemies of Cedar Roofing
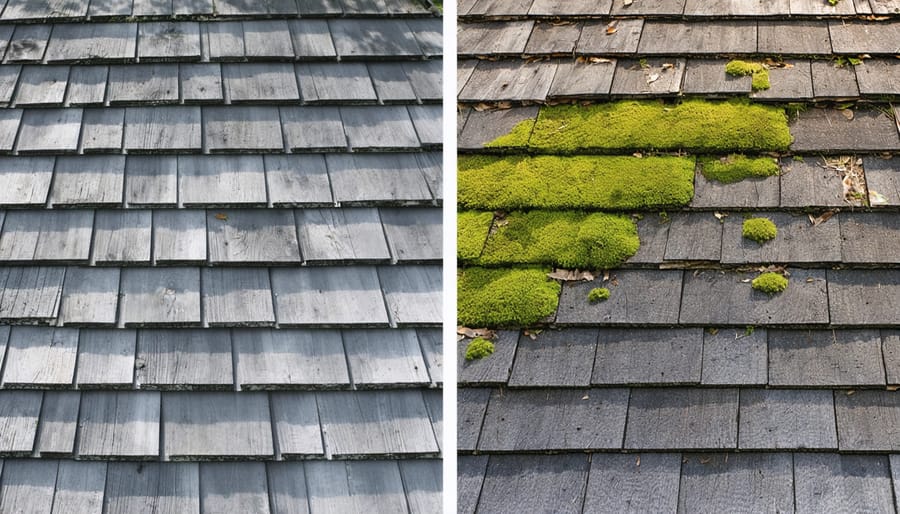
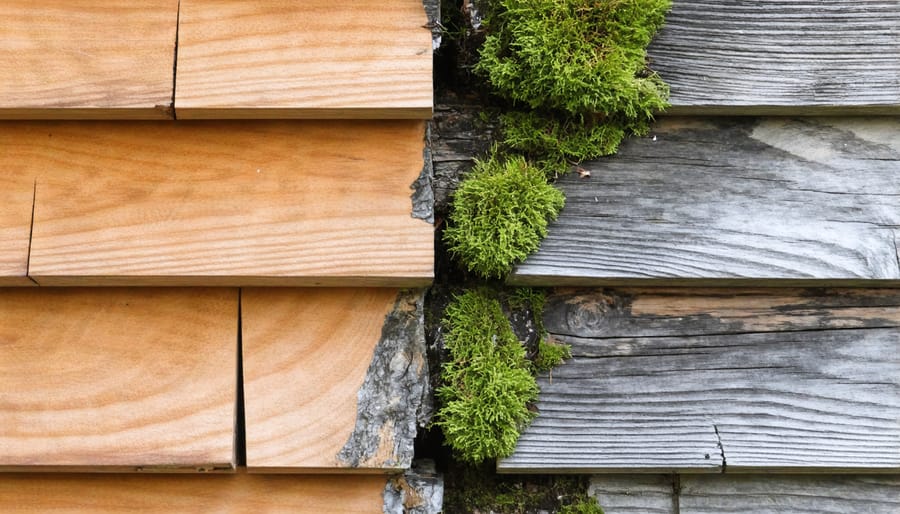
\n\nCedar roofs face several natural challenges that can affect their longevity and appearance. The sun’s ultraviolet (UV) rays are particularly harsh on cedar, causing the wood to gradually fade from its warm, rich color to a silvery gray. While this weathered look has its charm, excessive UV exposure can lead to wood deterioration if left unchecked.\n\nMoisture is another significant concern for cedar roofing. Rain, snow, and high humidity can penetrate the wood fibers, potentially leading to warping, splitting, or decay. In areas with poor ventilation or heavy shade, moisture retention becomes an even bigger issue, creating perfect conditions for moss and algae growth.\n\nSpeaking of moss, these persistent plants, along with lichens and algae, love to make themselves at home on cedar roofs. They trap moisture against the wood surface and can lift shingles, creating pathways for water to seep underneath. Additionally, falling leaves and pine needles can accumulate in valleys and gutters, trapping moisture and accelerating decay.\n\nWind and storm damage can also take their toll, potentially loosening or dislodging shingles over time. Regular inspection and maintenance are crucial to combat these natural enemies and ensure your cedar roof’s lasting beauty and protection.\n\n
Signs Your Cedar Roof Needs Attention
\n\nRegular inspections can help you spot potential issues with your cedar roof before they become major problems. Watch for curling or cupping shingles, which indicate moisture damage and aging. Dark spots or discoloration often signal the presence of moss, mildew, or fungal growth that can compromise your roof’s integrity.\n\nSplit or cracked shingles are another red flag, typically caused by weather exposure and natural aging. If you notice missing or loose shingles, particularly after storms, address these issues promptly to prevent water damage to your structure. Pay attention to excessive granules in your gutters, as this suggests your shingles are deteriorating.\n\nLook inside your shed for signs of water damage, such as dark stains on the ceiling or walls. A musty odor can indicate hidden moisture problems. Check your roof’s edges and valleys for any gaps or separation, as these areas are particularly vulnerable to water infiltration.\n\nDuring your inspection, note any shingles that appear bleached or gray, as this indicates UV damage and the need for protective treatment. These visual cues help you maintain your cedar roof’s beauty and functionality for years to come.\n\n
 \n
\n\n\n\n
Essential Preservation Techniques
\n\n
Regular Cleaning and Inspection
\n\nMaintaining your cedar roof starts with establishing a regular inspection routine. We recommend checking your roof thoroughly at least twice a year, ideally in spring and fall. Here’s a simple step-by-step process to keep your cedar roof in top condition:\n\n1. Start by removing debris like leaves, branches, and pine needles using a soft-bristled brush or leaf blower. Work from the top down to prevent debris from collecting in lower areas.\n\n2. Inspect for signs of wear, including cracked or curling shakes, moss growth, or areas of discoloration. Pay special attention to valleys and areas around chimneys or vents where moisture tends to collect.\n\n3. Clean the roof surface using a gentle mixture of water and specialized cedar cleaner. Avoid high-pressure washing, which can damage the wood fibers and force water under the shakes.\n\n4. Check for loose or missing shakes and ensure all fasteners are secure. Look for any signs of water damage or rot, particularly in shaded areas.\n\n5. Examine the gutters and ensure they’re clear of debris to prevent water backup.\n\n6. Document any areas of concern with photos for future reference and to track changes over time.\n\nRemember to wear appropriate safety gear and consider hiring a professional if you’re not comfortable working at height. Regular cleaning and inspection can significantly extend the life of your cedar roof while maintaining its natural beauty.\n\n
 \n
\n\n\n
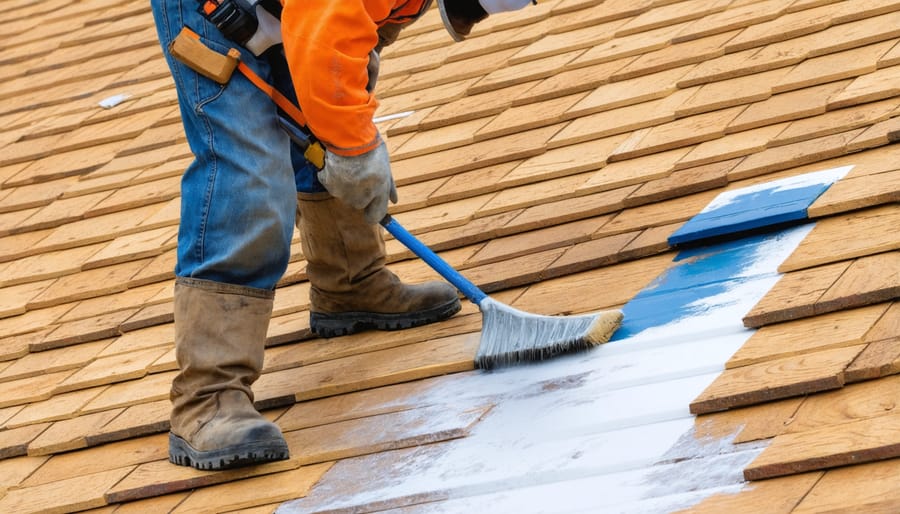
Protective Treatments and Sealants
\n\nProtecting your cedar roof with the right treatments and sealants is essential for its longevity and appearance. The most common protective options include water-resistant preservatives, UV-blocking finishes, and oil-based treatments that penetrate deep into the wood fibers.\n\nClear water repellents offer basic protection while maintaining cedar’s natural color. These treatments prevent moisture absorption without creating a surface film, allowing the wood to breathe naturally. For enhanced protection, choose preservatives with added UV inhibitors, which help prevent the silvery-gray weathering that occurs over time.\n\nSemi-transparent stains provide excellent protection while adding a subtle color that enhances cedar’s natural beauty. These products typically last 3-5 years and offer superior UV protection compared to clear treatments. For maximum durability, oil-based sealants penetrate deeply into the wood, offering comprehensive protection against moisture, sun damage, and insect infestation.\n\nWhen applying treatments, timing is crucial. Choose a dry day with moderate temperatures (50-80°F) and no rain forecast for at least 24 hours. Always clean the roof thoroughly and allow it to dry completely before application. For best results, use a sprayer or roller for even coverage, working in small sections and following the wood’s grain pattern.\n\nRemember to reapply treatments according to the manufacturer’s recommendations, typically every 3-5 years, depending on your climate and exposure levels.\n\n
Ventilation and Moisture Control
\n\nProper ventilation is crucial for extending the life of your cedar roof and preventing moisture damage. Without adequate airflow, moisture can become trapped beneath your shingles, leading to rot, mold, and premature deterioration of your cedar roofing.\n\nStart by ensuring your roof has sufficient intake and exhaust vents. Ridge vents along the peak of your roof, combined with soffit vents under the eaves, create an effective airflow system that helps regulate temperature and moisture levels. For every 300 square feet of attic floor space, you’ll want at least one square foot of ventilation area.\n\nCheck your vents regularly for blockages from leaves, debris, or pest nests. Clear any obstructions promptly to maintain proper airflow. Installing mesh screens over vent openings can help prevent future blockages while still allowing air to circulate freely.\n\nPay special attention to areas where moisture tends to accumulate, such as valleys and around chimneys. Ensure these areas have proper drainage and aren’t collecting debris that could trap moisture. Consider installing cedar breather materials during roof installation or replacement to create an additional ventilation layer between your cedar shingles and roof deck.\n\nDuring seasonal inspections, look for signs of poor ventilation, such as warped shingles, mold growth, or excess moisture in your attic space. Address these issues promptly to protect your investment in cedar roofing.\n\n\n
 \n
\n\n\n
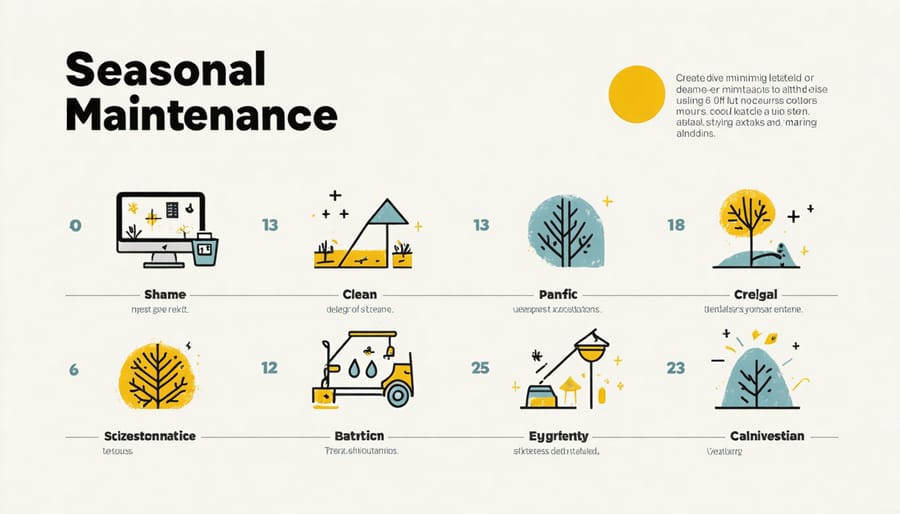
Seasonal Maintenance Schedule
\n\n
Spring and Summer Care
\n\nAs temperatures rise, your cedar roof requires special attention to maintain its durability and beauty. Begin by inspecting your roof for any winter damage, paying particular attention to loose or damaged shingles. Clean your cedar roof thoroughly using a soft-bristled brush to remove accumulated debris, moss, and algae. This not only enhances appearance but helps protect against pests and prevent moisture-related issues.\n\nConsider applying a UV-resistant cedar preservative during late spring when temperatures are mild and consistent. This timing allows the treatment to penetrate effectively and create a protective barrier before intense summer heat arrives. Choose a day with clear weather and ensure no rain is forecasted for at least 48 hours after application.\n\nDuring summer months, maintain good ventilation around your cedar roof by trimming overhanging branches and clearing gutters regularly. This prevents moisture buildup and reduces the risk of mold growth. Watch for signs of cedar shake curling or splitting, which can be exacerbated by intense sun exposure.\n\nFor optimal protection, consider installing zinc or copper strips near the roof’s peak. These metals naturally inhibit moss and algae growth when rainwater washes over them, providing ongoing protection throughout the warm seasons.\n\n
Fall and Winter Protection
\n\nAs temperatures drop, your cedar roof requires special attention to withstand the harsh elements of fall and winter. Start by thoroughly cleaning your roof before the first frost, removing any accumulated debris, leaves, or pine needles that could trap moisture and promote decay.\n\nConsider applying a winter-grade cedar preservative that offers enhanced moisture protection. These specialized treatments create a protective barrier against snow, ice, and freezing temperatures while allowing the wood to breathe naturally. Apply the treatment when temperatures are above 50°F (10°C) for optimal absorption.\n\nInstall zinc or copper strips near the roof’s ridge to prevent moss and algae growth during wet winter months. These metals release compounds that naturally discourage organic growth when it rains or snow melts.\n\nCheck your roof’s ventilation system before winter sets in. Proper airflow helps prevent ice dam formation and reduces moisture buildup in your attic space. Ensure all vents are clear and functioning correctly.\n\nDuring winter, use a roof rake with soft bristles to carefully remove heavy snow accumulation, leaving about an inch of snow for protection. Avoid using metal tools that could damage the cedar shakes. After major storms, inspect for any damage or loose shakes that winter winds might have caused.\n\nRemember to schedule a professional inspection in late fall to address any potential issues before they become major problems during winter months.\n\n\nMaintaining a cedar roof is an investment in your home’s beauty, durability, and value. Throughout this guide, we’ve explored the essential aspects of cedar roof preservation, from understanding early warning signs to implementing effective maintenance strategies. By following these guidelines, you can significantly extend the life of your cedar roof while preserving its natural charm and protective qualities.\n\nRemember that prevention is always better than cure when it comes to cedar roof care. Regular inspections, prompt cleaning, and timely treatments can help you avoid costly repairs and premature replacement. The natural oils and compounds in cedar make it naturally resistant to decay and insects, but proper maintenance is crucial to maintain these protective properties.\n\nThe seasonal approach to cedar roof care we’ve discussed ensures your roof receives the attention it needs throughout the year. Spring cleaning, summer inspections, fall debris removal, and winter weather preparation create a comprehensive maintenance cycle that keeps your roof in optimal condition.\n\nWhile the initial investment in cedar roof preservation might seem substantial, the long-term benefits far outweigh the costs. A well-maintained cedar roof can last 30-40 years or more, compared to just 15-20 years for a neglected one. Plus, the enhanced curb appeal and improved energy efficiency contribute to your home’s overall value.\n\nDon’t forget that professional inspections play a vital role in your maintenance routine. While many maintenance tasks can be handled by homeowners, expert assessments every few years can identify potential issues before they become serious problems.\n\nBy committing to proper cedar roof preservation, you’re not just protecting your home – you’re preserving a beautiful, natural roofing material that adds character and value to your property. With consistent care and attention, your cedar roof will continue to provide reliable protection and aesthetic appeal for decades to come.