
The Wall Panels That Transform Your Shed From Eyesore to Eye-Catcher
Your shed’s wall panels determine far more than appearance—they dictate durability, maintenance requirements, and long-term costs. Choose the wrong cladding material, and you’ll face warping within two years, constant repainting, or weather damage that compromises everything stored inside. Select wisely, and your shed becomes a low-maintenance asset that protects your belongings for decades.
The cladding decision comes down to balancing four factors: your budget constraints, the climate conditions where you live, how much ongoing maintenance you’re willing to handle, and whether you’re tackling installation yourself or hiring professionals. A homeowner in rainy Seattle needs different wall panels than someone in dry Arizona, just as a DIY enthusiast with basic tools has different options than someone hiring contractors.
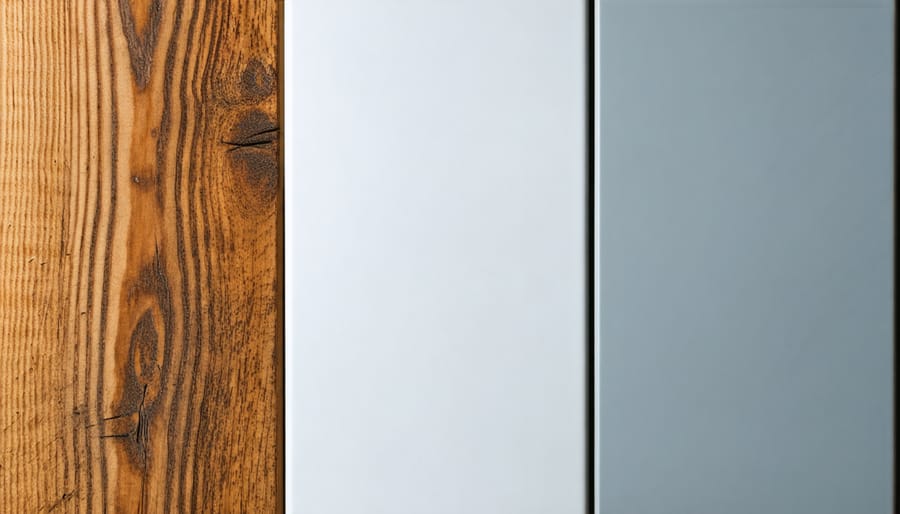
Understanding the material trade-offs prevents expensive mistakes. Vinyl panels offer weather resistance without painting but can crack in extreme cold. Wood siding delivers classic aesthetics but demands regular staining. Metal cladding provides unmatched durability yet shows dents and requires insulation considerations. Composite materials blend benefits from multiple sources but often carry premium pricing.
This guide breaks down each cladding option with real-world performance data, honest cost comparisons including installation and maintenance, and practical matching advice so you can confidently choose panels that suit your specific situation, skill level, and long-term expectations.
Why Your Shed Wall Panels Matter More Than You Think
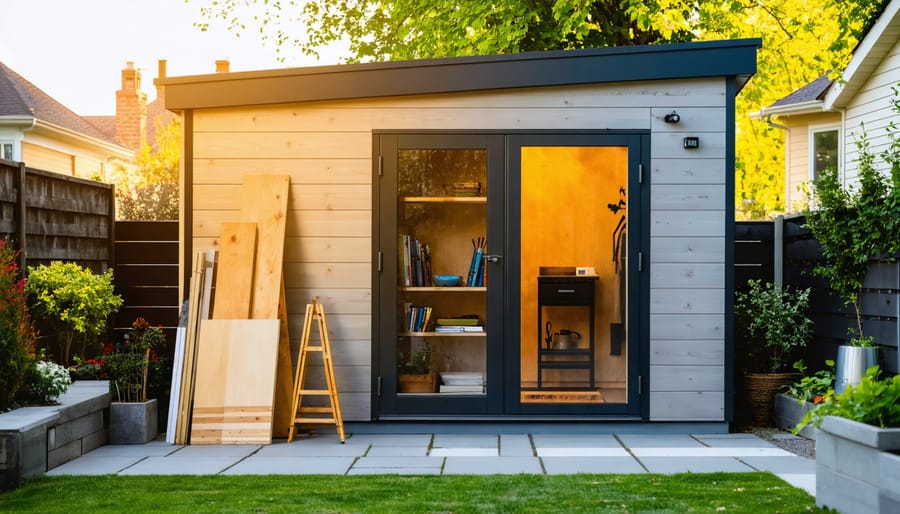
When most people plan a new shed, they focus on size and location—but here’s something many discover too late: your wall panels are the unsung heroes of your entire structure. These exterior surfaces do far more than simply make your shed look attractive (though that’s certainly a bonus).
Think of shed wall panels as your shed’s armor and face rolled into one. On the protection front, quality wall cladding shields your investment from relentless weather—rain, snow, UV rays, and wind-driven moisture that would otherwise seep into the structure. Just as protecting the bottom perimeter prevents water damage from below, proper wall panels guard against threats from every angle. They also deter pests like termites and carpenter ants from turning your storage space into their new home.
But protection is only half the story. Your shed is visible from your backyard, your neighbor’s yard, and sometimes from the street. A well-chosen wall panel material can complement your home’s architecture and boost your property’s curb appeal. Conversely, a cheap or mismatched choice can become an eyesore that diminishes your outdoor space.
Sarah, a homeowner from Ohio, learned this firsthand: “I went with the cheapest option initially and regretted it within two years. The panels warped, and it looked terrible. When I upgraded to quality panels, the difference was night and day—both in appearance and durability.”
This decision deserves thoughtful consideration because you’ll live with it for years to come.
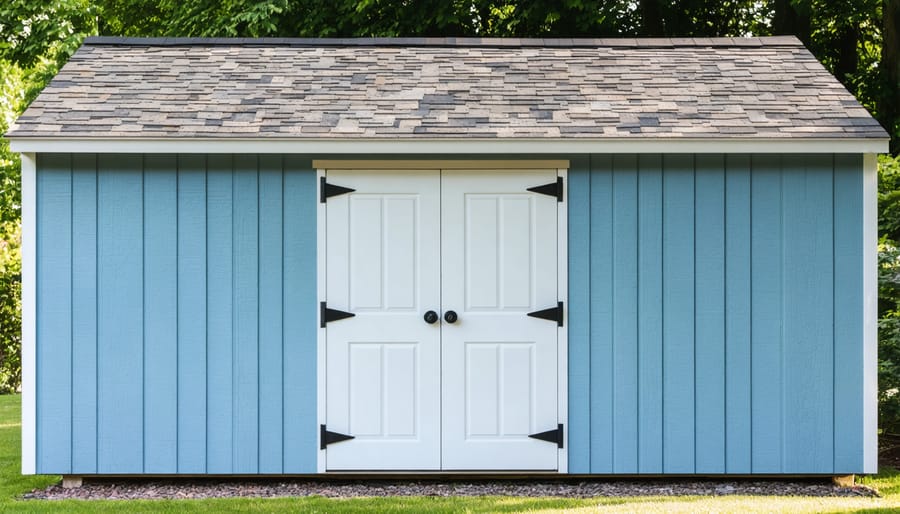
Wood Shed Wall Panels: Classic Appeal With a Catch
Best Wood Options for Long-Lasting Beauty
When choosing wood for your shed walls, selecting the right material ensures your investment stands the test of time while looking great year after year.
Cedar naturally resists rot, insects, and weather damage, making it a premium choice for shed exteriors. It weathers to a beautiful silver-gray patina or maintains its rich color with proper sealing. The downside? Cedar carries a higher price tag, though many homeowners find the longevity worth the investment.
Pressure-treated pine offers excellent value and widespread availability. Chemical treatments protect against rot and pests, making it ideal for budget-conscious projects. However, it requires regular maintenance including staining or painting, and proper handling during installation is important due to the treatment chemicals.
Engineered wood products like T1-11 siding combine affordability with decent durability. These panels install quickly and provide a finished look right away. They’re particularly popular for DIY projects because they cover large areas efficiently. The catch is they need consistent maintenance, including waterproofing plywood panels annually to prevent moisture damage and delamination.
One satisfied shed owner shared: “I went with cedar for the front-facing walls and pressure-treated pine for the sides. Five years later, it still looks fantastic with minimal upkeep.” This mixed approach lets you maximize beauty where it counts while managing costs effectively.
What Wood Cladding Actually Costs You
Let’s talk numbers. Wood cladding typically runs between $3-8 per square foot for materials, depending on species and grade. For an average 10×12 shed, expect to invest $500-1,200 just for the cladding itself.
But here’s where it gets real: maintenance costs add up quickly. You’ll need to reseal or repaint every 2-3 years at around $150-300 per session. Over 10 years, that’s an additional $600-1,200 in upkeep.
Sarah from Oregon shares her experience: “I budgeted for the wood panels but didn’t anticipate the ongoing maintenance. Between weather damage repairs and repainting, I’ve spent nearly as much maintaining them as the initial purchase.”
Factor in potential repairs for warping, rot, or pest damage—anywhere from $200-500 over a decade—and your true 10-year cost sits between $1,800-3,400. While wood’s charm is undeniable, being prepared for these ongoing expenses helps avoid sticker shock down the road and keeps your shed looking great year after year.
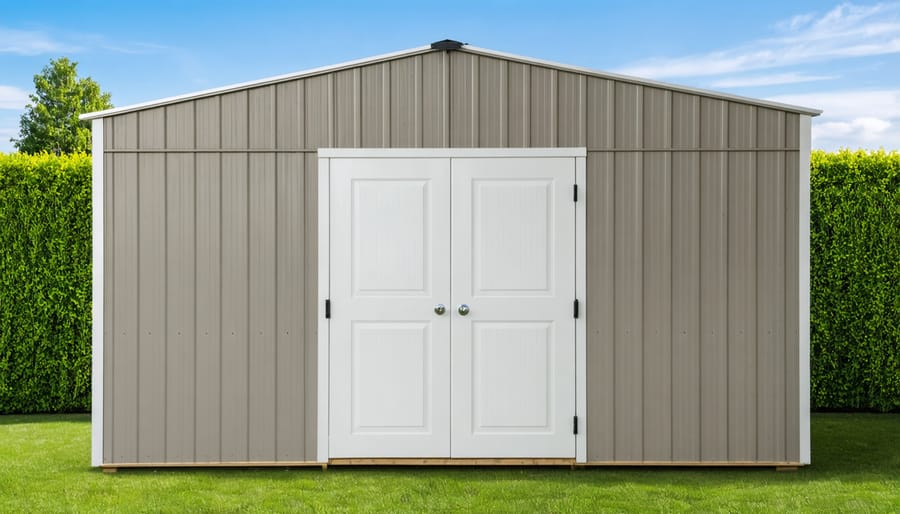
Metal Wall Panels: The Tough Choice That Lasts Decades
Steel vs. Aluminum: Which Metal Wins?
When it comes to metal shed panels, steel and aluminum are your top contenders, each with distinct advantages depending on your situation.
Steel panels are the go-to choice for durability and security. They’re incredibly strong, making them ideal if you’re storing valuable equipment or live in areas with extreme weather. Modern galvanized or coated steel resists rust effectively, especially if you maintain the finish. One homeowner in Colorado shared that her steel-paneled shed has withstood heavy snow loads for over 15 years without buckling. The trade-off? Steel is heavier, which can make DIY installation more challenging, and it typically costs slightly more upfront.
Aluminum panels shine when weight and corrosion resistance matter most. They’re naturally rust-proof, making them perfect for coastal areas or humid climates. Their lighter weight means easier handling during installation—a real benefit for weekend DIY projects. Aluminum also requires virtually no maintenance over its lifetime. However, aluminum dents more easily than steel, so it may not be the best choice if your shed sits near active play areas or high-traffic zones.
The bottom line? Choose steel for maximum strength and security, or aluminum for easy installation and zero rust worries in challenging climates.
Vinyl and Plastic Panels: Low-Maintenance Favorites
Why Homeowners Are Switching to Vinyl
Homeowners are making the switch to vinyl shed wall panels for one simple reason: they want their weekends back. Sarah from Portland shares, “I used to spend every spring repainting my wooden shed. Now with vinyl cladding, I just hose it down once a year and it looks brand new.” This sentiment echoes across countless homeowner experiences.
Mike, a busy dad of three, found vinyl panels transformed his backyard eyesore into an attractive storage space. “Installation took me one Saturday instead of a whole week. The panels just clicked together, and I didn’t need special tools,” he explains.
The practical benefits shine through in real situations too. Jennifer discovered vinyl’s durability firsthand when a storm knocked a branch against her shed. “The panel popped right back into place. With wood, I would’ve needed repairs and repainting.”
For homeowners juggling work, family, and home maintenance, vinyl panels offer a set-it-and-forget-it solution that doesn’t sacrifice curb appeal.
Fiber Cement and Engineered Options: The Best of Both Worlds
If you’re drawn to the classic look of wood but cringe at the thought of annual painting and sealing, fiber cement and engineered composite panels might be your perfect match. These modern materials are game-changers for shed walls, offering the best features of traditional options without their typical headaches.
Fiber cement panels combine wood fibers, cement, and sand to create incredibly durable siding that can faithfully replicate wood grain textures. They resist rot, insects, and fire far better than natural wood, and they won’t warp or split over time. Many homeowners love that they can achieve that charming cottage aesthetic without the constant upkeep.
Engineered wood composites take a similar approach, bonding wood fibers with resins and protective coatings. The result is a material that looks authentically wooden but stands up to moisture and temperature swings much better than solid lumber. “I was skeptical at first,” shares David from Oregon, “but after three years, my shed still looks freshly built while my neighbor’s cedar siding needs refinishing again.”
The maintenance advantage is significant. While you’ll need to repaint eventually, these materials typically require attention every 10-15 years rather than annually. They’re also dimensionally stable, meaning fewer gaps and cracks as seasons change.
Installation is straightforward for DIYers comfortable with basic carpentry, though fiber cement requires specialized cutting tools due to its density. The upfront cost sits between vinyl and premium wood, making these options a smart middle-ground investment for durability-focused homeowners.
Matching Your Wall Panels to Your Shed’s Purpose
Not all sheds serve the same purpose, so why should their wall panels be one-size-fits-all? The right cladding choice depends on what you’re storing, your local weather, and how long you need your shed to last.
If you’re storing basic garden tools and seasonal decorations, economy-friendly options like T1-11 siding or vinyl panels work beautifully. These materials handle occasional moisture from damp gardening gloves and provide adequate protection for items that aren’t temperature-sensitive. Sarah from Oregon shares: “My vinyl-sided shed has housed my patio furniture and lawn equipment for five years without any issues, and I’ve done zero maintenance.”
Planning a workshop or storing valuable equipment? Step up to LP SmartSide or quality engineered wood with proper wall framing. These materials offer better durability and can support shelving systems for heavier tools. They also provide superior insulation if you’re working in the space during colder months.
Climate plays a huge role too. Coastal areas with salt air demand vinyl or fiber cement panels that won’t corrode. Regions with harsh winters and temperature swings benefit from wood composite materials that expand and contract without cracking. Hot, dry climates do well with nearly any material, though UV-resistant options prevent fading.
Here’s a simple framework: Match your investment in wall panels to your shed’s importance and the value of what’s inside. A basic storage shed on a solid foundation storing $200 worth of rakes needs different panels than a climate-controlled workshop housing $5,000 in power tools.
Consider your 10-year outlook. Will you upgrade to a garage eventually, or is this your permanent solution? Your answer guides whether budget-friendly or premium panels make the most sense.
Installation Reality Check: What You Need to Know
Let’s be real about what you’re getting into with shed panel installation. The good news? Many homeowners successfully tackle this as a DIY project, especially with wood panels and vinyl siding. These materials are forgiving and typically require just basic carpentry skills—think measuring, cutting, and nailing. You’ll need a circular saw, level, drill, and a free weekend or two. One homeowner from Ohio told us she paneled her 10×12 shed in two Saturday afternoons with her teenage son helping.
Metal panels present a moderate challenge. The panels themselves install quickly, but you’ll need metal shears or a nibbler, and cutting corrugated steel takes practice. The sharp edges demand safety gloves and careful handling. If you’re comfortable with power tools and have experience with home projects, this is doable.
Fiber cement is where things get serious. These panels are heavy—around 2.5 pounds per square foot—and require specialized cutting tools that minimize silica dust. You’ll also need a helper for lifting and positioning. Unless you have concrete cutting experience and proper safety equipment, strongly consider hiring a pro for this material.
Here’s the deciding factor: hire help if you’re working above 8 feet, dealing with complex angles, or feeling uncertain about structural support. Professional installers typically complete jobs in 1-2 days versus your 2-4 weekends, and they guarantee weatherproofing. Sometimes peace of mind is worth the investment, especially when protecting your stored valuables from the elements.
Making Your Wall Panels Last: Simple Protection Tips
A little regular attention goes a long way in keeping your shed panels looking great and performing well. The good news? Most maintenance takes just minutes and can save you from costly repairs down the road.
For wood panels, think seasonally. Each spring and fall, walk around your shed looking for peeling paint or stain, especially near the ground where moisture loves to sneak in. A quick touch-up with matching paint prevents water damage before it starts. Check for any warping or splitting boards—catching these early means a simple board replacement instead of major repairs. One homeowner told us she sets a reminder on her phone twice a year, and it’s become as routine as changing smoke detector batteries.
Metal panels need far less fussing, but they’re not invincible. Once or twice yearly, spray them down with a garden hose to remove dirt and debris that can trap moisture. Look for scratches in the coating and touch them up promptly—exposed metal invites rust. If you live near the coast, rinse more frequently to wash away salt spray.
Vinyl panels are the low-maintenance champions. An annual wash with mild soap and water keeps them fresh, and you’re essentially done. Just watch for any cracks around fasteners, which occasionally happen in extreme temperature swings.
No matter your material, keep vegetation trimmed back at least six inches from panels. Branches scratching against siding and moisture from overgrown plants are universal troublemakers that no cladding appreciates.
Choosing the right wall panels for your shed doesn’t have to feel overwhelming. Think of it as matching the solution to what matters most in your situation. If you’re working with a tight budget and enjoy hands-on maintenance, traditional wood panels might be your sweet spot. For those who’d rather spend weekends relaxing than repainting, vinyl or metal could save you countless hours down the road. Live in a harsh climate with extreme weather? Durability becomes your priority, making engineered wood or steel worth the investment.
Remember, there’s no universally perfect choice—only the perfect choice for you. Consider your local weather patterns, how much time you realistically have for upkeep, and what you can comfortably spend both now and over the years ahead. Many homeowners find success by balancing two priorities: perhaps splurging on premium materials for walls facing the weather while choosing economical options for protected sides.
You’ve done the research, weighed the options, and now you’re equipped to make a confident decision. Trust your assessment of your needs, and don’t second-guess yourself. Your ideal shed is closer than you think.