
Transform Your Shed Into a Professional Storage Haven (With Interior Finishing Secrets)
Transform your basic storage shed into a functional workspace by installing insulation, proper lighting, and moisture barriers before adding interior finishes. Strategic planning helps maximize your storage space while creating a comfortable, year-round environment. Custom shelving, pegboard walls, and modular storage systems adapt to your specific needs, whether you’re creating a workshop, home office, or organized storage area. Professional-grade materials like moisture-resistant drywall, vinyl flooring, and LED lighting fixtures ensure durability while maintaining a polished, home-like atmosphere that increases your property’s value and extends usable square footage beyond your main house.\n\n\n
Planning Your Finished Shed Interior
\n\n
Space Assessment and Layout Design
\n\nBefore diving into organizing your shed’s interior, take time to assess your available space and create an efficient storage layout design. Start by measuring your shed’s interior dimensions, including height, width, and depth. Don’t forget to account for windows, doors, and any structural elements that might impact your storage capacity.\n\nDivide your shed into distinct zones based on how you’ll use the space. Consider creating areas for frequently accessed items near the entrance, seasonal storage towards the back, and workspace zones if needed. Use graph paper or a digital planning tool to sketch your layout, allowing for adequate walkways (at least 30 inches wide) between storage areas.\n\nWhen planning vertical space, mark off three zones: floor-level for heavy items, mid-level for frequently used tools and supplies, and upper-level for lightweight or seasonal items. This approach maximizes your storage potential while keeping everything accessible and organized.\n\nRemember to factor in future needs – leave some flexibility in your design for additional storage solutions as your requirements change over time. This forethought will help create a more sustainable and adaptable storage system.\n\n
 \n
\n\n\n
Material Selection for Interior Walls
\n\nWhen it comes to finishing your shed’s interior walls, several practical options can enhance both functionality and appearance. Drywall remains a popular choice, offering a clean, professional look and excellent durability. It’s perfect for hanging storage solutions and creates a home-like atmosphere in your shed.\n\nPlywood presents another versatile option, particularly 1/2-inch or 3/4-inch sheets. Its natural strength makes it ideal for mounting heavy items, and you won’t need to search for wall studs when installing shelves or hooks. Plus, it’s more resistant to moisture than drywall.\n\nFor a budget-friendly alternative, consider oriented strand board (OSB). While not as aesthetically pleasing as other options, it provides solid mounting surfaces for storage systems and handles humidity well. Paint it for a more finished look.\n\nPegboard offers exceptional versatility for tool storage and organization. Install it over existing walls or use it as panels in specific areas. Some homeowners combine materials, like using plywood for the lower half of walls and drywall above, maximizing both functionality and appearance.\n\nRemember to consider your climate and shed’s usage when selecting materials. A proper vapor barrier behind your chosen material will protect against moisture issues and extend your shed’s life.\n\n\n
Custom Storage Solutions for Your Finished Interior
\n\n
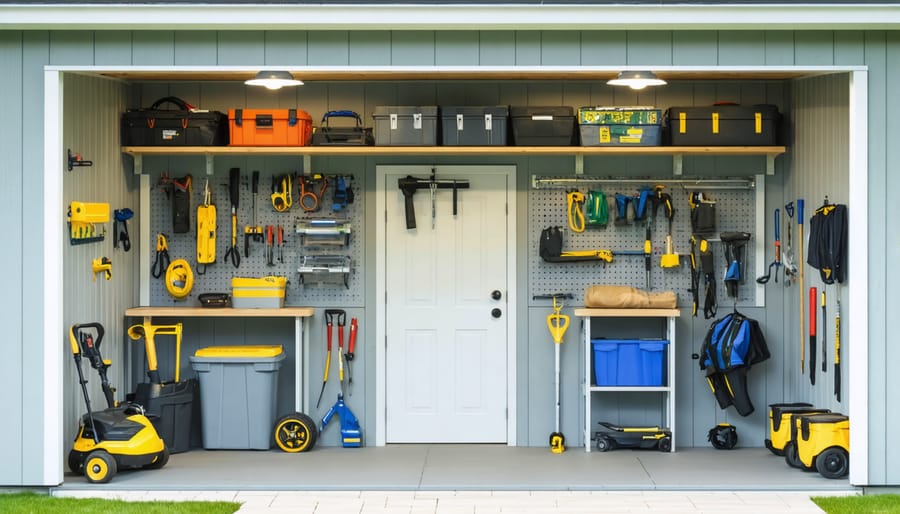
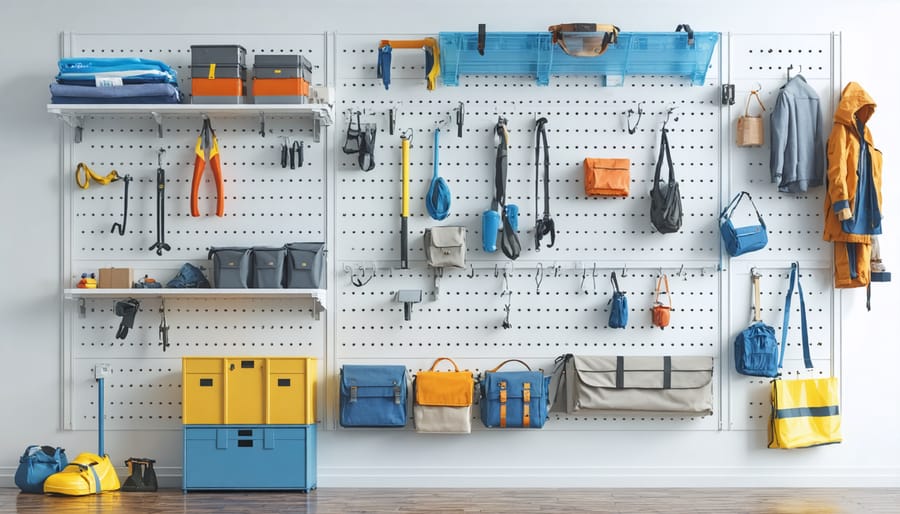
Wall-Mounted Storage Systems
\n\nMaking the most of your finished shed’s vertical space starts with choosing the right wall-mounted storage systems. A well-planned arrangement of hooks, shelves, and specialized organizers can transform your walls into efficient storage zones while maintaining the polished look of your interior finish.\n\nStart by installing a sturdy track system that attaches securely to your wall studs. These versatile systems allow you to add or remove hooks, brackets, and shelves as your storage needs change. For tools and garden equipment, heavy-duty hooks and tool holders keep items easily accessible while protecting your finished walls from damage.\n\nAdjustable shelving units are perfect for storing bins, boxes, and smaller items. Consider installing floating shelves that complement your interior finish – wooden shelves pair beautifully with paneled walls, while sleek metal options work well with modern finishes. For frequently used items, magnetic strips or pegboards create easily customizable storage solutions that keep tools and supplies within arm’s reach.\n\nDon’t forget about corners and spaces above windows and doors. Corner shelving units maximize these often-overlooked areas, while overhead storage racks make use of ceiling space for seasonal items. Wire baskets and mesh organizers are excellent for storing smaller items while maintaining visibility and airflow.\n\nRemember to consider the weight capacity of your walls and mounting hardware when planning your storage system. Always use appropriate anchors and follow manufacturer guidelines to ensure safety and longevity of your installation.\n\n
 \n
\n\n\n
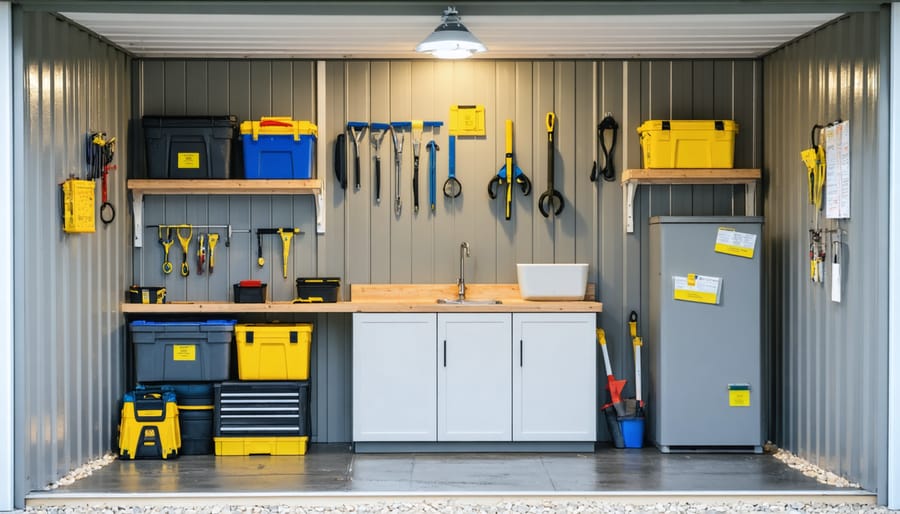
Built-in Shelving and Cabinets
\n\nBuilt-in shelving and cabinets transform your finished shed into a highly organized space that maximizes every square inch. By integrating storage solutions directly into your walls, you’ll create a sleek, clutter-free environment that feels more like an extension of your home than a typical garden shed.\n\nStart by mapping out your storage needs and identifying prime locations for built-ins. Corner spaces often work well for floor-to-ceiling shelving units, while wall-mounted cabinets can be installed at comfortable reaching height. Consider incorporating a mix of open shelving for frequently accessed items and closed cabinets for storing less attractive essentials.\n\nWhen designing your built-ins, match them to your shed’s finished walls for a cohesive look. If you’ve used drywall, paint your shelving units the same color for a seamless appearance. For wooden wall finishes, consider using the same or complementary wood types for your storage solutions.\n\nDon’t forget to include adjustable shelving options to accommodate items of various sizes. Installing track systems allows you to modify shelf heights as your storage needs change over time. Add finishing touches like cabinet handles and shelf lips to prevent items from falling, especially in areas prone to vibration.\n\nFor maximum durability, secure all units properly to wall studs and consider adding support brackets for heavy-duty shelving. This ensures your storage solutions remain stable and safe while maintaining their aesthetic appeal for years to come.\n\n
Overhead Storage Solutions
\n\nMaking the most of your finished shed’s ceiling space can dramatically increase your storage capacity without compromising the polished look of your interior. Overhead storage solutions offer an elegant way to keep items organized while maintaining the professional appearance of your finished walls and floors.\n\nConsider installing sliding storage racks that mount directly to your ceiling joists. These systems allow you to slide plastic bins or storage containers above your head, keeping seasonal items accessible yet out of sight. Look for models with smooth-rolling wheels and secure locking mechanisms to ensure safe operation.\n\nOverhead pulley systems present another smart option, particularly for storing bikes, kayaks, or large equipment. These systems can be integrated with your finished ceiling using discrete mounting brackets that complement your interior design. Many modern pulley systems feature safety locks and controlled descent mechanisms for peace of mind.\n\nCustom-built overhead cabinets that match your wall finish can provide enclosed storage while adding architectural interest to your space. Install these along the upper walls or in ceiling corners where they won’t interfere with movement below. For frequently accessed items, consider adding LED strip lighting underneath to illuminate your workspace.\n\nRemember to account for ceiling height when planning overhead storage – you’ll want to ensure comfortable clearance for walking and working. It’s also crucial to verify your ceiling’s load-bearing capacity before installing any storage system, especially in prefabricated sheds.\n\n\n
Climate Control and Insulation
\n\n
Moisture Prevention
\n\nProtecting your stored items from moisture is crucial in maintaining a functional finished shed interior. Start by installing a proper vapor barrier behind your wall panels to prevent condensation from seeping through. Quality insulation not only regulates temperature but also helps control humidity levels inside your shed.\n\nConsider installing a small dehumidifier during humid seasons, and ensure proper ventilation through strategically placed vents or a small exhaust fan. For flooring, elevate wooden materials slightly off the concrete base using plastic sheeting or moisture-resistant underlayment to create a barrier against ground moisture.\n\nStore items in plastic containers rather than cardboard boxes, and use moisture-absorbing products like silica gel packets in storage areas. Keep valuable items on shelves rather than directly on the floor, and maintain a few inches of clearance between stored items and walls to promote air circulation.\n\nRegular maintenance checks for leaks or water damage, especially around windows and doors, will help catch potential moisture issues before they become serious problems. Remember, a dry shed interior is essential for protecting both your stored items and your finished surfaces.\n\n
Temperature Management
\n\nA finished interior provides excellent temperature regulation, making your shed a more reliable storage space throughout the year. The insulated walls and ceiling help maintain consistent temperatures, protecting your belongings from extreme heat and cold. This is particularly important for sensitive items like electronics, photographs, or wooden furniture that can be damaged by temperature fluctuations.\n\nTo maximize your shed’s temperature management capabilities, consider implementing additional climate control solutions such as ventilation fans or small heating units. The finished walls create an ideal surface for mounting these accessories while concealing any necessary wiring or ductwork.\n\nDuring summer months, the insulated walls help reflect heat, keeping the interior significantly cooler than unfinished sheds. In winter, the same insulation prevents heat loss, protecting stored items from freezing temperatures. For optimal results, ensure all seams are properly sealed and consider adding weather stripping around doors and windows to prevent drafts. This comprehensive approach to temperature management will extend the life of both your shed and its contents.\n\n\n
Lighting and Electrical Considerations
\n\n
Lighting Installation
\n\nProper lighting transforms your finished shed from a basic storage space into a functional and inviting area. Start with a combination of ambient and task lighting to ensure every corner is well-illuminated. Install LED ceiling fixtures for overall brightness, spacing them evenly to eliminate shadows. Consider 4000K-5000K color temperature bulbs, which provide natural-looking light perfect for detailed work.\n\nFor workbenches or specific activity areas, mount adjustable LED strip lights underneath cabinets or shelving. These provide focused illumination without creating glare or taking up valuable space. Battery-operated motion sensor lights are excellent additions for less-frequently accessed storage areas, automatically illuminating when you need them.\n\nDon’t forget about natural light – if your shed has windows, maximize their potential by keeping them unobstructed and clean. For areas where electrical wiring might be challenging, solar-powered skylights offer an energy-efficient alternative that brings in plenty of daylight.\n\nRemember to install light switches near the entrance and consider adding secondary switches at the back of larger sheds. For enhanced convenience, smart lighting systems allow you to control your shed’s lights from your phone or set up automated schedules. Weather-resistant fixtures and proper electrical conduit installation are essential to ensure your lighting system remains safe and functional throughout the seasons.\n\n
 \n
\n\n\n
Electrical Planning
\n\nProper electrical planning is crucial when finishing your shed’s interior to ensure safety and functionality. Before installing any walls or insulation, map out your electrical needs, including lighting, outlets, and any specific power requirements for tools or equipment. Working with a qualified electrician is recommended for electrical system installation to ensure compliance with local building codes.\n\nConsider installing a dedicated electrical subpanel in your shed, which provides better control and safety features. Plan outlet placement at convenient heights and locations, typically every 6 feet along walls where you might need power tools or equipment. For lighting, combine overhead fixtures with task lighting near workbenches or storage areas.\n\nWhen running wires, use proper electrical conduit to protect cables within the walls. Install junction boxes before completing wall panels, and ensure all electrical components are rated for your shed’s environment. Include weatherproof outlets for any exterior connections, and consider adding surge protection for sensitive equipment.\n\nDon’t forget to plan for future needs – installing extra conduit and junction boxes during the initial build makes it easier to add circuits later. Label all circuits clearly in your electrical panel, and keep a detailed diagram of wire routing behind finished walls for future reference.\n\nRemember to schedule inspections at appropriate stages of the project to ensure all electrical work meets safety standards before sealing up walls.\n\n\nA finished interior shed transforms an ordinary storage space into a versatile, organized, and enjoyable extension of your home. By taking the time to properly plan and execute your interior finishing project, you’ll create a space that not only protects your belongings but also adds value to your property. The benefits are clear: improved organization, better protection from the elements, enhanced aesthetics, and the potential for multiple uses beyond simple storage.\n\nWhether you’re creating a gardening haven, a workshop, or a multi-purpose storage solution, a finished interior provides the perfect foundation for your needs. The combination of proper insulation, wall covering, and thoughtful storage solutions ensures your shed remains functional throughout all seasons while keeping your items safe and accessible.\n\nRemember that finishing your shed’s interior is an investment that pays dividends in both the short and long term. Not only will you enjoy immediate benefits like better organization and increased usability, but you’ll also protect your stored items from moisture, temperature fluctuations, and pest damage.\n\nReady to start your shed interior finishing project? Begin by assessing your needs, gathering materials, and creating a detailed plan. With proper preparation and attention to detail, you can transform your basic shed into a beautiful, functional space that serves your specific needs for years to come. The satisfaction of completing this project and enjoying your newly finished space makes it well worth the effort.