


Build the Perfect Pet Shelter: A Simple 3-Sided Kit That Keeps Your Animals Safe

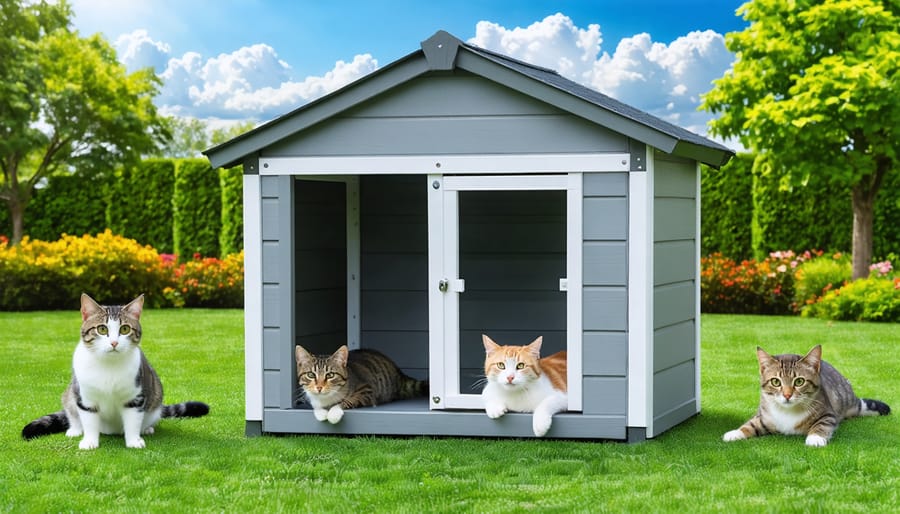
Transform your backyard into a protective outdoor pet haven with a 3-sided animal shelter kit – the perfect balance of shelter and accessibility for outdoor pets and livestock. These versatile structures provide essential protection from rain, wind, and harsh sunlight while allowing animals to move freely in and out of their sanctuary. Built with durability in mind, these shelters feature weather-resistant materials, elevated flooring to prevent moisture damage, and strategic ventilation to maintain comfortable temperatures year-round. Whether you’re housing farm animals, creating a feral cat shelter, or protecting outdoor dogs, a properly installed 3-sided shelter offers the ideal combination of protection and freedom that outdoor animals need to thrive in any weather condition.\n\n\n
Why Choose a 3-Sided Animal Shelter?
A 3-sided animal shelter strikes a practical balance between protection and openness, making it an excellent choice for livestock, horses, goats, and other animals that benefit from shelter without complete enclosure. Unlike fully enclosed barns that can trap heat and moisture, or completely open spaces that offer little protection, these shelters provide targeted coverage where it matters most.
The open front design allows animals to move freely in and out, reducing stress and preventing the claustrophobic conditions that can develop in fully closed structures. Natural air circulation keeps bedding drier and minimizes respiratory issues caused by ammonia buildup and poor ventilation. During hot summer months, the cross-breeze provides natural cooling without the expense of fans or mechanical ventilation systems.
Pros
- Natural ventilation reduces respiratory problems and keeps animals healthier.
- Lower construction and material costs compared to fully enclosed barns.
- Animals can enter and exit freely without claustrophobia or stress.
- Easier daily maintenance with better light and accessibility.
- Reduced moisture buildup keeps bedding drier longer.
Cons
- Limited protection during severe storms or extreme cold when positioned incorrectly.
- Wind-driven rain or snow can reach interior space depending on orientation.
- May require strategic placement to block prevailing winds.
- Offers less security against predators in some rural settings.
Cost-effectiveness is another significant advantage. A 3-sided shelter kit requires fewer materials and less complex framing than a four-walled structure, translating to savings on both the initial purchase and installation labor. You’ll also save on ongoing costs since natural ventilation eliminates the need for powered ventilation systems and their associated energy bills.
The key to maximizing these benefits is proper site preparation and orientation. Position the open side away from prevailing winds and winter storms to shield animals from harsh weather while still allowing them easy access. Many farmers orient the opening toward the south or southeast to capture warming sunlight in winter while the roof and walls provide shade during summer heat.
For pet owners looking to create comfortable outdoor spaces, the same principles apply. Whether you’re building an outdoor haven for your German Shepherd or housing smaller animals, a 3-sided shelter offers protection without isolation, keeping your animals comfortable year-round without breaking the budget.
Weather Protection Features
Our 3-sided shelter kit features thoughtfully designed weather protection elements that keep your animals safe and comfortable in various conditions. The extended roof overhang prevents rain and snow from entering the shelter while allowing for proper ventilation. This clever design ensures your animals stay dry without feeling confined.
The side panels are strategically positioned to block prevailing winds while maintaining an open front for easy access. During winter months, this configuration creates a cozy microclimate inside the shelter, while summer breezes can still flow through to prevent overheating. The shelter’s orientation helps divert drifting snow around ends rather than into the protected area. The shelter’s height and depth are carefully calculated to provide shade throughout the day as the sun moves across the sky.
Each panel features weather-resistant materials and protective coatings that stand up to harsh elements. The roof’s slight pitch encourages water runoff, preventing pooling that could compromise the structure over time. Corner joints are reinforced and sealed to eliminate drafts, ensuring your animals remain comfortable year-round while still enjoying the benefits of fresh air and natural light.
Complete assembled 3-sided shelter in outdoor setting showing weather protection features
Natural Comfort Benefits
\n\nThe three-sided design of this shelter kit perfectly mirrors animals’ natural instincts for protection and comfort. Animals in the wild often seek spaces that offer protection from the elements while maintaining a clear view of their surroundings. The open front allows them to observe potential threats while staying dry and protected, reducing anxiety and stress.\n\nThe shelter’s depth provides a cozy retreat during harsh weather, while the raised floor keeps animals off cold, wet ground. This elevation is particularly important as it matches their instinct to seek higher ground for safety and warmth. The roof overhang offers additional protection from rain and sun, creating a comfortable microclimate inside the shelter.\n\nWhether for livestock or pets, this design encourages natural behaviors like nesting and territorial marking, making animals feel more secure in their environment. The simple yet thoughtful layout helps them feel protected without feeling trapped.\n\n\n
Components and Assembly
\n\n
 \n
\n\n\n
Kit Contents
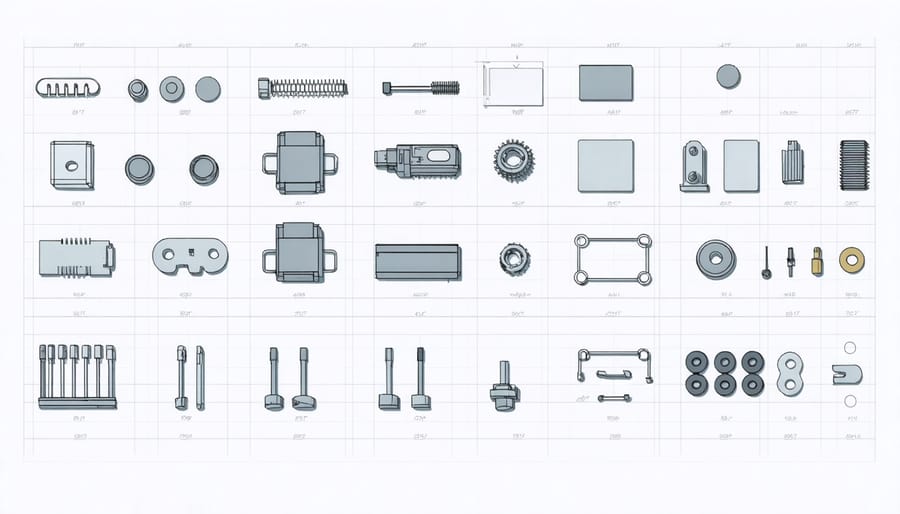
\n\nYour 3-sided animal shelter kit comes complete with everything needed for a quick and straightforward assembly. The base package includes pre-cut, weather-treated wooden panels for the back wall and two side walls, each designed for optimal ventilation and protection. The roof assembly consists of durable metal sheeting, complete with necessary overlap for proper water runoff, along with reinforced support beams.\n\nAll essential hardware is included: rust-resistant screws, heavy-duty hinges, corner brackets, and mounting plates. You’ll also find weatherproof sealant for protecting joints and seams, plus detailed assembly instructions with clear diagrams. The kit features adjustable feet for uneven terrain and ground anchoring stakes for added stability.\n\nFor ease of assembly, we’ve included numbered components and color-coded hardware packets. A basic tool checklist is provided, though most standard household tools will work fine. The package also contains touch-up paint and protective wood sealant to maintain your shelter’s appearance and durability over time.\n\nAdditional optional components like feed bins, water bottle holders, and comfort mats are available separately to customize your shelter based on your specific needs.\n\n
- Pre-cut, weather-treated wooden panels (back wall and two side walls)
- Durable metal roofing sheets with reinforced support beams
- Rust-resistant screws, heavy-duty hinges, corner brackets, and mounting plates
- Weatherproof sealant for joints and seams
- Detailed assembly instructions with clear diagrams
- Adjustable feet for uneven terrain
- Ground anchoring stakes for stability
- Numbered components and color-coded hardware packets
- Touch-up paint and protective wood sealant
- Optional upgrades: floor panels, insulation kits, feed bins, and water bottle holders (sold separately)
Tools Needed
\n\nTo successfully assemble your 3-sided animal shelter kit, you’ll need a basic set of tools and possibly a helping hand. Essential tools include a cordless drill with various drill bits, a hammer, a level, measuring tape, and a utility knife. You’ll also want to have a set of screwdrivers (both Phillips and flathead), adjustable wrenches, and pliers on hand.\n\nFor safety and convenience, we recommend wearing work gloves and safety glasses throughout the assembly process. A sturdy step ladder might be necessary for reaching higher sections during construction. Having a rubber mallet can be helpful for gentle adjustments without damaging the materials.\n\nOptional but helpful tools include:\n- Power saw (if any custom cuts are needed)\n- Square tool for checking angles\n- Pencil for marking\n- Work table or sawhorses\n- Socket set\n- Extension cord (if using corded tools)\n\nBefore starting assembly, gather all tools in your work area and ensure batteries for cordless tools are fully charged. Having a helper during assembly can make the process much smoother, especially when handling larger panels or aligning sections.\n\n\n
Installation and Placement Tips
\n\n
Step-by-Step Assembly Guide
Most three-sided animal shelter kits arrive with pre-cut lumber and numbered components, making assembly straightforward even for first-time builders. Start by selecting a level site and clearing away rocks, roots, or debris that could interfere with the foundation. Lay out all parts according to the included diagram before picking up any tools.
Begin with the floor frame. Connect the pressure-treated base boards using galvanized bolts or screws specified in your kit instructions. Square the frame by measuring diagonally from corner to corner; both measurements should match exactly. Attach the floor decking, leaving small gaps between boards for drainage.
The back wall goes up next. Assemble the wall frame flat on the ground, then lift it into position and secure it to the floor frame with corner brackets. Many kits use a tongue-and-groove system or pre-drilled holes that eliminate guesswork. Have a helper hold the wall plumb while you fasten it.
Side walls follow the same process. These typically slope from the back wall down toward the open front, creating the roof pitch that sheds rain and snow. Use a level frequently to keep everything straight. The kit’s hardware pack should include all necessary screws, bolts, and brackets; resist the urge to substitute different fasteners.
Roofing panels install last. Most kits use corrugated metal sheets that overlap by one ridge. Start at the bottom edge and work upward, securing each panel with roofing screws that have rubber washers to prevent leaks. Trim overhang to the recommended length, usually 6-12 inches past the back wall.
Double-check that all fasteners are tight and add caulk around roof seams if your kit doesn’t include pre-sealed panels. The entire assembly typically takes 4-6 hours with two people.
Selecting the Perfect Spot
\n\nChoosing the right location for your 3-sided animal shelter is crucial for your animals’ comfort and safety. Start by identifying a spot that offers natural protection from prevailing winds and harsh weather conditions. The shelter should face south or southeast when possible, allowing morning sun while blocking cold winter winds.\n\nEnsure the ground is slightly elevated to prevent water pooling, and consider installing the shelter on a level, well-draining surface like crushed stone or concrete blocks. Keep the structure at least 20 feet away from other buildings to prevent moisture buildup and ensure proper ventilation.\n\nConsider proximity to your home for easy monitoring and maintenance. Place the shelter near existing fencing or natural barriers for added protection, but avoid areas where branches could fall during storms. If housing multiple animals, position the shelter where you can easily access it for feeding and cleaning while allowing enough space for animals to move freely around the structure.\n\n
 \n
\n\n\n
Ground Preparation
\n\nBefore assembling your 3-sided animal shelter, it’s crucial to prepare the site properly to ensure stability and longevity. Start by choosing a level spot that’s slightly elevated to prevent water pooling. Clear the area of vegetation, rocks, and debris within a 2-foot perimeter of your planned shelter location.\n\nUse a level and string lines to mark the shelter’s footprint. If the ground isn’t naturally level, you’ll need to grade it using a rake and shovel. Consider laying a 4-inch deep gravel base for improved drainage, especially in areas with heavy rainfall. Compact the gravel using a hand tamper or plate compactor.\n\nFor added stability, you may want to install concrete blocks or pavers at each corner where the shelter’s posts will sit. This creates a solid foundation and helps protect the structure from ground moisture and shifting soil. Ensure all foundation elements are level with each other before proceeding with assembly.\n\n\n
- Clear and level the site: Choose a slightly elevated spot and remove all vegetation, rocks, and debris within a 2-foot perimeter of your planned shelter location. Use a level and string lines to mark the shelter’s footprint, then grade the area with a rake and shovel until it’s even.
- Create slight elevation for drainage: If your site is naturally flat, build up the ground by 2-3 inches at the center to encourage water runoff away from the shelter.
- Add gravel base layer: Spread a 4-inch deep layer of crushed gravel or drainage rock across the entire footprint, extending 6 inches beyond the perimeter on all sides.
- Compact the surface: Use a hand tamper for small shelters or a plate compactor for larger structures to create a firm, stable base that won’t shift over time.
- Install optional moisture barrier: In wet climates or areas with poor drainage, lay landscape fabric beneath the gravel or add a vapor barrier on top to protect the shelter floor from ground moisture.
- Position anchor points: Place concrete blocks, pavers, or post anchors at each corner where the shelter’s posts will sit, ensuring all foundation elements are perfectly level with each other before assembly begins.
Maintenance and Customization
\n\n
Seasonal Care
\n\nTo maintain your 3-sided animal shelter throughout the year, adjust your care routine according to the seasons. During spring, check for winter damage and clean any debris, ensuring proper drainage around the structure. Apply a weather-resistant sealant if needed and repair any loose boards or hardware.\n\nSummer maintenance focuses on ventilation and shade. Consider adding a reflective roof coating to keep temperatures comfortable, and regularly check for pest infestations that might seek shelter in the structure.\n\nAs autumn approaches, reinforce the roof and ensure it’s clear of falling leaves. Install wind barriers if your area experiences strong gusts, and check that all support posts are firmly anchored.\n\nWinter requires the most attention. Add extra bedding material, ensure the structure remains elevated above snow level, and regularly clear snow from the roof to prevent collapse. Consider installing a water-resistant tarp over the open side during severe weather while maintaining adequate ventilation.\n\n
Personalization Options
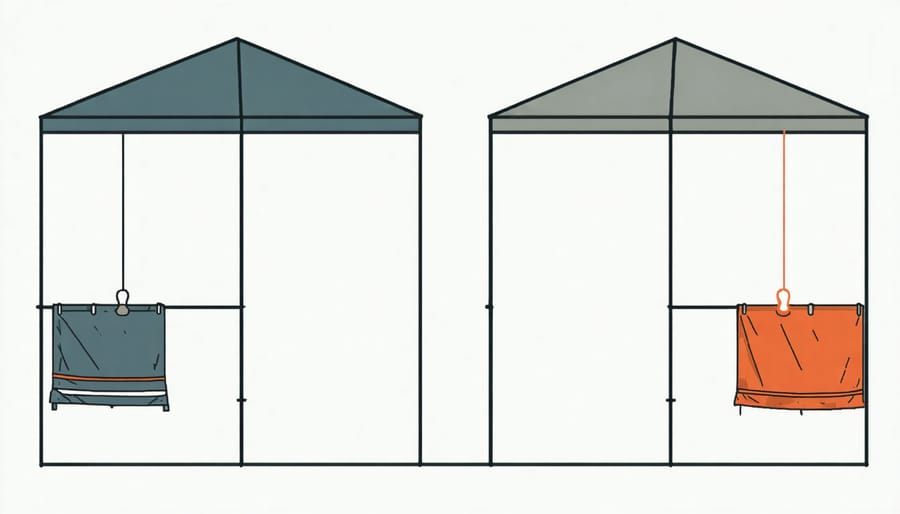
\n\nMake your animal shelter truly unique with our range of customization options. Add removable divider panels to create separate spaces for multiple pets or storage areas. Weather-resistant curtains can be installed across the open side for additional protection during harsh conditions while maintaining ventilation. Enhance comfort by adding raised platforms or built-in feeding stations, perfect for keeping food and water bowls organized and clean.\n\nFor added durability, consider upgrading to our heavy-duty flooring options or installing rubber matting for easier cleaning. Pet owners often personalize their shelters with name plates, decorative trim, or even solar-powered LED lighting for visibility at night. The shelter’s neutral design allows for custom paint colors to match your home’s exterior or create a standout feature in your yard.\n\nYou can also add insulation panels to the walls and roof for temperature control, making the shelter comfortable year-round for your pets.\n\n\nA 3-sided animal shelter kit offers the perfect balance of protection and accessibility for your outdoor pets and farm animals. With its straightforward assembly process, durable materials, and versatile design, this shelter solution provides essential coverage from rain, wind, and sun while allowing animals to move freely in and out. The open-front design prevents animals from feeling trapped and promotes natural ventilation, making it an ideal choice for various species and climates.\n\nBy investing in a quality shelter kit, you’re not just providing basic protection – you’re creating a comfortable space that supports your animals’ well-being throughout the seasons. The modular nature of these kits means you can easily customize the size and configuration to suit your specific needs, whether you’re housing horses, goats, or other livestock.\n\nDon’t let another season pass without giving your animals the shelter they deserve. With minimal tools required and clear assembly instructions included, you can have your new shelter up and running in no time. Take action today to provide your animals with a reliable, weather-resistant haven they’ll appreciate for years to come.
Looking for a portable garages?
Browse our full range of portable garages from authorized dealer brands. Free shipping to the continental US.