


How to Build a DIY Shed Foundation: From Kit Delivery to First-Day Setup

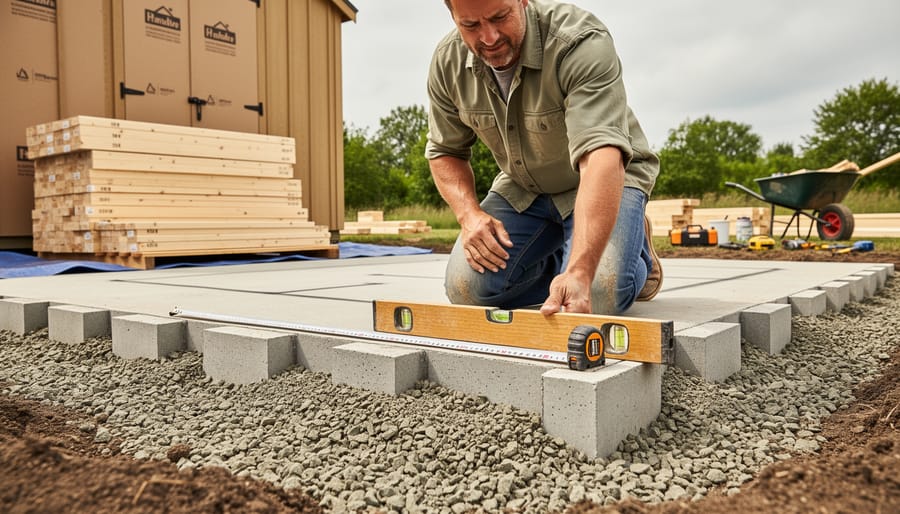
Building a DIY shed foundation is a weekend project that most homeowners can complete successfully with the right preparation and technique. You’ll need basic tools, gravel or concrete blocks, and about 8-12 hours of work to create a level, stable base that will keep your shed dry and square for decades.
The difference between a shed that lasts five years and one that lasts thirty often comes down to those first few hours of foundation work. A proper foundation prevents moisture rot, keeps doors operating smoothly, and stops your entire structure from settling into an uneven mess. The good news? You don’t need specialized skills or expensive equipment to get it right.
Most DIYers choose between three proven foundation types: gravel pads with concrete blocks, wood skid foundations, or poured concrete slabs. Each works well for different soil conditions, budgets, and shed sizes. The gravel and block method has become the most popular choice because it’s forgiving, adjustable, and costs roughly half what contractors charge while delivering professional results.
What trips up first-timers isn’t the actual construction but the preparation work. Getting the site properly leveled and the measurements accurate saves hours of frustration later. We’ve walked dozens of homeowners through this process, and the ones who take time to prepare the ground correctly finish faster and end up with foundations that pass the test of time.
Key Takeaway: Three non-negotiable checks before shed placement: confirm level in both directions (side-to-side and front-to-back), verify square by measuring diagonals (they must match exactly), and ensure all support points sit at identical heights within 1/4 inch.
Planning Your Foundation Before Kit Arrival
Before your foundation kit shows up, smart planning prevents expensive mistakes and delays. Taking a few hours to survey your site, confirm your shed’s footprint, and understand local requirements now saves you from tearing out work later.
Start by confirming your shed’s exact dimensions from the manufacturer’s specifications. You’ll need to measure dimensions precisely, then add 6-12 inches on all sides for your foundation, this buffer prevents water from pooling against the shed walls and gives you working room during installation.
Note: Before you break ground, check local shed permits and setback requirements, as many municipalities require permits for structures over 100-120 square feet and mandate minimum distances from property lines.
Your foundation choice depends on shed size, soil conditions, and budget. Gravel pads work well for most small to medium sheds (up to 12×16 feet), cost $150-300 in materials, and handle freeze-thaw cycles without cracking. Concrete blocks offer a faster setup for level sites and smaller sheds under 10×12 feet. Pressure-treated skids suit uneven terrain where leveling the entire pad would require excessive excavation.
Walk your property to identify the flattest spot with natural drainage away from the foundation area. Avoid low spots where water collects after rain, areas under roof drip lines, and sites within tree root zones. A gentle slope of 1-2 inches over ten feet is ideal, enough to shed water but not so steep that leveling becomes difficult. Check for underground utilities, sprinkler lines, and septic systems before marking your foundation area.
What You’ll Need for First-Day Setup
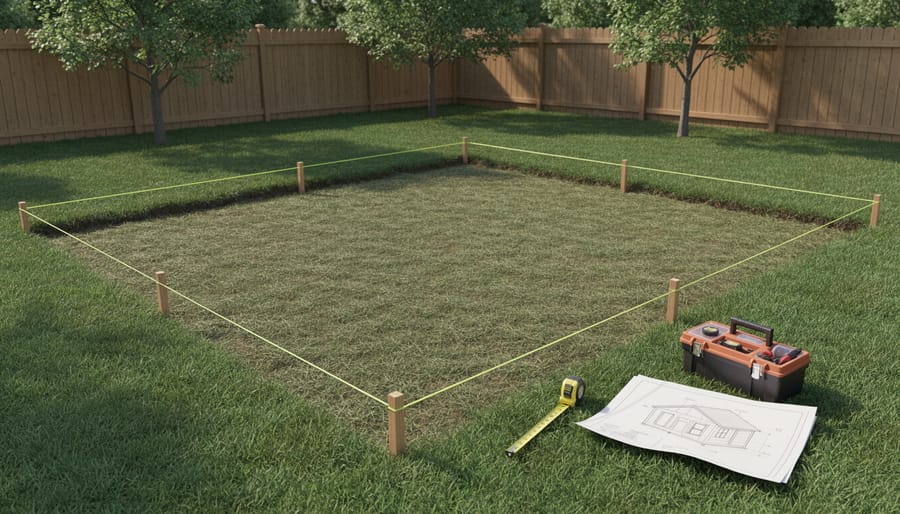
Essential Tools
Most DIY shed foundations require the same basic toolkit, regardless of which type you choose. You’ll need a 4-foot or longer level to ensure your base is truly flat, this is non-negotiable. A 25-foot tape measure handles most shed dimensions, though grab a 50-footer if your shed exceeds 10×12 feet. Wooden or metal stakes and mason’s string line create your layout and level reference points. A square-point shovel moves soil efficiently, while a garden rake spreads and grades materials. Finally, a hand tamper or plate compactor (rentable for about $50/day) compacts your base layers properly. Skipping the tamper results in settling and an unlevel shed within months, so don’t cut this corner.
Materials Checklist by Foundation Type
The materials you need depend heavily on which foundation type you’re building. Here’s what to buy for each option.
For Gravel Pad Foundations:
You’ll need crushed stone or pea gravel (calculate 1 cubic yard per 80 square feet at 4-inch depth), landscape fabric wide enough to cover your foundation area with 6-inch overlaps, and plastic or metal edging to contain the gravel. Don’t forget stakes or landscape spikes to secure the edging.
For Concrete Block Foundations:
Purchase solid concrete blocks, not the hollow kind used for walls. For an 8×10 shed, expect to need 8-12 blocks depending on your layout. You’ll also want gravel for beneath each block (about 2 bags), plus shims or composite leveling blocks for fine-tuning height adjustments.
For Pressure-Treated Skid Foundations:
Buy 4×6 or 6×6 pressure-treated lumber rated for ground contact. Two skids typically support sheds up to 10 feet wide; wider structures need three. You’ll need gravel for the skid beds (3-4 bags per skid), plus galvanized or stainless steel lag bolts if you’re connecting skids to a perimeter frame.
All foundation types benefit from having extra gravel on hand. Running short mid-project means frustrating trips to the hardware store when you’re trying to finish in one day.
Safety Precautions and Site Preparation
Before you break ground, prioritize safety to avoid injuries and costly damage. The most critical step is to call 811 before digging which connects you to your local utility locating service. They’ll mark underground gas, electric, water, and communication lines free of charge, typically within a few business days.
Warning: Digging without locating utilities first can result in serious injury, service disruptions to your neighborhood, and repair bills exceeding thousands of dollars.
When excavating and moving materials, lift with your legs, not your back, and keep loads close to your body. If you’re handling gravel bags or concrete blocks heavier than 50 pounds, get help or use a wheelbarrow. Never work alone when moving heavy foundation components.
Check the weather forecast before starting your foundation project. Avoid working during rain or on saturated ground, which makes excavation difficult and prevents proper compaction. Extreme heat requires frequent water breaks and sun protection.
Wear sturdy work boots with ankle support, work gloves to prevent blisters and splinters, and safety glasses when cutting or hammering. If you’re renting a plate compactor or other power equipment, read the operating manual thoroughly and keep loose clothing and jewelry away from moving parts.
Clear the work area of children and pets, and mark your foundation perimeter with bright flags or caution tape so family members know to stay clear. A few precautions now prevent accidents that could derail your entire project.
Receiving and Inspecting Your Foundation Kit Delivery
When your foundation kit arrives, you’ll typically receive a bundled package containing components like anchors, brackets, or frame pieces, sometimes palletized, sometimes shrink-wrapped. Delivery drivers usually drop materials at the curb or driveway entrance, so plan to have help available for moving heavier items to your build site.
Before signing any delivery receipt, walk around the shipment and look for obvious damage: torn packaging, crushed boxes, or split plastic wrapping. If you spot problems, note them on the delivery paperwork and take photos immediately. Most suppliers require damage claims within 24 hours.
Once the driver leaves, open everything and count components against the packing list. Check for cracks in concrete blocks, bent metal brackets, or missing hardware bags. Foundation kits often include small parts like screws or connectors that can slip out of packaging during transit. Lay everything out in groups, fasteners together, blocks together, brackets together, so you can verify nothing’s missing.
If you discover shortages or defects, contact the supplier right away with photos and item numbers from your packing list. Most companies ship replacements quickly, but waiting a week for a missing component ruins your first-day setup plan.
Store materials close to your build site but off the ground. Stack blocks on scrap plywood to prevent settling into soft soil. Keep metal components dry and organized in a covered area. This simple staging saves dozens of trips back and forth during construction.
Step-by-Step: Building Your DIY Shed Foundation
Step 1: Mark and Clear Your Foundation Area
Start by adding 6-12 inches to each dimension of your shed. If you’re building a foundation for an 8×10 shed, mark out a 9×11 or 10×12 area. This extra space gives you room to work and ensures proper drainage around the structure.
Drive stakes at each corner, then run string lines between them to outline your perimeter. Here’s where precision matters: use the 3-4-5 triangle method to guarantee square corners. Measure 3 feet along one side from a corner stake, then 4 feet along the adjacent side. The diagonal between these two points should measure exactly 5 feet. If it doesn’t, adjust your stakes until it does. For larger sheds, scale up to 6-8-10 or 9-12-15 for more accuracy.
Once your outline is square, clear everything inside the marked area. Remove grass, weeds, roots, and any rocks or debris. Dig out any organic material down to bare soil, decomposing vegetation will eventually create voids that undermine your foundation’s stability. Take your time here. A clean, properly marked area sets you up for success in every step that follows.
Step 2: Excavate and Level the Ground
Start digging within your marked perimeter, removing soil to a consistent depth of 4-6 inches across the entire area. Work from one corner outward, checking depth frequently with your tape measure. You’ll know you’ve gone deep enough when the excavated base sits below your string lines by the target amount.
Creating a level surface is where many DIYers struggle, but string lines make it straightforward. Set your strings at the desired final height (after gravel), then dig until the bottom sits 4-6 inches below. Use a long level or laser level to verify the base is flat. Small dips or high spots will telegraph through to your finished foundation, so take time here.
If your site slopes, you have two options: dig deeper on the high side to create a level excavation, or build up the low side with additional gravel base. For slopes greater than 6 inches across your foundation area, consider terracing or professional grading first.
Always slope the finished grade away from the foundation perimeter, aim for a 1-2% grade (roughly 1/4 inch per foot) to prevent water pooling under your shed. This drainage slope happens in the surrounding yard, not within the foundation itself.
Step 3: Install Landscape Fabric and Edging
Unroll your landscape fabric across the entire excavated area, letting it extend 6-8 inches beyond your foundation perimeter on all sides. This overhang will tuck under your edging to create a complete barrier against weeds. Where multiple sheets meet, overlap the seams by at least 6 inches to prevent gaps where vegetation can push through.
Install your perimeter edging next, plastic landscape edging, pressure-treated lumber, or concrete pavers all work well. The edging serves two purposes: it anchors the fabric edges and prevents gravel from migrating into surrounding grass or soil. Stake plastic edging every 3 feet with anchoring pins. If using lumber, secure it with rebar stakes driven through pre-drilled holes.
Don’t skip the fabric. Even a few weeds pushing up through your gravel base can compromise your foundation’s stability over time.
Step 4: Add and Compact Gravel Base
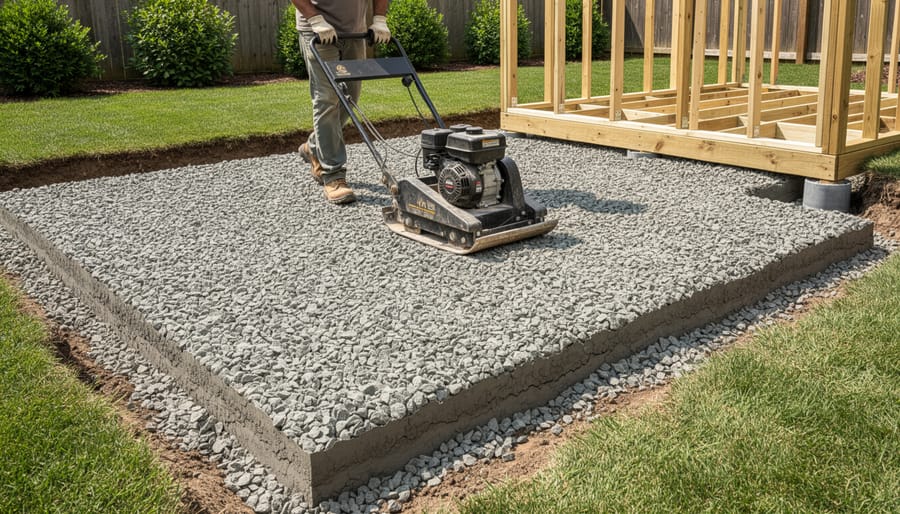
With your excavation complete and landscape fabric in place, it’s time to build the actual foundation base. Start by spreading a 2-inch layer of crushed stone or 3/4-inch gravel across the entire foundation area. Don’t dump it all at once, working in thin layers is crucial for proper compaction.
Compact this first layer thoroughly using a hand tamper or plate compactor. Move systematically across the area, overlapping each pass. You’ll know it’s compacted when the gravel stops shifting under the tamper and feels solid underfoot. Check your level every few feet as you work. If you find low spots, add more gravel and compact again.
Repeat this process: add another 2-inch layer, compact it completely, check level, then add the next layer. Most DIY shed foundations need two to three layers to reach the target 4-6 inch compacted depth. The gravel will compress about 20-30% during tamping, so you’ll need more material than the finished depth suggests.
Take your time with each layer. Rushing this step creates weak spots that’ll cause your shed to settle unevenly later.
Step 5: Position Foundation Supports
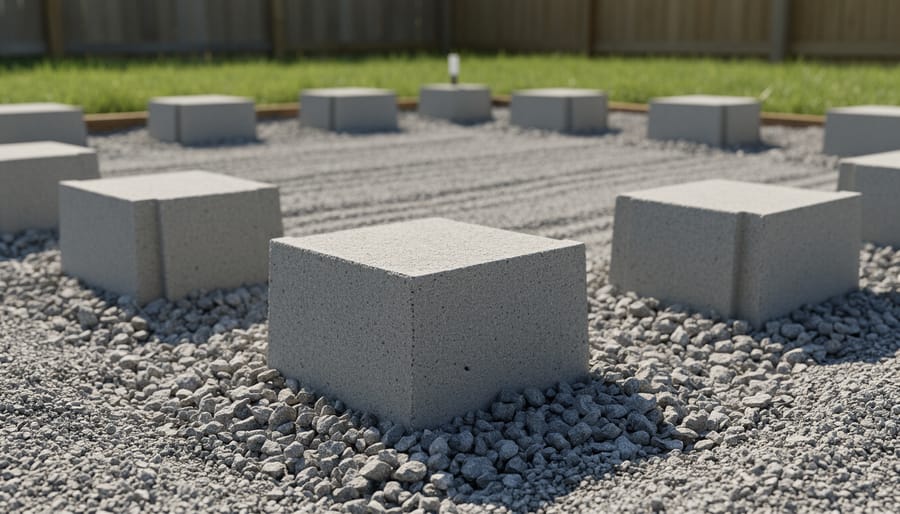
With your gravel base fully compacted and level, you’re ready to position the foundation supports that will actually hold your shed. Pull out your shed’s assembly manual, this tells you exactly where supports need to go, typically at corners and at intervals along the perimeter (often every 4-6 feet for larger sheds).
Start by placing concrete blocks or skids at the corner positions first. Set them directly on the compacted gravel, not halfway off the edge. Use your 4-foot level to check that each support sits perfectly level in both directions. If a block rocks or sits high, remove it and scrape away a small amount of gravel beneath it. If it’s too low, add a thin layer of gravel and re-compact.
Once corners are level, position the intermediate supports along the walls and center beam locations. The critical checkpoint: lay your level across supports in multiple directions. All blocks must contact the level simultaneously with no gaps underneath. A single low or high support will cause your shed floor to twist, warp, or fail to assemble properly.
Double-check spacing measurements against your shed’s specs before moving forward.
How to Verify Your Foundation Is Ready
Before you place your shed, take 20 minutes to verify your foundation passes these critical checks. Skipping this step is the number one reason DIY foundations fail, you’ll save yourself hours of frustration by catching problems now rather than after your shed is sitting crooked.
Start with the level test. Place your longest level across the foundation in multiple directions, north-south, east-west, and both diagonals. You’re looking for less than 1/4 inch variation across the entire foundation. If you’re working with concrete blocks or skids, check each individual support point, then run the level between pairs of supports. Small adjustments now (adding or removing gravel, shimming blocks) prevent major headaches later.
Next, verify square by measuring both diagonal corners. Run your tape measure from the front left corner to the back right, then front right to back left. These measurements must be identical, if they’re off by more than 1/2 inch, your shed won’t assemble properly and doors will bind. If the diagonals don’t match, shift your perimeter markers or support blocks until they do.
Finally, walk the entire foundation checking for soft spots or areas that compress underfoot. Press down firmly on each gravel section and support point. Everything should feel solid and stable. Check that your foundation slopes slightly away from the center (about 1 inch per 8 feet) to shed water, but remains level enough that your shed floor won’t tilt. Use a garden hose to pour water along the edges and watch where it flows, it should move away from the foundation, not pool underneath where your shed will sit.
Next Steps After Foundation Completion
Your foundation is complete, congratulations on finishing the groundwork! Before placing your shed, wait 24-48 hours if you used compacted gravel to allow any settling, especially after rain. For concrete block or skid foundations, you can proceed immediately if everything checked level.
Schedule your shed delivery or start assembly once you’ve confirmed the foundation remains level and square. Most manufacturers recommend placing a moisture barrier (heavy-duty plastic sheeting or treated plywood) directly on the foundation before setting the shed floor to prevent ground moisture from wicking up into the structure.
Plan your anchoring strategy now. You’ll need to anchor securely to prevent shifting and protect against wind and storm damage. Ground anchors, auger anchors, or concrete anchor bolts work well depending on your foundation type and local wind conditions.
Take photos of your completed foundation from multiple angles, they’re helpful for future reference and troubleshooting. You’ve built a solid base that will support your shed for decades.
Common First-Day Foundation Questions
People always have questions when they’re about to tackle their first shed foundation, and that’s smart. Getting clarity before you start can save you hours of backtracking. Here are the concerns that come up most often when DIY builders are ready to begin.
Can I really finish the foundation in one day?
Yes, most DIY builders complete a gravel pad or block foundation in 6-8 hours with proper preparation and decent weather. The key is having all materials on site and your area already measured before you start digging.
Do I need a building permit for a shed foundation?
It depends on your local regulations and shed size, many areas don’t require permits for sheds under 120 square feet without permanent foundations, but always check with your city or county building department before starting. Skipping this step can lead to fines or forced removal.
What if my yard is sloped?
You can build on a slope by excavating more on the high side to create a level pad, though steep slopes may require retaining walls or professional grading. Minor slopes are manageable with extra digging and fill work.
How level does the foundation actually need to be?
Aim for level within 1 inch across the entire foundation, any more than that and your shed doors won’t close properly and the structure can rack over time. Check level in multiple directions as you work, not just at the end.
The grass question deserves extra attention because it trips up many first-timers. You can’t build directly on grass, it will decompose, settle unevenly, and create moisture problems. Remove all sod and organic material down to bare soil before laying landscape fabric and gravel. This takes an extra hour but prevents major headaches later.
If you’re unsure whether to call a professional, consider doing so if you discover clay soil that won’t drain, a slope exceeding 6 inches across your foundation area, or underground utilities you can’t easily work around. Most flat-yard projects are absolutely manageable on your own, but difficult site conditions can quickly turn a one-day job into a week-long ordeal.
Building your own shed foundation in a single day isn’t just possible, it’s a realistic goal when you follow the systematic approach outlined above. Homeowners who take the time to plan, gather materials beforehand, and work methodically through each step consistently report successful first-day completions. By handling the foundation yourself, you’re saving anywhere from $300 to $800 compared to contractor rates, money you can invest in shed upgrades or yard improvements.
Now that your foundation is solid and level, you’re ready for the exciting part: assembling your shed. Take a moment to appreciate what you’ve accomplished. With the groundwork complete, you’re set up to get it right on the structure itself and create the storage solution your property needs.