
Keep Your Greenhouse Plants Thriving Without Overheating
Your greenhouse plants are wilting despite regular watering, or you’ve noticed mold creeping across leaves and walls. The culprit isn’t your gardening skills—it’s stagnant air trapping heat and humidity at dangerous levels. Without proper air circulation, temperatures can spike 30 degrees above outdoor levels within hours, literally cooking your crops and creating the perfect breeding ground for diseases.
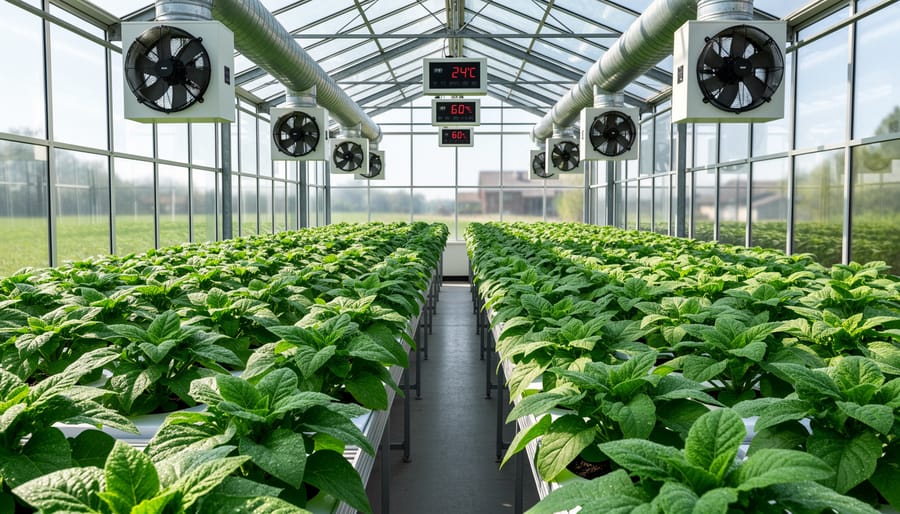
Greenhouse ventilation fans solve this by exchanging stale interior air with fresh outdoor air, maintaining optimal growing temperatures between 70-85°F and humidity levels around 50-70%. Whether you’re running a small backyard hobby greenhouse or a larger growing operation, the right fan system prevents heat stress, controls moisture-related diseases, and strengthens plant stems through gentle air movement.
Choosing the correct fan involves calculating your greenhouse cubic footage and matching it to appropriate CFM (cubic feet per minute) ratings—a process simpler than it sounds. Installation typically requires basic tools most DIY homeowners already own, and strategic placement makes the difference between adequate and exceptional climate control. This guide walks you through selection criteria, practical installation steps, and optimization strategies to keep your plants thriving year-round.
Why Your Greenhouse Needs More Than Just Fresh Air
You might think opening a few windows or leaving the door cracked is enough to keep your greenhouse comfortable, but the reality often tells a different story. Many greenhouse owners discover the hard way that natural airflow alone can’t combat the unique challenges of enclosed growing spaces.
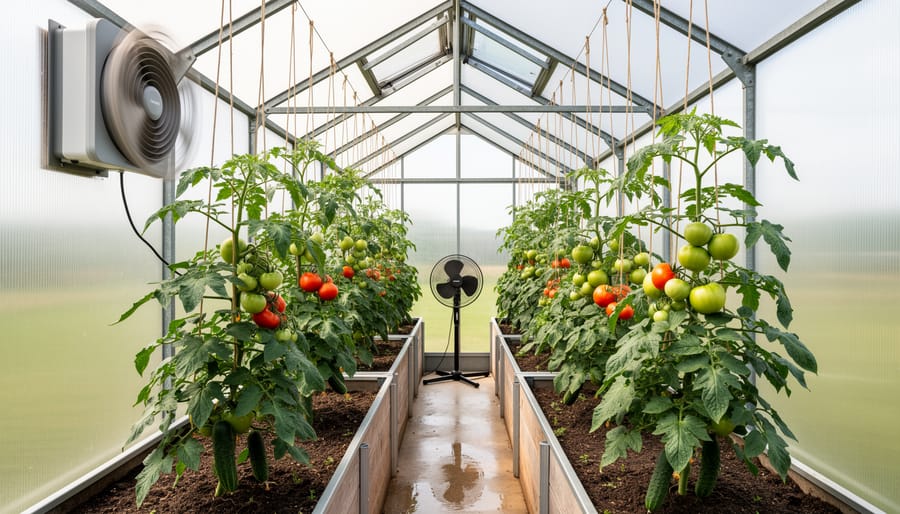
Picture this: You step into your greenhouse on a sunny spring afternoon and immediately feel like you’ve entered a sauna. Your tomato plants are drooping despite wet soil, and you notice water droplets streaming down the walls. Sound familiar? This scenario plays out in countless greenhouses where heat buildup becomes the enemy of healthy growth. Without proper air circulation, temperatures can spike 20-30 degrees above outdoor conditions in just a couple of hours, essentially cooking your precious plants from the inside out.
Excessive humidity creates another hidden threat. When moisture has nowhere to escape, it settles on leaves and stems, creating the perfect breeding ground for fungal diseases like powdery mildew and botrytail. Sarah from Michigan shared her experience: “I lost half my pepper crop to mold before I realized my 3 season greenhouse needed more than just open vents. The condensation was constant, and my plants couldn’t breathe.”
Stagnant air also means carbon dioxide depletion around your plants during peak photosynthesis hours, essentially starving them of what they need most for growth. You’ll notice stunted development, yellowing leaves, and disappointing yields. The investment in a quality ventilation fan isn’t just about comfort—it’s about creating an environment where your plants can truly thrive instead of merely survive.
How Greenhouse Ventilation Fans Actually Work
Understanding how ventilation fans work doesn’t require an engineering degree. At their core, these fans solve a simple problem: greenhouses trap heat and moisture, and without proper airflow, your plants suffer. Think of your greenhouse as a sealed car on a sunny day – temperatures can spike quickly, creating an unhealthy environment.
Greenhouse ventilation fans operate on a straightforward principle. Exhaust fans mount on one end of your greenhouse and pull hot, humid air out, while intake vents or fans on the opposite end draw fresh, cooler air in. This creates a continuous flow that sweeps through your entire growing space, typically exchanging the air volume once every minute or two.
Here’s what happens during this process: as hot air rises and accumulates near the roof, the exhaust fan pulls it outside. Fresh air enters low through intake vents, travels across your plants at ground level, picks up heat and moisture, then exits through the exhaust system. This constant movement prevents hot spots, reduces excessive humidity that leads to fungal diseases, and brings in the carbon dioxide your plants need for photosynthesis.
Temperature regulation happens naturally through this exchange. When outside air is cooler than inside, the fan system gradually brings down your greenhouse temperature without shocking your plants. The same circulation prevents moisture from settling on leaves overnight, addressing that common problem of morning condensation that many greenhouse owners battle. It’s climate control that works with nature, not against it.

Choosing the Right Ventilation Fan for Your Greenhouse
Exhaust Fans vs. Circulation Fans: What’s the Difference?
Understanding the difference between exhaust fans and circulation fans is essential for creating an effective greenhouse ventilation system. While they might look similar, these two fan types serve distinct purposes in your greenhouse climate control strategy.
Exhaust fans are your greenhouse’s primary tool for removing hot, stale air. Mounted in walls or gables, these powerful fans pull warm air out of your greenhouse while drawing fresh, cooler air in through vents or openings on the opposite side. They’re particularly effective when you need to quickly reduce temperature and humidity levels. Think of them as your greenhouse’s emergency cooling system during those scorching summer afternoons.
Circulation fans, on the other hand, work to move air within your greenhouse without removing it. These fans create gentle air movement that prevents hot or cold pockets from forming, distributes humidity evenly, and strengthens plant stems through constant, slight movement. They’re the workhorses that run throughout the day, ensuring consistent conditions from floor to ceiling.
Here’s a practical example: Sarah, a hobby gardener with a 10×12 greenhouse, struggled with temperature swings until she installed both fan types. She uses an exhaust fan with a thermostat that kicks in when temperatures exceed 80 degrees, while two small circulation fans run continuously to prevent condensation on her tomato plants.
Most successful greenhouse setups benefit from both fan types working together. Exhaust fans handle the heavy lifting during extreme conditions, while circulation fans maintain consistent, healthy air movement during normal operation. This combination ensures your plants thrive in optimal conditions year-round.
Sizing Your Fan: The Simple Math That Saves Money
Getting the right fan size doesn’t require an engineering degree—just some simple math that’ll save you from buying too much or too little ventilation power.
Here’s the basic formula: multiply your greenhouse’s length × width × height to get cubic footage, then multiply that number by your desired air exchanges per minute. For most hobby greenhouses, you’ll want one complete air exchange per minute during hot weather, though cooler climates might only need one exchange every two minutes.
Let’s walk through a real example. Say you have an 8×10 greenhouse with 8-foot walls. That’s 8 × 10 × 8 = 640 cubic feet. For one air exchange per minute, you’d need a fan rated at 640 CFM (cubic feet per minute). Simple as that!
For a larger 10×12 greenhouse with the same height, you’re looking at 960 cubic feet, so a 1000 CFM fan would handle your needs nicely.
Here’s a money-saving tip from experienced greenhouse gardeners: if you’re between sizes, round up slightly rather than down. A fan running at 80 percent capacity lasts longer and runs quieter than one constantly maxed out. However, don’t go overboard—a fan twice the size you need wastes energy and creates uncomfortable drafts that stress your plants.
For attached greenhouse structures or those in partially shaded locations, you can often get away with slightly lower CFM ratings since they naturally stay cooler.

Features Worth Paying For (And Ones You Can Skip)
When shopping for a greenhouse ventilation fan, focus on features that genuinely solve climate control problems. Built-in thermostats are absolute game-changers—they automatically kick your fan on when temperatures rise, preventing heat damage to plants without you constantly monitoring conditions. Mary, a tomato grower in Texas, says her thermostat-controlled fan saved her entire crop during an unexpected heatwave while she was away.
Variable speed settings offer real value for greenhouses with fluctuating needs, letting you adjust airflow intensity rather than settling for all-or-nothing ventilation. Automated louvers that open and close with the fan prevent heat loss during cooler periods—definitely worth the investment in regions with temperature swings.
Weatherproof housing and rust-resistant materials matter tremendously for longevity, especially in humid greenhouse environments. However, you can skip expensive “smart” connectivity features unless you’re frequently away; a simple programmable timer usually does the trick at a fraction of the cost. Similarly, ultra-quiet operation sounds appealing but rarely justifies premium pricing for typical backyard greenhouses where some ambient noise isn’t problematic.
Installing Your Greenhouse Ventilation Fan
Installing a ventilation fan in your greenhouse is easier than you might think, and the payoff in healthier plants makes it absolutely worthwhile. Whether you’re just building a greenhouse or upgrading an existing one, following these straightforward steps will get you up and running smoothly.
Start by choosing the right location. Position your exhaust fan on the wall opposite your air intake vents or louvers, ideally at the highest point where hot air naturally accumulates. This creates efficient cross-ventilation that draws fresh air through your entire growing space. For intake vents, place them low on the opposite wall to maximize airflow.
Before mounting, check your electrical setup. Most greenhouse fans run on standard 120-volt household current, but you’ll need a dedicated GFCI-protected outlet for safety in this humid environment. If you’re not comfortable with electrical work, hiring a licensed electrician for this step is money well spent. Never use extension cords as a permanent solution.
For mounting, most fans come with a universal frame that fits standard wall studs. Mark your mounting holes carefully, ensuring the fan sits level. Use weatherproof sealant around the frame to prevent drafts and moisture infiltration. Secure the fan firmly, as vibration from a loose installation creates annoying noise and reduces efficiency.
One common mistake homeowners make is installing a fan that’s too small for their space. Remember that calculation we discussed earlier about air changes per minute. Another frequent error is forgetting to install a backdraft damper, which prevents cold air from entering when the fan isn’t running.
Test your installation by turning on the fan and checking airflow with a simple tissue test near the intake vents. You should feel strong, steady air movement throughout the greenhouse. If certain areas seem stagnant, consider adding a small circulation fan to keep air moving evenly around your plants.
Getting the Most From Your Ventilation System
Pairing Fans with Natural Ventilation
Fans work best when they complement your greenhouse’s natural airflow rather than fighting against it. Think of it as teamwork—your roof vents, side vents, and doors create the pathways, while fans accelerate the air movement through those channels.
During cooler months (spring and fall), start by opening just your roof vents and running fans at lower speeds. This gentle approach prevents temperature swings that can stress plants. As temperatures climb into summer, open side vents or doors on opposite ends to create cross-ventilation, then position fans to push hot air toward roof vents while drawing cooler air through lower openings. This layered strategy can reduce your fan runtime by 30-40%, cutting energy costs significantly.
One greenhouse owner in Arizona shared that after strategically pairing her exhaust fans with manually-operated side vents, she reduced her cooling costs by nearly half during peak summer months. The key was adjusting vent openings throughout the day rather than relying solely on fan power.
For maximum efficiency, open vents wider on particularly hot days and reduce fan speed to compensate. On mild days, natural ventilation alone might suffice—give your fans a break. Install simple vent controllers or set reminders to adjust openings seasonally, ensuring your system adapts as outdoor conditions change.
Seasonal Adjustments That Make All the Difference
Your greenhouse ventilation needs shift dramatically with the seasons, and adjusting your fan usage accordingly keeps your plants thriving year-round. During hot summer months, run fans continuously during daylight hours to prevent heat buildup that can stress or damage crops. Spring and fall require a balanced approach—use fans intermittently when temperatures rise above 75°F, especially during sunny afternoons. In winter, while extending your growing season, reduce ventilation but don’t eliminate it entirely; brief air exchanges on warmer days prevent humidity problems and fungal issues. For cold climates, consider installing a thermostat-controlled fan that activates only when necessary, conserving energy while maintaining air quality. Gardeners in humid regions should prioritize consistent air movement even in cooler months to combat moisture, while those in arid areas can scale back significantly during winter. The key is monitoring your greenhouse’s internal temperature and adjusting fan schedules as conditions change.
Real Greenhouse Owners Share Their Ventilation Solutions
Sarah from Vermont struggled with excessive humidity in her 8×10 hobby greenhouse where she grows tomatoes and herbs. “My plants were constantly battling fungal issues,” she shares. After installing two thermostat-controlled exhaust fans at opposite ends, her problems disappeared. “The automated system keeps humidity in check without me constantly monitoring it. My tomato yields increased by nearly 40% the first season.”
For Mike, a retired orchid enthusiast in Florida, the challenge was different. His 12×16 greenhouse was overheating during summer months, threatening his delicate orchid collection. “I tried manually opening vents, but I couldn’t keep up with temperature swings,” he explains. He solved this by combining solar-powered fans with shade cloth. “The fans kick in automatically when it hits 78 degrees, and I haven’t lost a single orchid to heat stress since.”
Jennifer runs a small vegetable operation in her 20×30 greenhouse in Oregon. She needed serious airflow but worried about energy costs. “I installed three circulation fans and two larger exhaust fans on a timer system,” she says. “They run during peak heat hours, and my electric bill only went up about $15 monthly. Meanwhile, my lettuce and greens grow consistently year-round, which more than pays for itself.”
These real-world solutions show that matching your fan setup to your specific growing needs makes all the difference.
Maintaining Your Ventilation Fan for Years of Reliable Service
Keeping your greenhouse ventilation fan in top shape doesn’t require much effort, but regular attention pays off with years of reliable performance. Start by unplugging your fan monthly to wipe down the blades and housing with a damp cloth—accumulated dust and debris reduce airflow efficiency by up to 30%. Check the manufacturer’s guidelines, but most fans benefit from a drop of lightweight machine oil on motor bearings every six months.
Before winter arrives, give your fan a thorough inspection. Look for loose screws, frayed wires, or worn belts that might fail during peak use. One greenhouse owner we spoke with avoided a costly mid-summer breakdown simply by replacing a cracked fan blade during her fall maintenance routine.
If your fan starts making unusual noises or runs slower than normal, check for obstructions first before assuming the worst. Often, a simple cleaning solves the problem. Keep a maintenance log noting cleaning dates and any issues—this helps you spot patterns and catch small problems before they become expensive repairs. With just 15 minutes of care each month, your ventilation fan will deliver efficient climate control season after season, protecting your investment and your plants.
The right ventilation fan truly transforms your greenhouse from a struggle into a thriving success story. Proper airflow means healthier plants, better yields, and fewer headaches managing temperature and humidity swings. Take a moment to assess your current greenhouse setup—are your plants showing signs of heat stress or disease? Is condensation building up on walls? These clues tell you it’s time to upgrade your ventilation system. Start by calculating your greenhouse’s cubic footage and matching it with the appropriate CFM rating for your fan. At Storage Sheds Outlet, we understand that creating the perfect outdoor growing environment involves getting every detail right, from the structure itself to the climate control systems inside. With the knowledge you’ve gained here, you’re ready to make an informed decision that will pay dividends in healthier plants and more rewarding harvests for seasons to come.