


How to Calculate and Ensure Proper Snow Load Capacity for Your Heavy Duty Portable Garage

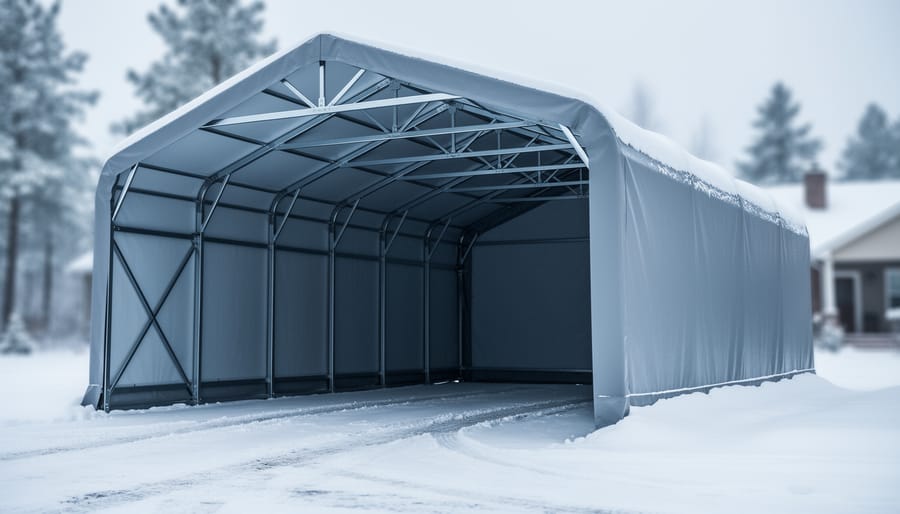
A heavy duty portable garage can safely handle snow loads between 20 and 35 pounds per square foot when properly engineered and installed, but choosing the wrong rating for your region can lead to a dangerous collapse that destroys your vehicles and equipment. The difference between a structure that survives winter and one that buckles under the first heavy snowfall comes down to three factors: understanding your local snow load requirement, selecting a frame and cover system rated to meet or exceed that number, and reinforcing the structure during installation with proper anchoring and support.
Most homeowners discover snow load ratings only after their first portable garage fails, but you can skip that expensive lesson. Snow load refers to the weight of accumulated snow your structure must support, measured in pounds per square foot. A light snowfall might add only 3-5 pounds per square foot, while wet, heavy snow can exceed 20 pounds in a single storm. Your building code sets minimum requirements based on decades of weather data, and a portable garage rated below that threshold is a gamble you’ll likely lose.
The good news is that selecting and setting up a snow-rated portable garage isn’t complicated once you know what to look for. You’ll need to calculate your area’s ground snow load, compare it against manufacturer specifications, and then follow specific installation steps that maximize your structure’s strength. This guide walks you through each stage, from interpreting engineering certifications to adding mid-span supports, so you can confidently protect your investment through every winter season.
Key Takeaway: Most heavy duty portable garages are rated between 20-40 psf for snow load. If your area receives more than 30 pounds per square foot of ground snow annually, look for models rated at 35 psf or higher with documented engineering certifications, not just marketing claims of “heavy duty.”
Understanding Snow Load Ratings for Portable Garages
Snow load is simply the weight of accumulated snow pressing down on your roof, measured in pounds per square foot (psf). When you see a portable garage rated for 35 psf, that means its roof can safely support 35 pounds of snow on every square foot of surface area. A 12×20 foot shelter has 240 square feet of roof, so a 35 psf rating means it should handle roughly 8,400 pounds of snow total before structural failure becomes a risk.
Manufacturers determine these ratings through engineering calculations and, ideally, physical load testing. Heavy duty portable garages use stronger tube steel frames, reinforced peak joints, and commercial-grade covers to achieve higher capacities. You’ll see ratings ranging from 20 psf for basic models up to 40 or even 50 psf for top-tier shelters designed for serious winter climates. These numbers come from analyzing frame strength, connection points, fabric tension, and overall structural geometry under load.
Here’s where it gets important: ground snow load and roof snow load are not the same thing. Ground snow load is what weather services and building codes measure on flat ground in your region. Roof snow load is typically lower because wind, sun, and roof slope reduce accumulation. A pitched roof on a portable garage sheds some snow naturally, so a structure in a 40 psf ground snow area might only need a 30-35 psf roof rating. Manufacturers account for this in their specifications, but you need to understand which number they’re referencing.
Portable shelters face different engineering challenges than permanent garages. They rely on tension and anchoring rather than foundation-bolted rigidity. The fabric cover must stretch properly to transfer load to the frame, and anchors must resist uplift and lateral forces during snow events combined with wind. A permanent structure with rafters, trusses, and sheathing distributes weight differently. That’s why a portable garage rated for 30 psf isn’t equivalent to a stick-built garage designed for the same load. The margin for error is smaller, installation quality matters more, and you can’t assume any “garage” will perform the same way under snow.
What You’ll Need to Assess and Install a Snow-Rated Portable Garage
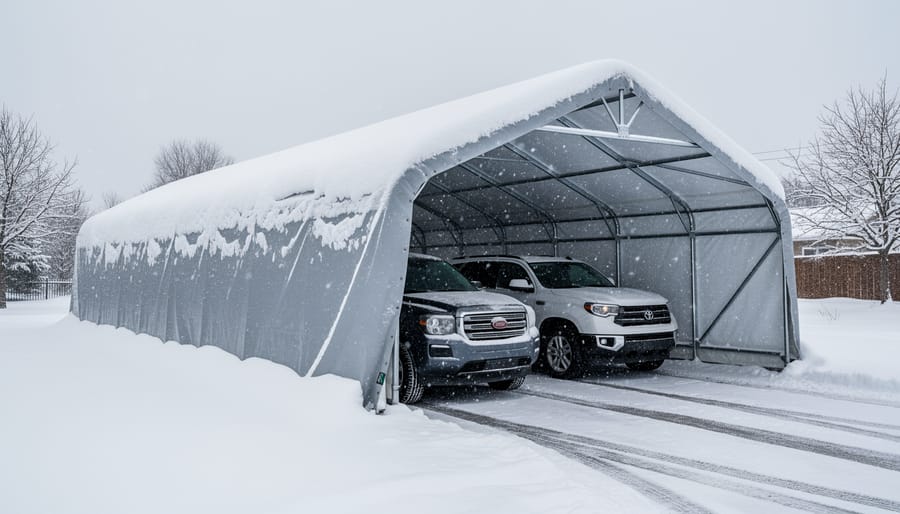
Before you buy or set up a heavy duty portable garage, you need the right information and equipment on hand. Starting with accurate data prevents costly mistakes and ensures your shelter will actually handle the snow you’ll face each winter.
Information You Must Gather First
Your most important task is finding your local ground snow load. Check your municipal building department’s website, contact local code enforcement, or search the American Society of Civil Engineers (ASCE) snow load maps for your zip code. This number, measured in pounds per square foot, is the foundation for everything else. Without it, you’re guessing.
Next, collect the manufacturer’s specifications for any portable garage you’re considering. Look for the rated snow load capacity, engineering certifications, and installation requirements. Reputable manufacturers publish these details clearly; if you can’t find them, that’s a red flag.
Tools and Materials for Installation
Once you’ve verified the shelter meets your snow load requirements, assemble what you’ll need for proper setup:
- Tape measure and level for site preparation and frame alignment
- Anchoring hardware appropriate for your soil type (auger anchors, rebar stakes, or concrete anchors)
- Socket wrench set and adjustable wrenches for frame assembly
- Mallet or rubber hammer for securing fittings without damage
- Helper or two, most heavy duty frames require multiple people for safe assembly
- Reinforcement kit if your snow load exceeds the base rating (purlin braces, cross supports)
- Stakes and string for marking the perimeter before assembly
Keep the manufacturer’s installation manual with your tools. Many snow load failures trace back to skipped steps or improvised anchoring, so following the exact procedure matters more than you might think. If your region experiences heavy snow and your shelter sits at the higher end of its rating, order reinforcement components at the same time as the garage itself.
Safety Warnings and Critical Considerations
Before you select or install any portable garage, understand that snow load failure is a real risk, and one that’s entirely preventable when you respect the engineering limits and installation requirements. Treating a portable shelter as a casual purchase without verifying its snow rating against your local conditions can lead to crushed vehicles, damaged equipment, and even injury if the structure could collapse this winter.
Never exceed the manufacturer’s stated snow load capacity. That number isn’t a suggestion or a conservative estimate, it’s the maximum safe limit based on specific engineering assumptions. Those assumptions include proper installation, correct anchoring, a level foundation, and using all provided hardware exactly as specified. If you cut corners on setup, even a high-rated shelter won’t perform as designed. A portable garage rated for 30 psf loses that rating the moment you skip anchors, ignore frame alignment, or substitute unapproved parts.
Warning: Structural failure from snow overload may void your homeowner’s insurance and result in total loss of stored property. Always follow manufacturer installation guidelines exactly and never modify load-bearing components.
Resist the urge to DIY-modify your portable garage to “make it stronger.” Adding unauthorised cross braces, drilling extra holes in the frame, or altering the cover tensioning system can actually weaken the structure and void both the warranty and the snow load certification. If you need extra capacity, buy a shelter engineered for higher loads from the start.
Not all “heavy duty” labels mean the same thing. Marketing language is vague; actual snow load ratings are specific numbers backed by testing. A garage marketed as heavy duty might handle 20 psf while your area regularly sees 40 psf events. Always verify the exact PSF rating in the product specifications before purchasing.
When to consult a structural engineer: if you’re installing an oversized shelter (beyond standard residential sizes), planning a custom or modified build, or your local snow load exceeds 50 psf, professional guidance is worth the investment. Engineers can assess site-specific factors like wind exposure, drift patterns, and foundation requirements that generic product specs can’t address.
Step-by-Step: Calculating Your Required Snow Load Capacity
Here’s the calculation process that takes the guesswork out of choosing the right shelter. We’ll walk through each step with a real example so you can see exactly how the numbers work.
Start by looking up your area’s ground snow load. Your local building department keeps these records, or you can check the American Society of Civil Engineers snow load map online. This number represents the weight of snow your region typically receives, measured in pounds per square foot. For our example, let’s say you’re in northern Michigan where the ground snow load is 50 psf.
- Find your local ground snow load. Contact your building department or search “ground snow load” plus your zip code. Write down this baseline number, it’s your starting point for all calculations.
- Apply roof slope and shape factors. Portable garages with steeper roof pitches shed snow more effectively than flat roofs. Most manufacturers provide conversion charts, but as a general rule, roofs with a 4:12 slope or steeper can use 0.7 times the ground load, while flatter roofs require the full ground load or higher. Our Michigan example with a standard peaked portable garage: 50 psf × 0.7 = 35 psf minimum roof rating needed.
- Add a safety margin of 20-30%. Engineering calculations account for average conditions, but winter throws curveballs, ice accumulation, drifting against one side, wet heavy snow instead of powder. Taking our 35 psf and adding 25% gives us 43.75 psf. Round up to 45 psf as your target rating.
- Match your number to product specifications. Now you shop with confidence. Look for portable garages rated at or above your calculated number. In our example, you’d choose a model rated for 45 psf or higher, many heavy duty options offer 50-60 psf ratings for serious snow country.
- Verify certification and engineering documentation. Ask for the manufacturer’s engineering stamp or third-party certification. Legitimate ratings come with documentation showing how the structure was tested. If a seller can’t provide this paperwork, the “heavy duty” label might be marketing rather than engineering.
This methodical approach ensures you’re not gambling with your investment. A properly rated shelter that’s correctly installed will prevent collapse even during the worst storms your area experiences. The few extra minutes spent calculating your true needs can mean the difference between a shelter that lasts decades and one that fails in its first winter.
Installing Your Portable Garage for Maximum Snow Load Performance
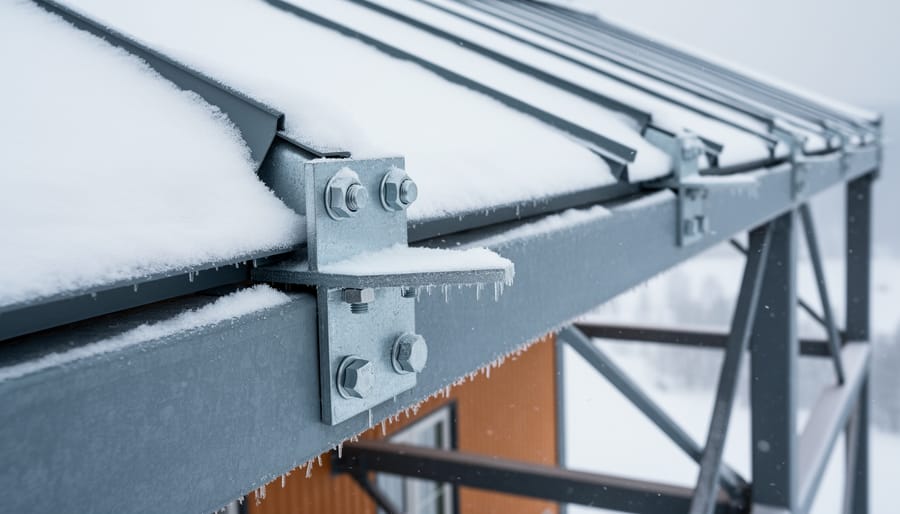
Even the highest-rated portable garage will fail under snow if it’s installed poorly. Your shelter’s real-world capacity depends as much on proper setup as it does on the manufacturer’s rating. Cutting corners during installation doesn’t just risk voiding your warranty, it can turn a 35 psf shelter into one that buckles at 20.
Start with site selection and preparation. Choose level ground with good drainage, avoiding low spots where snowmelt pools. If your site slopes, level it with compacted gravel rather than setting the frame on uneven terrain. Poor drainage undermines anchors and creates ice dams that add unexpected weight. Clear the footprint of rocks, roots, and debris that could puncture the cover or prevent the frame from sitting flush.
Follow this installation sequence to maximize structural integrity:
- Position all anchor points according to the manufacturer’s template before assembling any frame components. Mark each spot with a stake, precision here determines how evenly the frame distributes snow weight.
- Install anchors appropriate for your soil and snow load. Use auger anchors (24-36 inches) for firm soil, concrete footings for loose or sandy ground, or rebar stakes driven 24+ inches deep. Each anchor must reach undisturbed soil below the frost line if possible.
- Assemble the frame exactly per the instructions, paying close attention to connector orientation and bolt placement. Reversed connectors or missing hardware create weak points that fail under lateral snow pressure.
- Tighten all bolts and fittings in two passes, first to snug, then to the specified torque. Uneven tension causes the frame to twist under load, concentrating stress where it shouldn’t be.
- Attach the cover with proper tension across the entire surface. Loose fabric sags and collects snow; overly tight fabric tears at anchor points. Walk the perimeter and adjust ratchet straps incrementally until the cover is drum-tight but not straining.
Consider reinforcements if you’re near the upper limit of your shelter’s rating. Purlin kits add horizontal support between rafters, reducing unsupported spans. Cross bracing stiffens the end walls against racking forces. Snow tubes, inflatable supports placed under the ridgeline, prevent the center sag that leads to snow accumulation and progressive collapse.
Check every connection point before the first snowfall. Wiggle the frame to identify loose joints, and re-torque bolts after the first week as the structure settles. Proper installation isn’t just about following steps, it’s about understanding that snow load safety starts with a rock-solid foundation and precise assembly that lets the engineering work as designed.
How to Verify Your Portable Garage Is Ready for Snow

Before the first snowflake falls, walk around your portable garage and run through a complete pre-season inspection. Start with the anchors: each one should be tight, unmoved, and still firmly seated in the ground. If any anchor feels loose or has shifted, re-install or replace it immediately, anchors are your first line of defense against snow load stress. Next, check the frame for alignment. Stand inside and look down the ridgeline; it should be straight, not sagging or bowed. Push gently on the frame corners and joints to confirm everything feels solid and secure.
Inspect the cover tension across the entire roof and sidewalls. A properly tensioned cover sheds snow more effectively and distributes weight evenly across the frame. If you notice sagging, wrinkles, or loose areas, retighten the cover according to the manufacturer’s instructions. This step is critical for winter storm prevention because loose fabric collects snow pockets that concentrate weight in dangerous ways.
Throughout the winter, maintain your shelter’s snow load integrity with these ongoing checks:
- After each snowfall, visually inspect the roof for sagging, pooling, or uneven accumulation
- Monitor anchor points weekly during heavy snow periods for any movement or frost heave
- Check frame connections for stress signs like bending, cracking, or loosened bolts
- Remove snow manually if accumulation exceeds 6-8 inches or if you notice any structural stress
- Watch for fabric tears, stretched seams, or areas where the cover has pulled away from the frame
If you spot frame deflection, hear unusual creaking, or see the cover pulling away from its attachment points, remove snow immediately and assess the damage. These are warning signs that your garage is approaching or exceeding its rated capacity. If structural damage has occurred, evacuate any stored items, document the issue, and contact the manufacturer before continuing use.
Common Questions About Portable Garage Snow Loads
Can I use a portable garage in heavy snow areas?
Yes, but only if you choose a model engineered for your region’s snow load and install it properly. Many heavy duty portable garages are designed for 30-40+ psf snow loads, which covers most residential areas including regions with moderate to heavy snowfall.
What happens if I exceed the rated load?
Exceeding the snow load rating risks frame deformation, cover tearing, or complete collapse. The structure may appear fine initially, but stress accumulates and can lead to sudden failure, often during additional snowfall or when wet snow refreezes.
Do I need to shovel snow off the roof?
Monitor accumulation and remove snow before it approaches your shelter’s rated capacity. In heavy snowfall events or when wet, dense snow builds up quickly, proactive removal prevents damage and is much easier than repairs.
How do I know if my garage is heavy duty enough?
Check the manufacturer’s specifications for the actual psf rating, not just marketing terms like “heavy duty.” Compare that number to your calculated required capacity, and look for third-party engineering certifications or documentation that validates the claim.
Understanding why shelters collapse helps you avoid the most common mistakes. Most failures stem from mismatched ratings, poor anchoring, or assuming all portable garages handle snow equally.
Certifications matter more than you might think. Engineering stamps, compliance with local building codes, and documentation from recognized testing labs provide assurance that the published snow load rating reflects real-world performance. A shelter without any certification relies solely on the manufacturer’s word, which varies widely in accuracy across brands. When you’re trusting a structure to protect thousands of dollars in vehicles or equipment through winter, verified ratings give you confidence the investment will hold up when it counts.
Getting your heavy duty portable garage ready for snow doesn’t have to feel overwhelming. By following the steps outlined here, finding your local snow load requirement, selecting a shelter rated well above that number, installing it properly with secure anchoring, and checking it throughout the winter, you’re setting yourself up for a structure that will stand strong through even heavy snowfalls.
The difference between a portable garage that lasts and one that fails comes down to preparation. Take the time to do the math, follow the manufacturer’s installation instructions carefully, and don’t skip the anchoring. These aren’t just recommendations, they’re the practical steps that keep your investment safe and your vehicles protected.
Once your shelter is properly rated and installed, you can trust it to do its job season after season. Regular quick checks during winter storms give you peace of mind, and knowing when to brush off excess snow keeps you ahead of problems before they start.
With the right approach, your heavy duty portable garage becomes a reliable year-round solution, giving your vehicles, equipment, and outdoor gear the protection they need no matter what the weather brings.