
Why In-Ground Greenhouses Stay Warmer Without Electricity
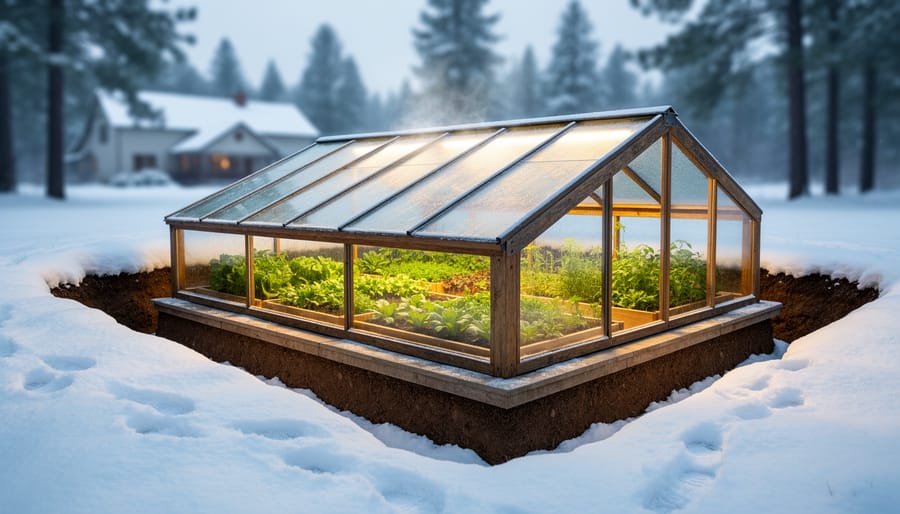
Dig your greenhouse 3-4 feet below ground level to tap into the earth’s natural insulation, maintaining stable temperatures year-round while slashing heating costs by up to 80% compared to traditional structures. This ancient technique, refined by modern growers, transforms a simple pit into a thriving growing environment that produces fresh vegetables even during harsh winters.
The concept works because soil temperature remains consistently between 50-60°F just a few feet down, regardless of surface conditions. By building partially underground, you’re essentially wrapping your plants in a thermal blanket that moderates extreme temperature swings. During winter, the earth prevents heat loss; in summer, it provides natural cooling that keeps plants from stress.
Homeowners across cold climates are rediscovering this efficient growing method, reporting tomatoes in January and leafy greens throughout February without expensive heating systems. Sarah Martinez from Montana shares, “I was skeptical about digging a massive hole in my backyard, but my in-ground greenhouse paid for itself in saved grocery bills within eighteen months. I’m growing salad greens when it’s 20 below outside.”
The beauty lies in accessibility. Unlike complex conventional greenhouses requiring sophisticated climate control, in-ground designs leverage physics you can’t mess up. Strategic placement of growing zones within your pit maximizes this natural advantage, allowing cool-season crops near walls while heat-lovers thrive in the center where sunlight concentrates. The result is a self-regulating ecosystem that works with nature, not against it.
What Makes an In-Ground Greenhouse Different

The Science Behind Earth Insulation
The secret to year-round growing success lies just a few feet beneath your garden. While air temperatures swing wildly from scorching summers to freezing winters, soil maintains remarkably stable temperatures once you dig below the frost line—typically 4 to 8 feet deep depending on your location.
Here’s why this matters for your in-ground greenhouse: soil acts like a massive thermal battery. During summer, the earth naturally stays cooler than the air above, helping prevent overheating. In winter, it retains warmth absorbed during warmer months, creating a buffer against freezing temperatures. This natural regulation means your greenhouse can maintain temperatures between 50-60°F even when outside conditions are extreme.
Think of it like a root cellar that farmers have used for centuries to store vegetables—the same principle applies here, but you’re growing instead of storing. By building your greenhouse partially or fully underground, you’re tapping into this free, renewable temperature control system. No complicated heating equipment, no sky-high energy bills, just the earth doing what it does best: maintaining equilibrium. This makes in-ground greenhouses particularly appealing for homeowners who want sustainable growing solutions without the complexity or cost of traditional climate control systems.
Cost Comparison: In-Ground vs. Traditional Greenhouses
Let’s talk real numbers, because we know that’s what matters when you’re planning a project like this. A traditional above-ground greenhouse typically runs between $2,000 to $5,000 for a decent-sized structure, depending on materials and features. An in-ground greenhouse requires a similar initial investment, sometimes slightly higher due to excavation costs, putting you in the $2,500 to $6,000 range for a comparable DIY build.
Here’s where things get interesting for your wallet. Sarah, a homeowner in Vermont, shared that her traditional greenhouse cost about $150 monthly to heat during winter months. After switching to an in-ground design, her heating bills dropped to roughly $30 per month. That’s $120 in monthly savings during the cold season, which adds up to over $700 annually in her climate.
The earth’s natural insulation does the heavy lifting here. You’re tapping into the ground’s stable temperature, which hovers around 50-60 degrees just a few feet down. This means less money spent on heating in winter and minimal cooling costs in summer. Most homeowners recoup that slightly higher initial investment within 2-3 years through energy savings alone. If you’re planning to garden year-round and you’re facing hefty utility bills with traditional greenhouses, an in-ground option quickly becomes the budget-friendly choice that keeps giving back season after season.
Planning Your Zoned Layout for Maximum Productivity
Understanding Microclimates in Your Underground Space
Your in-ground greenhouse naturally creates distinct climate zones, and understanding these patterns helps you position plants perfectly for their needs. Think of it as having multiple growing environments within one space—a real advantage for diverse crops.
The back wall, typically facing south if you’ve positioned your greenhouse correctly, becomes the warmest spot. Heat absorbs into the earth during the day and radiates back at night, making this ideal for heat-loving plants like tomatoes, peppers, and basil. One homeowner in Colorado reported successfully growing citrus trees in this zone year-round.
Near the entrance, temperatures fluctuate more dramatically with outside air mixing in. This cooler zone suits hardy greens, herbs, and root vegetables that appreciate consistent moisture and moderate temperatures.
To map your microclimates, spend a week monitoring temperatures at different times throughout the day. Place inexpensive thermometers at various locations—front, middle, back, and at different heights. Note moisture levels too, as areas near the earth walls often stay more humid.
The northern side typically remains coolest and shadiest, perfect for leafy vegetables and seedlings that need protection from intense sun. By matching plants to these naturally occurring zones, you’ll maximize your growing success without fighting against your greenhouse’s inherent characteristics.
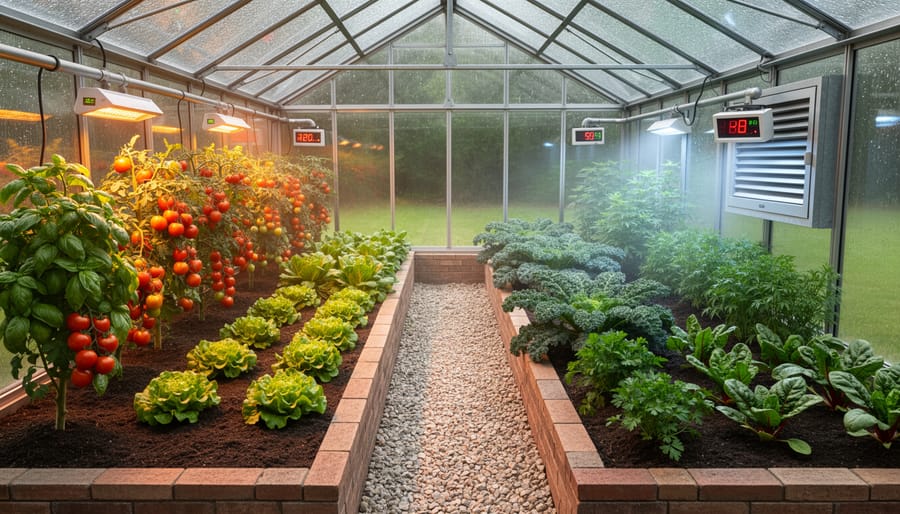
Matching Crops to Temperature Zones
Understanding which crops will flourish in different temperature zones of your in-ground greenhouse makes all the difference between a thriving garden and a disappointing harvest. The beauty of this growing method is that you can strategically position plants based on their temperature preferences.
The warmer zones, typically found in the sunnier, south-facing sections of your in-ground greenhouse, are perfect for heat-loving crops. Tomatoes absolutely thrive here, developing sweeter fruit with consistent warmth. Peppers, both sweet and hot varieties, perform beautifully in these spots, as do cucumbers, eggplants, and basil. These plants need soil temperatures between 65-75°F to really take off, and the naturally insulated warmth of an in-ground setup delivers exactly that.
Cooler zones, often along the north side or in shadier pockets, are ideal for leafy greens and cold-hardy vegetables. Lettuce, spinach, kale, and arugula actually prefer these conditions, becoming sweeter and less bitter when they’re not stressed by excessive heat. Radishes, peas, and most herbs like cilantro and parsley also appreciate the cooler environment.
Here’s a simple reference approach: warm zones get the crops you’d typically start after the last frost, while cool zones accommodate the vegetables you’d plant in early spring or fall outdoors. One homeowner shared that organizing her in-ground greenhouse this way doubled her harvest because each plant got its ideal microclimate. Start by observing temperature variations in your greenhouse throughout the day, then match crops accordingly for maximum success.
Creating Physical Dividers Without Blocking Light
Creating separate zones in your in-ground greenhouse doesn’t mean sacrificing the precious natural light your plants need. The key is choosing dividers that define spaces while allowing sunlight to reach every corner.
Transparent barriers work beautifully for this purpose. Consider using clear acrylic or polycarbonate sheets to create physical separation between cool-season and warm-season crops. These materials are durable, easy to clean, and won’t cast shadows across your growing beds. One homeowner from Oregon shared that her clear dividers helped maintain distinct temperature zones while keeping her entire greenhouse bright and welcoming.
Wire mesh trellises offer another smart solution. Position them strategically to support climbing vegetables like tomatoes or cucumbers while creating a natural boundary between zones. The open design ensures light passes through freely, and you’re making productive use of vertical space at the same time.
Tiered shelving units placed perpendicular to your light source create functional divisions without blocking illumination. Use wire or slatted shelving rather than solid surfaces, and position them to run north-south when possible. This arrangement maximizes light exposure throughout the day.
Glass block sections provide a decorative yet practical option, adding architectural interest while diffusing light beautifully across adjacent zones. These work especially well for creating windbreaks in larger in-ground greenhouses where air circulation needs management.
Building Your In-Ground Greenhouse: Key Considerations
Site Selection and Drainage
Choosing the right location makes all the difference when building an in-ground greenhouse. Your ideal site should face south to capture maximum sunlight throughout the day, especially during winter months when every ray counts. Think of your greenhouse as a solar collector that needs unobstructed southern exposure for at least six hours daily.
Drainage is absolutely critical. Since your greenhouse sits partially below ground, water management becomes your top priority. Walk your yard after a heavy rain and observe where water naturally flows and pools. Avoid low-lying areas where water collects, as these will lead to flooding issues. Instead, look for slightly elevated ground or gentle slopes that allow water to drain away naturally.
Here’s a simple test: dig a hole about two feet deep in your proposed location and fill it with water. If it drains within 24 hours, you’re in good shape. Slower drainage means you’ll need to install proper drainage systems, like French drains or gravel beds around your structure.
proper site selection also means checking underground utilities before breaking ground. One homeowner shared how marking utility lines saved her from a costly mistake during excavation. Consider accessibility too since you’ll be hauling soil, materials, and eventually harvested crops to and from your greenhouse year-round.
Excavation: DIY or Hire Out?
Let’s be honest: digging a pit for an in-ground greenhouse is serious physical work. Before you grab a shovel, consider the scope of your project. For a small 6×8 foot greenhouse requiring 2-3 feet of depth, a motivated DIYer with a weekend and some helping hands can tackle it manually. However, larger projects quickly become overwhelming.
Renting a mini excavator (around $250-400 per day) makes sense for most projects over 8×10 feet. You’ll complete in hours what would take days by hand, and you’ll have energy left for the actual building. If you’re unfamiliar with heavy equipment or dealing with rocky soil, hiring an excavation contractor ($500-1,500 depending on size and site conditions) might be your best bet.
One homeowner shared: “I tried DIYing our 10×12 pit and gave up after one exhausting day. Hired it out for $800 and watched them finish in three hours. Best money I spent on the whole project.”
Consider hidden challenges too: tree roots, rocky terrain, and proper soil disposal all complicate manual digging. If your property has drainage issues or slopes, professional expertise becomes even more valuable. Factor excavation costs into your budget from the start—it’s typically 15-25% of total project expenses but absolutely essential for success.
Structural Materials That Last Underground
Building an in-ground greenhouse means your structure faces constant moisture and soil contact, so choosing materials that can handle these conditions is essential for long-term success.
For framing, galvanized steel or aluminum stands up remarkably well to underground environments. These metals resist corrosion and won’t rot, making them ideal for the portions of your structure that sit below grade. If you prefer working with wood, pressure-treated lumber rated for ground contact offers decent durability, though it requires regular inspection and eventual replacement. Cedar and redwood provide natural rot resistance but come with a higher price tag.
When selecting greenhouse materials for below-grade applications, proper waterproofing is non-negotiable. Apply waterproof membranes or coatings to all buried surfaces, similar to basement waterproofing. This creates a barrier between your structure and moisture-laden soil.
For glazing panels on the exposed portions, polycarbonate panels outperform glass in underground settings. They’re lighter, more insulating, and handle the ground settling better than rigid glass panes.
One homeowner in Vermont shared that switching from treated wood to steel framing added fifteen years to their in-ground greenhouse lifespan. The initial investment paid off by eliminating the need for premature rebuilding.
Remember to install proper drainage around your structure’s perimeter. Even the best materials need help managing water, and good drainage prevents moisture from overwhelming your waterproofing efforts.
Ventilation and Moisture Management
Simple Ventilation Systems That Work
Proper airflow keeps your in-ground greenhouse healthy without breaking the bank. The simplest approach uses passive ventilation—nature does the work for you. Install vents near ground level on the north side and higher vents on the south side or roof. As warm air rises and exits through the top openings, cooler air flows in below, creating natural circulation. This gravity-fed system costs almost nothing to run and works beautifully in most climates.
For days when passive airflow isn’t enough, adding a solar-powered exhaust fan gives you extra control without increasing your electricity bill. These affordable units mount easily in roof vents or gable ends and automatically kick in during hot afternoons. Many homeowners find that combining both methods provides reliable year-round climate control.
One grower in Colorado shared that her combination of low intake vents and a small solar fan kept temperatures stable even during unexpected heat waves, protecting her tomato crop when neighbors lost theirs to heat stress. Understanding different greenhouse ventilation strategies helps you choose what fits your specific site conditions and budget, ensuring your plants thrive while keeping costs manageable.
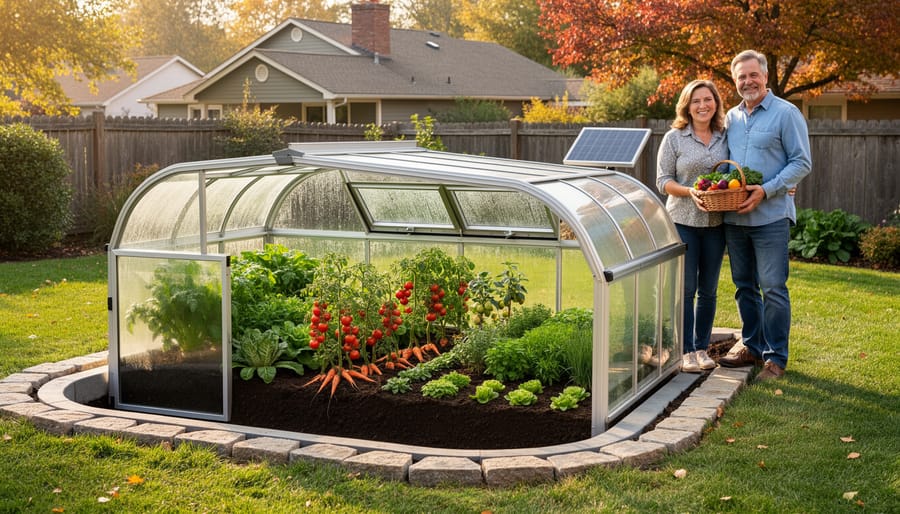
Real Results: What Homeowners Are Growing
When the Martinez family from Colorado dug their first in-ground greenhouse three years ago, they weren’t sure what to expect. “We started small with a 10×12 space, sunken about four feet,” Sarah Martinez shares. “That first winter, we harvested lettuce, spinach, and kale while there was snow on the ground. It felt almost magical.” They’ve since expanded their setup with dedicated zones for leafy greens, root vegetables, and cold-hardy herbs, achieving year-round growing without supplemental heating.
Tom Chen in Michigan took a different approach, converting his failed traditional greenhouse into a partially sunken design. “My heating bills were ridiculous before,” he explains. “Going three feet deep cut my energy costs by about 60 percent. Now I zone one side for tomatoes and peppers in spring, and the other stays dedicated to winter greens.” His biggest lesson? Don’t skip the drainage step. “I learned that the hard way after one heavy rain,” he laughs.
Meanwhile, the Johnsons in Vermont combined their in-ground greenhouse with rainwater collection and worm composting bins along the north wall. “We grow enough salad greens for our family of four all winter,” Jessica Johnson notes. “The kids love checking on the plants, and it’s taught them so much about where food comes from.”
The common thread among these homeowners? They all started smaller than planned, learned from initial mistakes, and gradually refined their systems. Most report that proper insulation and thoughtful crop zoning made the biggest difference in their success, transforming their growing season from a few months to nearly year-round productivity.
Is an In-Ground Greenhouse Right for Your Yard?
Before you grab a shovel, let’s honestly evaluate whether an in-ground greenhouse makes sense for your property. This isn’t the right fit for everyone, and that’s perfectly okay.
Start with your space. You’ll need at least a 10×12-foot area with good southern exposure for optimal sunlight. The site should be relatively level and positioned away from large trees that could block light or cause root interference. Sarah from Vermont learned this the hard way: “I initially picked a spot near my oak tree thinking it would provide wind protection, but the shade cut my growing season significantly.”
Next, check your soil and drainage. Dig a test hole about 3 feet deep after heavy rain. If water pools and stays for more than 24 hours, you’ll need extensive drainage solutions that might make this project impractical. Rocky or heavily clay-based soil can also complicate excavation.
Consider your climate zone. In-ground greenhouses excel in areas with cold winters and moderate summers. If you live where groundwater tables run high or soil freezes extremely deep, you’ll face extra challenges.
Finally, assess your commitment level. Unlike typical DIY greenhouse projects, this requires significant excavation and construction time. Ask yourself: Can I dedicate 2-4 weekends to building? Am I comfortable with ongoing maintenance?
Here’s a quick framework: If you answered yes to good drainage, adequate space, suitable climate, and strong commitment, you’re likely an excellent candidate for this sustainable growing solution.
Building an in-ground greenhouse offers remarkable rewards for motivated homeowners ready to embrace sustainable growing. By harnessing the earth’s natural insulation, you’ll slash heating costs while extending your growing season well into winter months—some gardeners even achieve true year-round production in moderate climates. The energy savings alone can offset your initial investment within just a few seasons.
The beauty of incorporating zoned layouts means you’re not limited to one type of crop. Imagine harvesting fresh lettuce from your cool zone while tomatoes ripen in warmer sections, all under one roof. This versatility transforms your greenhouse from a single-purpose structure into a productive food factory tailored to your family’s needs.
Yes, digging below grade requires more upfront effort than a standard greenhouse, but don’t let that discourage you. With careful planning, proper drainage considerations, and a weekend or two of focused work, this is absolutely achievable as a DIY project. Start by sketching your layout, determining your zones based on sun exposure, and calculating your excavation needs. Many homeowners find the hands-on process deeply rewarding, and the long-term benefits—lower energy bills, extended harvests, and fresh produce regardless of outdoor conditions—make every shovelful worthwhile. Your commitment to planning today ensures gardening success for years ahead.
Looking for a greenhouses?
Browse our full range of greenhouses from authorized dealer brands. Free shipping to the continental US.