


How to Install a Man Cave Sound System with Proper Acoustics and Soundproofing

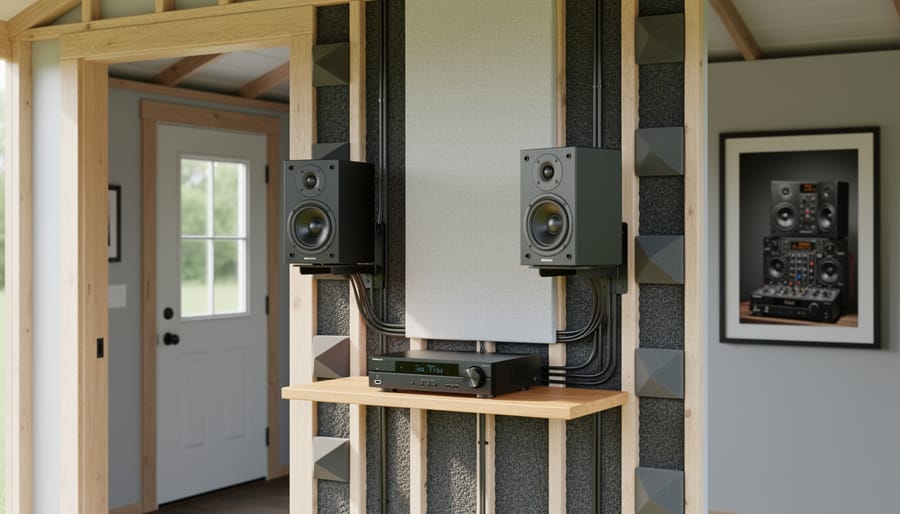
Installing a quality sound system in your shed man cave requires integrating soundproofing with your audio setup from the start, not treating them as separate projects. This dual approach takes a weekend to complete for most DIY homeowners and addresses the unique challenge of outdoor structures: keeping powerful sound inside while protecting equipment from temperature swings and moisture.
Your neighbors don’t want to hear your bass lines at 10 PM, and your speakers don’t want to live in an uninsulated box that swings from freezing to sweltering. Unlike basement or garage installations, sheds present specific acoustic challenges. Thin walls transmit sound easily. Non-standard framing means you can’t follow typical home theater guides. Temperature and humidity extremes can damage electronics and degrade sound quality.
The good news? These problems have straightforward solutions. By combining sound-dampening insulation, strategic speaker placement, and moisture-resistant materials, you create an audio space that sounds great inside without broadcasting to the neighborhood. Sarah from Portland learned this the hard way after installing a premium system in her backyard shed studio, only to have her neighbor knock on her door during the first jam session. After adding proper soundproofing panels and bass traps, she kept the same powerful system but cut outside noise by roughly 70 percent.
This guide walks you through the complete process: assessing your shed’s current state, installing soundproofing materials, treating interior acoustics, selecting and positioning equipment for shed environments, and verifying your results before cranking the volume.
Key Takeaway: Your planning checklist has three non-negotiables: accurate space measurements including construction type, a clear primary use case that drives speaker placement, and an honest assessment of whether your shed’s materials will help or fight your audio goals. Get these right before shopping, and you’ll avoid expensive mistakes.
Planning Your Man Cave Sound System Setup
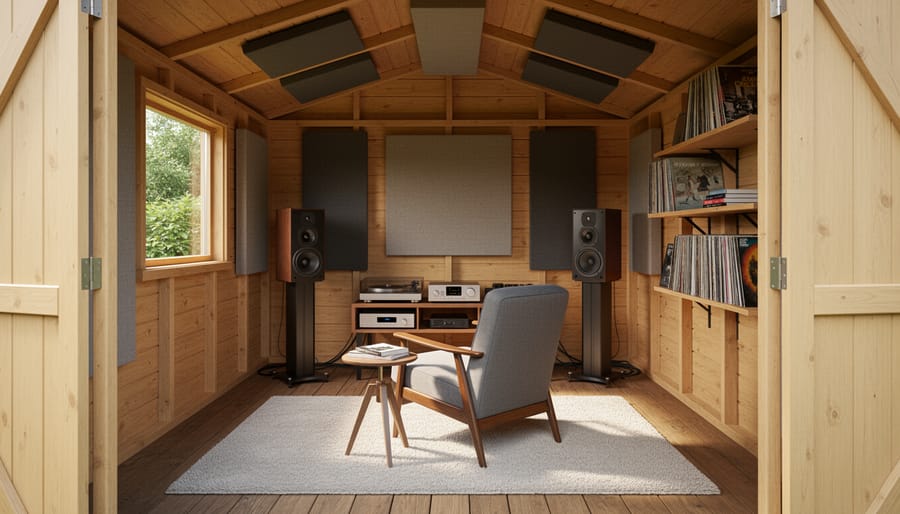
Before you buy a single speaker or amplifier, walk into your shed with a tape measure and notepad. The size of your space, what you’ll actually do in there, and how your shed is built will determine whether you need a $300 setup or a $3,000 one.
Start by measuring your shed’s dimensions and noting the ceiling height. A compact 8×10 space needs far less power than a spacious 16×20 workshop. Pay attention to the construction materials too, metal sheds reflect sound aggressively and create harsh echoes, wood sheds absorb some frequencies naturally, and vinyl-sided structures fall somewhere in between. These materials behave completely differently than the drywall and insulation in your house, which means you can’t just replicate an indoor home theater setup and expect good results.
Think hard about your primary activity. If you’re mainly gaming, you need clear dialogue and precise directional cues, which means a 5.1 surround system makes sense. For background music while working on projects, a quality stereo pair or soundbar handles the job without the complexity. Movie watching sits in the middle, where immersive sound matters but you might not need reference-grade precision. Many guys try to build a system that does everything perfectly and end up with something that costs twice as much while delivering a mediocre experience for each use case.
The component versus all-in-one decision comes down to your comfort level with wiring and calibration. Separate receivers, amplifiers, and speakers give you more control and better sound quality, but you’ll spend hours running cables and tweaking settings. Powered soundbars or wireless systems get you up and running in an afternoon, though they struggle in larger sheds and offer less room to upgrade later. If you’re already comfortable with transform your shed projects, components are worth the effort. If this is your first major shed upgrade, an all-in-one system lets you enjoy music now while you learn, and you can always expand later using the same shed planning tips that guided your initial build.
Tools and Materials You’ll Need
Before you start mounting speakers or treating walls, gather everything you’ll need. Shed installations present unique challenges, limited interior access, non-standard wall construction, and outdoor conditions, so having the right supplies on hand prevents frustrating mid-project trips to the hardware store.
Here’s what you’ll need, organized by purpose:
- Installation tools: Stud finder (magnetic type works best on metal sheds), drill with bits for wood and metal, screwdriver set, wire strippers, cable staples, level, measuring tape, and utility knife
- Acoustic materials: Acoustic foam panels or fabric-wrapped absorbers, bass traps for corners, diffuser panels if desired, and mounting adhesive rated for your wall type
- Soundproofing supplies: Mass-loaded vinyl barrier, acoustic insulation batts, weatherproof acoustic sealant, furring strips if adding layers to existing walls
- Audio equipment essentials: Speaker wire (14-gauge minimum, get 25% more than measured distances), banana plugs or wire connectors, speaker mounting brackets compatible with your wall material, cable management clips
- Testing and safety gear: Circuit tester for electrical work, sound level meter app (free on smartphones), moisture meter for checking wall conditions, safety glasses, work gloves
The stud finder deserves special mention for shed work. Unlike drywall over wooden studs in houses, sheds may have metal framing, widely-spaced supports, or vinyl siding over minimal structure. A magnetic stud finder locates metal fasteners and framing reliably where electronic models often fail on non-standard construction.
For acoustic materials, choose moisture-resistant options designed for basement or garage use rather than standard home theater foam. Sheds experience greater humidity fluctuations than climate-controlled rooms, and standard foam can deteriorate or harbor mold in these conditions. Similarly, your acoustic sealant should be weatherproof, regular caulk won’t maintain its seal through seasonal temperature swings.
Wire gauge matters more in sheds because longer runs from your equipment to speakers can cause signal loss. Fourteen-gauge wire handles most setups, but if you’re running cable more than 50 feet or powering high-wattage speakers, consider 12-gauge instead.
Safety Precautions and Pre-Installation Checks
Before you start drilling holes or running cables, let’s address the safety realities of working in an outdoor structure. Sheds pose unique electrical and structural challenges that don’t exist in traditional home theater installations, and skipping these precautions can create dangerous situations or damage your equipment.
Warning: Never tap into existing shed electrical circuits without verifying they’re properly grounded and have adequate capacity. Outdoor structures require GFCI protection, weatherproof enclosures, and proper moisture barriers around all electrical work.
Check your shed’s electrical system first. If you’re working with an older structure that only has a basic light circuit, you’ll likely need a dedicated 20-amp line for your audio equipment. Look for exposed or damaged wiring, especially near moisture-prone areas like windows or the roofline. Sheds experience temperature swings and humidity levels that indoor rooms don’t, which can compromise electrical connections over time.
Inspect where you plan to mount speakers and equipment. Press firmly on wall sections to identify weak spots or water damage. Many shed walls aren’t designed to support heavy subwoofers or large speakers without additional reinforcement. If you’re mounting to metal shed walls, you’ll need different hardware than wood structures, and the process differs significantly from standard drywall installation. For complex electrical upgrades or if you find any wiring concerns, call a licensed electrician who understands outdoor structure codes.
Before you proceed with how to soundproof your space and mount equipment, verify your shed’s structural integrity. Check for roof leaks, foundation settling, or any signs of moisture penetration that could damage your investment. These pre-installation checks take an hour but prevent costly mistakes and safety hazards down the road, whether you’re working on metal shed upgrades or standard wood construction.
Step-by-Step Sound System Installation Process
Step 1: Add Soundproofing to Walls and Ceiling
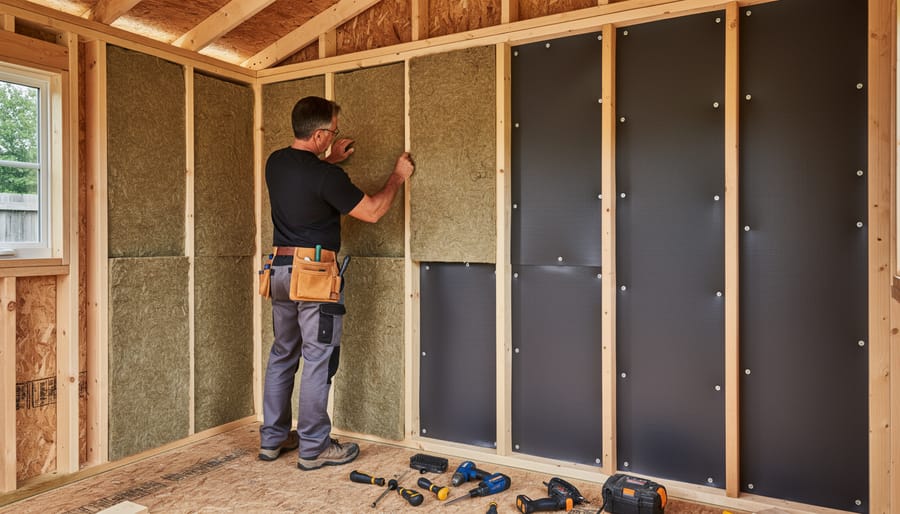
Start by identifying your shed’s wall construction because the soundproofing approach varies significantly between metal, wood, and vinyl structures. Most sheds weren’t built with noise control in mind, so you’re essentially retrofitting a barrier.
For wood-framed sheds, mass-loaded vinyl (MLV) offers the best bang for your buck. Cut it to fit between exposed studs or apply directly over interior walls before finishing. MLV works by adding mass that blocks sound transmission. Secure it with roofing nails or staples every 6-8 inches, overlapping seams by 2 inches and sealing with acoustic caulk. This prevents gaps where sound sneaks through.
Metal sheds present a unique challenge because thin panels vibrate and amplify sound. Apply closed-cell foam insulation boards first to dampen vibration, then layer MLV over that. Use construction adhesive rated for metal surfaces since nails can create new sound leak points.
Vinyl sheds typically have hollow walls. Remove interior panels if possible and fill cavities with rock wool or fiberglass batts before reinstalling. These materials absorb sound energy trying to pass through.
Don’t forget the ceiling. Sound travels up and out through roofs surprisingly well. Install rigid fiberglass panels between roof joists, then cover with MLV. In metal-roof sheds, add an air gap between insulation and metal to reduce vibration transfer.
Weatherstrip around doors and windows. Even tiny gaps around a door frame can undermine your soundproofing work completely.
Step 2: Install Acoustic Treatment for Better Sound Quality
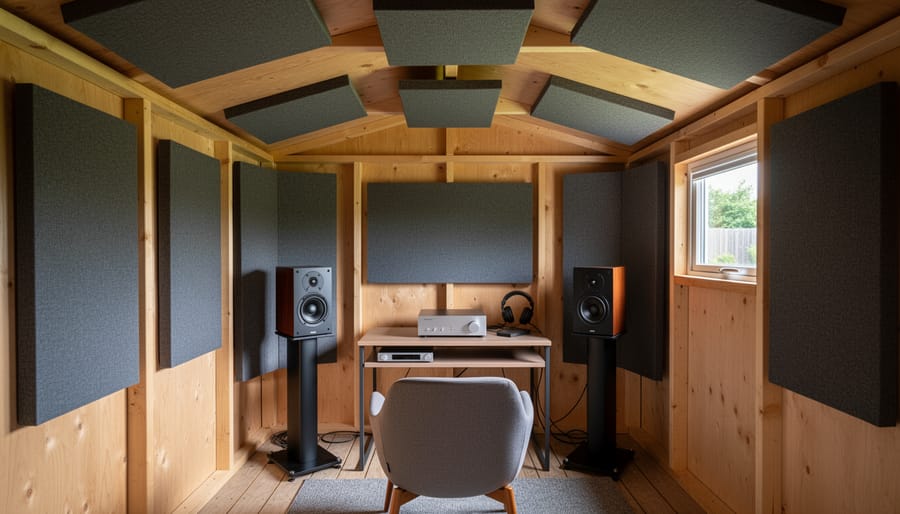
With your soundproofing in place from Step 1, you’re ready to tackle acoustic treatment. This step isn’t about blocking sound, it’s about making the sound inside your shed actually sound good.
The difference matters: soundproofing stops noise from escaping or entering, while acoustic treatment controls how sound waves bounce around inside your space. Without treatment, your shed becomes an echo chamber where dialogue sounds muddy and bass overwhelms everything.
Start with bass traps in the corners where your walls meet the ceiling. Bass frequencies accumulate in these spots, creating boomy, uncontrolled low-end. Dense foam corner traps or DIY fabric-wrapped panels filled with Rockwool mineral fiber work well. You need at least two corners treated, but all four delivers noticeably tighter bass.
Next, add absorption panels to your first reflection points, the wall spots where sound bounces directly from speakers to your ears. Sit in your main listening position and have someone slide a mirror along the walls. Where you see each speaker reflected is where a panel goes. Two-inch thick acoustic foam or fabric panels handle mid and high frequencies that otherwise create harsh, fatiguing sound.
For metal or particularly reflective sheds, consider adding a diffuser on the wall behind your seating. This scatters sound waves instead of absorbing them, maintaining energy without the slap-back echo that plagues hard surfaces.
Step 3: Run and Protect Your Wiring
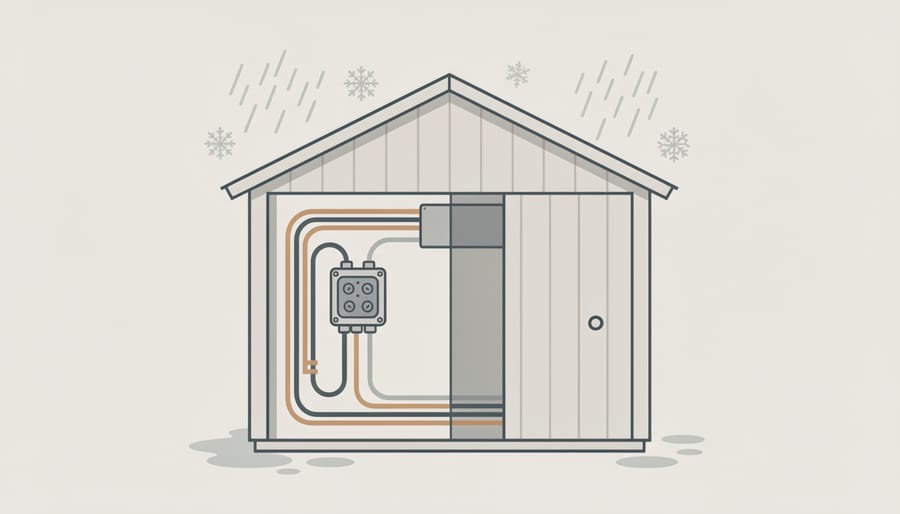
Running cables in a shed requires extra protection beyond what you’d need indoors. Temperature swings, humidity, and potential exposure to the elements mean standard wire routing won’t cut it.
Start by planning your cable runs before drilling any holes. Trace the path from your receiver to each speaker location, keeping power cables separate from speaker wire by at least six inches to prevent interference. If runs must cross, do so at 90-degree angles.
Use exterior-rated speaker wire (CL3 or better) that can handle moisture and temperature fluctuations. For power cables, run them through conduit even if they’re rated for outdoor use, this adds a protective layer against accidental damage and makes future upgrades easier. PVC conduit works well and you can paint it to match your walls.
Seal every hole you drill with silicone caulk to prevent moisture intrusion. This matters more than you’d think, as even small gaps let in humidity that can corrode connections over time.
Avoid running cables directly on the floor where they might get stepped on or crushed by furniture. Instead, secure them along wall edges using cable clips every 18 to 24 inches. Leave slight slack at connection points so thermal expansion and contraction doesn’t stress the terminals.
Label both ends of every cable before hiding them behind walls or acoustic panels, you’ll thank yourself later.
Step 4: Mount Speakers and Subwoofers
Start by identifying your primary listening position, usually where you’ll sit most often, and plan speaker placement around it. For a basic stereo setup, position front speakers at ear height when seated, angled slightly toward the listening spot. They should form an equilateral triangle with your head, typically 6-8 feet apart. If you’re installing surround speakers, place them 2-3 feet above ear level and slightly behind your seating.
Finding secure mounting points in sheds takes extra care. Wood-framed sheds let you locate studs with a standard stud finder, but metal or vinyl-sided structures require different approaches. For metal sheds, magnetic stud finders work well, or tap along the wall to listen for the solid sound of a support beam. Pre-built vinyl sheds often have visible seams marking stud locations every 16 or 24 inches.
Use appropriate hardware for your wall type: heavy-duty toggle bolts for hollow walls, lag screws directly into studs for solid mounting. Wall anchors rated for at least twice your speaker’s weight prevent accidents. For subwoofers, floor placement works best, corners amplify bass naturally, but experiment with positioning 1-2 feet from walls to reduce boominess. Always secure subwoofers to prevent vibration-induced movement, especially on wood floors that might transmit sound.
Step 5: Connect and Configure Your Audio Equipment
With all your speakers and subwoofers mounted and wired, it’s time to bring your system to life. Start by positioning your receiver or amplifier in a central location away from direct moisture exposure, even in a shed with climate control, temperature swings can cause condensation. If your shed lacks insulation, consider placing equipment in a ventilated cabinet or using silica gel packets to absorb moisture.
Connect your speaker wires to the corresponding terminals on your receiver, matching positive to positive and negative to negative. Most receivers color-code or label each channel, front left, front right, center, surround. Double-check each connection before powering on to avoid potential damage.
Next, plug in your audio sources: streaming devices, gaming consoles, Blu-ray players, or turntables. HDMI cables handle both audio and video for modern equipment, while older gear might need optical or RCA connections. If your shed doesn’t have stable WiFi, run an ethernet cable for reliable streaming.
Power everything on and access your receiver’s setup menu. Run the automatic speaker calibration if available, it uses a microphone to measure distances and levels. This takes about five minutes and dramatically improves sound balance. For sheds without climate control, inspect connections quarterly for corrosion and keep firmware updated for optimal performance.
Testing and Fine-Tuning Your Sound System
After completing your installation, testing ensures everything works as intended and sounds great. Start by powering up your system at moderate volume to confirm all speakers are active and producing sound. Play a familiar track and walk around your man cave to identify dead spots or areas where sound feels unbalanced.
Here’s a systematic testing sequence to verify your installation:
- Play audio with bass-heavy content and check for rattling or vibrations in your shed walls, doors, and windows. Tighten loose fixtures or add dampening material where needed.
- Step outside and walk the perimeter of your shed while music plays at your typical listening volume. Note where sound escapes most noticeably to identify weak points in your soundproofing.
- Test your system at different volume levels, listening for distortion, buzzing, or interference that might indicate wiring issues or improper connections.
- Play tracks with clear dialogue or vocals to assess clarity. Muddy or echo-heavy sound suggests you need more acoustic absorption panels in key reflection points.
- Use your smartphone’s sound meter app (many are free) to measure volume consistency across your listening area. Readings should vary by no more than 3-5 decibels in your primary seating zone.
Fine-tuning comes next. Adjust your receiver’s individual speaker levels using its built-in test tones, which cycle through each speaker. Most receivers include automatic calibration features using a microphone, but manual adjustment often yields better results in acoustically challenging shed spaces. If dialogue sounds thin, boost your center channel slightly. If bass feels overwhelming or boomy, reduce the subwoofer level or move it away from corners where bass naturally accumulates.
For persistent acoustic issues like excessive echo, add more absorption panels to bare wall surfaces or the ceiling. Professional calibration with specialized measurement equipment costs between $200-500 but makes sense if you’ve invested heavily in high-end components and want to extract every bit of performance from your setup.
Common Problems and Quick Fixes
If you’re hearing excessive echo or your music sounds muddy, you probably need more acoustic treatment. Sheds often have bare walls and ceilings that bounce sound around mercilessly. Add a couple more absorption panels to the walls opposite your speakers, or hang heavy moving blankets temporarily to test if absorption solves the problem before investing in permanent treatments.
Sound leaking to neighbors typically means your soundproofing wasn’t thick enough for your volume levels. You can add a second layer of mass-loaded vinyl over existing soundproofing, or install exterior-grade acoustic panels on the outside walls facing neighbors. For quick results, seal any gaps around doors and windows with weatherstripping, small air leaks let surprising amounts of sound escape.
Buzzing or humming usually points to electrical interference or ground loop issues. Check that all your equipment shares the same electrical circuit, and make sure power cables don’t run parallel to speaker wires for long distances. If the buzz persists, a ground loop isolator costs twenty bucks and solves most cases instantly.
Why do my speakers crackle in winter?
Cold temperatures can affect speaker cone materials and amplifier components. Let equipment warm to room temperature before cranking the volume, and consider a small space heater for extremely cold climates.
How do I stop moisture from damaging my gear?
Run a dehumidifier during humid months, keep equipment off the floor on stands or shelves, and use silica gel packets inside receiver cabinets to absorb excess moisture.
What if bass sounds boomy and overwhelming?
Move your subwoofer away from corners where bass builds up, or add bass traps to corner areas. Reducing the subwoofer’s volume slightly often clears up muddiness better than moving other speakers.
Moisture problems show up as corrosion on connectors or foggy receiver displays. Beyond running a dehumidifier, wrap exposed wire connections with electrical tape and keep a small fan circulating air year-round. If you spot rust forming on speaker terminals, clean them with contact cleaner and apply a tiny amount of dielectric grease to prevent future oxidation.
Most shed sound system headaches trace back to either inadequate soundproofing, insufficient acoustic treatment, or moisture management. Address the root cause rather than turning up the volume to compensate, which just creates more problems with neighbors and distortion.
Maintaining Your Man Cave Audio Setup
Your shed-based sound system faces challenges indoor setups never encounter, so a maintenance routine prevents costly damage and keeps everything sounding great year-round. The outdoor environment means you can’t just install and forget.
Check for Moisture Monthly
Condensation is your biggest enemy in a non-climate-controlled space. Inspect behind acoustic panels and equipment every month for dampness, especially during seasonal transitions when temperature swings are most dramatic. Run a dehumidifier if you notice moisture collecting, and wipe down metal components to prevent rust. Check that weatherstripping around doors and windows stays intact, gaps let humid air in, which settles on cold electronics.
Seasonal Equipment Inspections
Before winter and summer, verify all connections remain tight. Temperature changes cause materials to expand and contract, which can loosen speaker mounts, wire terminals, and equipment racks. Tighten mounting hardware, reseat cables, and confirm nothing has shifted out of position. Cold weather makes rubber and foam brittle, so check speaker surrounds and foam acoustic treatments for cracks.
Tip: Create a seasonal checklist: spring (check for winter moisture damage), summer (verify cooling/ventilation), fall (prepare for temperature drops), winter (monitor for condensation and ensure equipment stays above freezing).
Look for signs that rodents or insects have moved into your space, particularly around wiring and inside bass traps where they like to nest. A simple inspection saves you from discovering chewed cables during your next listening session.
When to Upgrade Acoustic Treatments
Acoustic foam degrades faster in sheds than in climate-controlled rooms. If panels have become brittle, discolored, or crumbly, they’ve lost effectiveness and need replacement, usually every three to five years depending on temperature extremes in your area. Bass traps filled with mineral wool last longer, but check the fabric covering for tears or mold. Soundproofing materials like mass-loaded vinyl are more durable and rarely need replacement unless physically damaged.
If you’ve added insulation to your shed since installation, you may need to adjust acoustic treatment since the space’s sound behavior will have changed. Similarly, replacing a metal roof with shingles dramatically alters acoustics and warrants reassessment.
Transforming your shed into an acoustically optimized man cave is absolutely achievable with the right approach. You’ve now got a complete roadmap, from soundproofing those exterior walls to positioning speakers and calibrating your system for your space’s unique characteristics.
The beauty of this project is that you don’t need to complete everything in one weekend. Start with the essentials like soundproofing and basic speaker placement, then add acoustic panels and fine-tune your setup over time. Each improvement you make will noticeably enhance your listening experience.
Remember, outdoor structures present challenges that standard home theater guides often ignore, but those challenges have straightforward solutions. Your shed’s metal siding, temperature swings, and proximity to neighbors aren’t obstacles, they’re just factors to address during planning and installation.
Once everything’s in place, you’ll have a personal space where you can crank your favorite albums, immerse yourself in games, or host movie nights without compromising sound quality or worrying about disturbing anyone. There’s genuine satisfaction in enjoying audio you’ve carefully installed and optimized yourself, especially in a space you’ve transformed from a simple storage building into your ideal retreat.