


How to Winterize Your Gazebo for Wind and Storm Protection (7 Essential Steps)

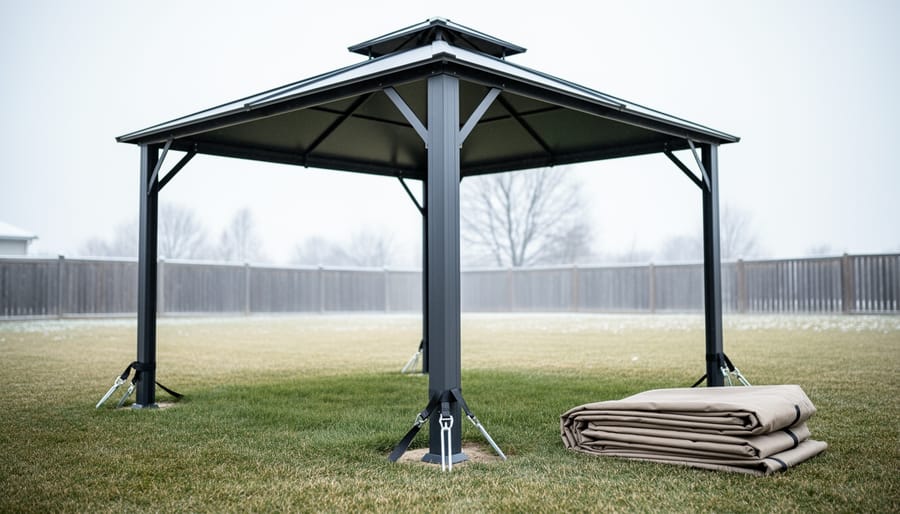
Your gazebo can withstand winter winds when you anchor it properly, reinforce weak points, and remove fabric panels or the canopy before storms arrive. Most gazebos fail during high winds not because of design flaws, but because homeowners skip the crucial steps of securing the frame to the ground and preparing vulnerable components for seasonal weather. The process takes about two to three hours and requires basic tools you likely already own.
Winter wind protection isn’t about luck. It’s about understanding how wind affects your structure and taking specific actions before the first major storm hits. A gazebo acts like a sail when wind catches the canopy or screens, creating uplift forces that can rip anchors from the ground or bend support posts. The good news? You can eliminate these risks without professional help or expensive equipment.
Many homeowners learn this lesson the hard way, finding their beautiful backyard centerpiece toppled or damaged after the first winter gale. Sarah from Michigan shared that her family’s gazebo survived three winters without issue until a sudden November windstorm lifted it completely off its deck mounts. “I thought the built-in weights were enough,” she told us. “Now I use ground anchors and remove the canopy every fall.”
This guide walks you through the complete winterizing process, from assessing your gazebo’s current anchoring system to verifying that every component can handle sustained winds and gusts. You’ll learn which parts need reinforcement, what materials work best for your ground type, and how to spot warning signs before they become expensive repairs. By the end, you’ll have a step-by-step action plan tailored to your specific setup, whether you’re securing a permanent hardtop structure or a seasonal soft-top model.
Key Takeaway: Metal hard-top gazebos handle 30-50 mph winds, wooden structures manage 35-45 mph, and soft-top designs become vulnerable above 25-30 mph. Know your gazebo type and its wind limits before winter weather arrives, because exceeding those thresholds risks serious structural damage.
Understanding Wind Resistance: How Much Wind Can Your Gazebo Handle?
Most gazebos aren’t designed to handle extreme wind conditions without proper preparation, and understanding your structure’s limits is the first step in effective winterization. The wind resistance of your gazebo depends primarily on three factors: construction material, roof type, and anchoring system.
Metal gazebos with hard-top roofs typically withstand winds of 30-40 mph when properly anchored, though premium models with reinforced frames can handle gusts up to 50-60 mph. Soft-top gazebos are more vulnerable, with fabric canopies creating significant wind resistance that can turn your structure into a sail during storms. Most soft-top designs struggle above 25-30 mph unless you remove the canopy entirely. Wood gazebos fall somewhere in the middle, handling 35-45 mph winds when built with quality lumber and solid joinery, but their performance degrades if wood deteriorates or joints loosen over time.
Design features make a substantial difference in wind performance. Open-sided gazebos allow wind to pass through more easily than fully enclosed structures, reducing lateral pressure on the frame. Vented roofs help too, letting wind escape upward rather than pushing against a solid surface. The ASCE wind loads for canopies provide engineering standards that inform how permanent structures should be rated, though most residential gazebos don’t undergo formal wind testing.
Your anchoring system matters more than the gazebo itself in many cases. Ground stakes driven into soil offer minimal resistance compared to concrete footings or anchor plates bolted to a patio. A well-built gazebo with poor anchoring will fail before a modest structure properly secured to a solid foundation. Check what your gazebo came with and whether those original anchors match your soil type and exposure level.
Tools and Materials You’ll Need for Wind-Resistant Winterization
Before you begin winterizing your gazebo, gather all necessary supplies to complete the job efficiently and safely. Having everything on hand prevents mid-project trips to the hardware store and ensures you can finish the work before storm systems move in.
Essential Tools and Materials:
- Anchoring: Heavy-duty ground stakes or auger anchors, concrete anchors for paved surfaces, anchor straps rated for at least 50 mph winds
- Sealing: Exterior-grade silicone or polyurethane sealant, rust-inhibiting primer and paint for metal structures, wood preservative and weatherproof stain
- Reinforcement: Galvanized metal brackets and corner braces, lag bolts and washers in various sizes, cross-bracing materials matching your gazebo’s frame
- Protection: Heavy-duty weatherproof tarp or custom-fit cover, ratchet tie-down straps with rubber-coated hooks, bungee cords for securing loose elements
- Tools: Socket wrench set, cordless drill with bit assortment, measuring tape, level, ladder rated for your weight plus 25 pounds, work gloves and safety glasses
For extreme weather zones (sustained winds above 60 mph or frequent ice storms), consider upgrading to commercial-grade cable tie-down systems and engineered anchoring solutions designed for your soil type. Most homeowners can source basic materials from big-box hardware stores, but specialty anchoring systems often require online ordering from outdoor structure suppliers. Budget roughly $75-150 for a complete winterization kit, depending on your gazebo’s size and current condition. Having redundant anchoring materials provides backup options if your first installation approach doesn’t suit your specific ground conditions.
Safety Warnings and Pre-Winter Inspection
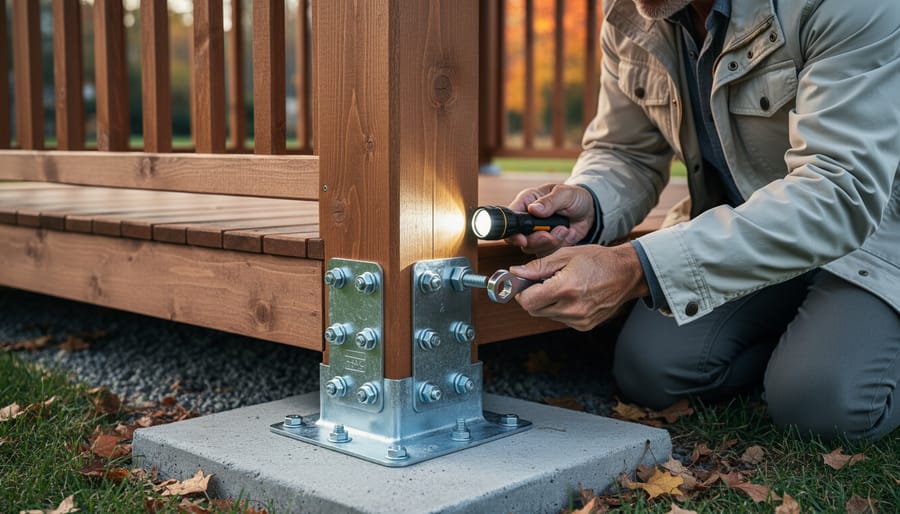
Before you start tightening bolts or climbing ladders, take thirty minutes to inspect your gazebo when conditions are safe. Never work on your structure during high winds or when storms are approaching, and avoid wet or icy days when ladders become slippery. If your gazebo sits near power lines, maintain at least ten feet of clearance with any tools or materials, electrical hazards aren’t worth the risk.
Check your structure systematically from the ground up. Look for cracked or split posts, wobbly corner connections, or soft spots in wooden beams that bend when you press them. Inspect the foundation carefully; issues with foundation drainage can undermine anchor points and create instability you won’t notice until wind loads hit. Metal frames need scrutiny too, surface rust is manageable, but flaking metal or holes mean the structure has lost strength.
Warning: Cracked support posts, unstable foundations, severe rust penetration, or rotted structural beams require professional assessment before winter, DIY fixes won’t hold against storm winds.
Understanding what qualifies as structurally sound matters because certifications protect against liability, but they assume your gazebo was properly maintained. If you spot major damage, contact a contractor or structural engineer now rather than discovering mid-January that your gazebo can’t handle the season. Minor wear is fixable; compromised structural integrity isn’t a weekend project.
Step-by-Step: Preparing Your Gazebo to Withstand Winter Winds
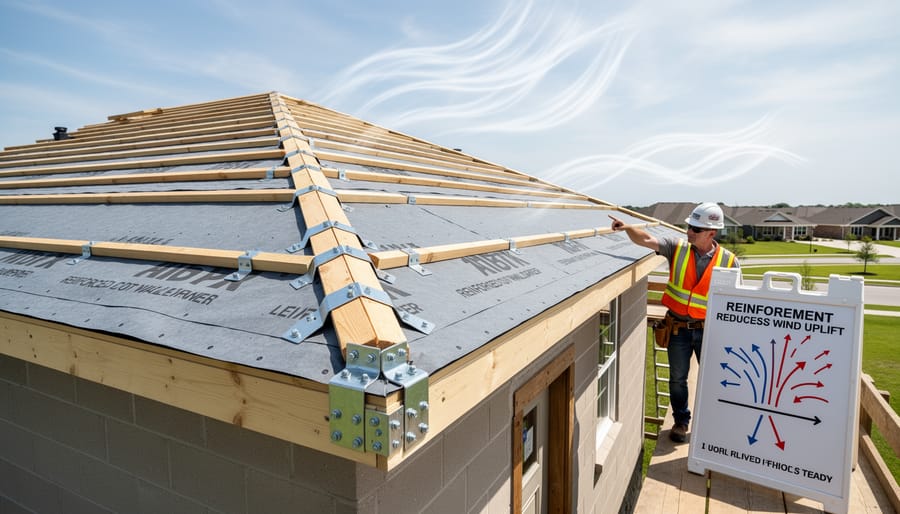
Step 1: Inspect and Reinforce All Anchor Points
Start at ground level where your gazebo meets the earth. Pull on each anchor point with firm, steady pressure, if anything shifts or feels loose, you’ve found your first weak spot. Check metal stakes for rust, plastic anchors for cracks, and concrete footings for crumbling edges or separation from the frame.
For gazebos on soft ground, standard stakes won’t cut it in winter winds. Replace them with auger-style anchors that screw deep into soil, or install concrete anchor blocks buried at least 18 inches down. In sandy or loose soil, add wider anchor plates to distribute the load and prevent pullout.
On concrete pads, verify that expansion bolts are tight and not pulling away from the surface. If you see gaps or cracks around existing anchors, drill new holes offset by two inches and install fresh wedge anchors rated for outdoor use. Corroded bolts need immediate replacement, they’ll fail when you need them most.
Add supplemental cable ties from upper frame corners to separate ground anchors set three feet beyond your gazebo’s footprint. This creates a backup system that catches wind loads even if primary anchors weaken. Test each connection by hanging your full body weight from accessible points.
Step 2: Tighten All Bolts, Screws, and Connections
Start at the canopy frame and work your way down methodically, checking every bolt, screw, and connection point. Use a socket wrench or screwdriver to tighten any loose fasteners, wind vibration gradually works hardware loose over time, creating weak points that storms exploit.
For metal gazebos, pay special attention to corner brackets and roof joints where the frame bears the most stress. Replace any rusted bolts immediately; corrosion weakens threading and can snap under wind pressure. Apply a small amount of thread-locking compound to critical structural connections to prevent them from loosening through freeze-thaw cycles.
Wood structures need different scrutiny. Check for screws that have pulled away from the wood or created enlarged holes. These require longer screws or repositioning to grab fresh material. Wiggle each joint gently, any movement indicates you need additional fasteners or reinforcement brackets.
Don’t forget less obvious connection points: where posts meet cross-beams, decorative trim attachments, and roof panel seams. A single loose connection can create a pivot point that multiplies wind force across the entire structure.
Step 3: Seal Gaps and Apply Weather Protection
Once all connections are tight, seal every gap where water can infiltrate and compromise your gazebo’s structural integrity. Start with roof penetrations, where poles meet the canopy frame, using clear silicone or polyurethane sealant rated for outdoor use. Apply a continuous bead along all joints and smooth it with a wet finger to ensure complete coverage.
For wooden gazebos, treat exposed surfaces with penetrating wood sealer or exterior-grade stain before winter arrives. Focus on end grain and joints where moisture absorption causes rot and weakens wind resistance. Metal structures need rust prevention: wire-brush any surface oxidation, then apply rust-inhibiting primer followed by corrosion resistance coating to vulnerable areas like bolt heads and frame welds.
Check manufacturer specifications for compatible products, some powder-coated finishes react poorly with certain sealants. Complete all sealing work during dry weather above fifty degrees Fahrenheit so materials cure properly before storms test your work.
Step 4: Remove or Secure Soft-Top Canopies
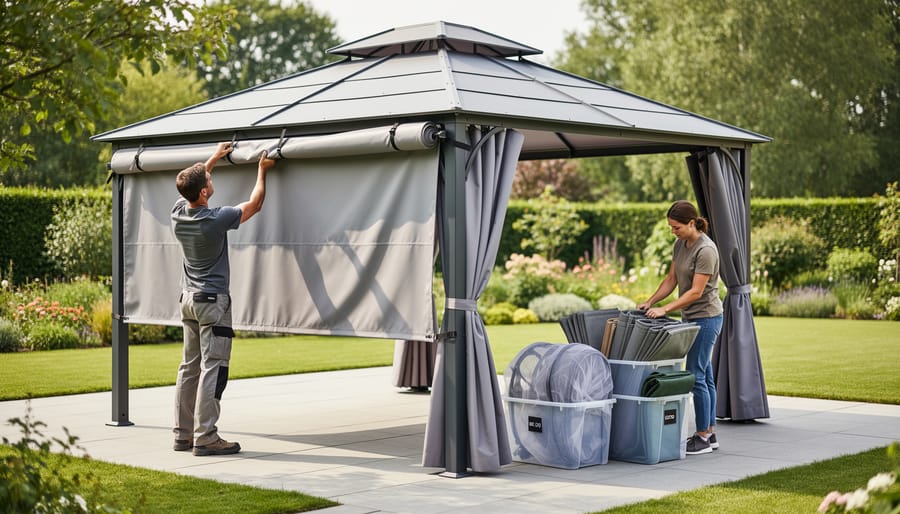
Soft-top canopies are the most vulnerable part of any gazebo in winter storms. A single gust can turn fabric into a sail that tears or lifts the entire structure. You need to decide: remove the canopy completely or reinforce it to stay put.
Remove if: Your canopy shows wear, tears, or fading. Winter storage extends its life. You live in an area with frequent high winds or heavy snow loads. Your gazebo manufacturer recommends seasonal removal.
Secure if: The fabric is in excellent condition with no weak seams. You have a hard-top or reinforced soft-top designed for year-round use. You need winter shade or protection and can monitor it regularly.
For removal, clean and dry the canopy thoroughly before folding to prevent mold. Store it in a climate-controlled space, not a damp shed. Roll rather than fold to avoid permanent creases.
To secure fabric that stays on, tighten all velcro straps and ties. Add bungee cords from canopy grommets to frame anchor points for extra hold. Inspect monthly for loose areas that flap and stress seams.
Step 5: Add Wind Deflection and Reinforcement
Wind hitting an open gazebo creates lift and lateral pressure that can twist the frame or pull it from its anchors. Adding reinforcement distributes these forces across the structure instead of concentrating stress at weak points.
For metal gazebos, install corner brackets where roof posts meet the frame. These L-shaped or triangular braces prevent racking (sideways movement) during gusts. You can find powder-coated brackets that match your gazebo’s finish, keeping the look clean while adding serious stability.
Wooden structures benefit from diagonal cross-bracing between posts. Cut pressure-treated lumber at 45-degree angles to fit snugly from the top of one post to the bottom of an adjacent post, creating an X pattern. Secure with exterior-grade screws, not nails. This traditional technique is what keeps barns standing through decades of storms.
If your gazebo has open sides, consider temporary wind panels for winter. Clear polycarbonate sheets or lattice panels reduce wind penetration without blocking light. Mount them on removable brackets so you can take them down in spring. Position panels on the side facing prevailing winter winds for maximum protection with minimal visual impact.
Step 6: Secure or Store Removable Elements
Removable items transform into projectiles during winter storms, creating both safety hazards and structural stress on your gazebo. Start by removing all fabric curtains and mesh screens, even weather-resistant materials flutter and tear in sustained winds, potentially pulling hardware from the frame. Roll them carefully, secure with ties (never rubber bands that crack in cold), and store in waterproof bins away from moisture and pests.
String lights should come down entirely unless they’re commercial-grade outdoor fixtures rated for winter use. Standard patio lights become whipping cables that damage posts and electrical connections. Disconnect power first, coil wires loosely, and store indoors. Heavy decorations like hanging planters or wind chimes must go, their weight magnifies wind forces on anchor points.
Lightweight furniture needs relocation to protected storage. If moving pieces isn’t feasible, anchor them to the gazebo floor with ratchet straps or weatherproof bungees, keeping weight low and centered to avoid creating sail-like surfaces that catch wind.
Step 7: Install Storm Tie-Downs and Final Checks
Storm tie-downs provide the final layer of protection when high winds hit. After you’ve reinforced everything else, these straps act as insurance against extreme weather events.
Start by attaching ratchet straps or heavy-duty cables from your gazebo’s top frame to ground anchors positioned 3-4 feet outside the structure’s footprint. Space them evenly around the perimeter, four tie-downs minimum for small gazebos, six to eight for larger structures. Angle the straps at roughly 45 degrees from the frame to the ground for maximum holding power.
Tension each strap until it’s taut but not over-tightened. You should feel resistance without bending the frame. Over-tensioning can actually weaken the structure or pull anchors loose during storms.
Create backup anchor points by installing additional ground stakes or augers between your primary anchors. If one fails, the backups distribute the load.
Complete your final check by gently pushing against each corner of the gazebo. It should feel rock-solid with minimal movement. Walk around the entire structure, tugging each connection point. Any give indicates you need to adjust that area.
Verification and Next Steps: Testing Your Wind-Resistant Setup
After completing your winterization work, verify everything’s secure before winter storms arrive. Walk around your gazebo and physically test each anchor point by pulling firmly on the structure from different angles. It shouldn’t shift or feel loose. Check that all bolts remain tight (vibration from initial wind exposure can loosen them) and that tie-downs have proper tension without over-tightening that stresses connection points.
Run through this quick verification checklist within 48 hours of finishing your prep work:
- Push and pull each corner post to confirm no movement at ground anchors
- Inspect all sealant applications for complete coverage with no gaps or bubbles
- Verify tie-down straps have consistent tension and backup anchors are properly set
- Confirm all removable items are stored and remaining elements are locked down
- Check that drainage paths are clear so water and snow won’t pool on the roof
During your first moderate wind event (15-25 mph gusts), go outside afterward and look for telltale problems: new gaps between joints, loosened hardware, fabric flapping where it shouldn’t, or shifted anchor stakes. These early warnings let you make corrections before a serious storm hits.
Schedule a mid-winter inspection around January, especially after heavy snow or ice. Look for stress cracks in wood, bent metal components, or anchor points working loose in freeze-thaw cycles. Properly winterized gazebos show no structural movement, maintain tight connections, and shed precipitation without pooling. If you spot sagging, hear rattling in moderate wind, or find hardware on the ground, address those issues immediately rather than waiting for spring.
Special Considerations for Different Gazebo Types
Different gazebo materials demand distinct winterization strategies, and understanding your structure’s specific vulnerabilities prevents costly mistakes.
Metal gazebos handle wind differently based on construction quality, frame gauge matters more than many owners realize. Thinner gauge frames (20-gauge or higher numbers) flex excessively in wind and require extra cross-bracing. Focus reinforcement on corner joints where metal frames typically show weakness first. Aluminum structures need frequent bolt checks since thermal expansion loosens connections faster than steel. Apply anti-seize compound to threaded connections to prevent cold-weather binding.
Wooden gazebos suffer most from moisture-related weakening before winter storms hit. Inspect joinery carefully, rotted mortise-and-tenon joints compromise the entire frame’s wind resistance. Seal all exposed end grain and reapply exterior stain where weathering appears. Wood structures benefit from diagonal knee braces added between posts and roof beams, distributing wind load across multiple connection points rather than stressing individual fasteners.
Soft-top canopies create the highest wind load and should be removed entirely in regions expecting sustained winds above 30 mph. Hard-top roofs (polycarbonate or metal) stay secure but need edge trim inspection, loose panels act as sails. One Maryland homeowner lost only his gazebo’s roof panels during a storm because screws had backed out over the season.
Pergolas present unique challenges since their open design catches wind unpredictably. Remove all hanging plants, shade cloth, and decorative elements that increase surface area. Check rafter connections where cross-beams meet posts, the most common failure point in high winds.
Common Mistakes That Compromise Wind Resistance
Even careful homeowners make critical mistakes that leave their gazebos vulnerable to winter storms. Understanding these pitfalls helps you avoid costly damage and ensures your preparation actually protects your structure.
- Over-tightening bolts and straps, which cracks joints and weakens connection points instead of strengthening them
- Using inadequate anchoring for your soil type, like relying on simple stakes in sandy or loose ground that won’t hold under wind pressure
- Leaving furniture, planters, and decorations that become projectiles or create additional wind load on the structure
- Skipping the manufacturer’s weight limits for snow and wind, then adding heavy tarps or covers that stress the frame beyond its design capacity
- Waiting until storms are forecast to start winterizing, when cold temperatures make sealants ineffective and rushed work leads to missed steps
One homeowner learned this lesson the hard way when he reinforced his metal gazebo in November during a cold snap. The sealant never properly cured, and the first winter storm found every gap he thought he’d sealed. Another common error is removing only the canopy while leaving side curtains attached. Those fabric panels catch wind like sails, creating tremendous lateral force that can bend or topple the frame. The same goes for ignoring small rust spots or hairline cracks during your pre-winter inspection. These minor issues become structural failures when ice gets in and expands, then wind exploits the weakness.
Frequently Asked Questions
When should I start winterizing my gazebo?
Begin your wind-resistant winterization in late fall, ideally 4-6 weeks before the first severe weather typically hits your area. This gives you time to complete all steps without rushing and allows you to test your setup during milder autumn winds before winter storms arrive.
Should I completely dismantle my gazebo for winter?
In regions with sustained winds over 50 mph or heavy snow loads, removing soft-top canopies and storing them is wise, but the frame can usually stay up if properly anchored and reinforced. Only dismantle the entire structure if it’s temporary, poorly anchored, or you live in an area with extreme winter conditions that exceed your gazebo’s wind rating.
What wind speed should I prepare for?
Most residential gazebos are designed for winds between 30-40 mph when properly anchored, but winter storms can produce gusts of 50-70 mph. Your winterization should target the highest wind speeds typical for your region, plus a safety margin of at least 10-15 mph above that threshold.
Will reinforcing my gazebo void the warranty?
Adding supplemental anchors and tie-downs typically won’t affect your warranty as long as you don’t drill new holes in the frame or modify the structure’s design. Check your manufacturer’s guidelines before making permanent alterations, and document your winterization work with photos in case you need to file a claim later.
Beyond these common questions, homeowners often wonder about permit requirements for permanent anchoring systems. In most areas, simple ground stakes don’t require approval, but if you’re pouring concrete footings or installing substantial tie-down anchors, your upgraded setup might needs a permit depending on local building codes. Regional climate also plays a role in your approach. Coastal areas face salt corrosion along with wind, requiring more frequent inspections and protective coatings. Mountain regions deal with snow load combined with wind, making roof reinforcement critical. Desert climates might seem mild but can produce sudden, violent dust storms that test your anchoring system. Tailor your winterization strategy to your specific weather patterns rather than following generic advice.
Winterizing your gazebo doesn’t have to be overwhelming. By following these seven essential steps, you’re doing more than just protecting a structure, you’re safeguarding an investment that brings enjoyment to your outdoor space year after year. A properly prepared gazebo can withstand harsh winter winds and emerge ready for spring without costly repairs or replacement.
The key is acting before severe weather arrives. Don’t wait until storm warnings appear to start your preparation. Set aside a weekend this fall to inspect, reinforce, and secure your gazebo using the methods we’ve covered. Most homeowners find the process takes just a few hours, and the peace of mind during winter storms makes every minute worthwhile.
Your gazebo has given you countless hours of shade, shelter, and outdoor memories. Return the favor by giving it the protection it needs to last for many more seasons. Review your current setup against the checklist we’ve provided, gather your materials, and tackle each step systematically. When spring arrives and your gazebo stands intact while neighbors deal with damage, you’ll know your effort paid off. Start your winterization today, your future self will thank you.